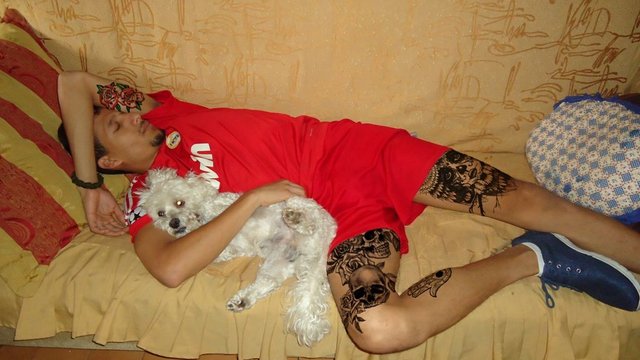
Tattoo placement with photoshop cs6

Hello my dear followers, lovers of the tutorials;
This time I will show you step by step how to put a tattoo with my favorite editing program PHOTOSHOP CS6, I hope you enjoy it.
Step 1
Once the image to edit has been previously chosen, we adjust the levels to give it a little contrast
Step 2
Go to: filter, blur, blur Gaussian, this creates a movement in the image (adjust the value creating a minimum movement)
Step 3
Go to: File, save as and save the document as photoshop PSD
Step 4
Click twice by pressing the "Ctrl + Alt + Z" command, to return to the original image
Step 5
Place the tattoo image to use and adjust its size and desired location
Step 6
Go to: Filter, distort, move
Adjust the values so that the movement is created more realistically, if the chosen values are not correct, remove the layer and repeat the step again.
Step 7
When pressing OK, this window will appear where the document created with movement should be selected
Step 8
The image will be something like the example, place the layer in multiply and erase the excesses of the tattoo
Step 9
We add another tattoo by applying "Step 8" as many times as you wish
Step 10
Place the image in black and white and ready


Special thanks: @castellano, @proconocimiento, @provenezuela and @engranaje for their continuous support and motivation to continue creating new designs for you.

Dear friend, you do not appear to be following @artzone. Follow @artzone to get a valuable upvote on your quality post!
Downvoting a post can decrease pending rewards and make it less visible. Common reasons:
Submit
Done my friend, and thank`s @artzone
Downvoting a post can decrease pending rewards and make it less visible. Common reasons:
Submit
Thanks for sharing your knowledge and experience..! Great Tutorial..!
Downvoting a post can decrease pending rewards and make it less visible. Common reasons:
Submit
Congratulations! This post has been upvoted from the communal account, @minnowsupport, by maryresp from the Minnow Support Project. It's a witness project run by aggroed, ausbitbank, teamsteem, theprophet0, someguy123, neoxian, followbtcnews, and netuoso. The goal is to help Steemit grow by supporting Minnows. Please find us at the Peace, Abundance, and Liberty Network (PALnet) Discord Channel. It's a completely public and open space to all members of the Steemit community who voluntarily choose to be there.
If you would like to delegate to the Minnow Support Project you can do so by clicking on the following links: 50SP, 100SP, 250SP, 500SP, 1000SP, 5000SP.
Be sure to leave at least 50SP undelegated on your account.
Downvoting a post can decrease pending rewards and make it less visible. Common reasons:
Submit
Great tutorial bro, I'm not used to ps and this makes it easy to understand. Thanks for it.
Downvoting a post can decrease pending rewards and make it less visible. Common reasons:
Submit