OWNCLOUD - CREATING AN ADMIN ACCOUNT

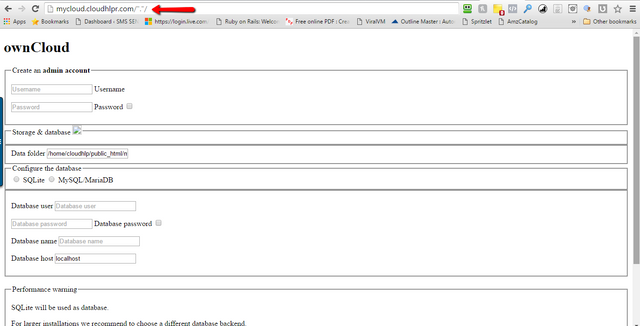
There are a few things to note at this point. You want to make sure that your hosting account has an updated PHP version.
For example, my VPS was running PHP 5.4.37 so I had to get my server administrator to increase the PHP 5.5 for my cloud to run properly on my server.
I had to do this because there was a PHP module missing that I needed for the cloud to run without any hiccups. So, therefore, I would make sure that you're running at least a 5.5 PHP, and if your hosting is not running at least a 5.5, I would ask my hosting company to increase the PHP to at least that if not greater.
It should not be a problem for them to do this for you if necessary. Now is also a good time to pull out a notepad so that you can save the credentials that you create for your new cloud set up.
So in your set up administration page, you need to create a username and password that will be the username and password for the administrator of your ownCloud.
Depending on your setup you might see a page that looks like this…
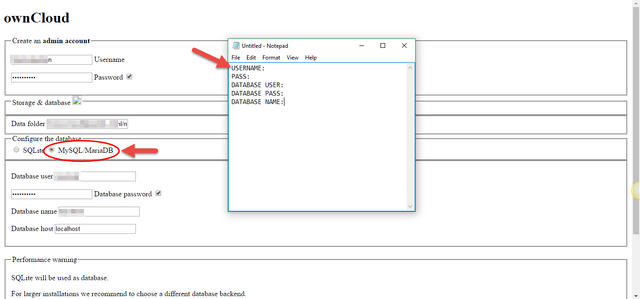
Or this…
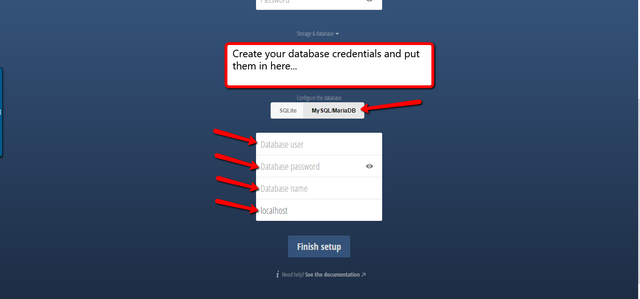
If you have MySQL, then you also will want to create a database as well. It is suggested that you use MySQL for your ownCloud, but you can also use SQLite as well.
If you do not know how to create a database you can refer to Part 2 of this guide, and I’ll include a link to a YouTube video to show you exactly how to create a database on your cPanel MySQL server.
If you know how to create a database, then this should be very familiar to you. But again, you can use SQL lite and just keep it moving if you want to.
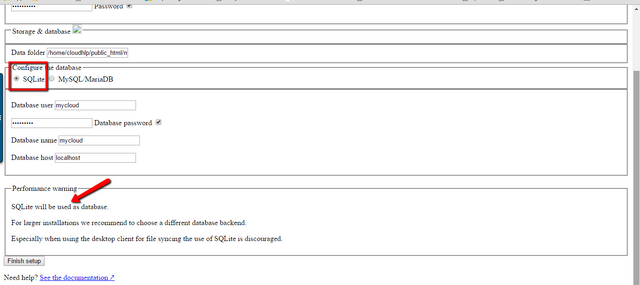
Bear in mind as well that you can make as many of these ownCloud installations as you want to, so don't worry if something doesn't quite go right the first time. Once you fill in all the details here though you should be good to go with installing your setup.
There is also a link to see the documentation for your setup if needed. You can always feel free to click that link to get more information.

Now all you have to do is click the finish set up button.
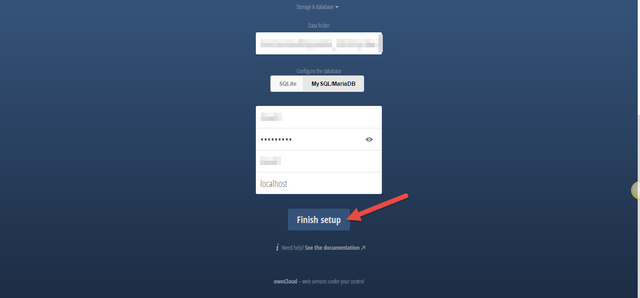
After this happens, you should be taken to the login page for your new cloud storage site.
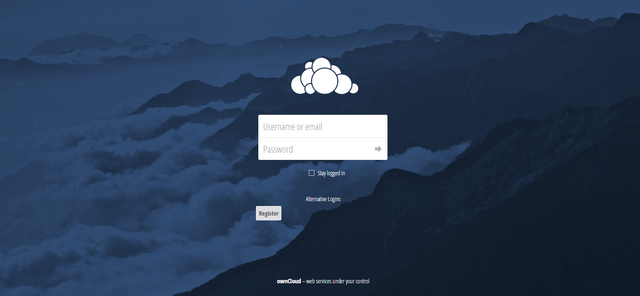
Voilà! You have just created and installed your brand-new cloud storage that you own and can do many different things with.
In the video training, we go through a lot more of the different functions inside of the cloud set up, so if you want to learn more about it feel free to get the video tutorials. I will put a link to them when they become available.
In Part 4 of this series we'll show you some other ownCloud installation options.
By the way, here are all of the lessons in the Drop The Box. Own The Cloud Series... these steps are in order from top to bottom for creating your own Dropbox style cloud storage set-up.
- Why your business needs its own cloud
- PART 2 - ownCoud Creating A Database
- PART 3 - ownCoud Creating An Admin Account
- PART 4 - Other ownCloud Installation Options
- PART 5 - The ownCoud Community
- PART 6 - ownCoud Amazon S3 Integration
- PART 7 - ownCoud FTP Integration
- PART 8 - ownCoud Google Drive Integration
- PART 9 - ownCoud Dropbox Integration
- PART 10 - Installing The ownCoud Desktop Application
- PART 11 - The ownCloud Apps Section
- PART 12 - ownCloud App Updates
See you in the next lesson...
Congratulations @sms! You have completed some achievement on Steemit and have been rewarded with new badge(s) :
Happy Birthday - 1 Year on Steemit
Click on any badge to view your own Board of Honor on SteemitBoard.
For more information about SteemitBoard, click here
If you no longer want to receive notifications, reply to this comment with the word
STOPDownvoting a post can decrease pending rewards and make it less visible. Common reasons:
Submit
Congratulations @sms! You received a personal award!
You can view your badges on your Steem Board and compare to others on the Steem Ranking
Vote for @Steemitboard as a witness to get one more award and increased upvotes!
Downvoting a post can decrease pending rewards and make it less visible. Common reasons:
Submit