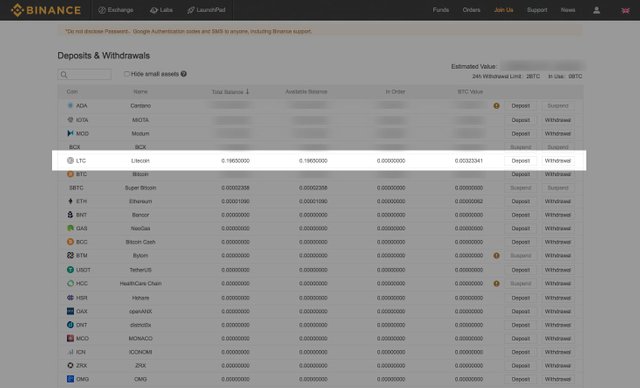
So you've purchased your Litecoin because you heard it's faster then Bitcoin, congrats! Now what? The following steps are for sending Litecoin out of Coinbase and receiving it on the Binance exchange. The guidelines can be applied to any Litecoin address. whether it's a Litecoin address on a cryptocurrency exchange, software wallet, or hardware wallet. Let's get to it!
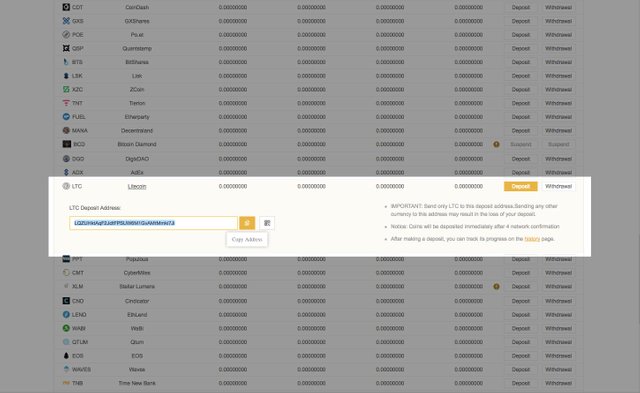
Before sending LTC, you'll need an address to send to, this address is likely coming from an ecommerce store, a friend, or an exchange. In my case, I'm sending Litecoin to Binance so I can trade LTC.
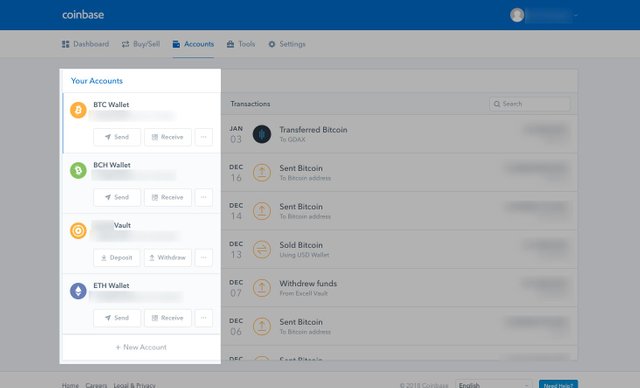
Once you have an address, you'll want to sign into your Coinbase account and log in to see your dashboard. Click on your Accounts tab.

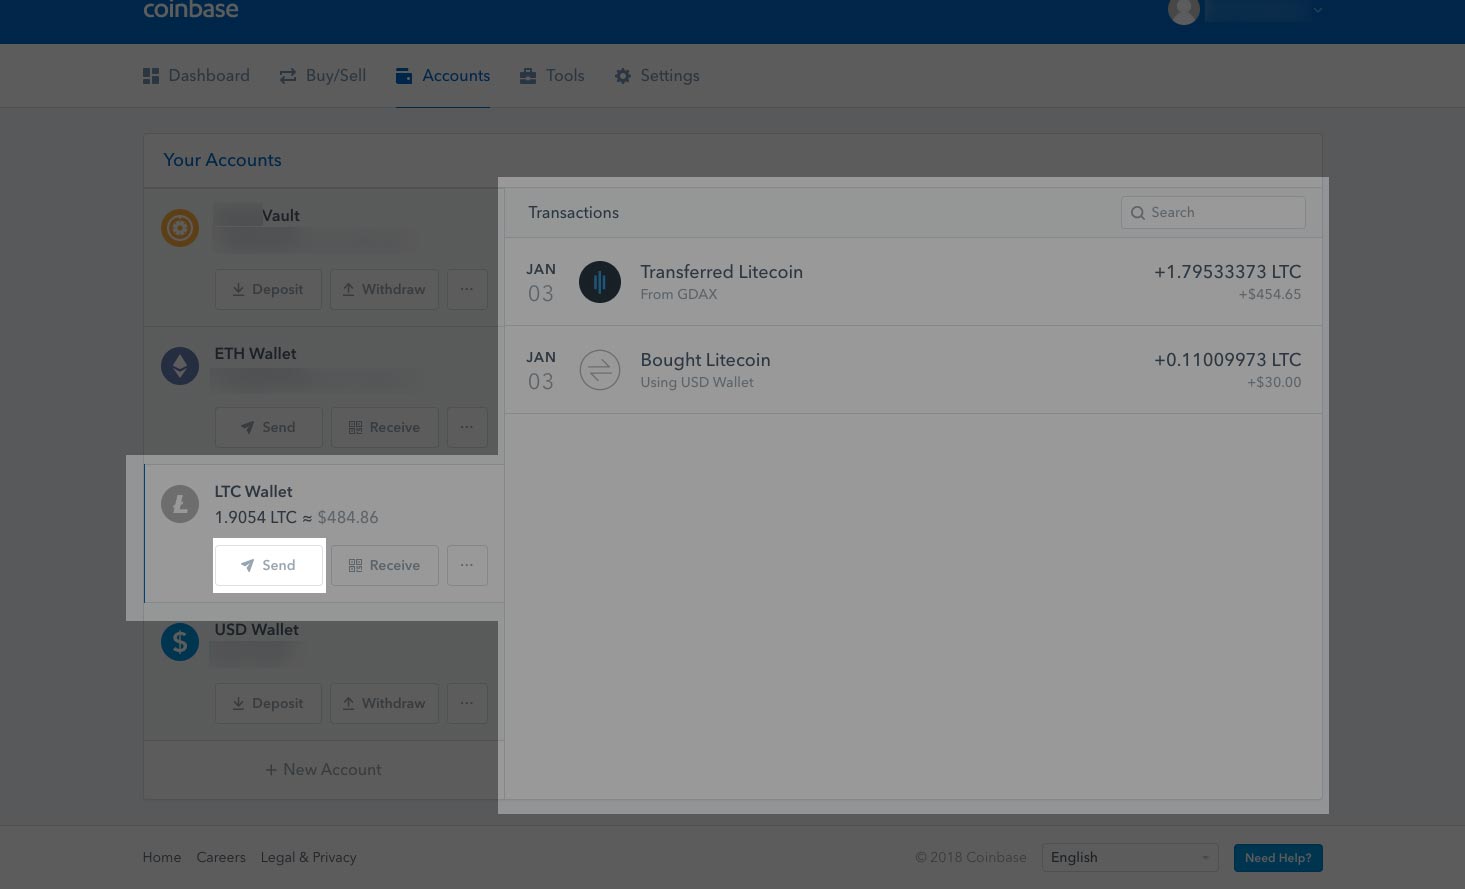
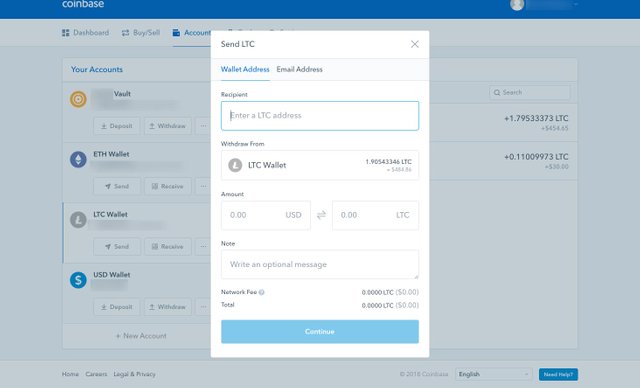
On the account tab, you'll see your wallets on the left hand side. Your Litecoin wallet might not be visible, but roll your mouse over the My Accounts area, and scroll down to view your Litecoin (LTC) wallet. If you click anywhere on the Litecoin box area, you'll see your transaction history on your right. You'll want to click on the SEND button to send Litecoin to another address.
- A pop up box should come up where you can insert the Litecoin address and amount of Litecoin (LTC) you want to send. Always double check the amount and address you are sending it to. I'll be using the address from Step 1. Once you've filled in the details, you'll notice at the bottom a Network Fee. The network fee is what is used to pay the network to send your money. Every transaction you make with Litecoin will require a network fee. Depending on where you are sending your Litecoin from, you can adjust your Network fee. If you want your transaction to be processed faster, you can pay a priority fee, likewise if you don't mind how long it will take, you can choose a more economical fee. In this case, Coinbase automatically chooses what tier we are put in. Click on the Continue button.
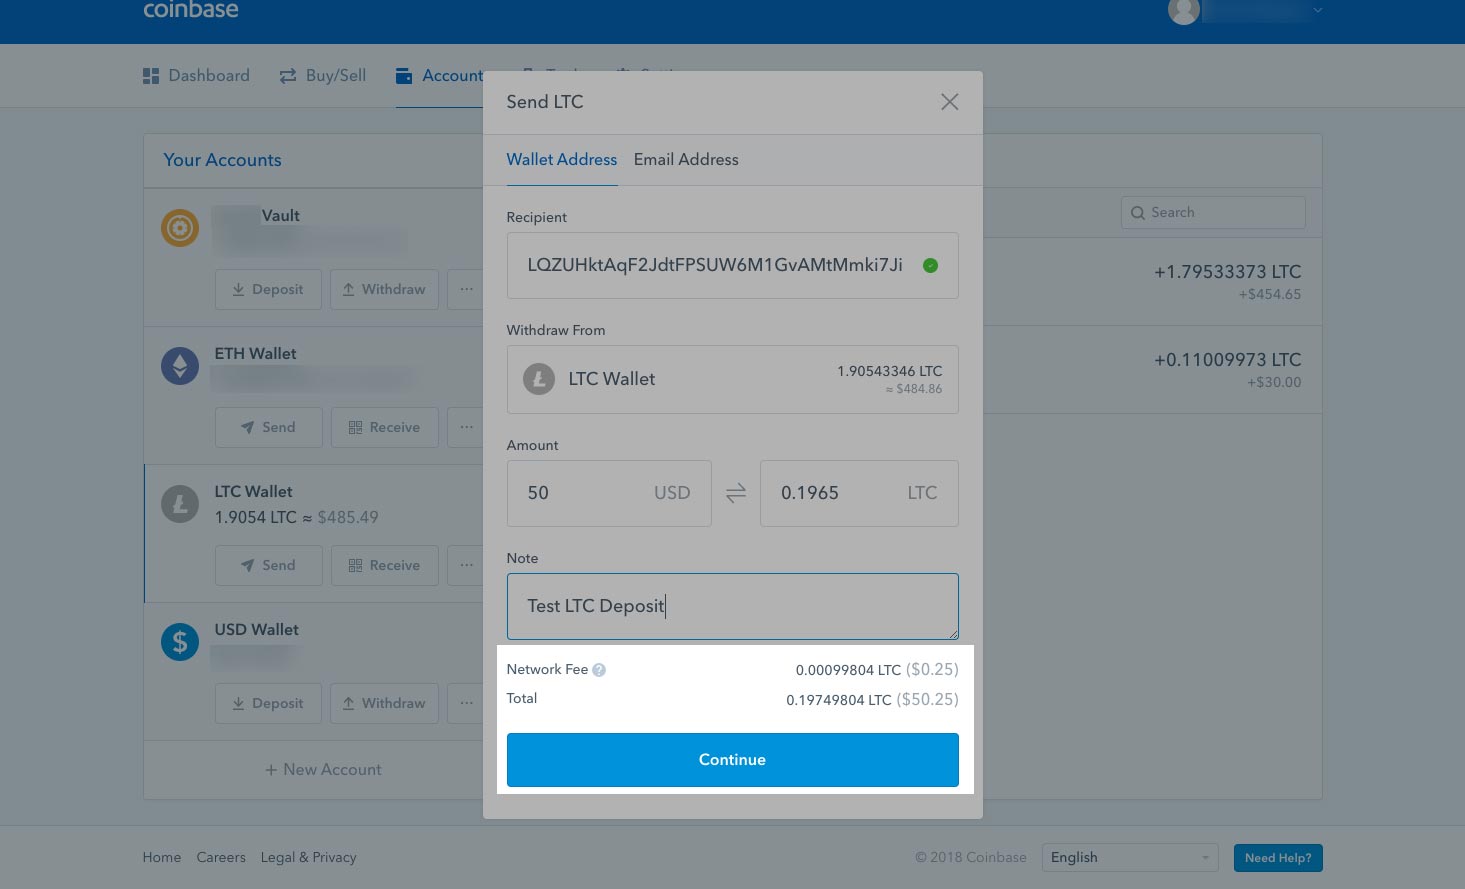
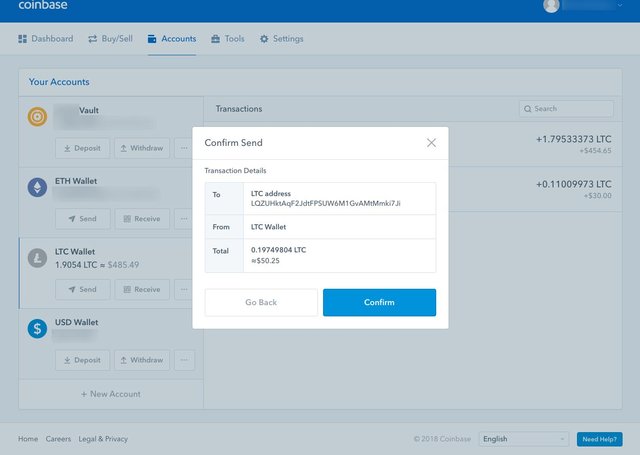
Once you've clicked on the continue button, you'll get another pop up box that will ask you to confirm the address and amount you're sending your Litecoin to. Click on the Confirm button.
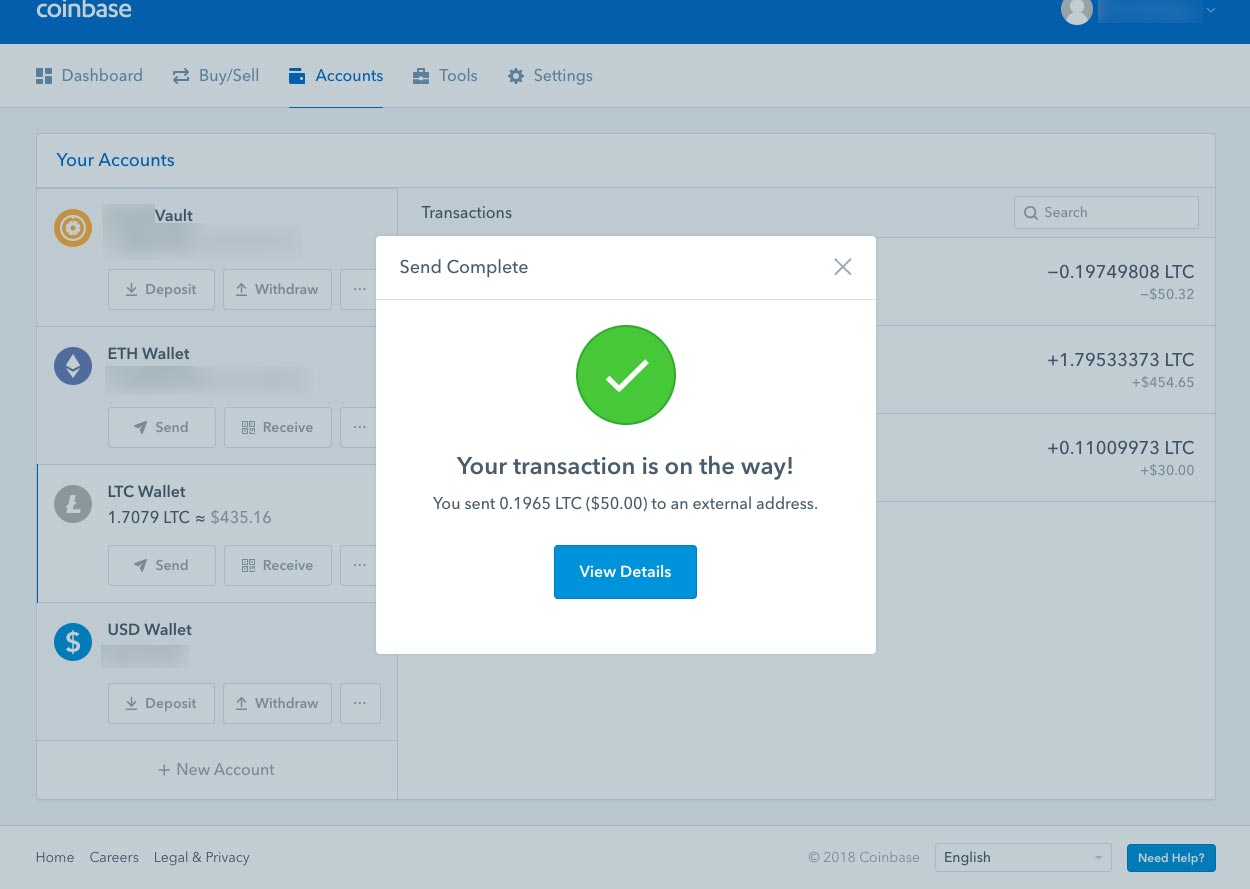
Once you've confirmed, you will get yet another dialog box. Click on the View Details button to view more information about the Litecoin you have sent.
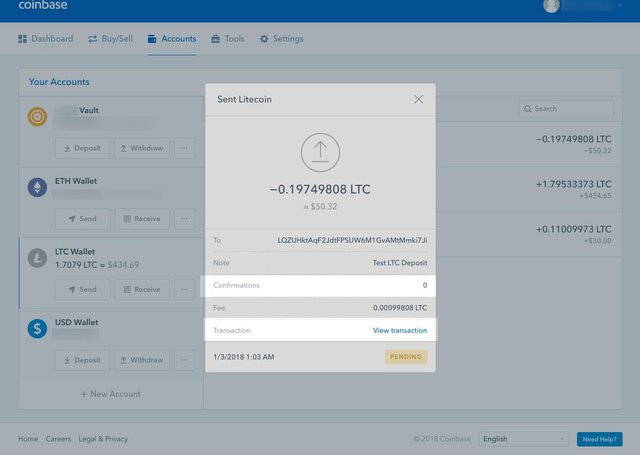
You will arrive at yet another pop up box with a summary of the transaction you just made. What you should notice here is the number of Confirmations, and the View transaction link. Click on the View transaction link
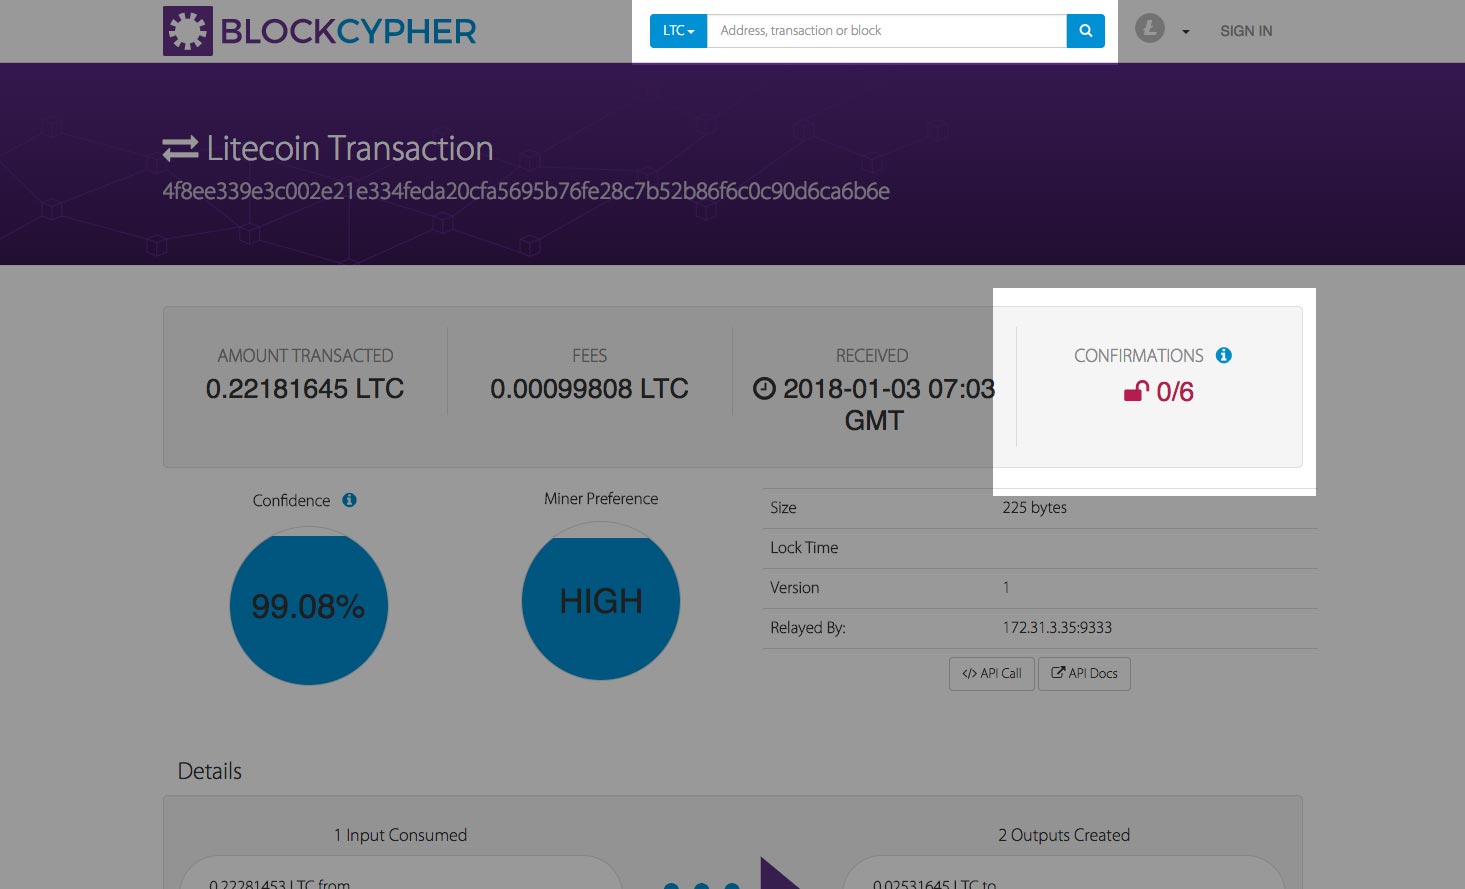
You will be redirected to Litecoin's blockchain explorer. Notice the confirmations box that says 0/6. This means that the network has not verified the transaction has occurred yet. Once 6/6 has been reached, the transaction will have arrived at your address. Depending on where you are sending your Litecoin to, you may need less then 6 confirmations. The amount of time to reach 6 confirmations depends on how busy the network is, in my case it took roughly 15 minutes. To view your transaction history, simply type in your personal address at the top of LTC Blockchain explorer.
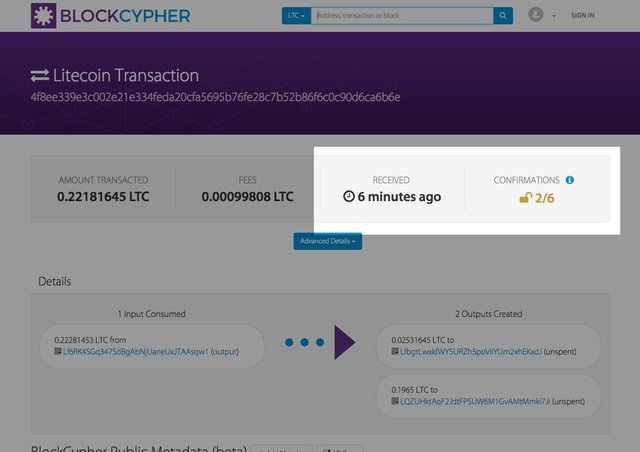
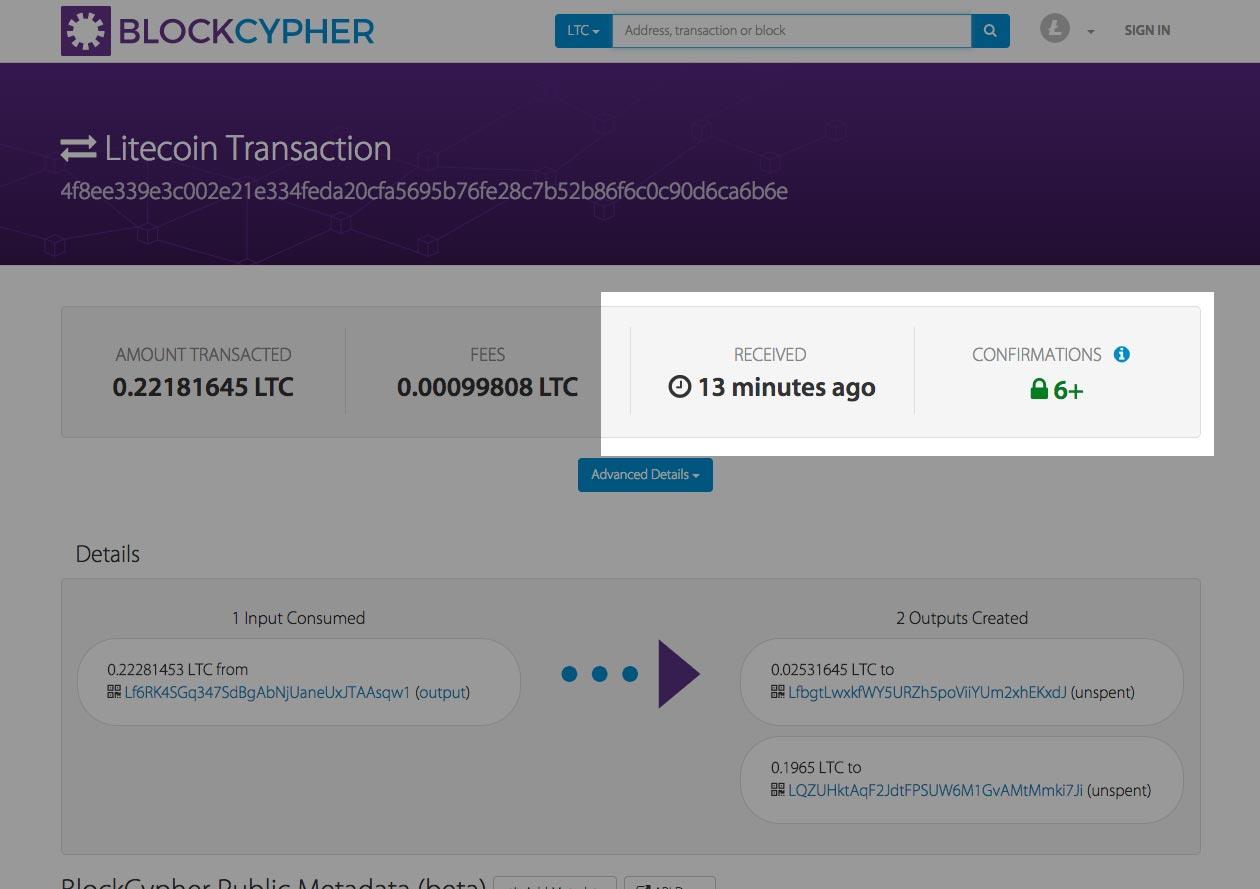
- After the transactions have been verified, you should now see the funds at the address you sent it to. Congrats, you're done!
