So, it's been a long while since my last 3D design.
I could blame it on the whole "my favorite tool changed the entire UI", but that's just kind of a lazy way of avoiding the problem, which was that I was busy... very busy.
Learning more about Blockchains, Ethereum, and how to develop Smart Contracts and Dapps in the ConsenSys Professional Blockchain Developer course I got a scholarship to (+ during my internship we kind of redefined a lot of what we wanted done, so had to re-adapt a lot of code to adjust it to the new goals... even more stuff to do !).
So, yeah... I was very distracted and never took the time to work on a 3D model X/
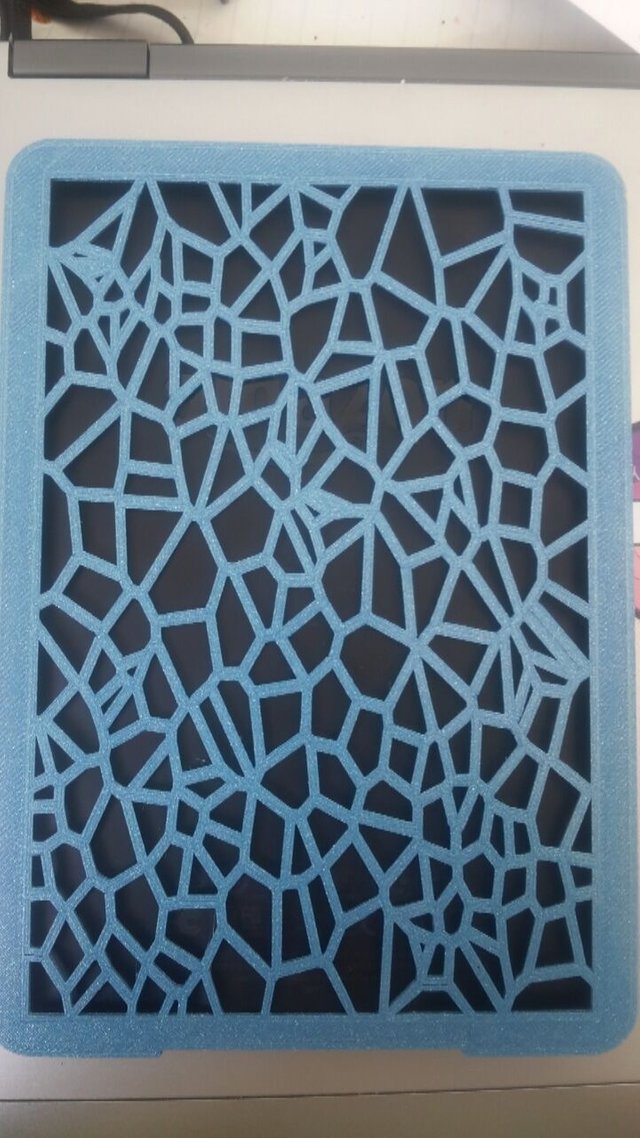
I did work on-off on a project I'd been putting off for a while, as it was relatively complicated to find a good model to work off, which was to make a personalized Kindle Paperwhite case.

I've had 2 Kindle's in my life.
One was an old Kindle with real buttons for page turning, which sadly didn't survive my sabbatical year in Australia, and the one I have owned for the last 5 years is a Kindle Paperwhite.
So it's only natural that I'd want to customize it a bit !
The very first thing I ever did to customize my Kindle was to Jailbreak it, which allowed me to do a few things.
Besides playing chess and accessing the terminal, there were only really two things that I wanted from the Jailbreak:
- Custom screen savers
- epub reader functionality
So, with my newfound 3D design skills, it's only natural that I'd want to design a cover for my Kindle !
Finding an adequate base model
To make a case for my Kindle Paperwhite, there were two options:
- I could try to design it from scratch, using some kind of template of a Kindle Paperwhite
- I could use an already existing Case and adapt it for my purpose.
I went with option 2, as I didn't feel like figuring out the exact dimensions everything had to be to work correctly.
So, a bit of searching over on Thingiverse lead me to this model by Eirinn.

photo credits to Eirinn
It looked perfect, and I thought it would just be a matter of booleaning out the shapes I wanted from the back, and voila !
Modifying the model
So, I went off into Tinkercad to adjust the model:

I've already used Tinkercad, it was actually the very first 3D design tool I ever used, so I knew it had custom shape generators, one of which let's you generate custom Voronoi patterns.
This seemed like the perfect pattern to have on the back of my Kindle !
So, I went into the Shape Generator menu of Tinkercad and got the Voronoi pattern out

And then adapted it's size so it superposed the bottom of the kindle case model

I also made it much deeper, so it'd cut through the Case

Doing all this is pretty intuitive, for those of you new to Tinkercad.
Clicking an object makes a menu appear overlayed on it, like this

The black squares are direction-specific resizers, and clicking and dragging them resizes the object in that specific direction.
The white squares simply resize in two dimensions at once, or, as the middle white one does, resizes the Height/Depth of a model.
Tinkercad is probably one of the simplest tools out there :)
So, once we've resized it, we can change the Shape Generators settings to something more pleasing to the eye and 4-6 cut out giant holes ;)
Here I simply increased the number of tiles to 68, as you can see in the sidebar.

Much better look, right ?
Tinkercad's Main modelling features -> Groupings and Holes
In Tinkercad, you create custom shapes using two main tools:
- Grouping, which let's you group two shapes together as one.
This can be used to either move two separate objects, resize them, etc... as a single object,
or to combine two objects into a single shape, if they're connected.
Here's how the Voronoi object looks when Grouped with the Case model

- Holes
A Hole in Tinkercad is simply an object which has been set to act as a Hole, which means that if it's Grouped with a normal object, it'll be cut out of said object, just like a Boolean Subtraction operation.
And here's how it looks if we first set the Voronoi pattern to a Hole


And then Group it together with the Case, to create our custom shape. (I changed the shapes of the Voronoi pattern a bit first).

Off to the Printing Press and it's done ! ... Or not
So, I thought that was it, I could send it off to a local 3DHubs owner and get it printed, voilà !
I was in for quite some more work though !
When seen in the Thingiverse view, the model itself doesn't look like it'd have any problems

It looks completely flat, as I expected it to be !
Turns out, parts of the model weren't entirely valid, and the size of the model itself was slightly off too !
So, after resizing the model itself slightly so it would actually fit my Kindle (Increase the Depth by a mm or so, and the X and Y coordinates by a few mm too), I got this picture from the 3DHubs operator, explaining to me there were some inconsistencies

That's certainly not flat XS
So, I fixed that by adding in rectangular shapes that I Grouped with the overall model itself

After that, There was the problem that not only were the holders a bit too large. AKA., the Kindle wouldn't have even managed to fit without breaking them, there was no supports of anything.
The previous designer apparently either wanted it printed with supports, or included an older version when he uploaded it.
So, I did as the 3DHub operator suggested, and included triangular shapes like these:
Here's the suggestion by the 3DHubs operator:

Here's how I added them in:

After that, the model itself was ready.
Finally, the printing !!
It turns out the operator had already printed the "broken" model to check the integrity of the model itself, so he gave me a choice of colors, between a normal Blue and a Metallic Blue:

I choose the Metallic Blue, of course ;)
The Operator then gave me a 4 Day estimate as to when I'd have my hands on my 3D printed kindle case, and sent me a couple more pictures:


Look fantastic, don't they ?
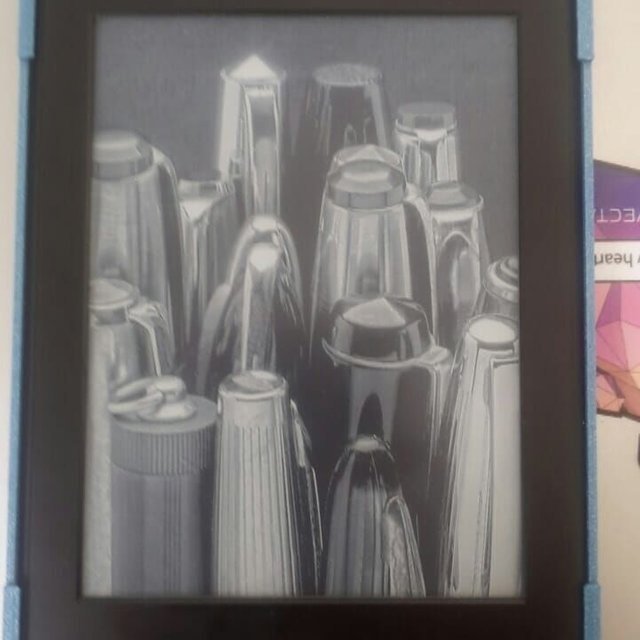
And here they are after arrival :


The models online:
Here's a link to the model on Tinkercad (for easy remixing) and MyMiniFactory
To change the models, here are the steps:
- Open the model with Tinkercad.
- Ungroup (
 ) the model. I've organized them so that it will separate only the top most layer (the cut out Hole) from the rest
 - Delete the Voronoi pattern (or change it's settings).
- Import another SVG / use another Shape generator.
For this part, it's important to choose an SVG/shape that doesn't have closed loops.
For example, the letter "e" has a closed loop where, if you were to use it as a Hole, you'd create a solid part surrounded by nothing :

In a 3D print, we call that wasted material (given the part surrounded by nothing is just going to stay attached to the print bed when you remove your 3D print from it) !
- Position and turn the SVG/Shape into a Hole object, then Group it together with the Case.
Voilà, your own custom Kindle Paperwhite Case !
So... Get creative people !
I hoped you liked my latest design/remix/tutorial :)
I've been doing a few more pieces of Collectible Art over on superrare too, if you want to invest in what's sure to be a brilliant artistic career for me and Google's algorithms XP
In any case, Hope you're all doing good, and have fun remixing the models if you want :)


Very nice case design. I still have my old Kindle Keyboard and even use it from time to time.
Downvoting a post can decrease pending rewards and make it less visible. Common reasons:
Submit
Thanks :)
I've played with the idea for quite some time, and I had to do something to get myself back in "3D Design" mode :)
E-readers are superb. I love them <3
it's a pain that every update resets my custom screensavers though... got to re-install the exploit every time XD.
Hang on to it, it'll probably go in an Amazon dedicated museum when they start to rewrite history to be Amazon-centered ;)
Downvoting a post can decrease pending rewards and make it less visible. Common reasons:
Submit
nice color!
Downvoting a post can decrease pending rewards and make it less visible. Common reasons:
Submit
Thanks :)
Downvoting a post can decrease pending rewards and make it less visible. Common reasons:
Submit
Hi pbock,
LEARN MORE: Join Curie on Discord chat and check the pinned notes (pushpin icon, upper right) for Curie Whitepaper, FAQ and most recent guidelines.
Downvoting a post can decrease pending rewards and make it less visible. Common reasons:
Submit
Great article! Followed you and resteemed.
Downvoting a post can decrease pending rewards and make it less visible. Common reasons:
Submit
Thanks, happy you liked it :)
Downvoting a post can decrease pending rewards and make it less visible. Common reasons:
Submit
Very nice and interesting article, I do engineering design let me lay my hands on other design apart from engineering aspect may my head will kill it
Downvoting a post can decrease pending rewards and make it less visible. Common reasons:
Submit
Join our Discord Channel to connect with us and nominate your own or somebody else's posts in our review channel.
Help us to reward you for making it ! Join our voting trail or delegate steem power to the community account.
Your post is also presented on the community website www.steemmakers.com where you can find other selected content.
If you like our work, please consider upvoting this comment to support the growth of our community. Thank you.
Downvoting a post can decrease pending rewards and make it less visible. Common reasons:
Submit