** NOT THE ORIGINAL DOGECOIN **
Join Our Community:
Dogecoin Private Discord:
https://discord.gg/jzTj2aY
Dogecoin Private Telegram:
https://t.me/PrivateDOGP
Dogecoin Private BitcoinTalk: (Ann Page)
https://bitcointalk.org/index.php?topic=5096254.0

Local PC setup:
1.) Download Dogecoin Private Wallet. (32bit or 64bit)
LINK: https://privatedogp.github.io/ (SCROLL DOWN)
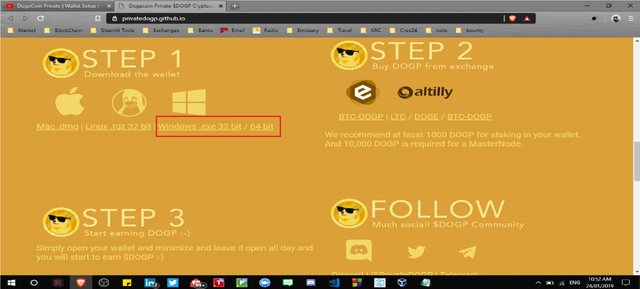
2.) Open your Dogecoin Private Wallet and Encrypt it.
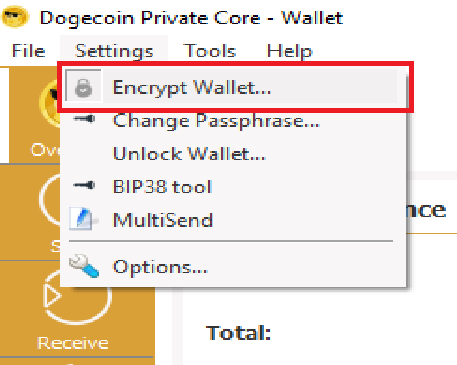
A.) It will ask you to make a password the Re-type it again.
B.) Prompt will show up and Click OK.
C.) Wallet will shut down and then manually Start it up again.
3.) Now You will need to create a New wallet address click on the "Receive" tab, Label it "MN01" and then click the "Request payment" button.

4.) You will see your new wallet generated on the bottom in the "Request Payment History" and when you double click that you will see the QR Code and wallet address.
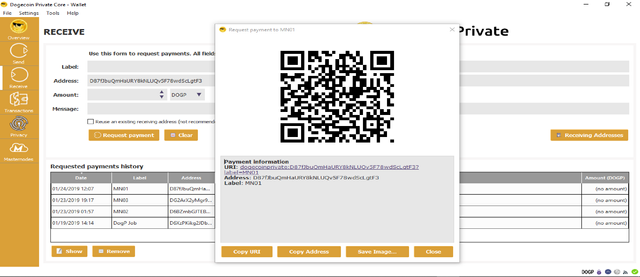
5.) Next make sure you Backup your wallet and name it what ever you want and save it somewhere safe!
(USB Flash Drive, Email or in a File in your PC/Laptop)
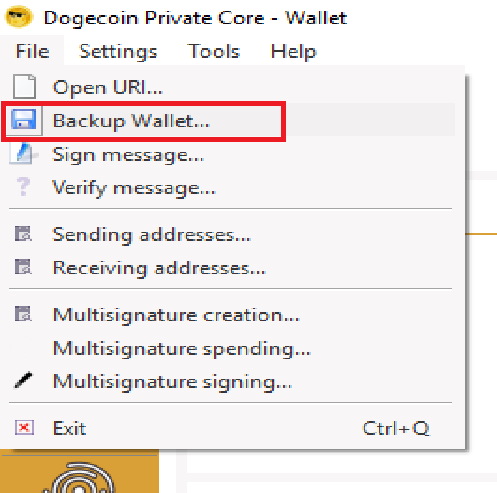
6.) Now let your wallet fully sync with the Blockchain. (Once is done we can move on)
7.) Now you will need to send 10,000 DOGP to your wallet address you can get some at these exchanges. Make sure you send 10,000 Even
8.) Now that you have the coins in your wallet you will now need to lock it up, This will prevent splits from happening while taking the other coins.
A.) Go to settings and click "options".

B.) Go to the Wallet Tab and check "Enable coin control features" then click OK.
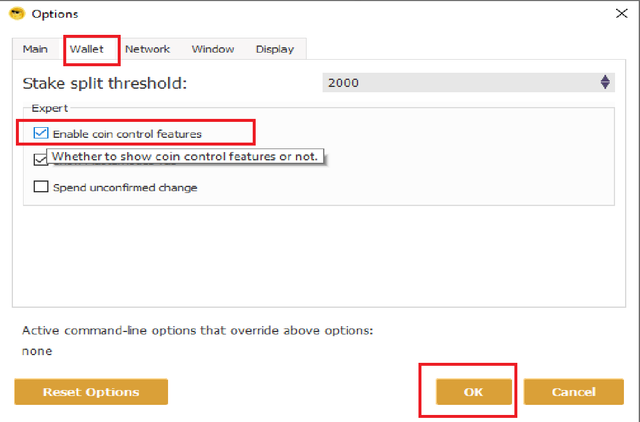
C.) Now go to your Send tab and click on "Open Coin Control".
D.) Now right click on the 10,000 DOGP and click on "Lock Unspent" and then click OK.
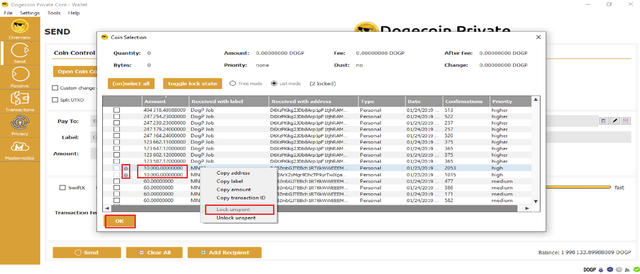
9.) Now you will need to click on "Tools" and click on "Debug Console".
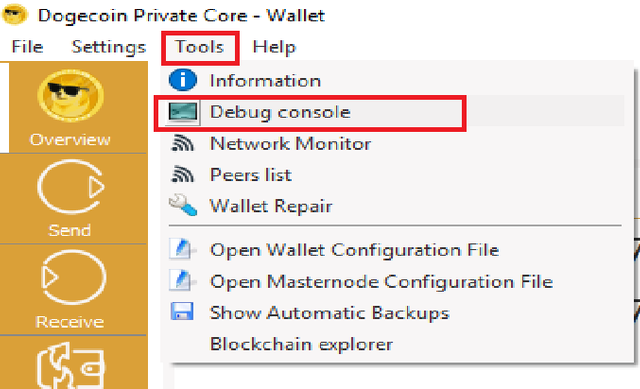
10.) In the Debug type "masternode genkey" and hit enter you will see your Genkey copy it and save this on a notepad you will need this!
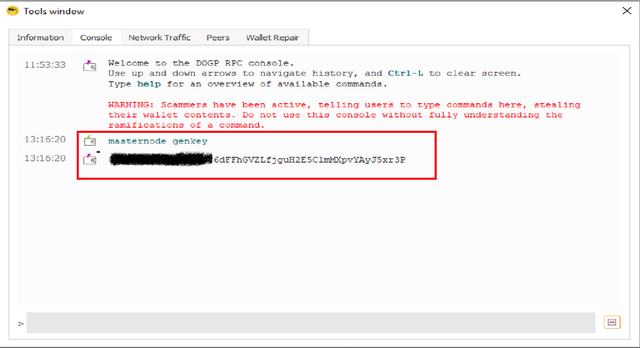
11.) Next type "masternode outputs" and copy both txhash and outputidx, Paste it your notepad you will need this!
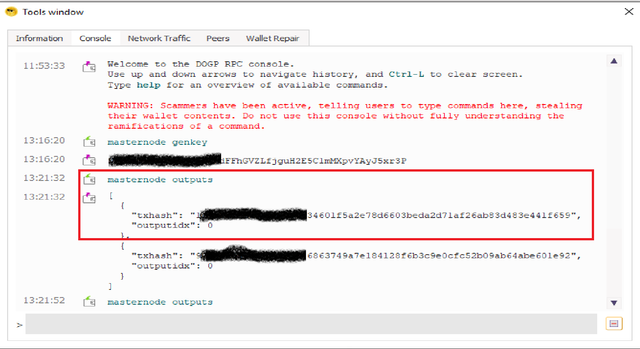
12.) Your Notepad should like this.

13.) Go to google and Type "what's my IP" then you will see your IP. You will need this
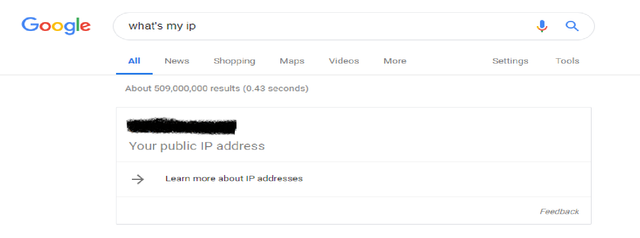
14.) Next click on Tools and open "Masternode Configuration File".

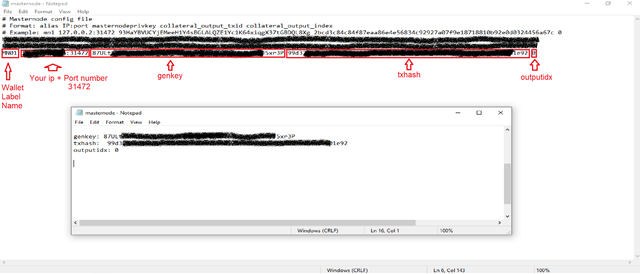
15.) Now you can paste everything that you saved in your Notepad on to the Masternode.conf file, save and close the Masternode.conf file.
Example:
THE_WALLET_NAME YOUR_IP:31472 THE_GENKEY THE_TXHASH THE_OUTPUTS

VirtualBox Setup: (Windows OS)
1.) Boot up windows OS in your Virtualbox or VMware.

2.) Download Dogecoin Private wallet.
**Link: https://privatedogp.github.io/ (SCROLL DOWN)
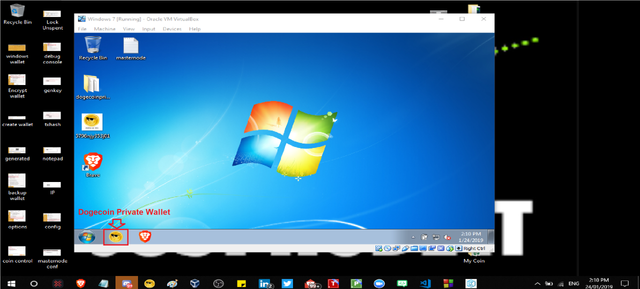
3.) Open your Dogecoin Private Wallet and Encrypt it.

A.) It will ask you to make a password the Re-type it again.
B.) This will take a while but a Prompt will show up and Click OK.
C.) Wallet will shut down and now Start it back up again.
4.) Let it sync up with the Blockchain.
5.) Once synced then go to "Tools" and click on "Open Wallet Configuration File".
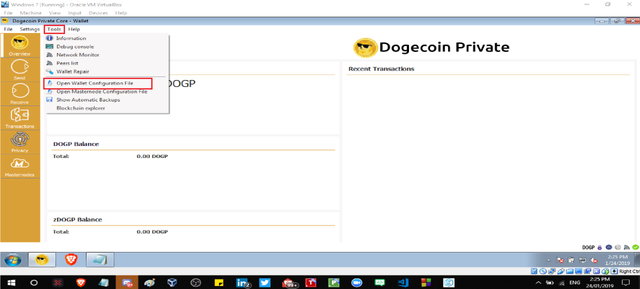
6.) The file will be empty but make sure to paste this in there! ;)
Example:
rpcuser=MAKE_A_USER_NAME
rpcpassword=MAKE_A_PASSWORD
rpcallowip=127.0.0.1
server=1
daemon=1
gen=0
logtimestamps=1
maxconnections=256
masternode=1
port=31472
externalip=YOUR_IP:31472
masternodeprivkey=YOUR_GENKEY
addnode=185.248.140.111:31472
addnode=37.187.135.212:31472
addnode=35.245.144.95:31472
addnode=193.29.56.203:31472
addnode=185.243.115.33:31472
addnode=95.179.131.10:31472
addnode=45.77.115.11:31472
addnode=35.221.27.134:31472
addnode=140.82.57.187:31472
addnode=185.250.204.28:31472
addnode=77.55.220.45:31472
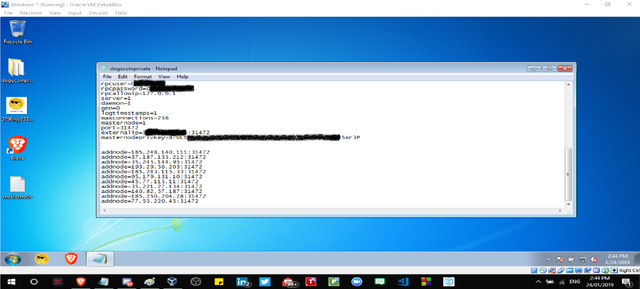
7.) Save and close.
8.) Open Dogecoin Private Qt Wallet in VirtualBox/VMware now.
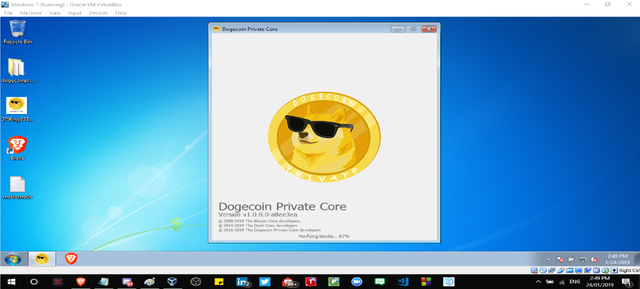
9.) go to "Settings" and click on "Unlock Wallet".
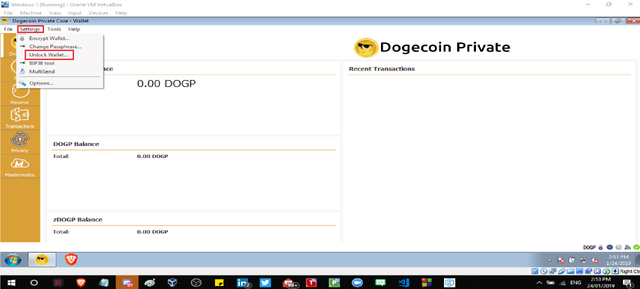
10.) Make sure to enter your password and put a check on the box and click OK.

KEEP THE VBOX WALLET RUNNING 24/7 DO NOT CLOSE IT

Local PC setup: (Part 2)
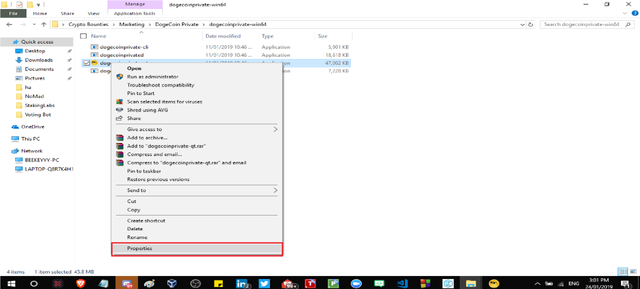
1.) Open your Dogecoin Private folder and right click on the DogecoinPrivat-qt and select "Properties".
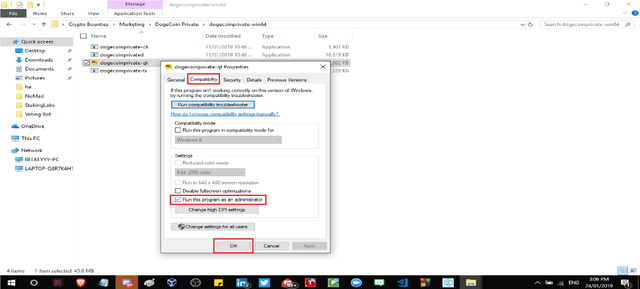
2.) Click on the "Compatibility Tab" and check "Run this program as an administrator" and click OK.
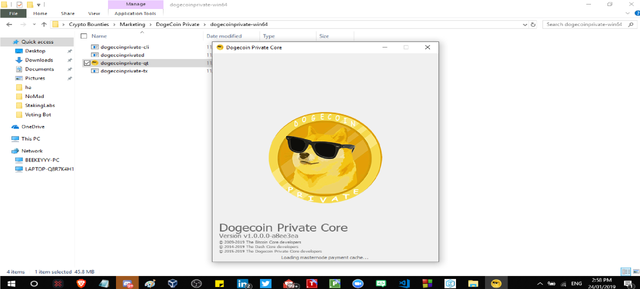
3.) A prompt will pop up and click Yes, The wallet will start.
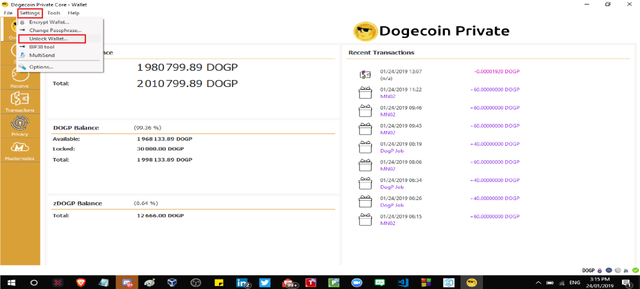
4.) Then you will need to Unlock the wallet by clicking "Settings" and click 'Unlock Wallet".
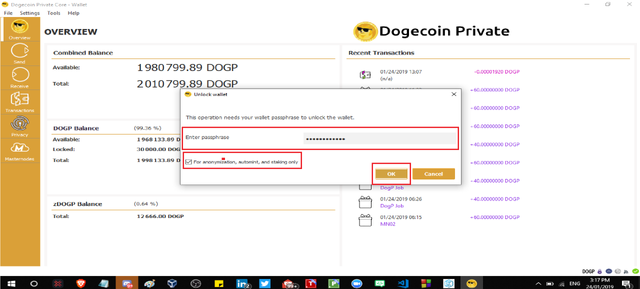
5.) Then type in your Password and leave a check on the Box and Click OK.
6.) Then click on your Masternodes tab and click on MN01
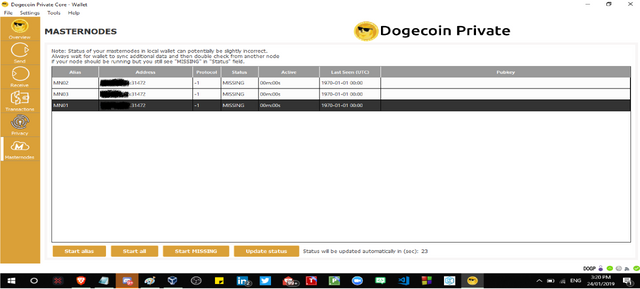
7.) Now click on "Update status".

8.) Now click on "Start alias" then a prompt will pop up click YES and then type your password and check the box and click OK.
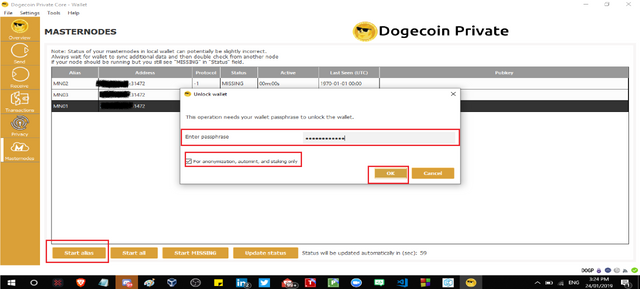
9.) There you guys =) Now you have a Masternode!!!!!
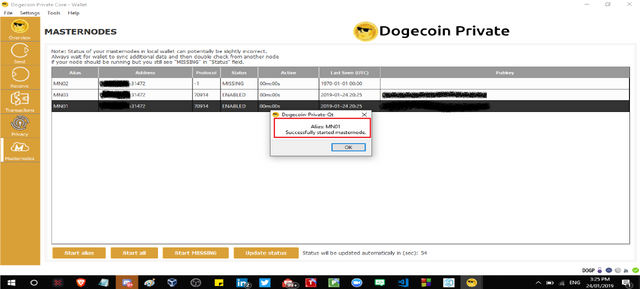
** IT WILL TAKE 12 HOURS TO RECEIVE A MASTERNODE REWARD AFTER THAT THEY WILL KEEP COMING EVERY 2 HOURS **


.png)

Downvoting a post can decrease pending rewards and make it less visible. Common reasons:
Submit