Firstly, you need to download, unzip and run Mist Ethereum Wallet version 8.1.
After running you will be asked at start which chain you want to be on. After selecting your choice, you will run either the Hard Fork chain, or stay on the old one. To return Ether you need to click on "yes".

Be sure to wait until the full synchronization blockchain!
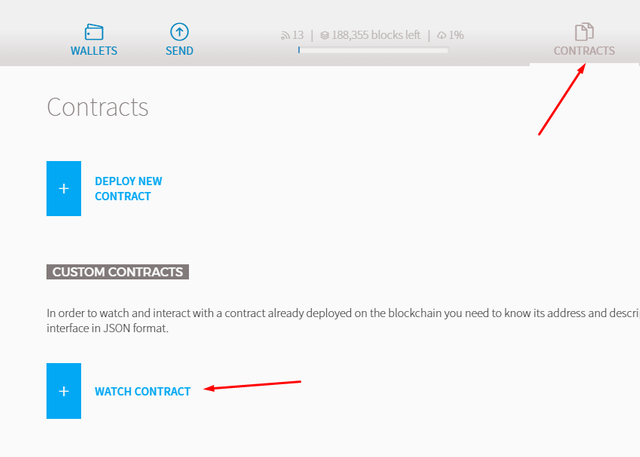
1. We need to "turn on" monitoring of the contract TheDAO:
Address: 0xBB9bc244D798123fDe783fCc1C72d3Bb8C189413
JSON: https://raw.githubusercontent.com/slockit/DAO/master/deploy/interface/full.json

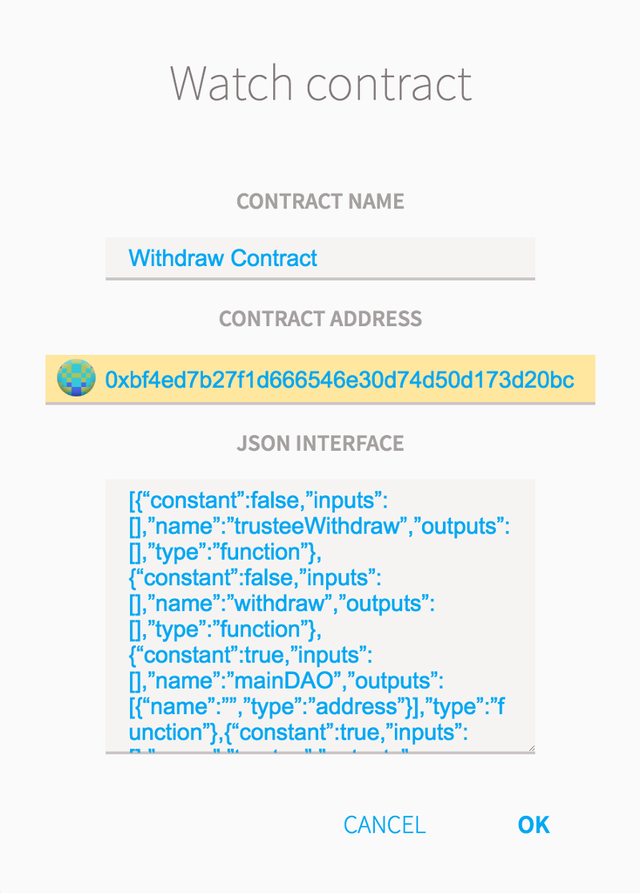
2. Do the same for the contract "Withdraw Contract" with the data:
Address: 0xbf4ed7b27f1d666546e30d74d50d173d20bca754
JSON:
[{"constant":false,"inputs":[],"name":"trusteeWithdraw","outputs":[],"type":"function"},{"constant":false,"inputs":[],"name":"withdraw","outputs":[],"type":"function"},{"constant":true,"inputs":[],"name":"mainDAO","outputs":[{"name":"","type":"address"}],"type":"function"},{"constant":true,"inputs":[],"name":"trustee","outputs":[{"name":"","type":"address"}],"type":"function"}]

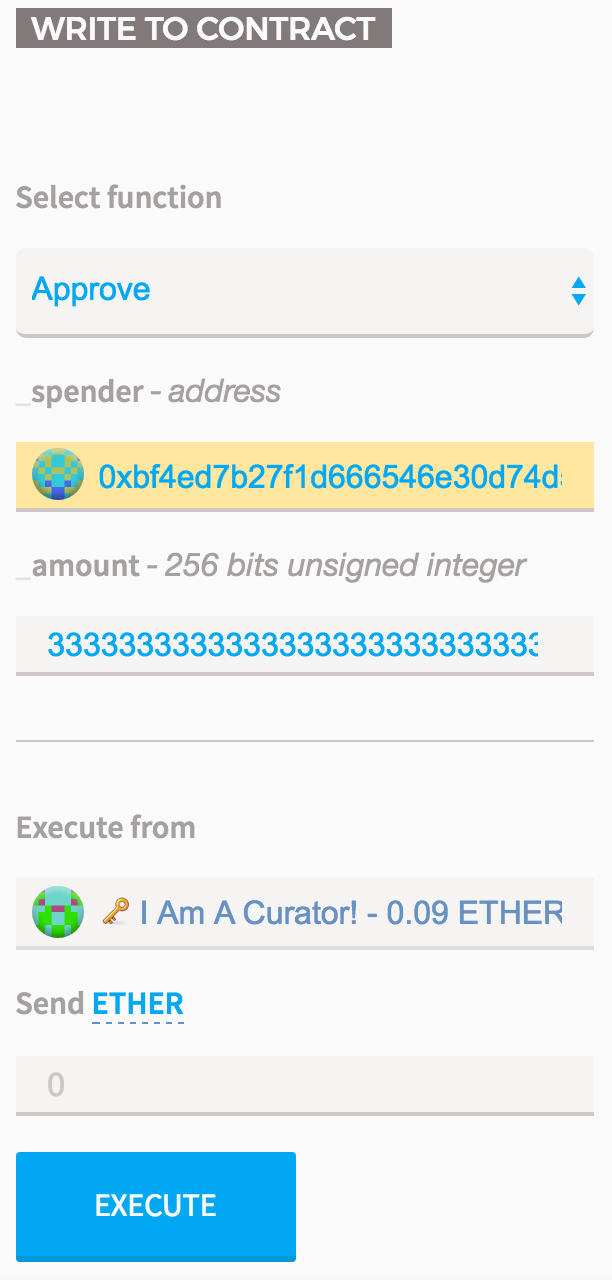
3. Go to TheDAO contract (which is being watched) and run the "Approve" function by typing:
_spender: 0xbf4ed7b27f1d666546e30d74d50d173d20bca754
_amount: 33333333333333333333333333333333333333333( or any number larger than the number of DAO tokens you hold x 10¹⁶ … )
Execute from: The address that holds your DAO tokens.
Send ether: 0
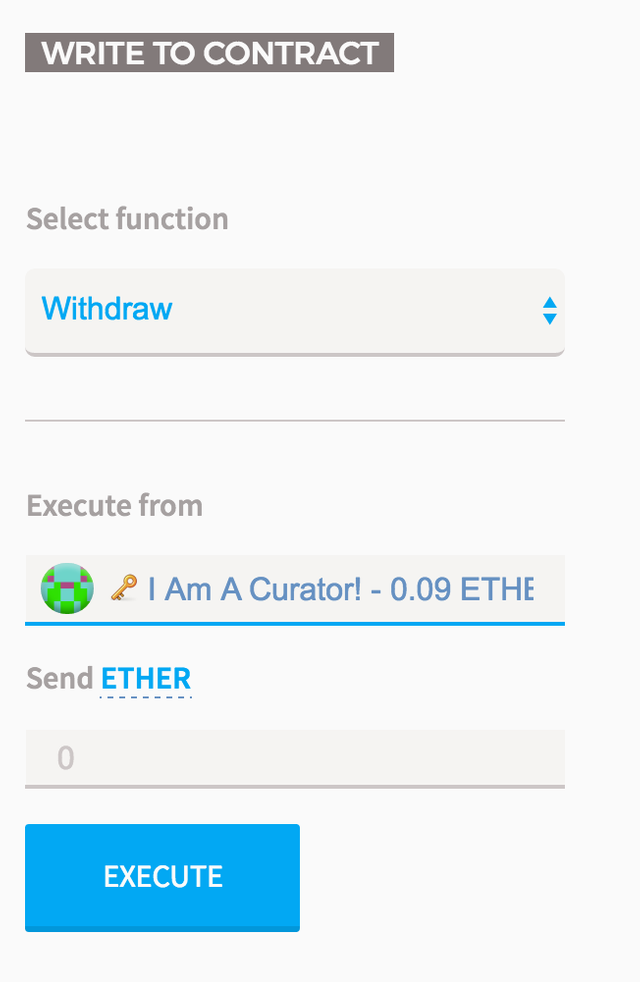
4. Then go to the "Withdraw Contract" and launch the "Withdraw" function by typing:
Execute from: The address that holds your DAO tokens.
Send ether: 0
After those 4 steps, your ether should be in the address that you used to hold TheDAO tokens.
Instruction has been taken there.
Russian instruction: https://steemit.com/ether/@dobcrypto/kak-vyvesti-ether-iz-thedao-ispolzuya-mist

