Greetings friends!!
This is @urmilanath650 from @bangladesh
How are you going on all of my steemian friends?? Hope each and every friend of this community and steemit is doing great in their life. I am well by the grace of Almighty Krishna. Today I am here to share a beautiful paperwork with you. I have made a pretty peacock with color paper and color pens. So I wish to share this beautiful peacock preparation with you. Ok let's see the required tools and steps of this nice work without delay.
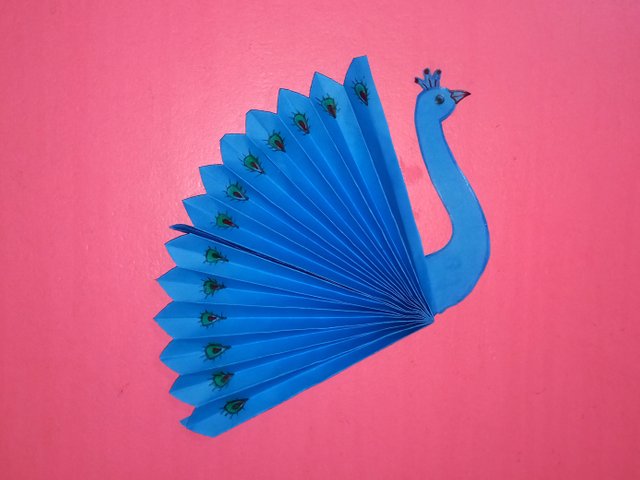
- A4 size blue color paper
- Pencil
- Black color pen
- Red color pen
- Green color pen
- Blue color pen
- Glue
- Scissor
- Eraser
Take a A4 size blue color paper and fold the paper at the middle longitudinally. Then make a 3 inch fold from the left side of this folded paper.
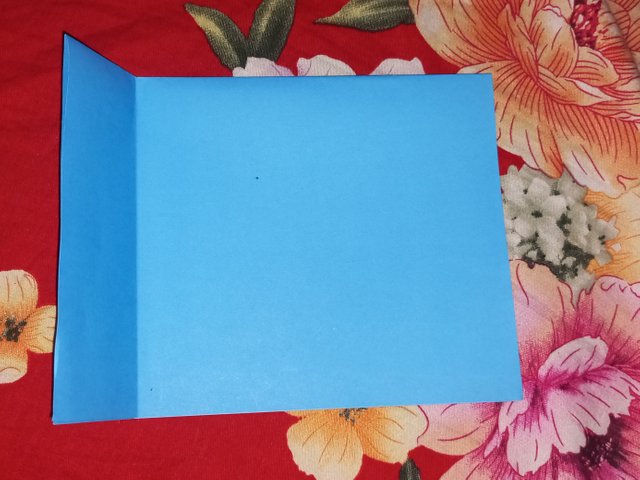
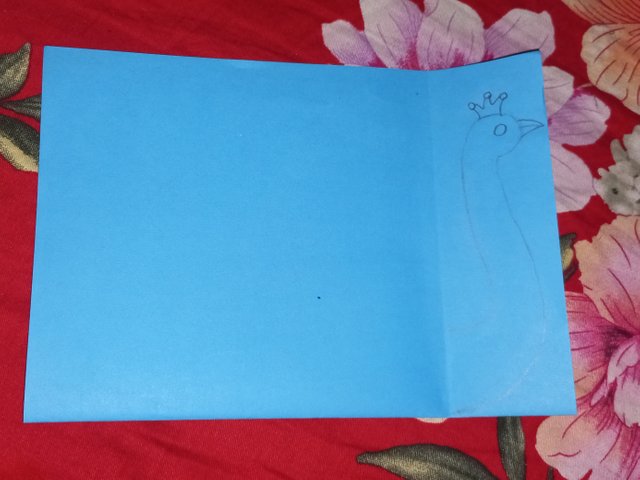
Now draw the neck and head of a peacock on the smaller folded portion of the paper. Draw the eye and beak of the peacock. Next cut the paper at the position of the peacock head and neck. Cut off the extra lower portion of the neck.
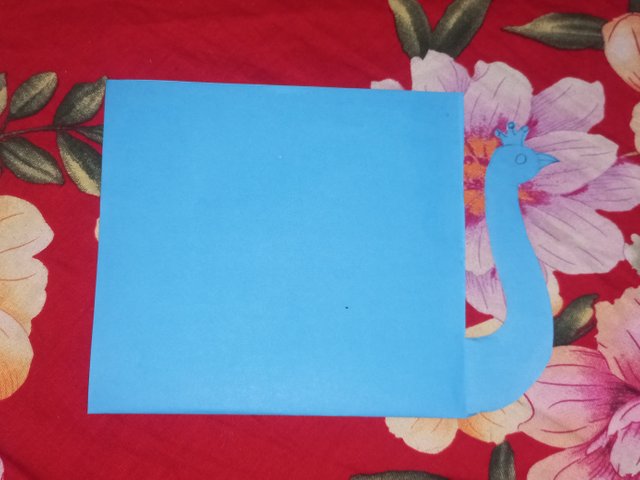
Now open the middle fold and fold the large part of the paper longitudinally at the middle position. Fold this folded paper again and again until the last small fold comes.
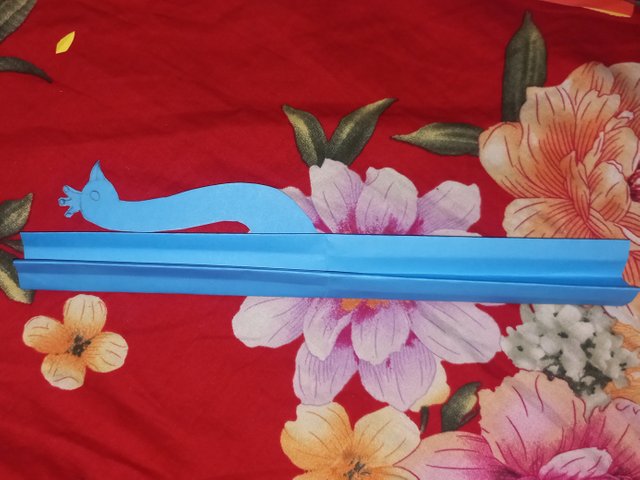
Open the folds and organize the small folds according to the folded shapes. Break the folds at the middle fold and attach the end paper piece of two portions with glue to make feathers of the peacock.
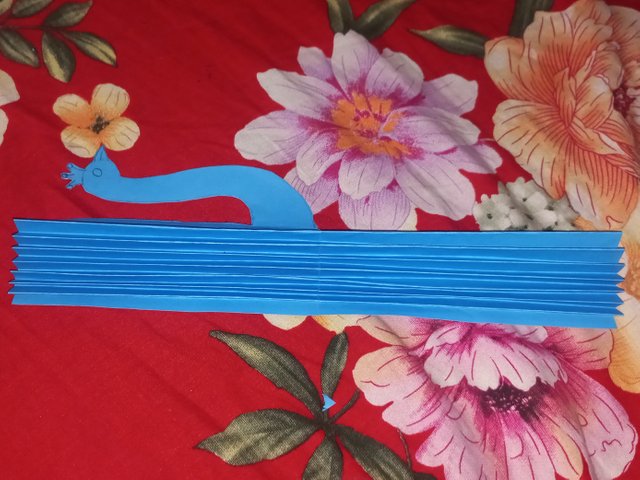
Then cut the last small portion of the features by making a corner that gives the peacock beautiful look. Then draw the designs of the feathers with black, green and red color pens. Draw such design in every folds of the features. Next draw the edges of the neck and head with blue color pencil. Draw the beak with red color pen and the eye with black color pen.
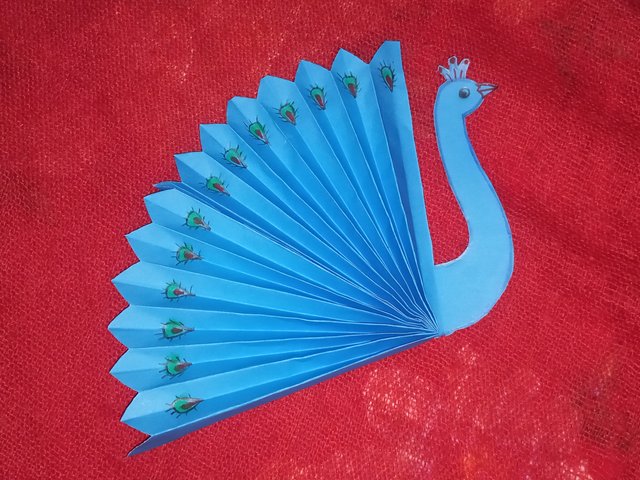
Here the beautiful peacock preparation is done. I have explained the detail process of this cute peacock in the above five steps. Hope you all understand the steps and like this peacock so much. You can try this craft at home easily and can decorate your wall as I do.
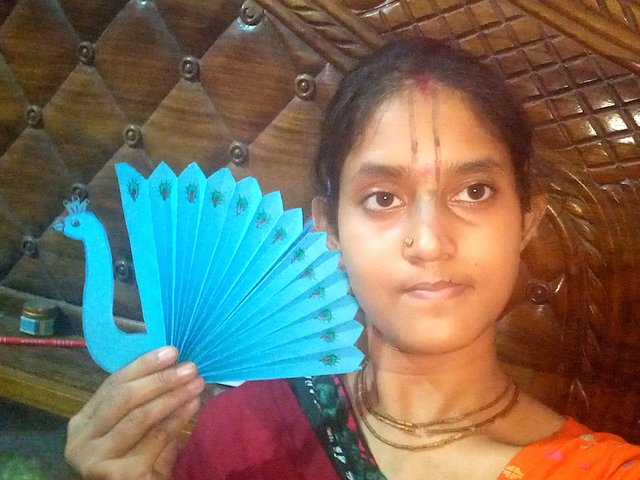
I have got thd idea of this nice peacock preparation from a pinterest reel. You can search the visual procedure using the following link.
Ending here for today. Keep me in your prayers so that I can do more beautiful works like this.

x share https://x.com/urmilanath55/status/1853473456169607342
Downvoting a post can decrease pending rewards and make it less visible. Common reasons:
Submit
Congratulations!!! because your post has been upvoted by Team 7 using steemcurator09. Keep up the good work and keep making quality posts. Curated By <@lhorgic>
Downvoting a post can decrease pending rewards and make it less visible. Common reasons:
Submit
Thank you sir..
Downvoting a post can decrease pending rewards and make it less visible. Common reasons:
Submit
Thank you for publishing an article in the Steem Kids & Parent community today. We have assessed your entry and we present the result of our assessment below.
MODs Comment/Recommendation:
This is a very beautiful craft work, thanks for sharing
Remember to always share your post on Twitter. This POST LINK is a guide to that effect.
Downvoting a post can decrease pending rewards and make it less visible. Common reasons:
Submit
Thank you mam...
Downvoting a post can decrease pending rewards and make it less visible. Common reasons:
Submit
It's amazing to see what you've made so beautiful and I've seen your whole preparation process and I understand it very well. You've made it in a very simple way but it looks amazing. Good luck seeing your creations and hope we get to see more of these
Downvoting a post can decrease pending rewards and make it less visible. Common reasons:
Submit
so many thanks dear friend for reading my post patiently and this encouraging comment 💗
Downvoting a post can decrease pending rewards and make it less visible. Common reasons:
Submit