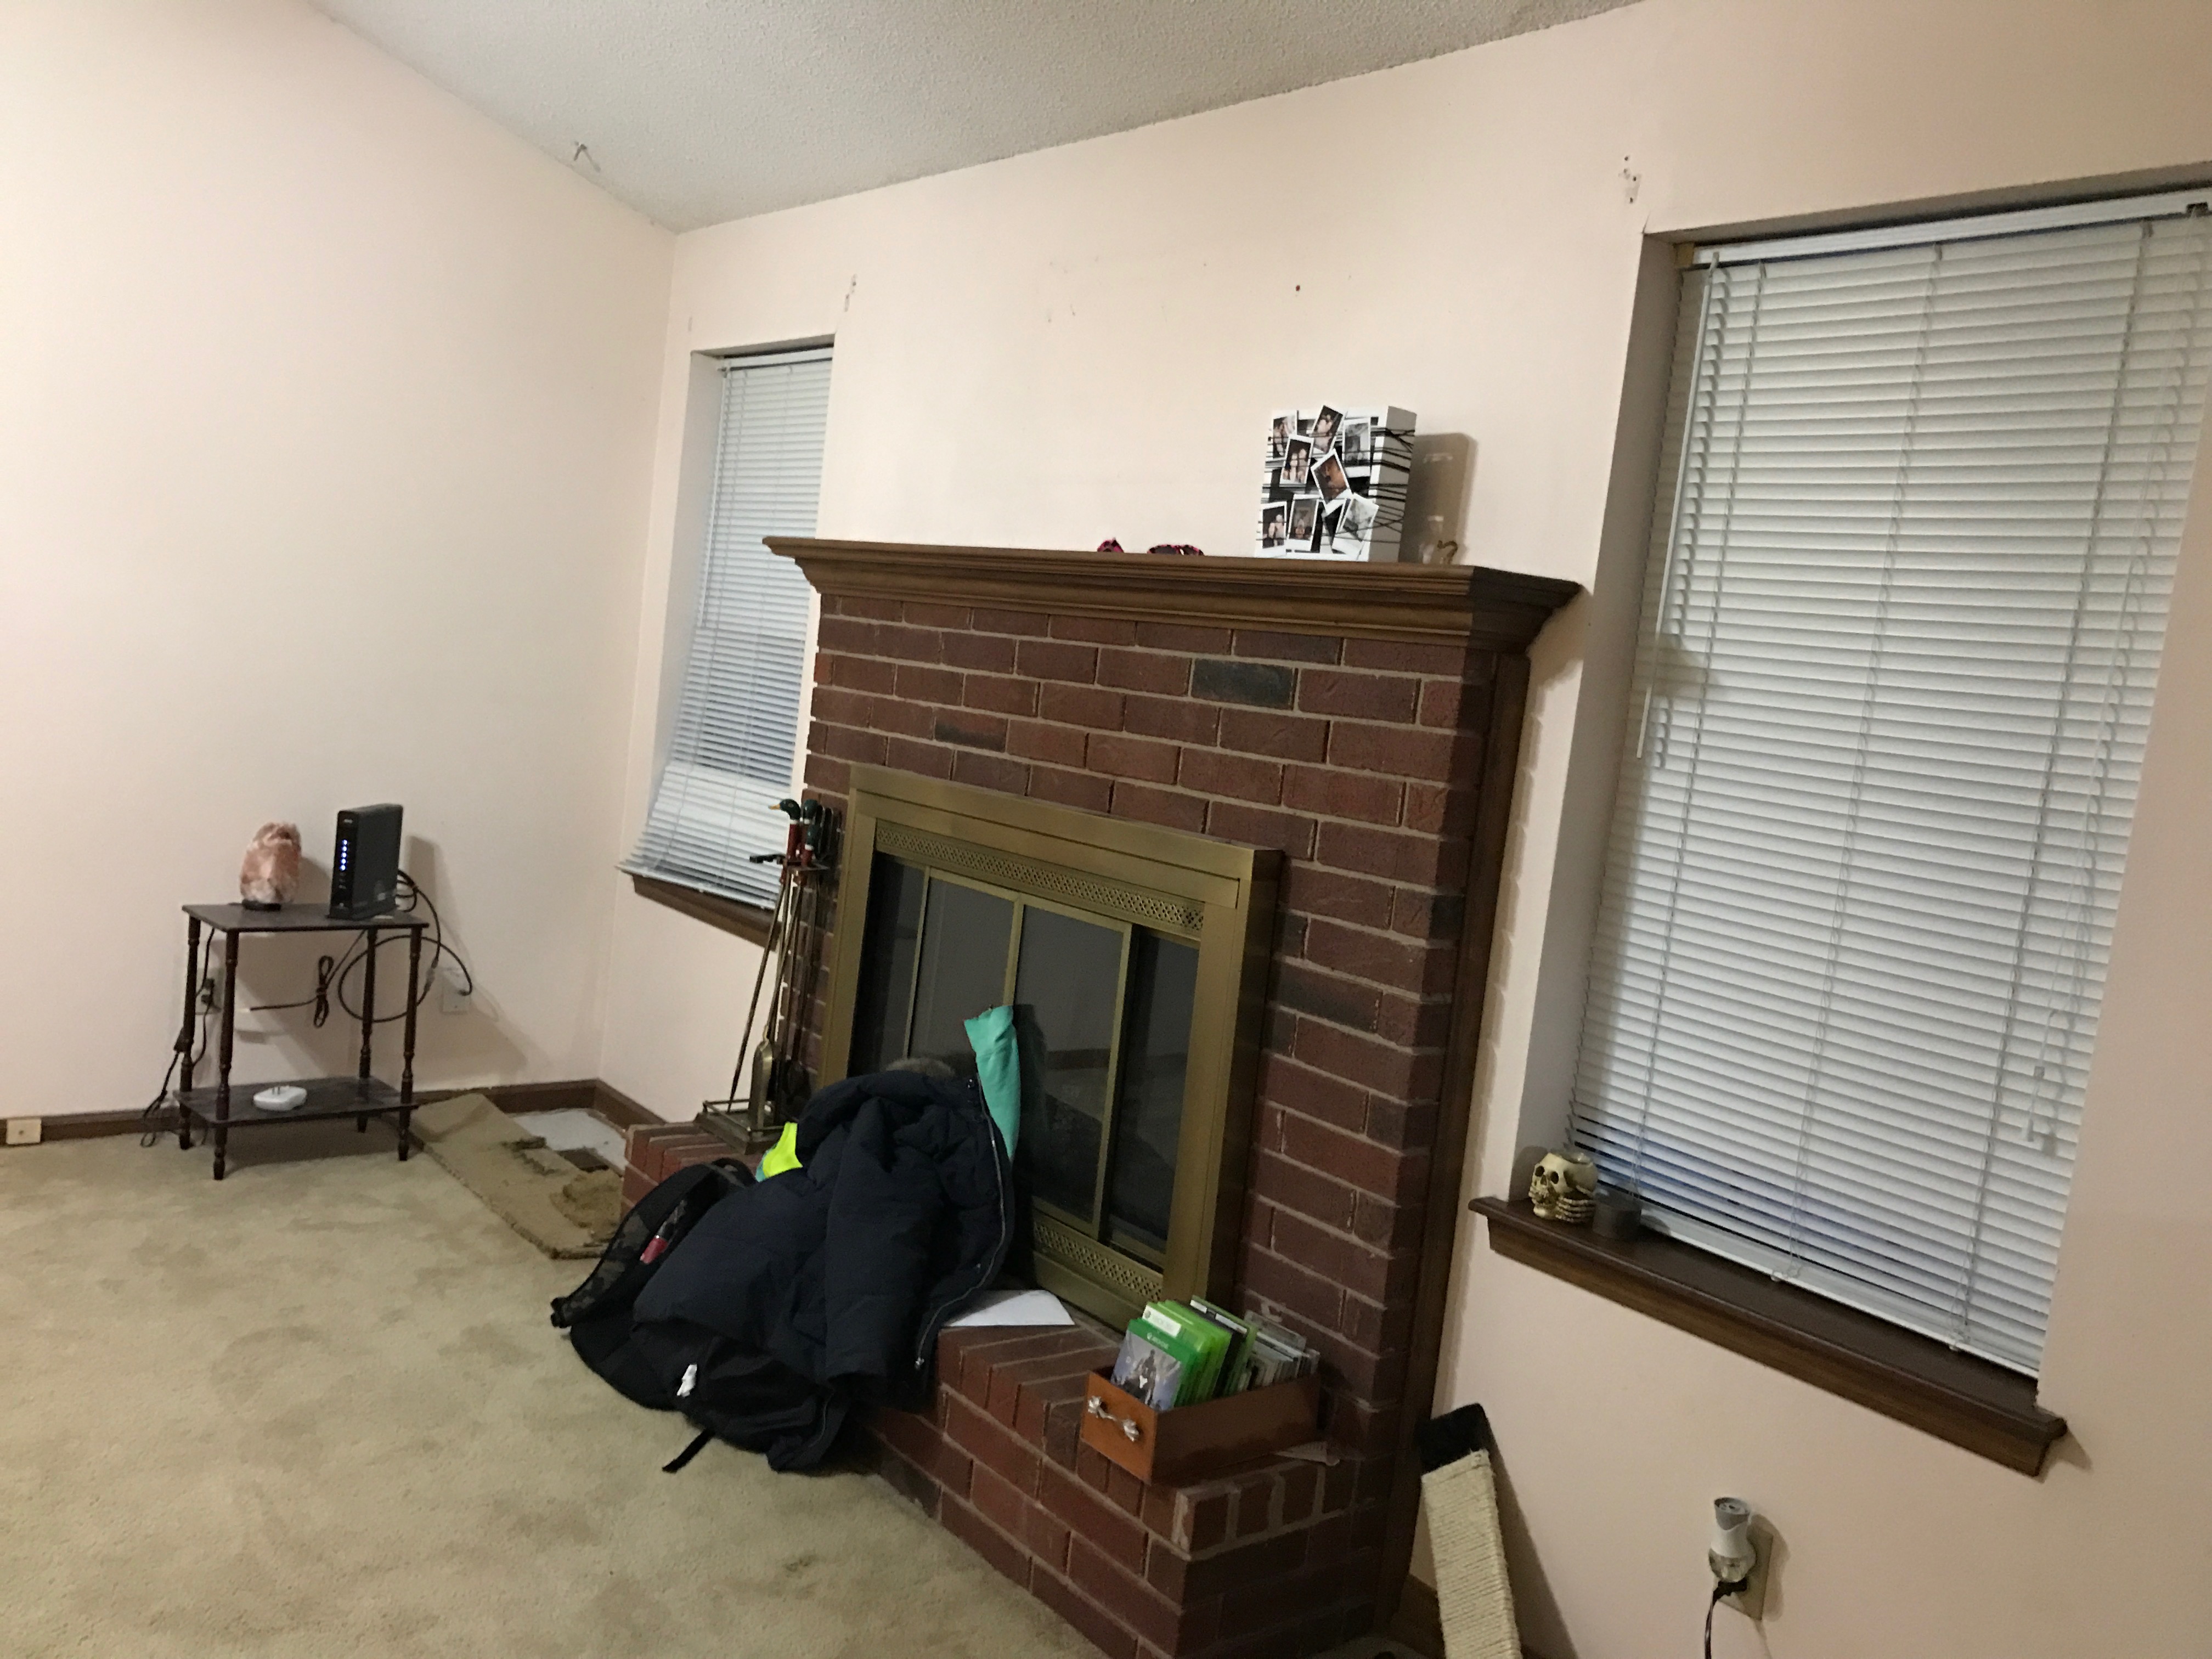
Here is a before shot of our not so pretty/modern fireplace:

Our fireplace originally had (ugly wooden) trim around the edges & the concrete didn't even fully reach the wall. I wish I had a better before photo of the side without the trim. Here's a shot with the trim before I removed it and revealed the huge gap. As you can see, this was when there was still (flea infested) carpet & popcorn ceilings in the room. ::cringe:: (I'll have a separate blog entry about our planked ceilings and new floors.)

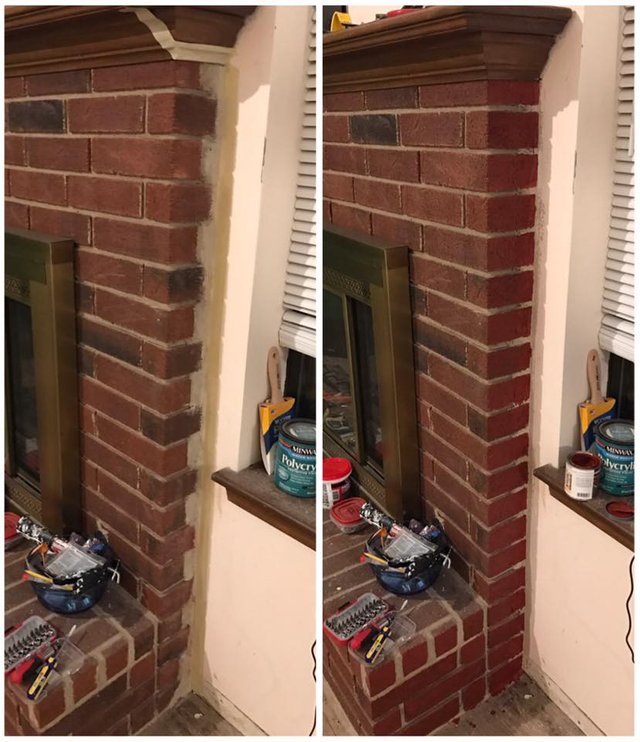
I removed the trim, filled in the gaps with concrete texture caulk, sanded it smooth, and stained the concrete brick red.

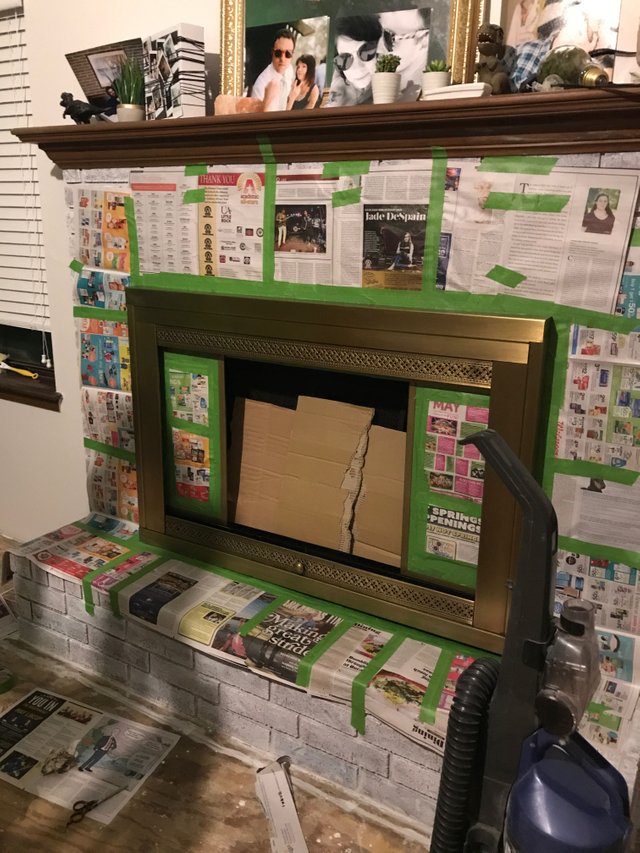
Now to white wash the entire thing. I did this by mixing equal parts of water and stain proof latex paint: Behr true white. I used a stain sponge to cover larger parts of brick and then used a medium sized paint brush to get between the bricks. One coat, baby!

Next up is painting the brass! I removed the glass doors and taped everything off. Then I used Rustoleum Grill/Heat Proof matte black spray paint. YEP. SPRAY PAINT. This stuff is supposed to support up to 1200 degree F temps. I was more scared of ruining the white-wash paint job I had done to the rest of the fireplace. O.O


Woo-hoo, almost done!
Now to paint the doors. I slacked and only took photos of the finished product. Whoops.

Then I had to clean the sucker out. It was STACKED half-way to the top of the opening with ashes. OMG. It was so bad. We are getting the fireplace serviced before we actually use it, so don't fret. Here it is after I cleaned it out. I put some candle inside to see what it would look like with a fire. haha

Next up, the mantle. We are actually going to replace the entire thing with a wooden squared off block, but for now I'm painting it white so that it matches the room and doesn't look off.


Boom, COMPLETE!
(Disclaimer: Those are lit candles. We aren't using the fireplace until it is serviced.)


It's not perfect, but for never having done anything like this I think I did an OK job. :D
Stay tuned for how to make your own planked ceiling & floors...BY HAND FOR CHEAP!
ice sharing , keep it up
Downvoting a post can decrease pending rewards and make it less visible. Common reasons:
Submit
Thanks!
Downvoting a post can decrease pending rewards and make it less visible. Common reasons:
Submit