참고 :https://groups.google.com/forum/#!topic/keras-users/_hXfBOjXow8
선요약:
# export PATH=~/anaconda/bin:$PATH # MAC
conda create -n tf python=3.5
# 17/3/1 기준으로 윈도우에서 3.5 버전만 TensorFlow/Keras가 지원
activate tf # Windows
# source activate tf  : Linux/macOS

# 여기서부터 (tf) 환경. 설치 순서 중요
pip install tensorflow   # pip install tensorflow-gpu : GPU 버전
conda install pandas matplotlib scikit-learn
pip install keras
conda install jupyter notebook

jupyter notebook # Test 해보기
평소에 Source code로만 설치하는 것을 선호했지만 Windows에서 설치가 조금 난감하기 때문에 Anaconda를 통해 비교적 쉽게 설치를 할 수 있습니다. 그리고 Linux/macOS에서도 다 작동하는 것을 확인했습니다.
편의상 문어체를 사용합니다.
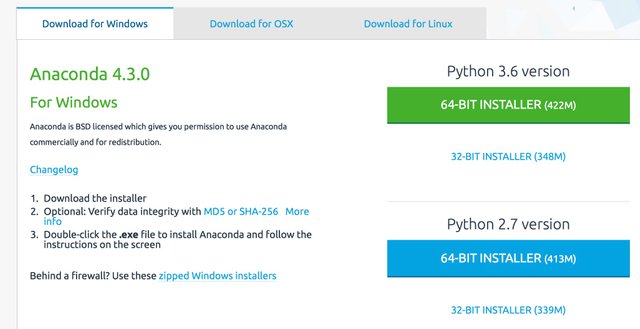
Anaconda 다운로드를 통해서 Anaconda Python 3.X 버전을 자신의 플랫폼에 맞게 설치한다.

나는 Python 3.6 버전이다.
Windows 경우 설치중에 Anaconda를 PATH 경로에 포함하는 체크란이 있음으로 반드시 체크 됨을 확인하자.
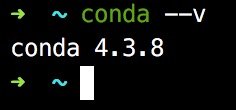
설치를 완료한 후에 linux/macOS 라면 terminal 그리고 Windows 라면 CMD 창에
conda --v 명령어가 작동해야한다.
만약 linux/macOS에서 conda 명령어가 먹히지 않으면
export PATH=~/anaconda/bin:$PATH 로 anaconda를 경로에 추가한다. 각자의 anaconda의 경로가 다를 수 있으므로 anaconda 혹은 anaconda3로 추가해준다. 편의상 자신의 .bashrc 등에 넣어주자.
echo 'export PATH=~/anaconda/bin:$PATH' >> ~/.bashrc

커맨드 작동을 확인한다.Anaconda의 현 버전은 상관없는 듯하다.
그리고 conda environment를 만든다.
환경 설정후 환경을 활성화 시킨다.
conda create -n tf python=3.5 # y 등으로 계속 진행
이 과정은 python의 virtualenv와 비슷하다. 안전하게 시스템의 python library가 꼬이지 않게 격리해서 만드는 과정이다. 예를들어 TensorFlow의 버전을 다르게 쓰고싶을때.
우선 현재(17/3/1)기준 윈도우에선 python 3.5.X 버전을 사용해야 현재 TensorFlow-v1.0.0와 Keras를 지원한다. 그래서 python=3.5를 해줘야하며 리눅스와 맥에서는 python 3.6도 지원한다고 한다. 나는 윈도우 기준으로 테스트해봤기때문에 3.5로만 해보았다. 따라서 Anaconda 기본 python3.6 버전을 사용하면 TensorFlow와 Keras 설치가 불가능했으므로 잘 선택하자.

activate tf # Windows
# source activate tf   # Linux/macOS
그리고 환경을 활성화시킬때 Windows와 Linux/macOS 명령어의 차이가 난다.

다음 처럼 (tf) 환경이라고 쉘/터미널의 모습이 바뀐다.
그리고 쭉쭉 이 순서대로 설치해준다.
pip install tensorflow  # pip install tensorflow-gpu
conda install pandas matplotlib scikit-learn
pip install keras
conda install jupyter notebook
TensorFlow를 GPU 버전으로 사용할 수 있다면pip install tensorflow-gpu로 설치한다.
Keras 설치 중에 Theano를 설치하는 듯 하지만 기본 백엔드는 TensorFlow로 작동한다.
참고로 Keras 설치 전에 jupyter notebook 설치시 keras module을 import 하지 못하는 오류가 있다. 그래서 keras 설치후 jupyter notebook을 설치한다.
간단하게 Keras import가 되는지 확인한다.

끝으로 ..
자세히 읽지는 않았지만 다음 블로그 글에서 Windows7 64bit에서 CUDA와 CuDNN을 포함한 Windows에서 Keras+TensorFlow를 설치하는 글도 참고하면 도움이 되겠습니다.
Python Keras+Tensorflow on Windows7 64bit 설치하기
Congratulations @nelya9227! You have completed some achievement on Steemit and have been rewarded with new badge(s) :
Click on any badge to view your own Board of Honor on SteemitBoard.
For more information about SteemitBoard, click here
If you no longer want to receive notifications, reply to this comment with the word
STOPDownvoting a post can decrease pending rewards and make it less visible. Common reasons:
Submit
좋은글 감사합니다.
아직 윈도우 + tensorflow로는 gpu지원이 안되지요?
Downvoting a post can decrease pending rewards and make it less visible. Common reasons:
Submit
지원됩니다~
Downvoting a post can decrease pending rewards and make it less visible. Common reasons:
Submit