 | GPU mining is still profitable, especially if you have access to cheap or free electricity. Here's my tutorial with measurements and parts needed to build a GPU mining rig frame. |
|---|---|
 | |
 |
Parts list :
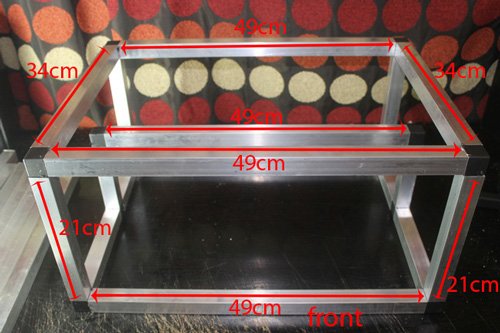
1" x 1" x 16swg (1.6mm) aluminium box section - 5m long, cut into
49cm x 5
34cm x 2
21cm x 4
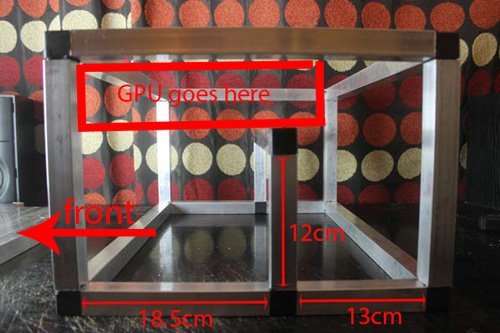
18.5cm x 2
13cm x2
12cm x 2
- 4 x 11cm spacers per frame If you are making the frames stackable.
Square tube connectors
| 8 x 3 Way Elbow Tube Connector 25mm. | 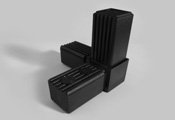 |
|---|---|
| 2 x Tee Tube Connector 25mm. | 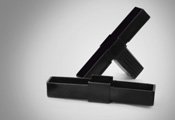 |
| 2 x 2 Way Elbow Tube Connector 25mm. | 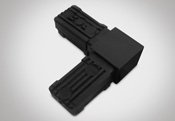 |
| If you want to make your frame stackable you will also need some of these. for the base frame you will need to replace 4 x 3 ways with 4 of these. for every frame you want to stack on top you will need to replace 8 x 3 ways for 8 of these. | 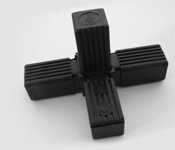 |
This is where i got my parts in the U.K.......
aluminium box section
https://www.themetalstore.co.uk/products/aluminium-box-section-16-swg
connectors
https://www.themetalstore.co.uk/products/tube-connectors-square
Now for the build.
I hope you can see from the pictures which way your tube connectors go.
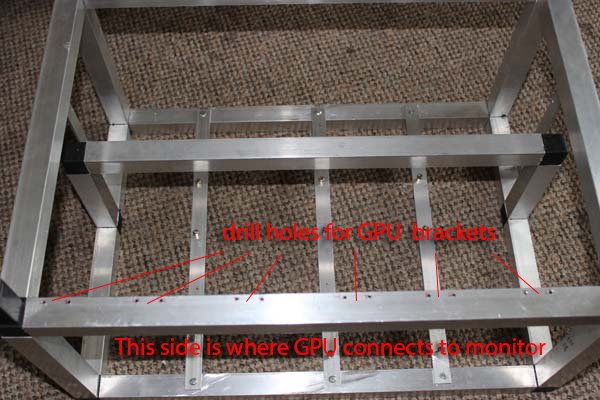
I have named the 'front' of the frame, this is the side that you will plug into your GPU from the monitor.
First make the base. The connectors push into the box section tubing quite easily but sometimes need a tap with a wood hammer. on the base you should have 2 x 49cm lengths, 2 x 18.5cm (towards front) and 2x 13cm lengths (towards back). 4 x 3 way connectors at the 4 corners and 2 x tee connectors (1 between each 18.5cm and 13cm lengths)
Next connect Your upright lengths, 4 x 21cm lengths ( 1 at each corner) and 2 x 12cm for the inner bar.
DO NOT connect any connectors ontop of your uprights at this stage or you will get stuck!
Now make your middle bar with a piece of 49cm lenth, connecting a 2 way elbow to each end. Now connect the bar to your 2 x 12cm uprights.
Then make the top with the 2 remaining 49cm and 34cm lengths. connecting the corners with the 4 x 3 way elbow connectors. Now connect the top to the rest of the frame.
 |  |
|---|
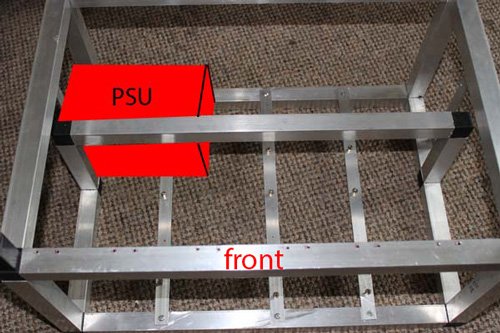
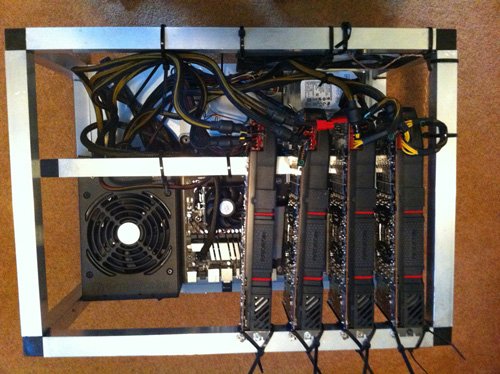
Next make a base plate for your mothorboard here ive used flat aluminium bar with hole drilled for mobo spacers. u can also use an old base plate out of an old pc case. place mobo to the front of frame. its best to work out first where you are going to place the psu, If you using up to 4 graphics cards you can place the psu at the front (fan facing up ).(see pics)
If you want to put 6 GPU's in then you'l have to put the psu at the back sideways. or your gpu's will cover the psu fan and reduce cooling efficiency (see pics)
 |  |
|---|---|
 | |
| ------------ | ------------ |
To make your frame stackable : For the base frame you need to replace the top 4 x 3 way elbow connectors with the 4 way connectors (as shown in parts list) then add the 4 x 11cm spacers on top , this will then allow another frame to be connected to the top. The next section will then need 4 x 4 way connectors on the bottom to slot into spacers on frame below , and 4 x 4 way connectors on top if you going to connect another frame on top.

Stackable section with spacers on bottom to stack onto a base frame and connectors on top to accept another frame.

Double frame
EDIT : please treat these measurements as a starting guide, this worked for me using the old style risers (pci-e x16 to 16 or pci-e x1 to 1) and was designed for 4 cards.
If you are using the new style usb risers you will have to move the middle rail forward and lower it slightly (so the usb connector sits on the rail) or move the rail back about 3cm and use right angle usb cables.
As @davebooi points out , you need to increase the size of the rig if you want to use 6 cards in this rig.
Downvoting a post can decrease pending rewards and make it less visible. Common reasons:
Submit
@pcste I was able to use these dimensions(with a small tweak) to build a 6 GPU mining rig using RX570's. I had to reverse the way the GPU's went in, and reduced the vertical support bars to 9.75CM which supports the riser cards. The risers are not secured, but I prefer that for easy card removal and swaps! Thanks for putting this together. It's a shame you can't edit your original post.
Downvoting a post can decrease pending rewards and make it less visible. Common reasons:
Submit
Thanks for your input, happy to see people using this tutorial.
yes it is a pity i can't edit.
Downvoting a post can decrease pending rewards and make it less visible. Common reasons:
Submit
Greeat post! I just built this rig with some Asus GTX 1070s and it works great.
I'd suggest to adjust the 18.5cm/34cm to 23.5cm/39cm so that you have enough room for the risers/their cables. In my rig the riser cables don't fit into the 18.5 space and could need the extra 5cm ;)
I also adjusted width to 60cm, I calculated it with 5cm space between GPUs and 5cm witdh per GPU. Since I'm using 6 GPUs per rig thats 10 * 6 = 60cm space needed on my end
Cheers, and thanks again for the great post!
Downvoting a post can decrease pending rewards and make it less visible. Common reasons:
Submit
thanks for your feedback. yes it depends what risers you use. i first built this set up with the old style risers. and then found recently that the usb style risers dont fit in this rig without some modding.
unfortunately i cant edit the post now.
Downvoting a post can decrease pending rewards and make it less visible. Common reasons:
Submit
Just want to thank you for the guide. Finished building my first frame today with the adjustments suggested by davebooi. I'll transplant my rig from its current PC case to the frame tomorrow.
Cheap and easy... and it looks great :)
Rock on!
Downvoting a post can decrease pending rewards and make it less visible. Common reasons:
Submit
I just pulled my rig out of my shed - got it pieced back together for the most part - running two psu's a 1250 and a 750w for 4 cards. Planning to use it as a heater this winter! Just pray no cards die.
Downvoting a post can decrease pending rewards and make it less visible. Common reasons:
Submit
Thanks for posting your design, I'm going to go and pick up the material to build this tomorrow!
Downvoting a post can decrease pending rewards and make it less visible. Common reasons:
Submit
Thanks for the feedback guys, great to see some of you have built this frame :-)
I will be making an updated frame for usb risers soon, ill post the details.
If my posts or tutorials have helped you please consider giving me a witness vote.

to vote go to : https://steemit.com/~witnesses
Scroll to the bottom of the page and enter pcste into the box. click vote.
do not use the @sign
Downvoting a post can decrease pending rewards and make it less visible. Common reasons:
Submit
Downvoting a post can decrease pending rewards and make it less visible. Common reasons:
Submit