Welcome back, budding programmer. As you know, this tutorial focuses on cultivating your passion towards programming and changing your the famous perspectives "programming is hard" to "programming is easy". Hence, this class is mainly for people who had no knowledge of Java programming before and hence, the difficulty is Basic. Tutorial details below.
What Will I Learn?
- You will learn how to create a simple arithmetic Java program
Requirements
- Computer system
- JDK must be installed
- Eclipse IDE
Difficulty
- Basic
Tutorial Contents
In our previous class, we learned how to write our first code, creating our very first program, "Hello world" application. For a full recap of the previous lesson, click here.
Today we are going to write two java programs. But do not panic, they are going to be as easy as our previous one. Let's get to it guys.
A simple Java program that adds two integer numbers
Here's our program for today's lesson. This program simply adds two numbers (of integers datatypes. I already explained what datatypes are in our previous lessons). Let's take a look at the code below.

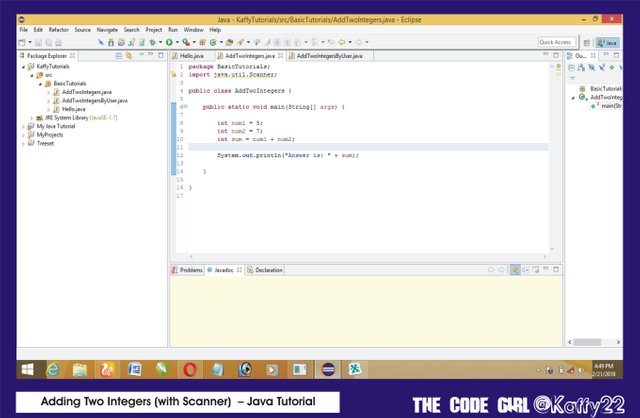
Our program #1 code on Eclipse IDE
See the code clearly below.
package BasicTutorials;
import java.util.Scanner;

public class AddTwoIntegers {

    public static void main(String[] args) {

        int num1 = 5;
        int num2 = 7;
        int sum = num1 + num2;

        System.out.println("Answer is: " + sum);

    }

}
See how simple it looks . Now let me explain each line of the code.
Package BasicTutorials
This is just a package name. Its where our basic tutorials are saved. I already explained this before.
import java.util.Scanner;
We use the import statement which introduces the Scanner class from the util package to the program. This Scanner class is used in printing our output to the output window.
public class AddTwoIntegers {
This is the program class. The AddTwoIntegers is the class and that represents the name of the program as stored when creating the class.
public static void main(String[] args) {
This is the program main method.
int num1 = 5;
Declaring the integer one (first number/variable) and assigning the value 5 to it.
int num2 = 7;
Declaring the integer two (second number/variable) and assigning the value 7 to it.
int sum = num1 + num2;
This is the variable that holds the outcome of the arithmetic operation taking place here.
System.out.println("Answer is: " + sum);
This is the print statement. This statement helps us print the result of this program on the output window.
That's it! You see how simple it is. Like I do tell you, programming is easy. You just have to be focused and give much commitment to it. In no time, you're gonn' become a great programmer.
Let me tell you this, there's another method we can use to declare our variables in this program. We can choose to first declare all the variables we want need in this program and then assign values to the in another lines.
int num1;
int num2;
int sum;
In the code given above, we only declared the variables we need in the program. No value is giving to them. we can then add this next lines of code below to assign values to them.
num1 = 5;
num2 = 7;
sum = num1 + num2;
Adding these together, we would have had this code below
Method 2
int num1;
int num2;
int sum;

num1 = 5;
num2 = 7;
sum = num1 + num2;
Note that if we choose to use this method (declaring our variable first and then assigning values to them thereafter), we do not add the datatype int when assigning the values. This is so because we've already add the datatype for the variables when declaring the in the first lines.
Alternatively, we can choose to use this method below:
Method 3
int num1, num2, sum;
num1 = 5;
num2 = 7;
sum = num1 + num2;
This new method saves us some time and lines. Since these variables are having the same datatype int, we can choose this method.
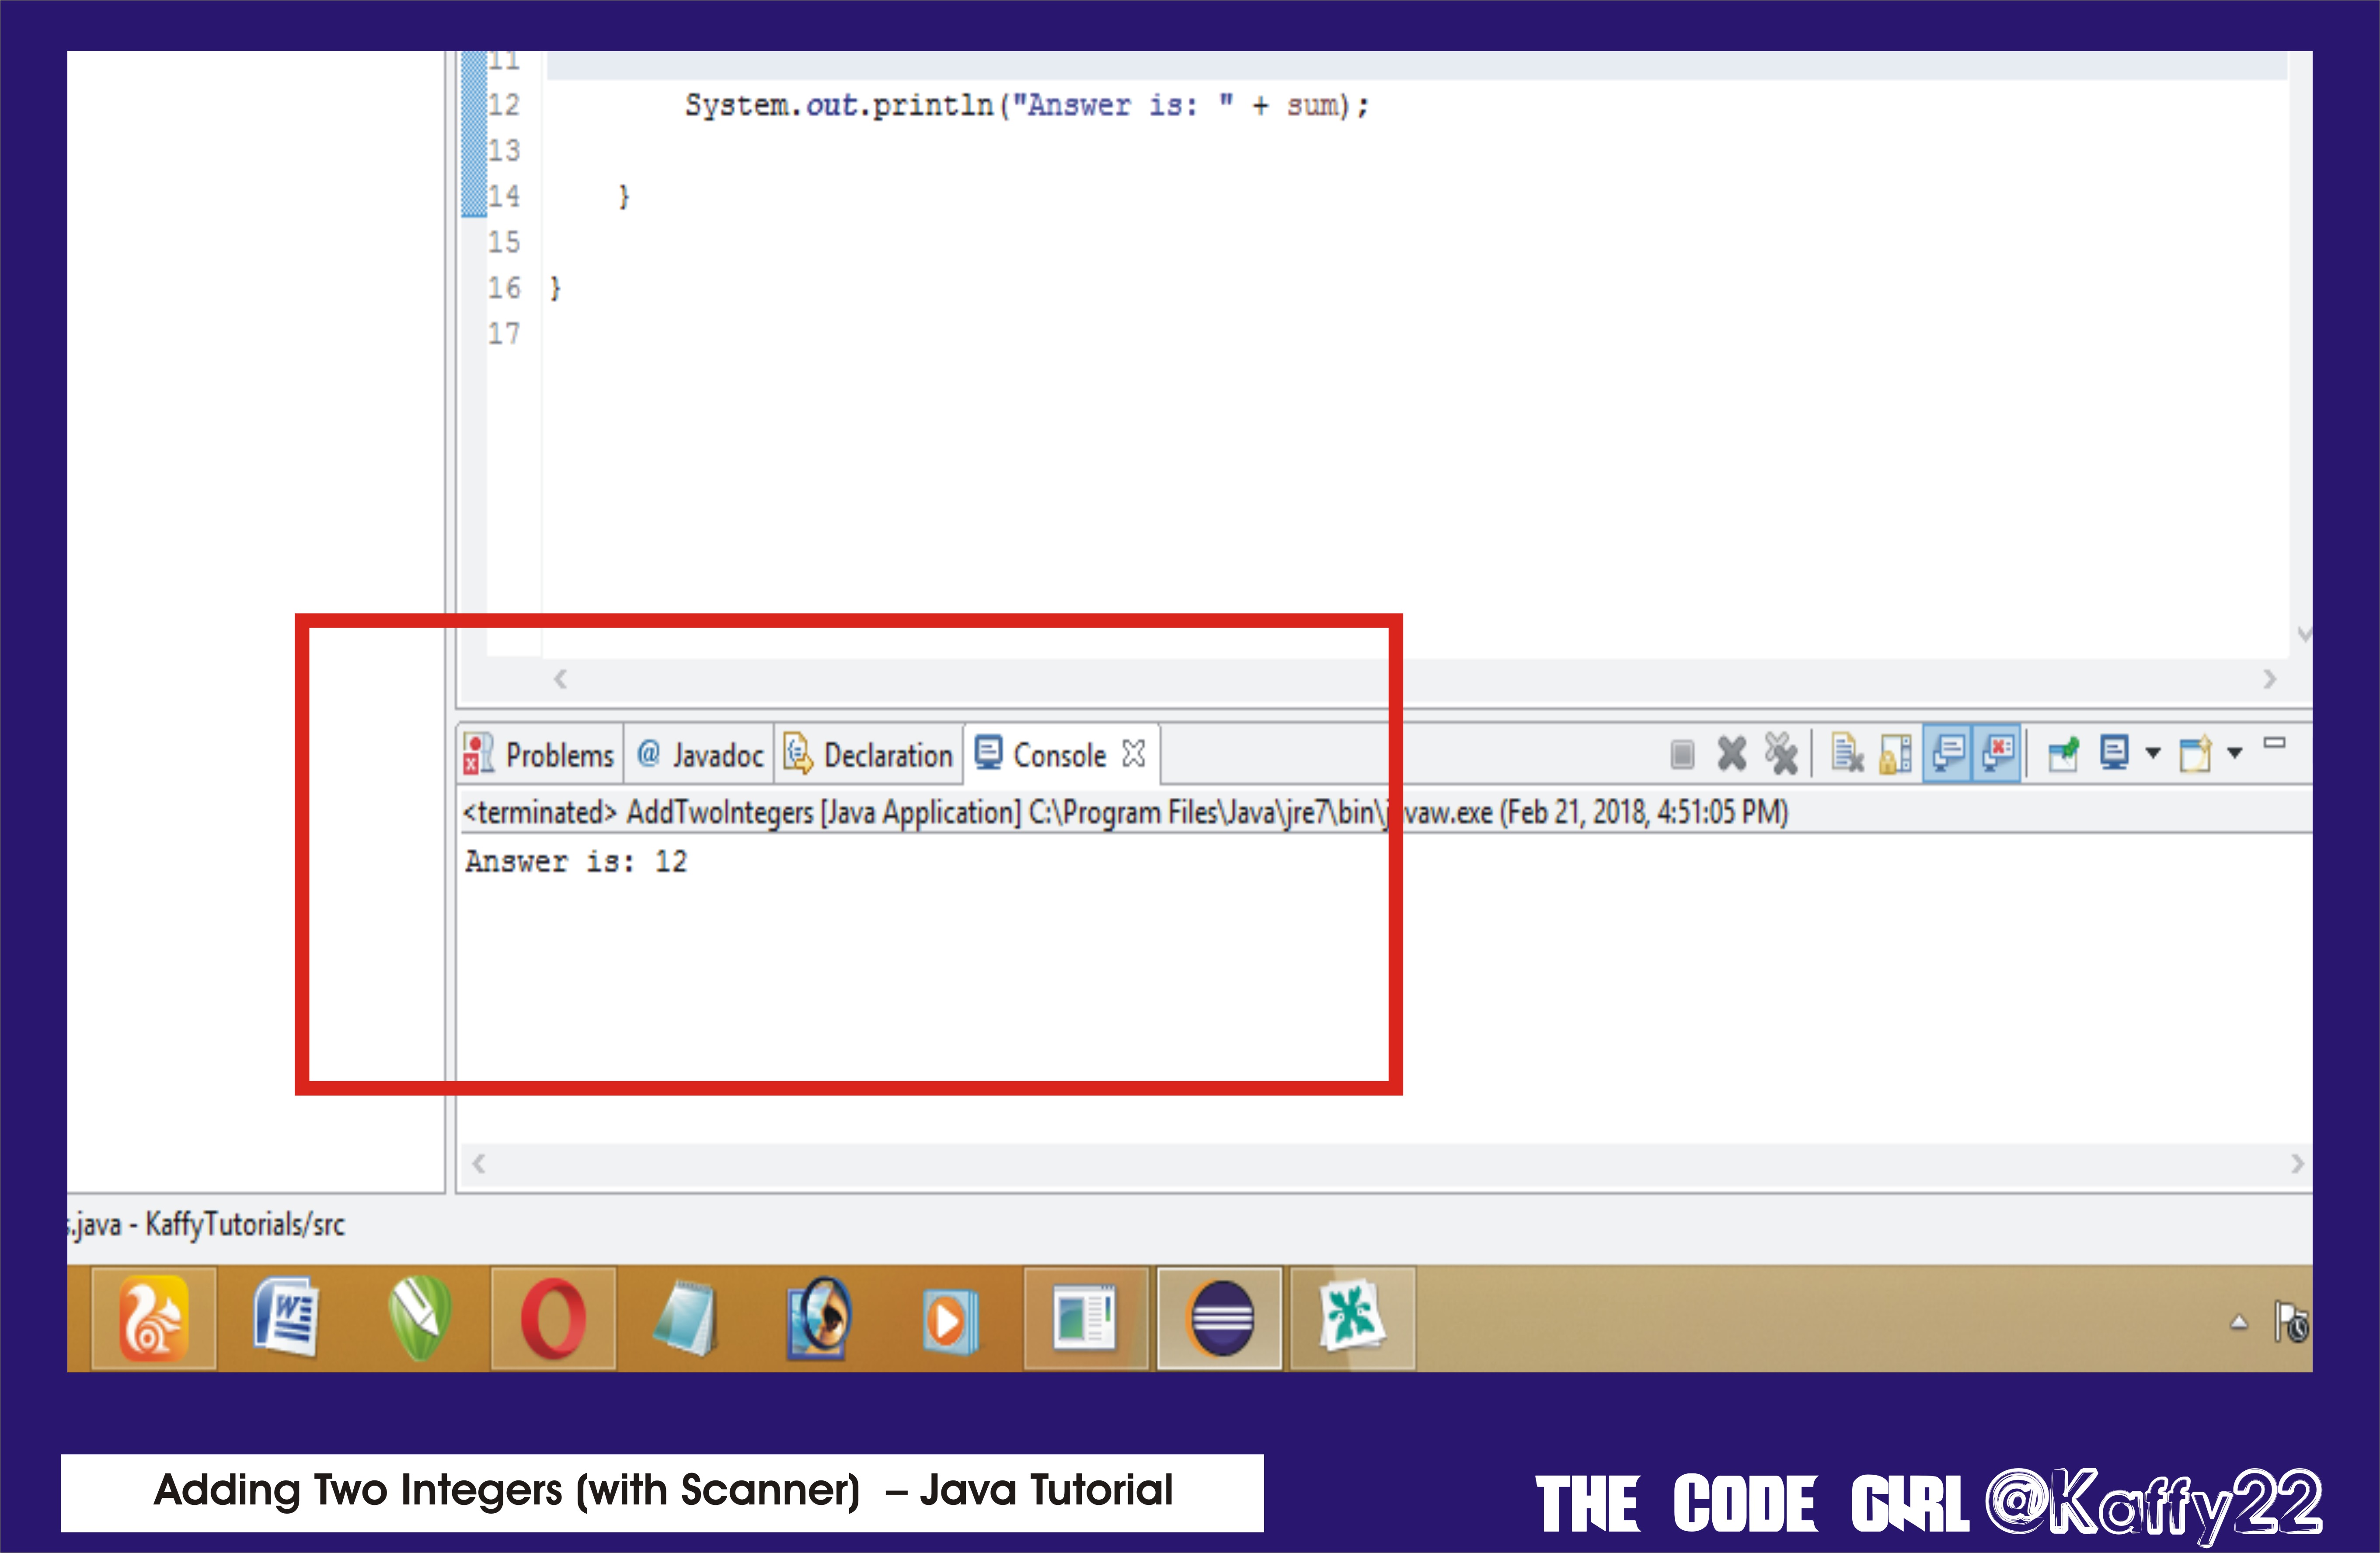
Now take a look at the output of this program below.

Our program output
The result "12" is displayed at the output window.
That's all for today guys. Check on the curriculum below to get a better understanding of this lesson. Do drop your feedback. Thanks for reading.
DON'T FORGET TO UPVOTE THIS.