One of my many hobbies is quilting, rather, putting together quilt tops. Last year my sweet husband, @qwasert hung a quilt hanger for my birthday. This quilt hanger is in our living room and is the first thing you see when walking in the front door. It's main function is to display my quilt tops. I love to decorate our home, I change things up for the Holidays and seasons. It's a lot of fun. I recently took down our christmas decorations and realized, I had nothing to go on my hanger. So, I went on the hunt! I wanted something wintery and fun to put up. That's when I found the #MRSNOWMAN pattern by Lori Holt. I sewed up a block to see how it would go together and texted a picture to my family. My mother quickly responded back, "I love it! But that snowman looks lonely!"
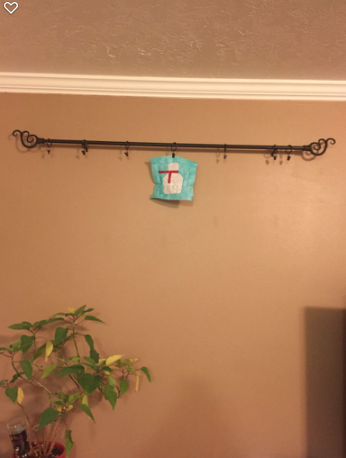
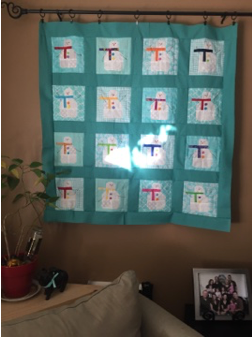
For this quilt: I used white scraps from my strip bin, and a few fat quarters from my fabric stash. For the sashing I used just over half a yard of the dark teal color I bought at my local fabric store. If you'd like to make a snowman of your own. I've written a easy to follow tutorial with pictures to boot below. Have a great day! :)
#MRSNOWMAN
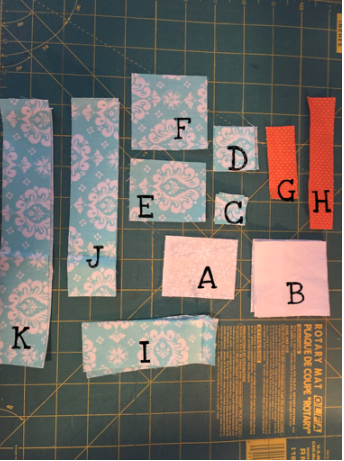
Here is the Cut list:
✂️BODY (White Fabric)
Cut a 2" x 2 1/2" for his head. (A)
Cut 4- 2 1/2" squares (B)
Choose one where the scarf will go and cut a 1" strip off of side.
One piece will be 1"(B2), the second piece 1 1/2" (B3)
✂️INSIDE BLOCK (Background color)
Cut 4- 1" squares (C)
Cut 2- 1 1/2" squares (D)
Cut 1- 2" x 2 1/2” strip (E)
Cut 1- 2 1/2" square (F)
Cut 2- 1 1/2" x 4 1/2" strips. (I)
✂️ SCARF (Colored scrap)
Cut a 1" x 2 1/2" (G)
Cut a 1" x 4 1/2” (H)
✂️ OUTSIDE BLOCK (Background color)
Cut 2- 1 1/2" x 6 1/2” strips for sides (J)
Cut 2- 1 1/2" x 8 1/2" strips for top and bottom (K)
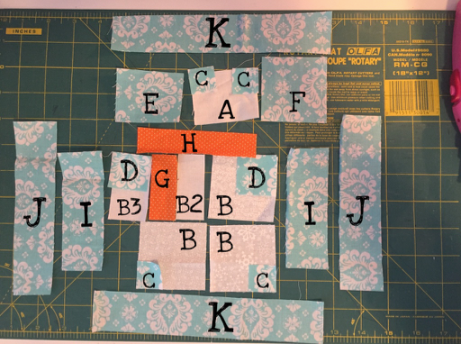
All of the pieces are joined right sides together of course. and then pressed open. Ok, let's get started.
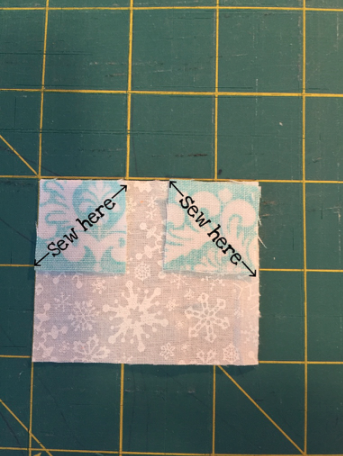
Step one: Starting with pieces A and two of pieces C, right sides together you are going line up each piece C with the top corners of piece A. Sewing from the corner of piece C that is closest to the center of Piece A diagonally to the opposite corner. Leaving a quarter inch seam trim excess fabric from corners and iron your pieces. Walayah, a snowman head.
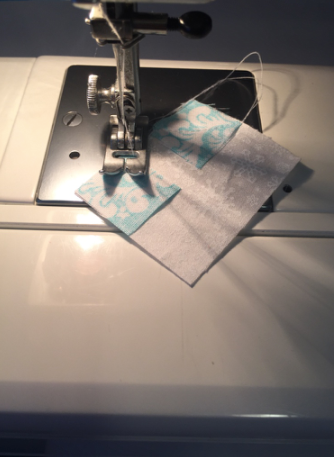
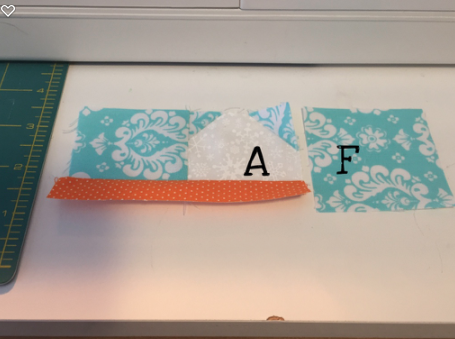
Step two: Next you are going to be joining piece E to the left side of piece A.
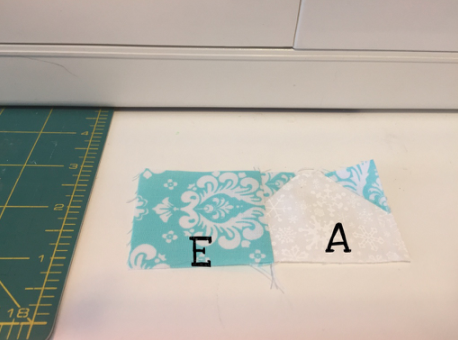
Step three: You will be adding the scarf, piece H to the head.
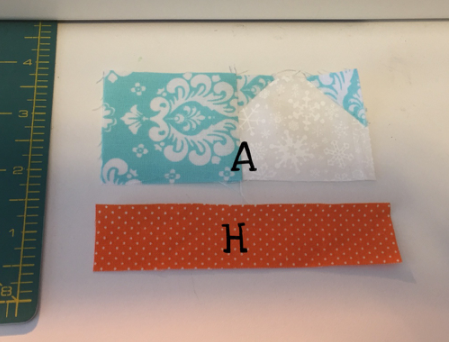
Step four: Add piece F to the left side of the head. Ok, set the head aside we'll come back to him in a moment.
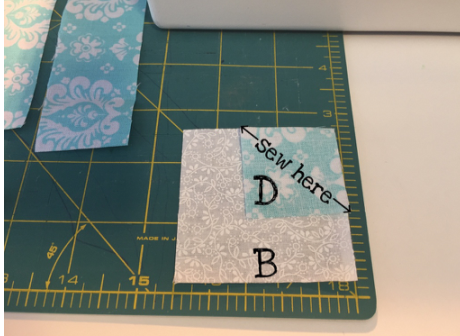
Step five: Starting to work on the top of the body. Take one piece B and you are going to sew on piece D to the upper right corner. Trim you seam to a quarter inch to get rid of some of the extra bulk, and iron open. This will be the snowman's right shoulder.
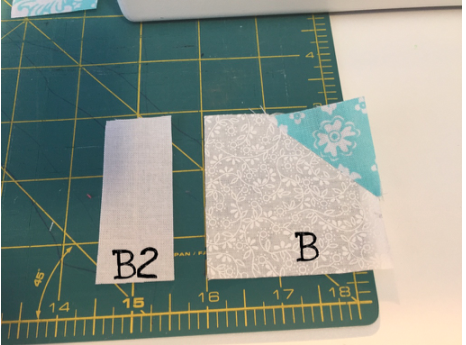
Step six: The left Shoulder. We are going to be adding the pieces B2 to the left side of the right shoulder.
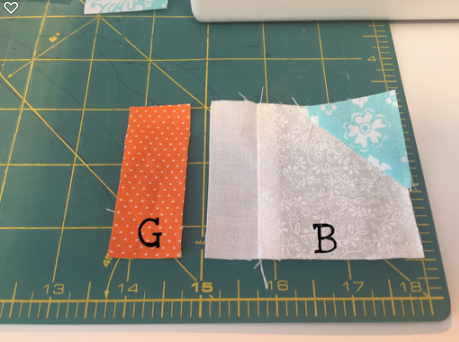
Step seven: The drop down part of the scarf. Sew piece G to the left side of piece B2. Iron and set aside.
Step eight: For the right shoulder we are going to be sewing together pieces B3 and the Second piece D. Trim and Iron open.
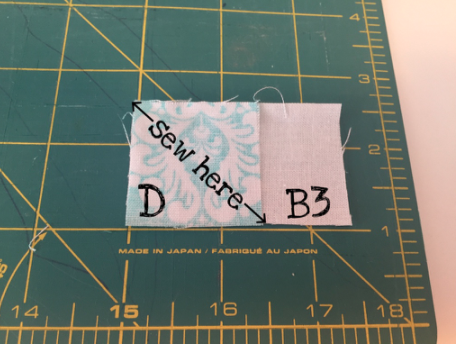
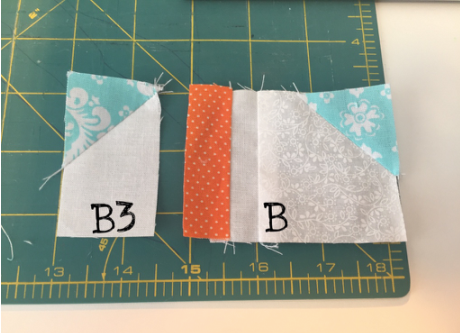
Step nine: Now we're going to joining the shoulders.
Step ten: Yay!! you are over halfway done now! Bottom of the snowman bottom. You are going to be doing two of these pieces, one for the right side and one for the left side. Starting on the left side, join together piece B and piece C lining up the corners on the lower left side. Sew, cut and iron open. Then do it again but lining up the two pieces on the right side.
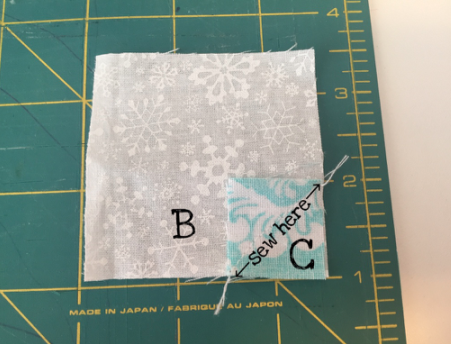
Step eleven: Sewing together the bottom pieces.
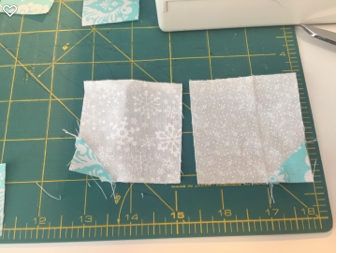
Step twelve: Putting together the body. Okay grab the shoulder that we put together and the bottom you just finished and join them together.
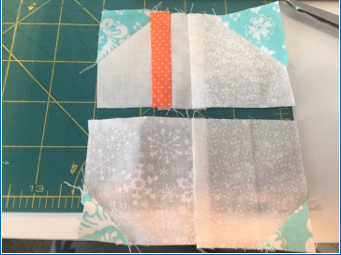
Step thirteen: Join together the snowman body and pieces I, one on the left side and one on the right side.
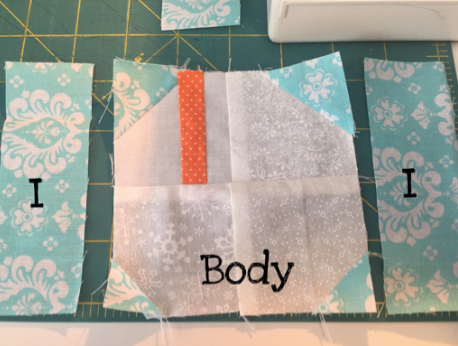
Step fourteen: Attach the head to the body of your snowman.
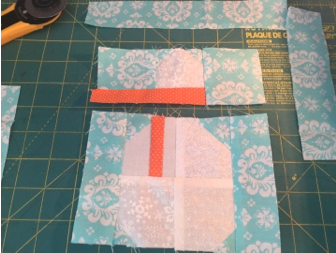
Step Fifthteen: Adding the outside of the block to finish it off. Joining your snowman to pieces J, one on the left and one on the right. And then add pieces K to the top and bottom.
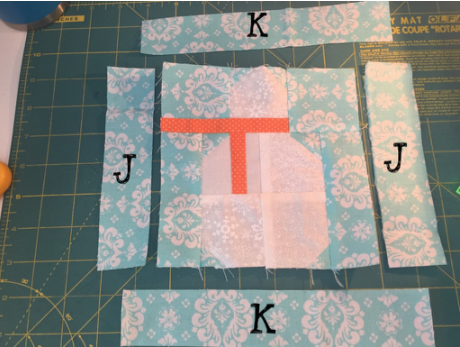
And there you have it a snowman.
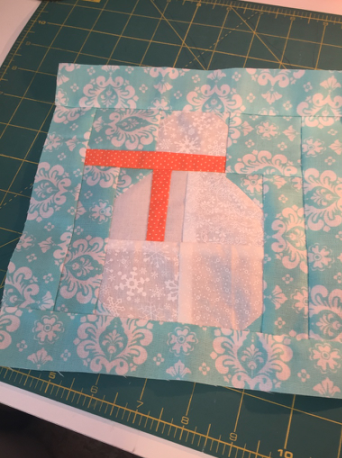
I finished my snowman by free handing some arms, and a carrot nose. Added a couple of buttons for the eyes and for the adornments. So cute right!?!
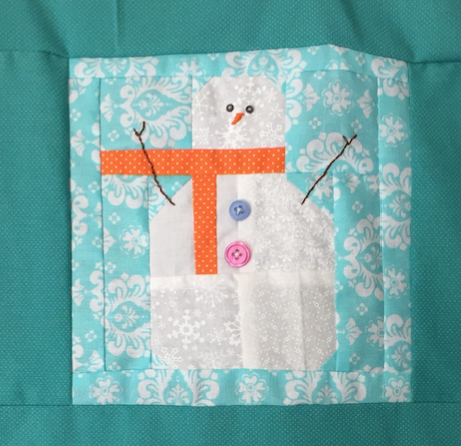
My finished blocks were around 8 1/2 inches square. I sewed 16 snowman in total and sashed them together with three inch sashing to complete my top. Hope you enjoyed it as much as I did.
Congratulations! This post has been upvoted from the communal account, @minnowsupport, by qwasert from the Minnow Support Project. It's a witness project run by aggroed, ausbitbank, teamsteem, theprophet0, someguy123, neoxian, followbtcnews, and netuoso. The goal is to help Steemit grow by supporting Minnows. Please find us at the Peace, Abundance, and Liberty Network (PALnet) Discord Channel. It's a completely public and open space to all members of the Steemit community who voluntarily choose to be there.
If you would like to delegate to the Minnow Support Project you can do so by clicking on the following links: 50SP, 100SP, 250SP, 500SP, 1000SP, 5000SP.
Be sure to leave at least 50SP undelegated on your account.
Downvoting a post can decrease pending rewards and make it less visible. Common reasons:
Submit