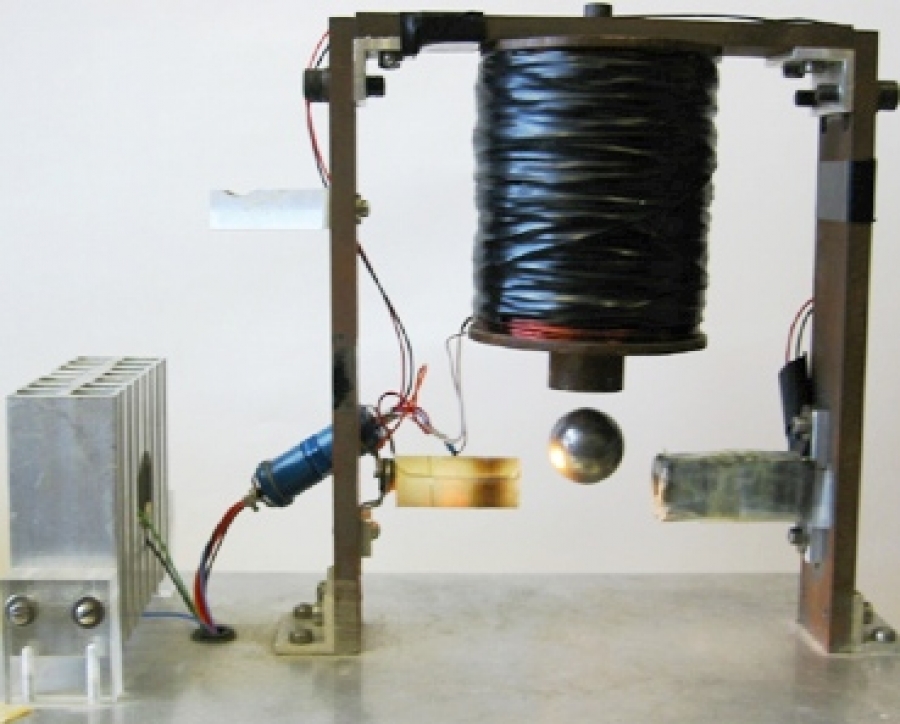
Magnetic Levitation Science Project
Description
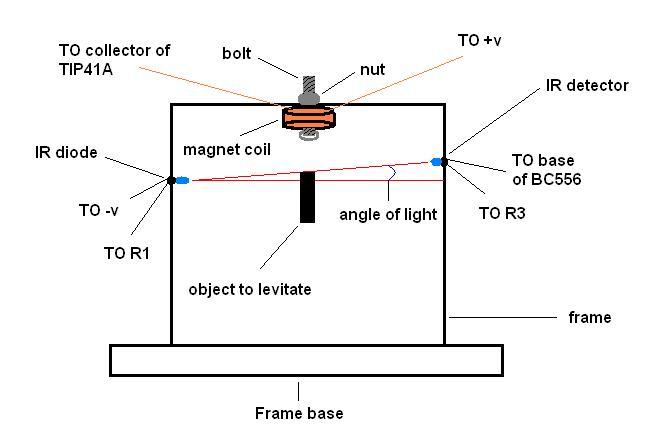
Here is a very cheap and high stable levitation schematic for beginners it uses only to transistors and few other parts they are all easily available in hole world instead of those pricey and complicated integrated IC schematics take hole day to built but this project is not only cheap but easy to built in minutes coil is made in this project from scrap I took primary winding wire from an old wall mount 12v power supply and Use sewing machine bobbin for coil winding there is no counting for turns just make sure wind bobbin full until it reaches its outer radius secure it with electrical tape make sure both ends of winding are enough length to solder it to project board use bolt as core which fits in bobbin hole make sure bolt must be twice in length than bobbin so that you can nicely tighten your coil to frame for further info see fig2. Tape photo diode and photo detector diode on the either side of frame facing each other just beneath the coil after that slide photo diode just a little bit more downward so that both (photo diode/photo detector) are at imaginary 5 degree angle from each other it is how because photo detector must see the IR light always from the photo diode when we place an object under the coil we don’t want to break its beam path completely thus your object couldn’t levitate we just want to break it partially. It is very critical that what type of object you are using for levitate either it is heavy or light non metal or metal please keep it in mind that this is 9 volts schematic and its electromagnetism is low and it is not capable to levitate object heaver than its magnetism it is an experimental project for beginners who wants to amaze there friends. But I ensure you it has best results for the objects those match its lifting power (magnetism) you can increase its magnetism power by changing value of some resistors and power supply
Tip: if your object is heavy (not much heavy) use small neodymium magnet on the top of your object and slide your photo diode/photo detector little bit upward at the point where your object start to pulling upward by the electromagnet here is the point where your object will levitate now fine tune your photo diode not photo detector slightly upward or downward please always keep there angle at imaginary 5 degree while you are sliding your diodes up and down and if your object is light then use this method this time reverse position thanks and enjoy please don’t forget your comments at mayouwin(at)yahoo.com
Note: always use neodymium magnet for best results
Magnetic Levitation Science Project


Hi! I am a robot. I just upvoted you! I found similar content that readers might be interested in:
https://paksc.org/pk/electronics/magnetic-levitation-science-project/
Downvoting a post can decrease pending rewards and make it less visible. Common reasons:
Submit