Have you noticed this cool new feature update on Steemit yet?
You can customize your Steemit cover!
I noticed it yesterday and actually tried finding an image that would fit the format since I am a big fan of appealing visuals, but I gave up after trying for quite some time, kept it in the back of my mind and went on to write a blogpost. After I published the post, I went through the comments as usual and found the comment of @vm2904
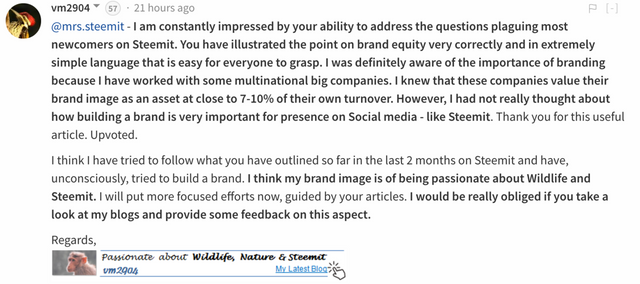
It's always a pleasure for me to read your though-through comments, I think any content creator appreciates genuine feedback and because he kindly asked me if I could provide some feedback in regards to the topic that I addressed in that blogpost, didn't hesitate to return the favor and check out his blog.
And what a surprise! His latest blogpost was exactly what I needed! A tutorial on customizing your Steemit Cover
Spice up Steemit Cover image ... Simple way!
So I created my own cover and it isn't the best, and the quality turned out quite awful, but at least I now know how to edit and change my Steemit cover in the future.
I went on to thank @vm2904 on steemit.chat and he told me:
"Thanks for the feedback on the Cover image blog. I am really happy and proud to see that you used the method for your own cover image. The image you created is AWESOME !! I request you to let a lot of your contacts know about the method. I am letting as many people I chat with know about the method but do not know how we can make it reach far and wide. Let us make Steemit pages beautiful and not let Fxxxbook gloat over their header images."
As well as commented:
"If you found the method quick and easy to use, can you please let your friends and proteges know. I am trying to let people know in Steemit Chat etc but do not know any other way of reaching more people. We must make Steemit beautiful !! Everyone should have a great Cover!"
AND I AM ALL FOR IT ! Let's make it happen, make our blogs unique and beautiful. In order to spread the word, I created this "Customize Your Cover Challenge" , combined with the actual tutorial on how to do it:
Step 1: Navigate to the collage maker page of free web based app BeFunky here
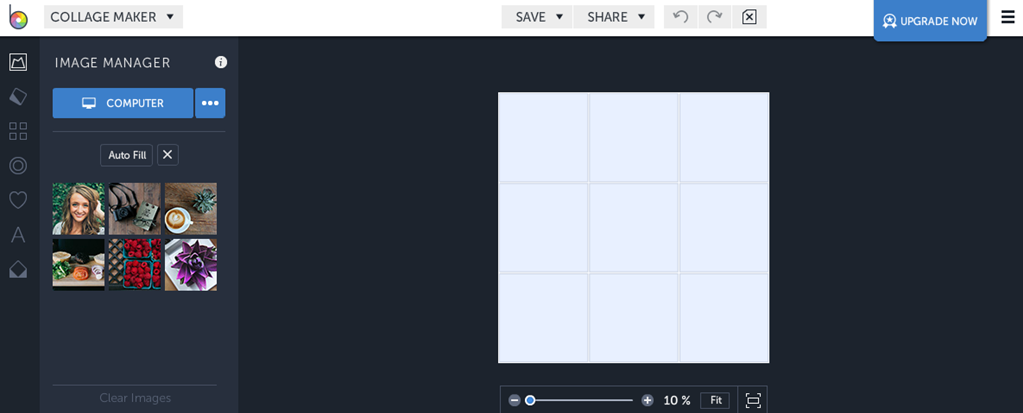
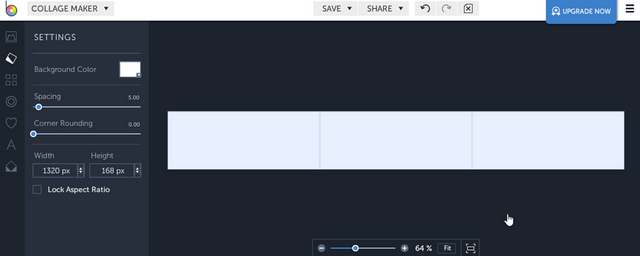
Step 2: Set image size of 1320 pixel width and 168 pixel height in the image settings by clicking second icon from top on the left.

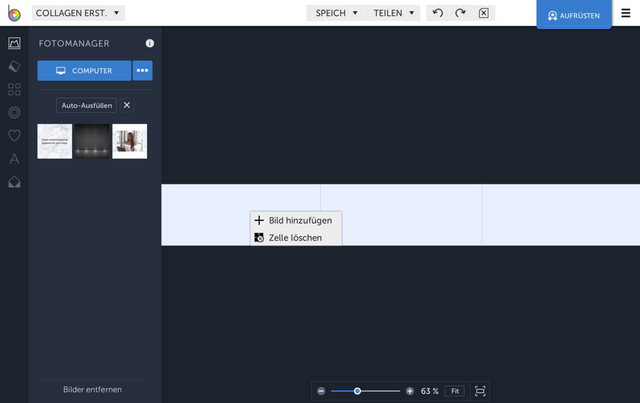
Step 3: Make a 3 x 1 collage configuration by deleting extra collage boxes (from the 3 x 3 default grid) by clicking on an unwanted box and selecting delete:
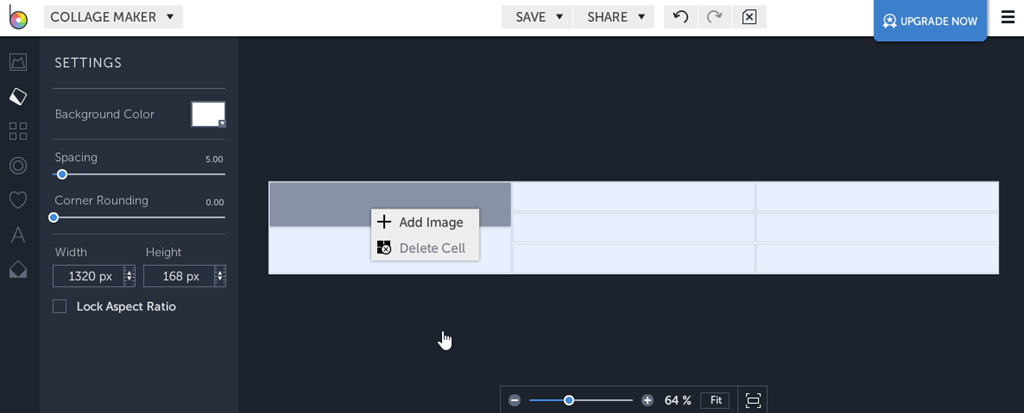
Step 4: This is how your collage box will look in a 3x1 configuration suitable for cover image. Now you are ready to add images.
Step 5: Select and upload images you need from your computer to BeFunky collagemaker by clicking on the Image manager button on the top left in BeFunky window. Click on 'Computer' and then, navigate to the location of your images on your computer in the dialog box that opens. Upload the 3 images you want to use on the cover image.Ensure that the middle image has dark background so that the text of your username, follows etc, which Steemit puts in the middle of the cover image will be visible.
Now here comes my in-between Step (feel free to skip it):
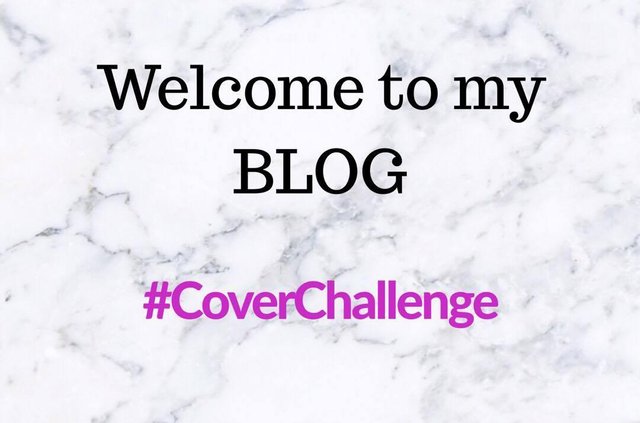
Prior to uploading the images, I edited my two images for left and right inside the APP: CANVA! I simply googled "marble background" saved a photo, edited the image once with the text "Welcome to my life", saved it :

and edited the second one inside the APP: PHOTOSHOP MIX! I pit 3 layers on top of each other, to get the effect of maintaining a marble background.

( You can obviously skip this extra step and just do it "the original way)
Step 6: Click on each of the uploaded images and Drag them each to one collage box.
Step 7: Click on an image if you wish to edit it (adjust size or flip it)
Step 8: Final result ...
Step 9: Click on Save to computer and save the image on your computer.
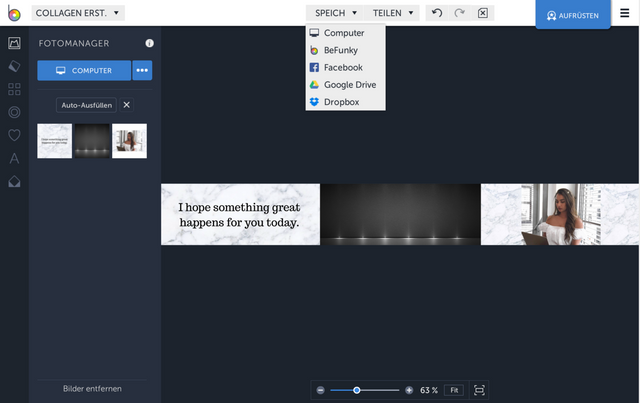
Step 10: Upload the image to an image hosting site such as postimg.org or imgur.com
Step 11: Click on Settings (on the right hand side of your Steemit blog main page) and paste the URL in the Cover image box. Click on Update and save.
Et Voilà!

I hope you found this little tutorial useful. Feel free to comment, upvote & resteem.
Also make sure to follow the originator of this tutorial: @vm2904 - a successful executive turned nature lover.
Now Get Creative! Adding to my previous post about building a brand, think about what visuals fit the theme of your blog...
Challenge OTD: Post your new cover in the comments below!
Much love,
Mrs.Steemit
I am totally against this customization. keep things clean and simple. These gets me back to how orkut (social network).Started out great and then had all these gifs and pictures and it was just too much clutter..Hope steem designers gets this and keep it clean
Downvoting a post can decrease pending rewards and make it less visible. Common reasons:
Submit
I really like the new look in steemit with there cover image and your post @mrs.steemit very helpful. thanks for sharing.
Downvoting a post can decrease pending rewards and make it less visible. Common reasons:
Submit
Such a helpful post for your readers just at the perfect time! I really liked your very own customized cover image! :) :)
Downvoting a post can decrease pending rewards and make it less visible. Common reasons:
Submit
great post
Downvoting a post can decrease pending rewards and make it less visible. Common reasons:
Submit
Amazing idea .
i am big fan of you.
@eman123
Downvoting a post can decrease pending rewards and make it less visible. Common reasons:
Submit
nice post, beautiful
Downvoting a post can decrease pending rewards and make it less visible. Common reasons:
Submit
very nice, beautiful cover, mrs.steemit thanks,

Downvoting a post can decrease pending rewards and make it less visible. Common reasons:
Submit
Very useful tutorial ! My banner @padmakshi

Downvoting a post can decrease pending rewards and make it less visible. Common reasons:
Submit
wow good information. Thanks for sharing.
Downvoting a post can decrease pending rewards and make it less visible. Common reasons:
Submit
Just updated mine with a new widescreen nature photo I took myself that I just posted in a blog on my Steemit profile.
Hope you like it @mrs.steemit and anyone viewing!
Downvoting a post can decrease pending rewards and make it less visible. Common reasons:
Submit
Mr steemit your blog is very interesting i daily visit your blog i follow u thank for sharing interesting post
Downvoting a post can decrease pending rewards and make it less visible. Common reasons:
Submit
and i made this for you my friend :)

Downvoting a post can decrease pending rewards and make it less visible. Common reasons:
Submit
i hope you would like it :) @mrs.steemit
Downvoting a post can decrease pending rewards and make it less visible. Common reasons:
Submit
i love this.....which to see more posts like this
Downvoting a post can decrease pending rewards and make it less visible. Common reasons:
Submit
@mrs.steemit Very nice detailed instructions. I have never heard of the program BeFunky. Steemit keeps teaching me new things...every...single...day!
Downvoting a post can decrease pending rewards and make it less visible. Common reasons:
Submit
nice.... thanks for this!!! personalize wall!
Downvoting a post can decrease pending rewards and make it less visible. Common reasons:
Submit
nice tutorial @mrs.steemit. hope i can follow through with it.
Downvoting a post can decrease pending rewards and make it less visible. Common reasons:
Submit
@mrs.steemit - Thank you for your mention of my work on this method. I am sure that it will spread a lot now with your support. I am hoping to see some lovely Steemit cover images from Steemians now.
The two steps you added really enhance the potential of the method and of course, your own branding touch of a 'themed' (white) approach makes it even more attractive. Thanks
Downvoting a post can decrease pending rewards and make it less visible. Common reasons:
Submit
That's a great post I'll surely try it let's see how good can I do.
Downvoting a post can decrease pending rewards and make it less visible. Common reasons:
Submit
I think I win the Steemit Cover Image (check mine out at @venuspcs) or here is a screen cap:
Downvoting a post can decrease pending rewards and make it less visible. Common reasons:
Submit
i'm not a fan of banners so i made this instead :P

Downvoting a post can decrease pending rewards and make it less visible. Common reasons:
Submit
Clean, prim, & lovely cover @mrs.steemit. :)
(here's mine on mobile. :D)
Downvoting a post can decrease pending rewards and make it less visible. Common reasons:
Submit
Good tutorial thanks a lot. Now is the time to personalise our steemit page...good option and thanks for the tip, upped.
Downvoting a post can decrease pending rewards and make it less visible. Common reasons:
Submit
Hello @mrs.steemit
Thanks for the tutorial, it is very resourceful.
Another good site for creating good cover images is Canva.com, there have lots of good templates.
@ogochukwu
Downvoting a post can decrease pending rewards and make it less visible. Common reasons:
Submit
always good post
Downvoting a post can decrease pending rewards and make it less visible. Common reasons:
Submit
That's a Perfect Tutorial time to make the Best Cover :D
Downvoting a post can decrease pending rewards and make it less visible. Common reasons:
Submit
Really apriciating post. Its very much right that with good content you have to make your cover photo attractive. Oterwise your post is not given much importance.
Thanks for sharing
Downvoting a post can decrease pending rewards and make it less visible. Common reasons:
Submit
Great. I'll try it.
Downvoting a post can decrease pending rewards and make it less visible. Common reasons:
Submit
This post is a great example of interaction between two people who contributed to the community through mutual help and promotion which is the main purpose of steemit. Once again I learned something new. Thank you!
Downvoting a post can decrease pending rewards and make it less visible. Common reasons:
Submit
thank you for sharing
upvote
Downvoting a post can decrease pending rewards and make it less visible. Common reasons:
Submit
OMG! Thank you! I was Just trying to figure this out!
Downvoting a post can decrease pending rewards and make it less visible. Common reasons:
Submit
Love the new additions. Will definitely be making my cover today! :) Also thanks for the step by step breakdown!
Downvoting a post can decrease pending rewards and make it less visible. Common reasons:
Submit
I like this post thanks for sharing. @na722
Downvoting a post can decrease pending rewards and make it less visible. Common reasons:
Submit
I must appreciate the fact that you took time to check the blog of your commentor. Most authors tend to ignore such comments. Between, your image cover is not only beautiful, but also very innovative. Especially the middle part makes a lot of difference. Cheers!
Downvoting a post can decrease pending rewards and make it less visible. Common reasons:
Submit
Thanks for the article. App works with laptop, I just created a collage for my cover page.
Downvoting a post can decrease pending rewards and make it less visible. Common reasons:
Submit