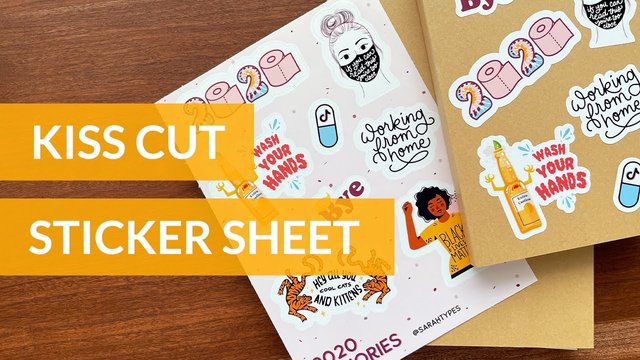
Are you ready to dive into the world of custom stickers and unleash your creativity? In this article, I'm going to show you how to make kiss-cut sticker sheets using the incredible Cricut machine. Whether you want to create unique stickers for your products or add a touch of personal flair to your belongings, this step-by-step guide will help you bring your designs to life. So, grab your favorite beverage, get cozy, and let's embark on this sticker-making adventure together!
Let's Start Designing: Unleash Your Imagination!
Designing your custom kiss-cut stickers . kiss-cut stickers is where the fun begins! Whether you're an experienced artist or just starting, the possibilities are endless. Think about the themes, colors, and styles that resonate with your vision. Are you creating stickers for your brand or personal use? Take some time to brainstorm and sketch your ideas until you find the perfect designs that truly represent you.
Crafting the Perfect Sticker Sheet: Design and Backing
Once you have your sticker designs ready, it's time to create a cohesive sticker sheet. Consider the layout and arrangement of your designs to maximize the use of space. To make your custom stickers look professional, don't forget to design a backing sheet as well. This backing sheet protects your stickers and provides an opportunity to showcase your brand identity or add a personal touch.
Setting Up in Cricut Design Space: Let the Magic Begin
Now that your designs and backing sheet are ready, it's time to set up your sticker sheet in Cricut Design Space. This user-friendly software lets you import and arrange your designs on a virtual canvas. Take advantage of the tools available to align, resize, and rotate your stickers, creating a visually pleasing layout. Let your creativity flow as you experiment with different compositions and combinations.
Importing Your Sticker Sheet and Backing
Once you're satisfied with the design, it's time to import your sticker sheet and backing into Cricut Design Space. This step ensures that your stickers and backing are perfectly aligned and positioned. Use the software's features to place them together, ensuring a seamless fit. Remember, attention to detail is critical to creating high-quality kiss-cut sticker sheets.
Adding a White Border: Enhancing Your Sticker Designs
Consider adding a white border around the edges to give your stickers a professional touch. This border enhances the visual appeal of your stickers and aids in the cutting process. Experiment with different border thicknesses to find the perfect balance that complements your designs. You'll be amazed at how a simple white border can elevate the overall appearance of your stickers.
Kiss Cutting: Bringing Your Stickers to Life
The moment has arrived to bring your sticker designs to life with kiss cutting. This technique allows you to cut through the sticker material without piercing the backing, making it easy to peel and apply the stickers later. Configure your Cricut machine with the appropriate settings for kiss cutting, such as the correct pressure, speed, and blade depth. Be patient and take the time to ensure that the cuts are precise and clean.
Testing for Perfection: Print and Cut Accuracy
Before moving forward with large-scale production, testing your sticker sheets for print and cut accuracy is essential. Print a test sheet and closely examine the colors, alignment, and cutting precision. Make any necessary adjustments to your design or settings to achieve the desired results. Remember, practice makes perfect, and fine-tuning your process will lead to exceptional sticker sheets.
Choosing the Right Cut Settings: Optimal Results
To achieve crisp and precise cuts, selecting the right cut settings for your Cricut machine is crucial. Experiment with different backgrounds, such as pressure, speed, and blade depth, to find the optimal configuration for your sticker material. Keep in mind that other materials may require specific settings, so don't hesitate to test and adjust until you achieve the best results.
Peeling Away the Excess Paper: Revealing Your Stickers
Once your sticker sheet is flawlessly cut, it's time to peel away the excess paper surrounding the stickers. Gently remove the surrounding paper, taking care not to damage the stickers. Witnessing your designs come to life as you peel away the excess paper is an incredibly gratifying experience. Get ready to admire your beautiful custom kiss cut stickers!
Final Thoughts
Finally, You've learned how to make kiss-cut sticker sheets with the help of Cricut. Now it's time to unleash your creativity and explore the endless possibilities of custom stickers. Whether you're branding your business or adding a personal touch to your belongings, kiss-cut stickers are a fantastic way to express yourself.
Remember to experiment, have fun, and let your imagination guide you. Happy sticker-making!