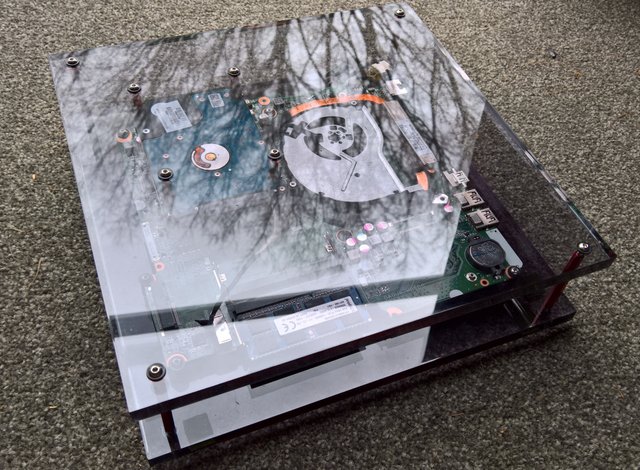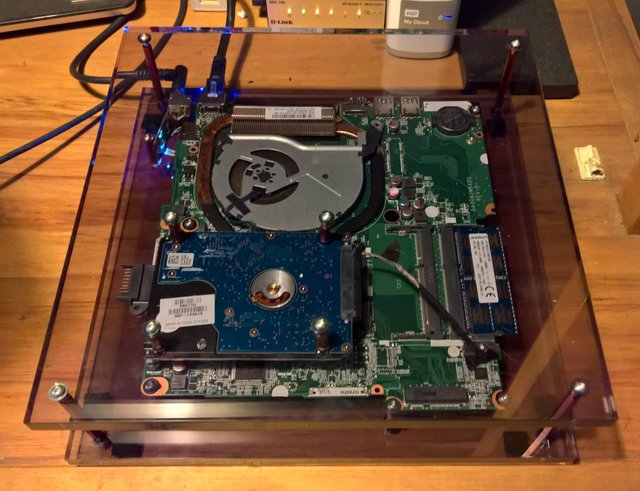
I ripped apart an old laptop and floated its guts between two thick pieces of acrylic. I hope this inspires others into similar projects.
The two PCs I use day to day are a fairly grunty Desktop and a Surface Pro 3. This left my old HP laptop sat collecting dust in the corner. Too beaten up to sell but with good enough specs to use as a server on my network.
- i5 4200U
- GTX 740m with 4gb ram
- 8gb ram
- 1tb disk
I could have just left it in one piece and put it to use as a server, but what is the fun in that.
The build
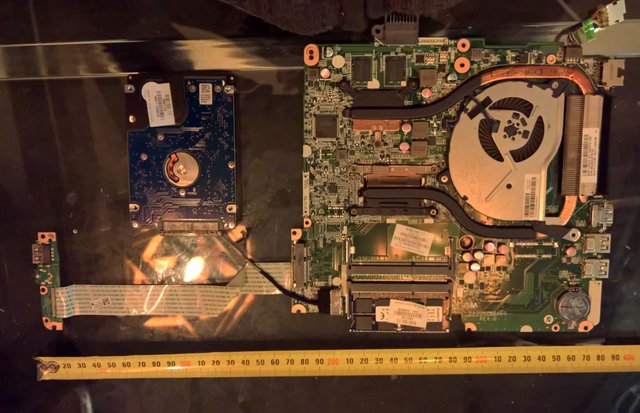
I watched a tear down video on YouTube then dismantled into its component parts.

Once in bits I worked out what parts to keep for the project, I settled on just the motherboard and hard disk. I did not need the sound breakout board or DVD for my use case.
The motherboard was square(ish) so I figured the easiest thing was to float these parts between two 10mm thick pieced of tinted acrylic using PCB standoffs.
Here is the parts list for my build:
- Laptop motherboard
- 2.5in hard disk
- Two 250mm * 250mm * 10mm acrylic sheets
- Four 50mm female/female standoffs
- Five 10mm female/femalke standoffs
- Four 10mm male/female standoffs
- Bag of 13mm M3 screws
- Bag of 5mm M3 screws
- Bag of M3 plastic washers
- Some sticky rubber feet
Tools required
- Drill
- M3 metal drill (An old one that is a bit blunted is preferable)
- Screwdriver
- A spudger, to help open the laptop case.
The plan... Hold the two acrylic sheets 50mm apart with the long standoffs. The motherboard bolted to top of the lower sheet and the hard disk to the underside of the top sheet.
The acrylic is really easy to source, I found a place locally that specialized in working with it. They cut two the two sheets for me and polished the cut edges to a glass like finish with a blow torch.
I got real lucky here, they did not even charge me. I got chatting with the guy and he said he had always planned similar projects, then said "Just take them for free". Nice :)
That said, the material is cheap so should not cost more than $10 cut and polished.
Next I needed the standoffs. These proved much harder to source locally, all boring brass fittings sold by the 100. No worries, aliexpress to the rescue. 8 days later and I had some great looking red anodized standoffs of various lengths and the other fittings shipped direct from China. These were not so cheap as I had to buy in packs of 10/20, about $40 all in. This was still cheaper than buying 100s of boring brass ones locally.
Assembly of the laptop parts into this new "case" was simple enough, but a little fiddly.

I do not have a vertical drill mount so I just marked out all the holes I needed to drill in the acrylic and did it free hand.
Acrylic can chip badly when you drill it, hence the bluntish drill bit. This helps stop that. Make sure you get another piece to use for test drilling ;)
The 10mm male/female standoffs are used to screw into the base of the hard disk, so it looked like a table. That is then bolted to the underside of the top acrylic sheet with some 15mm M3 screws.
To 10mm female/female standoffs are bolted to the motherboard with the washers and 5mm M3 screws. Then this is bolted to the base sheet in a similar way.
Finally the two parts are bolted together with the remaining 50mm standoffs and job done! A great looking new PC from an old laptop.
The thing booted first go, realized it was missing half its guts and then Windows adapted itself for the missing parts. Painless

Problems encountered
I did not really encounter many issues during the build, but these are the issues and also something I uncovered when the laptop was in bits:
I was unable to keep the MPCI bluetooth/wifi module. The screw hole that held this in place was part of the laptop case and not on the motherboard. No worries I planned on using this hard wired anyway. This will depend on your donor laptop, is the fixing hole on the motherboard or part of the case.
The battery charging hardware is on the motherboard so I get a no battery connection symbol on the task bar. Meh, I can live with this.
This one is not really a problem. When I got the laptop I had it upgraded from 4gb to 8gb ram. Stupid idiots swapped out the 4gb for an 8gb module instead of adding a second 4gb. If I source another 8gb though it will run dual channel instead of the current single channel which will boost performance a little.
Use cases
I am a full time geek so this will do the following work:
- Plex server
- Source control server
- Continuous build server
- Unit testing server
- Database server
- Web server
Conclusion
This was a far easier build than I thought it would be. All up about 8 hours work for: tear-down, planing, parts sourcing and ordering and then rebuild. All up it took 6 weeks but that involved waiting for ordered parts and far toooooooo much procrastination lol.
I now have a lowish power (About 70w) unique server PC that cost me next to nothing as I had an old laptop just collecting dust.
I am still not done though. You can purchase small circuit boards on aliexpress that turn old laptop screens into a monitor with HDMI input. That might be another project I post in the near future :)
Please feel free to ask any questions you have about this build, or let me know about your build if you have done similar already :)
Woz
Cool conversion, now I want it! The glass idea is exceptional
Downvoting a post can decrease pending rewards and make it less visible. Common reasons:
Submit
I used acrylic, type of plastic, as easier to work with than glass.
Far easier to do than I expected. At least to know what to do with old laptops now :)
Downvoting a post can decrease pending rewards and make it less visible. Common reasons:
Submit
I have an old laptop dead because of a problem with the power source plug. I will try to change it and probably will some fancy stuff like this :)
Downvoting a post can decrease pending rewards and make it less visible. Common reasons:
Submit
Very Nice
Up-voted :-)
RightWithin
Downvoting a post can decrease pending rewards and make it less visible. Common reasons:
Submit
Thanks. Well happy with he outcome.
Plex is up and running already. So just need to load up my other servers/services now
Downvoting a post can decrease pending rewards and make it less visible. Common reasons:
Submit
Cool post. Up. But there is no need to post it twice.
Downvoting a post can decrease pending rewards and make it less visible. Common reasons:
Submit
I have replied in other post, check you replies to save double post
Downvoting a post can decrease pending rewards and make it less visible. Common reasons:
Submit
This is a pretty cool Idea my only question is what are you doing to keep dust out of the unit?
Downvoting a post can decrease pending rewards and make it less visible. Common reasons:
Submit
I do not see the dust issue worse than some closed cases, filters only block so much. As fully open you just need a spray air can and blast it every now and again to clean.
You can also stand vertical if required, which might help.
Downvoting a post can decrease pending rewards and make it less visible. Common reasons:
Submit
Thanks for the support @woz.software.
Downvoting a post can decrease pending rewards and make it less visible. Common reasons:
Submit
Great!
Downvoting a post can decrease pending rewards and make it less visible. Common reasons:
Submit