What Will I Learn?
- You will learn how to generate schematic diagram using EasyEDA
- You will learn how to make a PCB design using EasyEDA
- You will learn how to shift schematic diagram into PCB layout
Requirements
-Laptop or PC
- EasyEDA Circuit simulator and PCB design that can be open using your web browser (www.easyEDA)
-Internet connection
Difficulty
- Intermediate
Tutorial Contents
In this tutorial Ill teach you how to convert the schematic diagram into PCB layout using EasyEDA. You can open in the web browser just type www.easyeda.com.You can create your account on EasyEDA
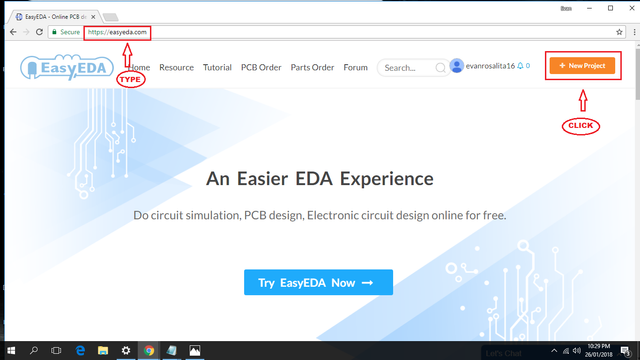
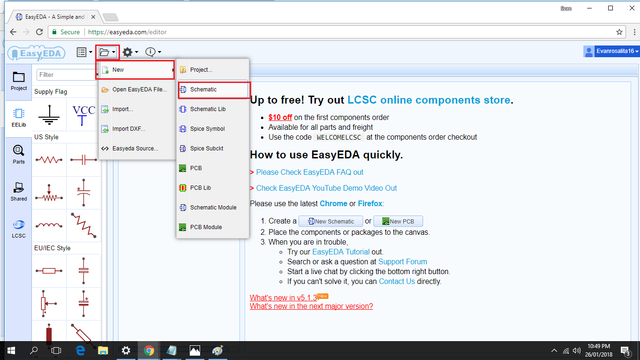
After clicking the new folder ,click the "folder icon " then "new" then last is click schematic.
Familiarization of easyEDA icon tool
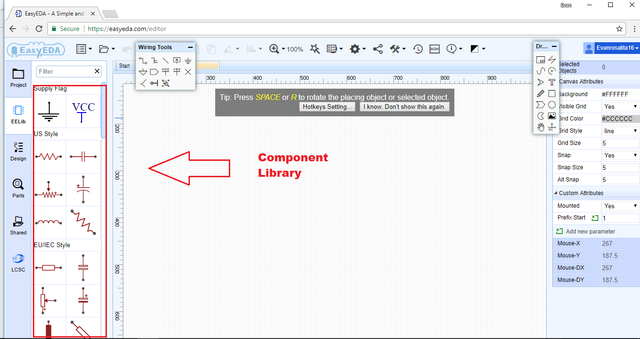
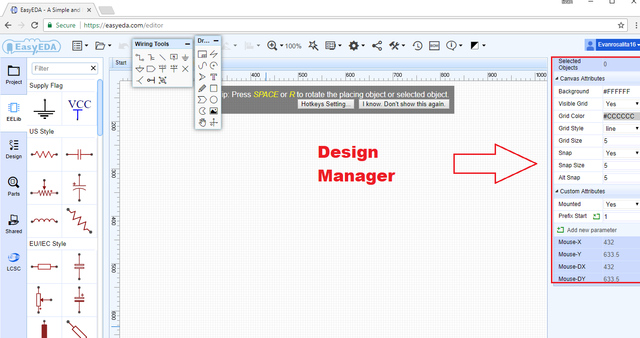
Part A. Making the Schematic Diagram
**Step 1. Placing Components **
Click the "EElib" button to display the components. Click the needed component and click again to the schematic station to place component.In this tutorial I use LM358.Dont drag the components just a single click to the choosen component the single click where it place.
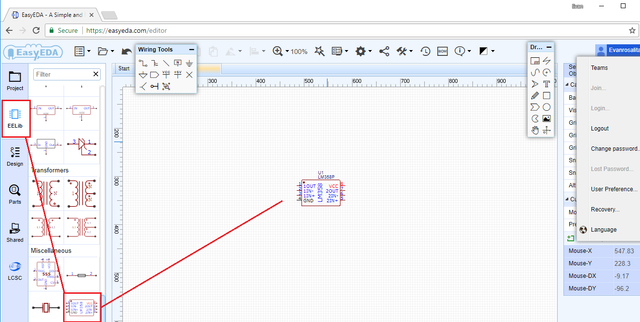
Place all the component needed .
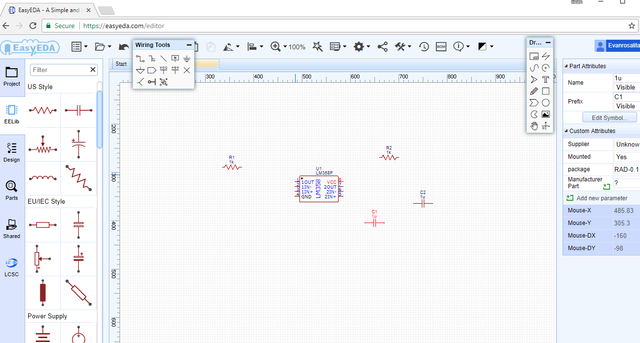
Step 2. Arrange the component
If you want to rearrange the component or move just click the left side of the mouse and then drag to the place you want.
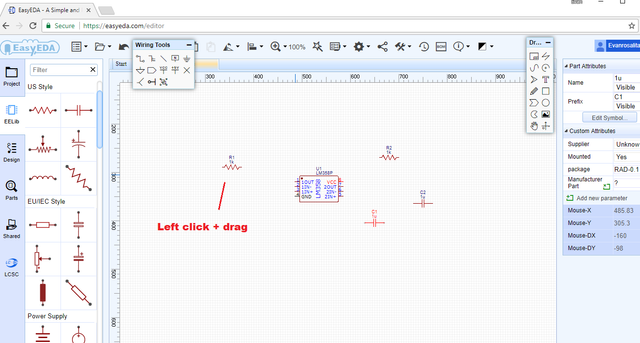
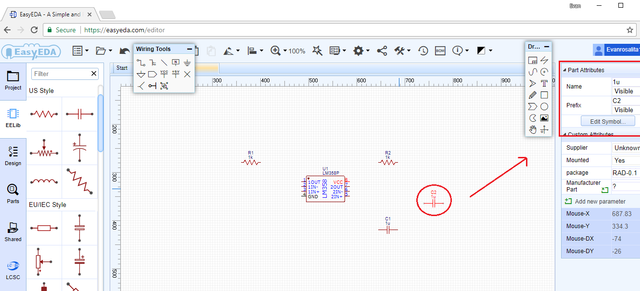
Step 3. Change the value of component
To change the value of each component just click to component then its specification will appear in the upper right.
Step 4. Connect wires
After arranging all the components connect wire. Find the wire icon in the wiring tools or click the W for shorcut.Click the pin where you want to start and click again where you want to end.
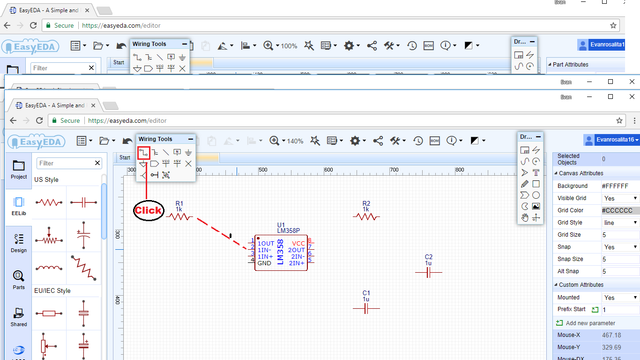
This is the diagram after putting wires in all component.
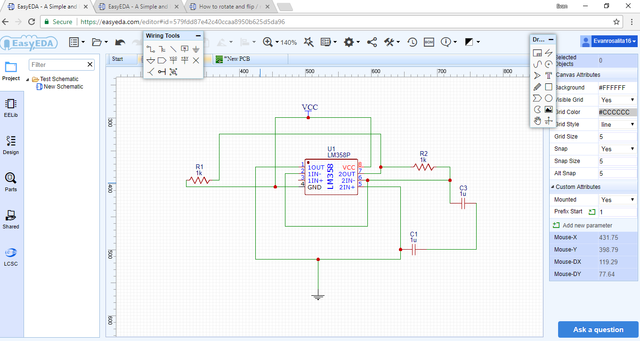
Part B. Saving the Project
Step 1. Checking the connectivity
To check the connectivity of the component ,click the " Design button", then go to "component folder" to show the summary of the components used. Last is click the nets folder it shows if the wired is connected or disconnected.
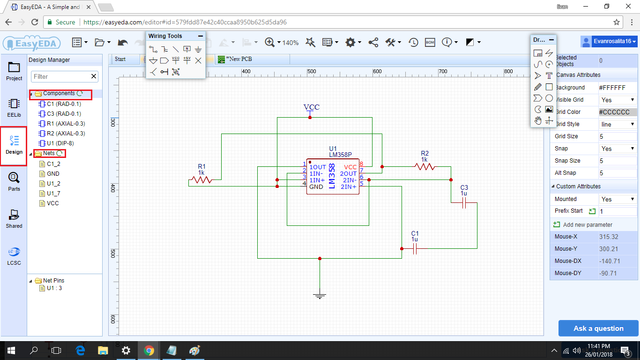
If theres disconnected it will appear.
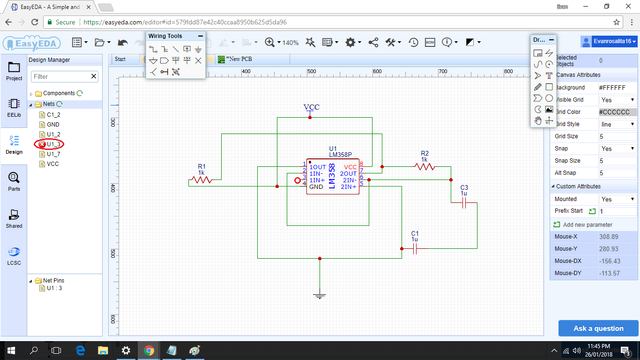
**Step 2. Save **
Click the document icon the under the document icon click the save.
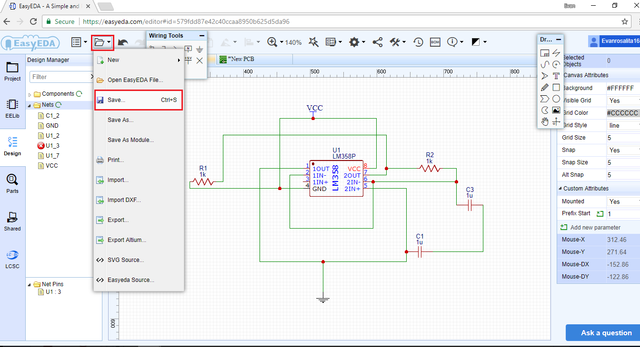
After clicking the save put the title or name of the schematic diagram . In this project I name it "new schematic".
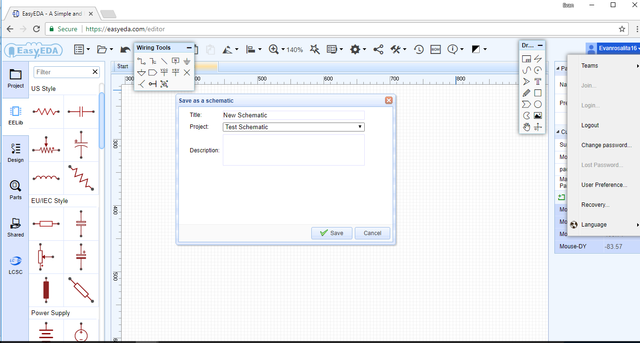
Part C. PCB Layout
Step 1. Convert project to PCB
Click the icon "Convert to PCB" the under convert to pcb click "Convert Project To Pcb"
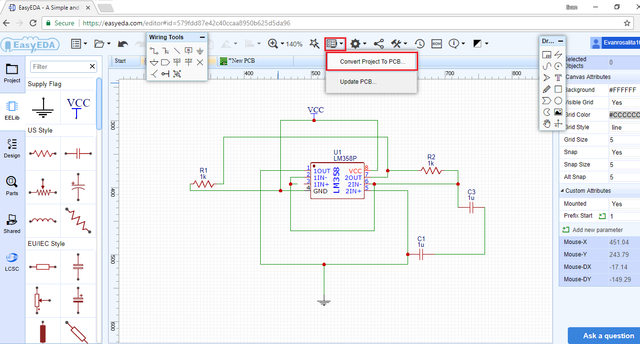
This is the converted PCB layout.
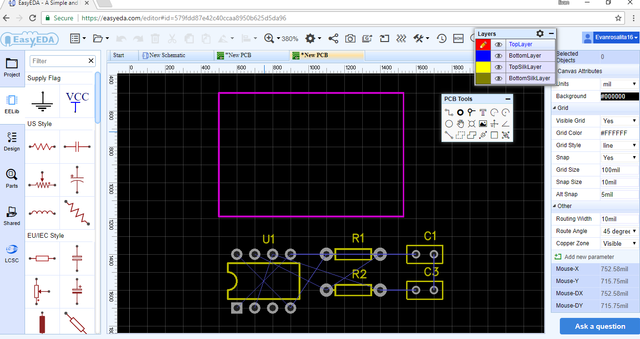
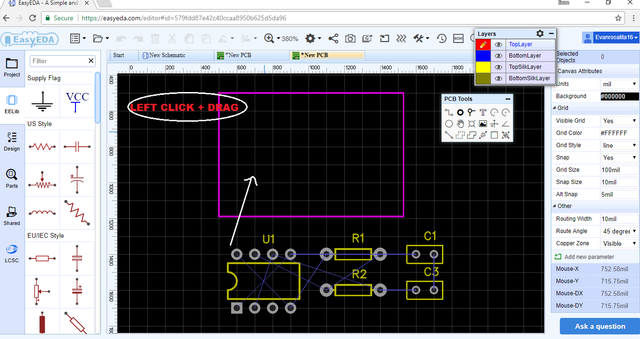
Step 2. Placing of components to PCB layout.
Place the components inside the rectangle. Left click and drag .
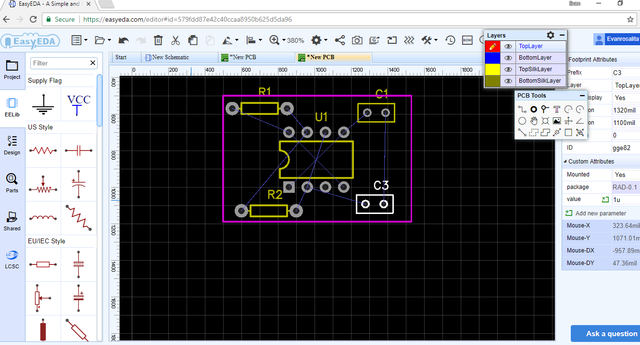
Step 3. Make your own Design
This is my own design .
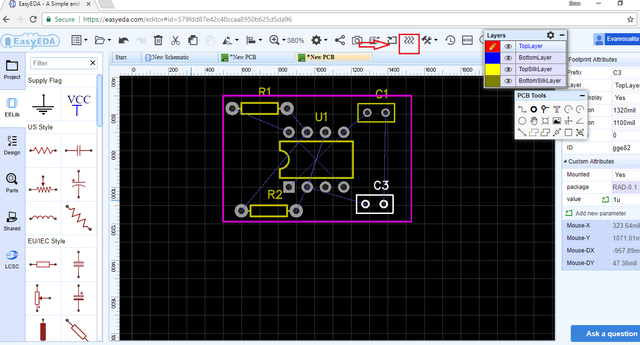
In EasyEDA, there is an option that you can route it automatically. It was called "Auto Router". Just click the auto router and let EasyEDA do the routing. Choose the attributes you want and hit run to auto route.
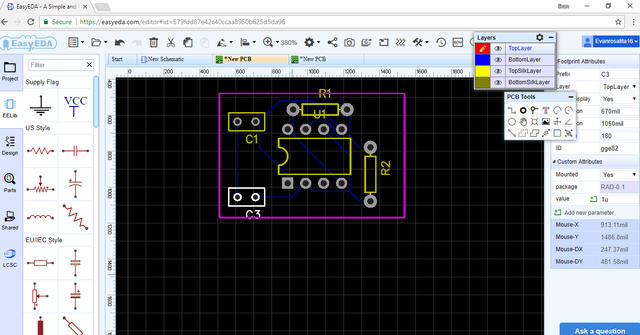
Step 4. Final Output
This it the result after clicking the " Auto Router"
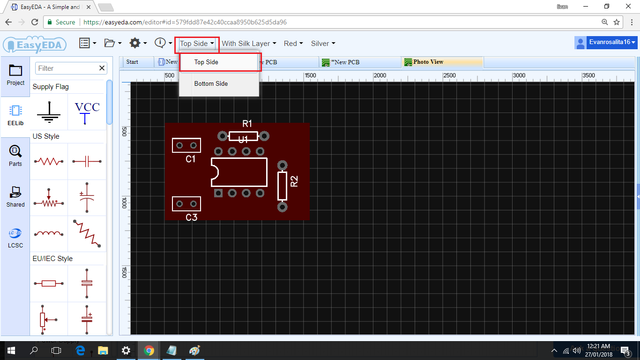
Step 5. Photo View
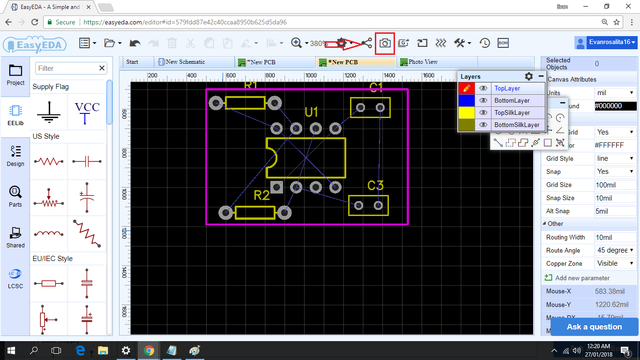
It will look like this . then click top side icon then click top side .
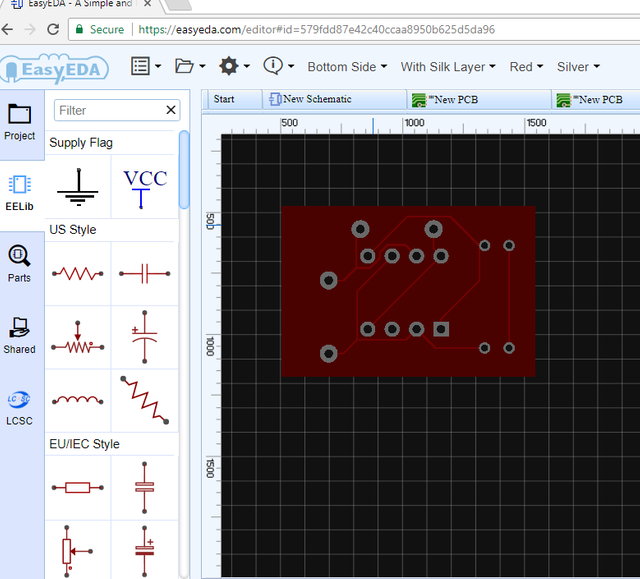
Bottom side
This is my first tutorial contribution in utopian-io
Posted on Utopian.io - Rewarding Open Source Contributors
Your contribution cannot be approved because it does not follow the Utopian Rules.
You can contact us on Discord.
[utopian-moderator]
Downvoting a post can decrease pending rewards and make it less visible. Common reasons:
Submit
Thanks I am working with a great pcb companies in the UK I highly recommend for pcb manufacture
Downvoting a post can decrease pending rewards and make it less visible. Common reasons:
Submit