Images are the most used thing that when we want to develop an app. Because, image is worth a thousand word. An image can easily understand by the users of an app whether it is Android, iOS, web or other development. The user doesn't need to read the whole text which is sometimes wasting the users time. In this tutorial, i wanna show you how to blur an image.
Definition of Blur
Blur is a shape or area which you cannot see clearly because it has no distinct outline or because it is moving very fast. Blur can be apply to an image and what we usually call it is effect. So, sometimes we heard blur effect on image. Let's go on to the how to make an image blur using VisualEffectView.
How to add the VisualEffectView library to an iOS app via Podfile?
The library is using Swift language. So, we need to make some changes because i will show how to achieve the effect in Objective-C language.
We need to add the library to our app so the VisualEffectView can run properly. We can do this by editing our Podfile. Remember to install the Cocoapods first if you haven't. Then, follow these steps:
- Add
'pod VisualEffectView'to the Podfile - Uncomment the
use_frameworks!line because we are using Swift library
# Uncomment the next line to define a global platform for your project
# platform :ios, '9.0'

target 'BlurImageDemoApp' do
  # Uncomment the next line if you're using Swift or would like to use dynamic frameworks
  use_frameworks!

  # Pods for BlurImageDemoApp
  pod 'Masonry'
  pod 'VisualEffectView'
  target 'BlurImageDemoAppTests' do
    inherit! :search_paths
    # Pods for testing
  end

  target 'BlurImageAppUITests' do
    inherit! :search_paths
    # Pods for testing
  end

end
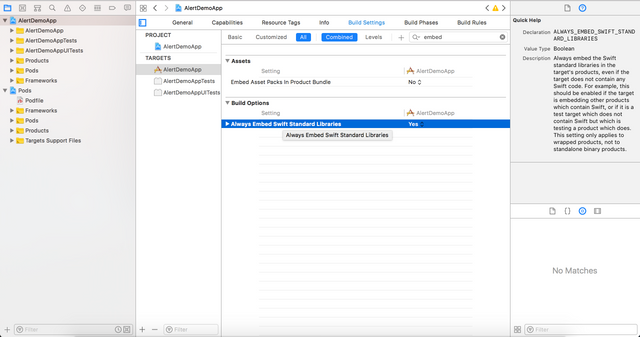
Then, don't forget to make "Always Embed Swift Standard Libraries" to Yes to be able to make the library work properly on Objective C iOS project.

Once you're done, clean and build the project and wait till the build succeeded. Then, let's move on to the next part.
Importing in .h class
The most important thing when we use a library or framework is we must remember to import to the code, otherwise it won't work well. Here we import the VisualEffectView.h file using this line
#import <VisualEffectView/VisualEffectView-Swift.h>. The full .h class code is below.
//
//  ImageViewController.h
//  BlurImageDemoApp
//
//  Created by Andri on 1/9/18.
//  Copyright © 2018 Andri. All rights reserved.
//

#import <UIKit/UIKit.h>
#import <Masonry/Masonry.h>
#import <VisualEffectView/VisualEffectView-Swift.h>


@interface ImageViewController : UIViewController

@end
We use "<VisualEffectView/VisualEffectView-Swift.h>" instead of "VisualEffectView/VisualEffectView-Swift.h" because we import access from the directory not from a single file
Implementation in .m class and applying to an image
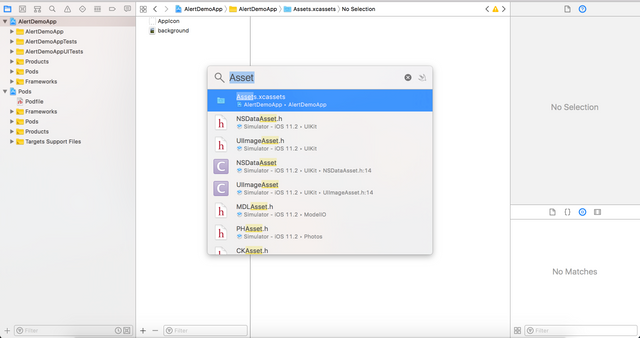
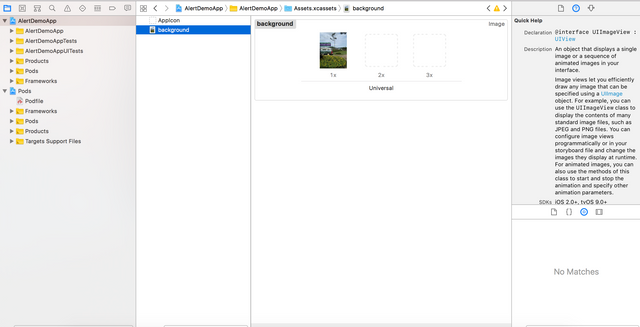
Because we have import the library, we can use the library now in our code. But, the first need we need to create our image first. So, now we will using an image and put it on the Assets.xcassets


When we have added the image to the project, let's continue on the code. Write down this code.
UIImageView *backgroundImage = [UIImageView new];
    backgroundImage.contentMode = UIViewContentModeScaleAspectFill;
    backgroundImage.image = [UIImage imageNamed:@"background"];
    [self.view addSubview:backgroundImage];
    [backgroundImage mas_makeConstraints:^(MASConstraintMaker *make) {
        make.edges.equalTo(self.view);
    }];
Explanation of the code:
backgroundImage.contentMode = UIViewContentModeScaleAspectFill; means that the option to scale the content to fill the size of the view. Some portion of the content may be clipped to fill the view’s bounds.
backgroundImage.image = [UIImage imageNamed:@"background"]; means we are setting the image using an image that named "background". And because we have added the image to the project we can apply the image to the UIImageView.
[self.view addSubview:backgroundImage]; means that the backgroundImage are added to the self.view.
Then this line
[backgroundImage mas_makeConstraints:^(MASConstraintMaker *make) {make.edges.equalTo(self.view);}];
means that we have four constraint using brief version of autolayout and that is make.edges.equalTo is equivalent with make.left.right.top.bottom.equalTo(self.view).insets(UIEdgeInsetsMake(0, 0, 0, 0));
Okay, let's continue to the next step.
Creating the VisualEffectView and assign the properties
When we want to create a something component, we must always remember to initialize it and follow these steps.
- Initialize the VisualEffectView, we are using this code
VisualEffectView *blurEffectView = [[VisualEffectView alloc] initWithFrame:self.view.bounds];. - Then, add this code
blurEffectView.autoresizingMask = UIViewAutoresizingFlexibleWidth | UIViewAutoresizingFlexibleHeight;to resizing perfomed by expanding or shrinking a view's width. - Write this code
blurEffectView.frame = self.view.bounds;meaning that we give the frame of the blueEffectView using self.view.bounds in this case meaning our screen width and screen height. - Add this code,
blurEffectView.colorTint = [UIColor blackColor];means we assign blackColor to the colorTint property. The colorTint property is the mixture of the color we use on the blurEffectView - Then set the colorTintAlpha property using this line
blurEffectView.colorTintAlpha = 0.5; means we set the opacity of the colorTint. - Remember to set the blur radius
blurEffectView.blurRadius = 9.5;to achieve that blur effect with the 9.5 radius value - Then, we set the scale factor to 1
blurEffectView.scale = 1; - And the last, we apply the blueEffectView to our image using this line ```[backgroundImage addSubview:blurImageView];
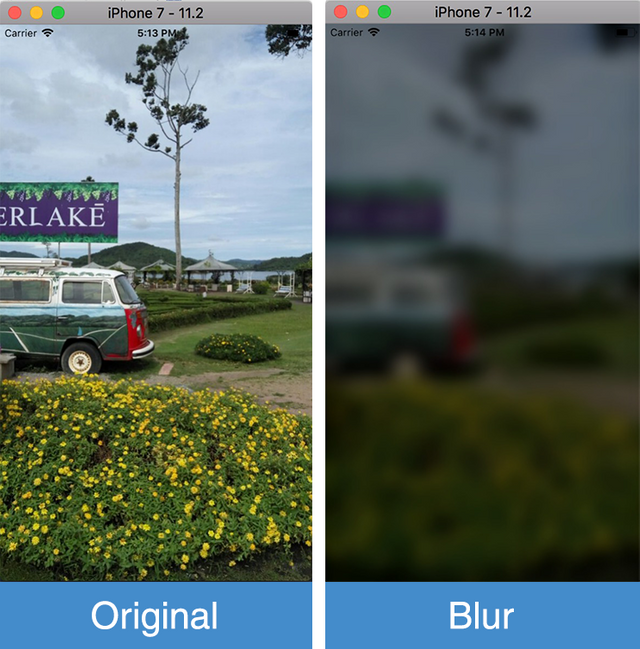
Then, build and run the project it will show the blur effect on the image. You can see the entire code below.
//
//  ImageViewController.m
//  BlurImageDemoApp
//
//  Created by Andri on 1/9/18.
//  Copyright © 2018 Andri. All rights reserved.
//

#import "ImageViewController.h"

@interface ImageViewController ()

@end

@implementation ImageViewController

- (void)viewDidLoad {
    [super viewDidLoad];
    [self setupUI];
}

- (void)setupUI{
    UIImageView *backgroundImage = [UIImageView new];
    backgroundImage.contentMode = UIViewContentModeScaleAspectFill;
    backgroundImage.image = [UIImage imageNamed:@"background"];
    [self.view addSubview:backgroundImage];
    [backgroundImage mas_makeConstraints:^(MASConstraintMaker *make) {
        make.edges.equalTo(self.view);
        make.left.right.top.bottom.equalTo(self.view).insets(UIEdgeInsetsMake(0, 0, 0, 0));
    }];

    VisualEffectView *blurImageView = [[VisualEffectView alloc] initWithFrame:self.view.bounds];
    blurImageView.autoresizingMask = UIViewAutoresizingFlexibleWidth | UIViewAutoresizingFlexibleHeight;
    blurImageView.frame = self.view.bounds;
    blurImageView.colorTint = [UIColor blackColor];
    blurImageView.colorTintAlpha = 0.5;
    blurImageView.blurRadius = 9.5;
    blurImageView.scale = 1;
    [backgroundImage addSubview:blurImageView];
}

- (void)didReceiveMemoryWarning {
    [super didReceiveMemoryWarning];
    // Dispose of any resources that can be recreated.
}


@end
You can learn and understand the code and we are setup the image in viewDidLoad method that has another method named setupUI method that we write our blurring effect there. Developers often use blur effect to make background image doesn't distract the mainly focus view to the user. Besides it, we can also achieve another visual effect which will attract the users. Thanks for following this tutorial.
Posted on Utopian.io - Rewarding Open Source Contributors
Thank you for the contribution. It has been approved.
You can contact us on Discord.
[utopian-moderator]
Downvoting a post can decrease pending rewards and make it less visible. Common reasons:
Submit
So nice :)
Downvoting a post can decrease pending rewards and make it less visible. Common reasons:
Submit
Hey @andrixyz I am @utopian-io. I have just upvoted you!
Achievements
Suggestions
Get Noticed!
Community-Driven Witness!
I am the first and only Steem Community-Driven Witness. Participate on Discord. Lets GROW TOGETHER!
Up-vote this comment to grow my power and help Open Source contributions like this one. Want to chat? Join me on Discord https://discord.gg/Pc8HG9x
Downvoting a post can decrease pending rewards and make it less visible. Common reasons:
Submit