Pillow is a python library used for image manipulation, you can do various tasks with it. It will allows you to edit or modify image using Python's library which is Pillow. Pillow is a fork of PIL, also known as Python Image Library. This will allow you to process and manipulate images on the fly. We can also use Pillow to use images in bots.
Repository
https://github.com/python-pillow/Pillow
What Will I Learn?
In this tutorial you will how to do following things in Python using Pillow
- Displaying Images To Screen
- Changing Extensions Of Image
- Resizing The Images
- Converting Images To Black & White
- Saving Them
Requirements
To follow along with this tutorial you will need to know basics of Python. If you don't know them you can check @scipio blog as he have made plenty of awesome tutorials from which you can learn from. You will also need to be focused while reading as sometimes the things become hard for me to explain. You can't explain colours to a blind person so be focused. I won't be teaching how you can install Pillow as installing libraries is just a basic task. You will also need a good code editor I will be using PyCharm for this tutorial and I recommend using it too.
Difficulty
- Intermediate
Example Use
If you have a web app in which you want every image to be different sizes so If image is gonna be used as thumbnail it's height and width should be according to it. You can use Pillow to create a Python script that will automatically resize every image for you so you can use those images as thumbnail.
Tutorial
Setup
If you haven't installed Pillow and you want to do it then you can check out this link, it has all the information regarding installing the Pillow. First create a directory in which there will be some images so you can run tests on them and there should be one Python file for coding. The first step will obviously be opening the code editor. After opening the code editor you will need to import Image from PIL which you can do by typing from PIL import Image.
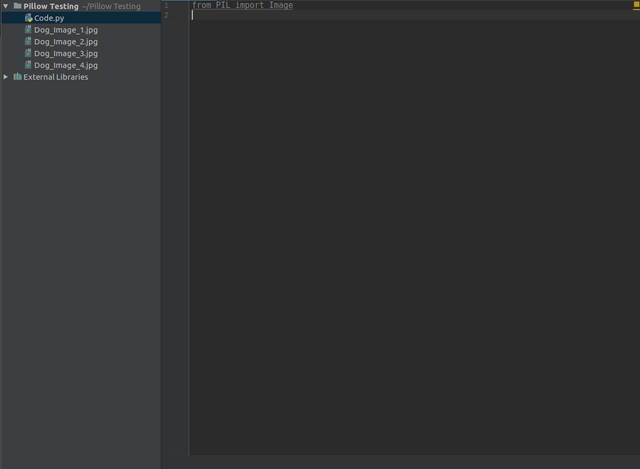
The import is showing in gray because I haven't used it yet
Displaying An Image Using Python
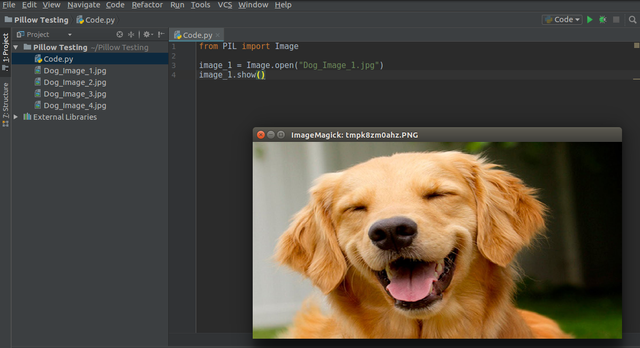
To display a image (make sure image is in the same directory as python file) we need to first create a image object which you can do by typing the code given below.
image_1 = Image.open("Dog_Image_1.jpg")
So here's what we are doing in above code. First we are creating image object name "image_1" and assigning it to image in the directory. So image variable is gonna open image in the directory known as "Dog_Image_1.jpg". It can't yet display the image. To make it able to display the the image we will do something like.
image_1.show()
As simple as it is it justs show the image. Now if you run the code the code it will open up the preview for the image.
Converting All .jpg Files To .png At Once
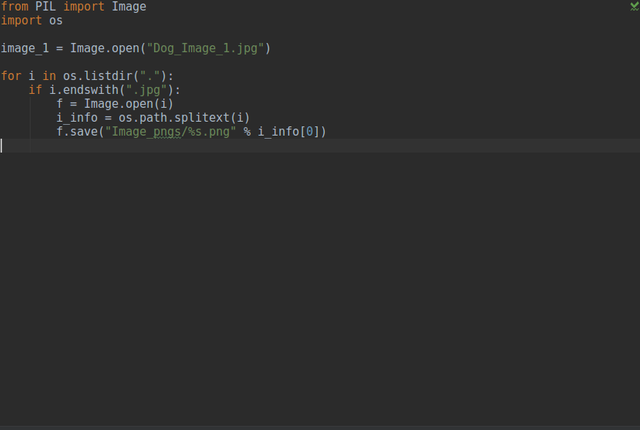
You might be thinking that we can just open the file using GUI of the Operating System. This is the plus point of Pillow that you can modify all the images at once. At the moment all of our images are in .jpg format. What if we wanted to convert all of out images to .png. Create a new directory where your python file is present and name it something like "image_pngs". To do this we will first need to import os module because this tutorial is about Pillow library I won't go in detail on how os works but it is required to loop through each image. We can import os by typing ```import os``, simple. To loop through each image we will use the code given below.
for i in os.listdir("."):
    if i.endswith(".jpg"):
        f = Image.open(i)
        i_info = os.path.splitext(i)
        f.save("Image_pngs/%s.png" % i_info[0])
So let me explain the code for you. First line is us starting the for loop that will loop through each file in the directory we are which is done by passing "." as the parameter for os.listdir. Second line is us filtering out the files which ends with the ".jpg" this will return all images we have in the directory which have .jpg extension. Then in the third line we are creating a image object for every image. In the fourth line we are seprating the extension and filename from each other so we can save it with save name. In the fifth line we are actually saving the file in the image_pngs directory which is inside the directory in which our python file exists. If you are new to python then this might seem like mess to you but it's really not you will need to get used to it, that's the reason I first recommend to read some of the tutorials by @scipio . Let's run the code, make sure to remove the image.save() line from code before running so it won't save the image.
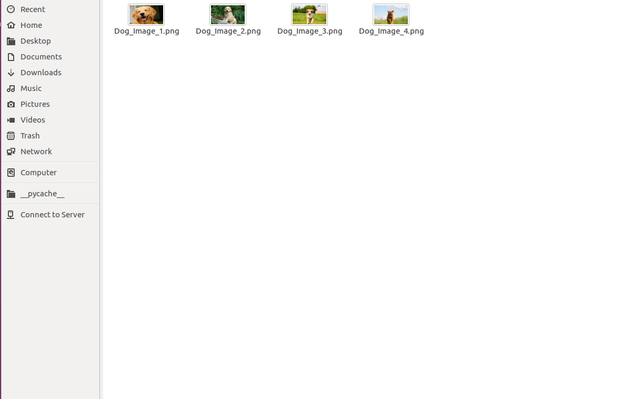
It worked! And it only took 1 second for it to convert all the jpg images to png. That's the power of Pillow and that's the reason why it is so useful to use it.
Let's take a look at all the code that we used till now.
Resizing Each File At Once
The above was one use of Pillow. Let's see if we can resize each image using Pillow but not only resize we will keep in mind to keep same aspect ratio. First step is to create a variable that will contain tuple and that tuple is size of the image, for this tutorial I will like to resize all the images to 500 by 500. So create a variable like image_size = (500,500). Create a new folder inside the directory that will contain all the resized images, you can name it something like "resized_images". Now we will need to modify the for loop abit the modified is given below.
for i in os.listdir("."):
    if i.endswith(".jpg"):
        f = Image.open(i)
        i_info = os.path.splitext(i)
        f.thumbnail(image_size)
        f.save("resized_images/%s_resized%s" % (i_info[0], i_info[1]))
Here's what we have changed from our last for loop. We made our images thumbnail and resized it by passing in the variable that contains size in the fifth line. Then we have have changed the place where images are going to be saved. We also wanted to add "_resized" after every image. I no longer wanted to save each image as png that's why I just formatted it to be saved as the the extension it had before. Now let's run the the script.
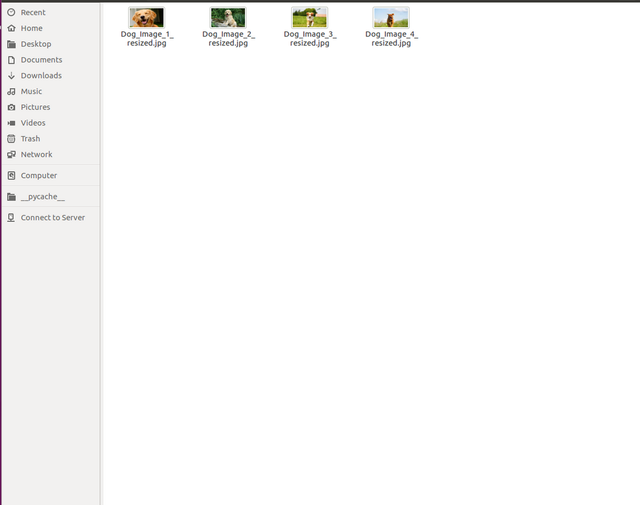
The script is working! And again it didn't took much time.
Rotating Images
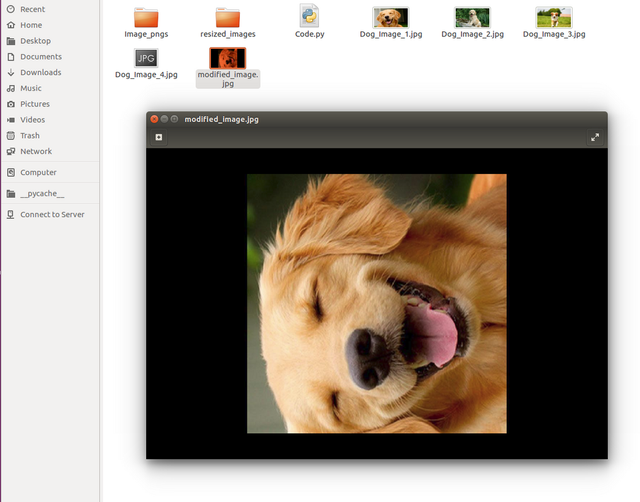
Rotating images in Pillow is as easy as just showing the images. To rotate a image we can do something like image_1.rotate(90). Make sure that image_1 object still exists. You can also use this method inside the for loop to rotate all the images inside the directory. After rotating the image we can now save the image by .save("modified_image.jpg"). So the complete code for rotating the image is image_1.rotate(90).save("modified_image.jpg") and as expected the script is running and working as intended.
Converting Image To Black & White
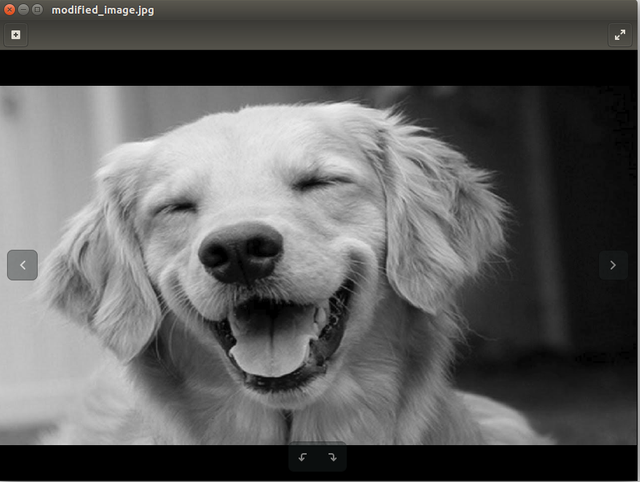
We can easily convert any image in Pillow to Black & White colour scheme. To convert the image to black and white we need to type image_1.convert(mode='L').save('black_and_white.jpg') and running the code will help us to turn the images to black and white. In the above line of code there is something called mode in it, modes are effects in Pillow and each mode have different functionality just to make your mind clear. Here's the result.
Blurring The Image
We can also blur the images Using Pillow. To do it you will first need to import ImageFilter from PIL so add a comma where you have imported Image and type there "ImageFilter". After importing ImageFilter type this code.image_1.filter(ImageFilter.GaussianBlur(10)).save("modified_image.jpg") So we are filtering the image and using GaussianBlur on it. The parameter of GaussianBlur is just amount of Blur you want to add you can leave it blank which will trigger it to use default values and they are so minimal. Using 10 is too much but I just wanted to show you how it works. Here's the result.
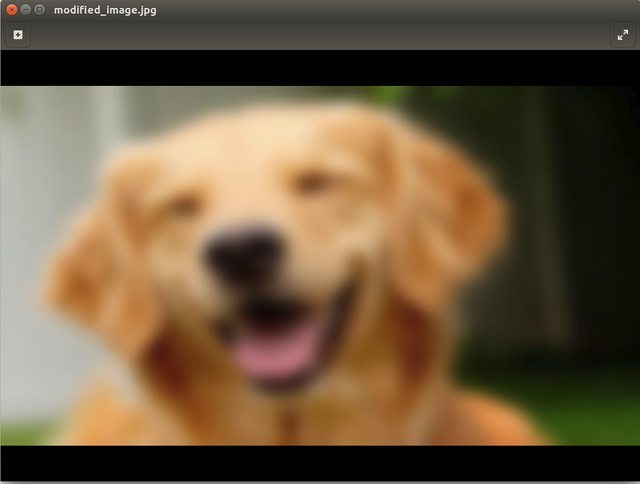
It is working as intended. In the upcoming tutorials I will show you how you can do more cool stuff with Pillow so stay tuned for that!
Code
All the codes used in this tutorial are present on here.
Thank you for your contribution.
While I liked the content of your contribution, I would still like to extend few advices for your upcoming contributions:
Looking forward to your upcoming tutorials.
Your contribution has been evaluated according to Utopian rules and guidelines, as well as a predefined set of questions pertaining to the category.
To view those questions and the relevant answers related to your post,Click here
Need help? Write a ticket on https://support.utopian.io/.
Chat with us on Discord.
[utopian-moderator]
Downvoting a post can decrease pending rewards and make it less visible. Common reasons:
Submit
Thanks for your reveiw. Will surely keep those points in mind. There wasn't any related tutorial that I made so I didn't knew what to put at the place of curriculum. Anyway, thanks for your time.
Downvoting a post can decrease pending rewards and make it less visible. Common reasons:
Submit
Hey @portugalcoin
Here's a tip for your valuable feedback! @Utopian-io loves and incentivises informative comments.
Contributing on Utopian
Learn how to contribute on our website.
Want to chat? Join us on Discord https://discord.gg/h52nFrV.
Vote for Utopian Witness!
Downvoting a post can decrease pending rewards and make it less visible. Common reasons:
Submit
great job @anonfiles
Downvoting a post can decrease pending rewards and make it less visible. Common reasons:
Submit
Hey @anonfiles
Thanks for contributing on Utopian.
We’re already looking forward to your next contribution!
Contributing on Utopian
Learn how to contribute on our website or by watching this tutorial on Youtube.
Want to chat? Join us on Discord https://discord.gg/h52nFrV.
Vote for Utopian Witness!
Downvoting a post can decrease pending rewards and make it less visible. Common reasons:
Submit