Lesson Objectives
A. The DataReader Object
B. create a web page which connects to the “AdventureWorks” database in Microsoft SQL
C. DataReaderDemo
Needs are;
A.PHP
B. SQL
C. C#
The difficulty level of commands we use is middle.
The DataReader Object
The DataReader object can be used to read information from the database in a read-only fashion. The data fetched through the DataReader cannot be modified and saved in the database. The DataReader fetches a single row at a time from the database. The DataReader requires a connection to be kept open for the duration for which the DataReader is used in the web page. Data is not cached in the client, when a DataReader is used.
Note: You cannot create an instance of the DataReader object. The ExecuteReader () method
of the Command object should be used which returns an instance of DataReader.
Demonstration: Accessing data using the DataReader
Let us create a web page which connects to the “AdventureWorks” database in Microsoft SQLmServer and displays the Product Names from the “Production.Product” table.
Steps to create the Demo:
1 ) Create a new Web Site named “DataAccess”
2 ) Add a new Web Form named as “DataReaderDemo.aspx” to the “DataAccess” web site.
3 ) Add a Label with the following settings :
a. ID : lblTitle
b. Text : DataReaderDemo
4 ) Add another label with the following settings:
a. ID : lblProductNames
b. Text : Product Names
5 ) Add a ListBox with the following settings:
a. ID : lstProductNames
6 ) Add a Button with the following settings :
a. ID : btnGetProductNames
b. Text : Get Product Names
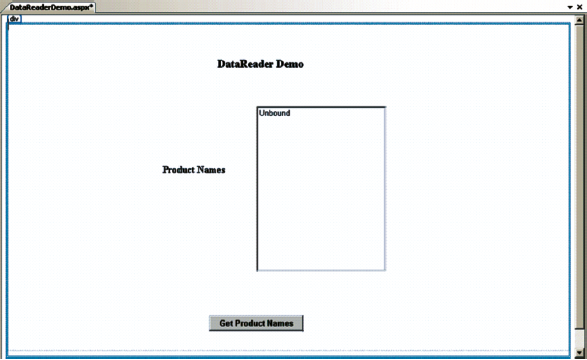
7 ) The Design View of the web form should look as below:

8 ) The code in the source view of the web form is given below:
<%@ Page Language="C#" AutoEventWireup="true"
CodeFile="DataReaderDemo.aspx.cs" Inherits="_Default" %>
<!DOCTYPE html PUBLIC "-//W3C//DTD XHTML 1.0 Transitional//EN"
"http://www.w3.org/TR/xhtml1/DTD/xhtml1-transitional.dtd">
<html xmlns="http://www.w3.org/1999/xhtml">
<head runat="server">
<title></title>
<style type="text/css">
#form1
{
height: 538px;
}
</style>
</head>
<body>
<form id="form1" runat="server">
<div style="height: 547px">
<asp:Label ID="lblTitle" runat="server" Font-Bold="True" Font-Size="Large"
style="z-index: 1; left: 355px; position: absolute; height: 28px; width: 287px; top:
70px; font-weight: 700"
Text="DataReader Demo"></asp:Label>
<asp:Label ID="lblProductNames" runat="server"
style="z-index: 1; left: 266px; top: 245px; position: absolute; font-weight: 700"
Text="Product Names"></asp:Label>
<asp:ListBox ID="lstProductNames" runat="server"
style="z-index: 1; left: 419px; top: 150px; position: absolute; height: 273px; width:
215px">
</asp:ListBox>
<asp:Button ID="btnGetProductNames" runat="server"
style="z-index: 1; left: 341px; top: 495px; position: absolute; font-weight: 700;
width: 156px;"
Text="Get Product Names" onclick="btnGetProductNames_Click" />
</div>
</form>
</body>
</html>
9 ) Switch to the Design View of the web page and double-click the button containing the text “Get Product Names” to open the event handler.
10 ) Enter the code to import the “System.Data.SqlClient” and the event handler of the button. The complete code is shown below:
using System;
using System.Collections.Generic;
using System.Linq;
using System.Web;
using System.Web.UI;
using System.Web.UI.WebControls;
//Importing the System.Data namespace
using System.Data.SqlClient;
public partial class _Default : System.Web.UI.Page
{
protected void btnGetProductNames_Click(object sender, EventArgs e)
{
//Establishing a connection to the AdventureWorks Database
SqlConnection connection= new SqlConnection(
"Server=.\\GlobalBankzServer;Database=AdventureWorks;User
ID=sa;Password='P@ssw0rd'");
//Creating a command to fetch the Names of Products.
SqlCommand command = new SqlCommand("select Name from Production.Product",
connection);
//Opening the connection
connection.Open();
//Calling the ExecuteReader() method of the Command to get the SqlDataReader
SqlDataReader reader = command.ExecuteReader();
//Iterating through the records one by one and fecthing the Name of the Product and
adding it to the Items Collection of the ListBox
while (reader.Read())
{
lstProductNames.Items.Add(reader[0].ToString());
}
//Closing the reader
reader.Close();
//Closing the connection
connection.Close();
}
}
11 ) Right-Click the “DataReaderDemo.aspx” file and select “Set as Start Page”.
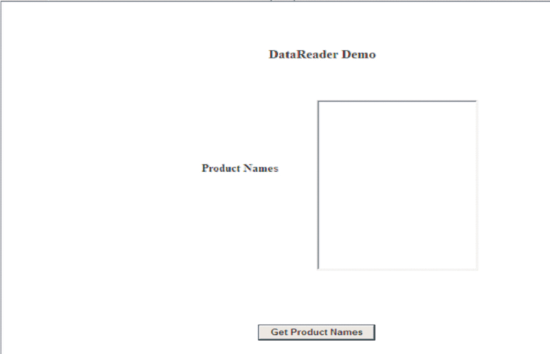
12 ) Run the project and view the Output 1 below:

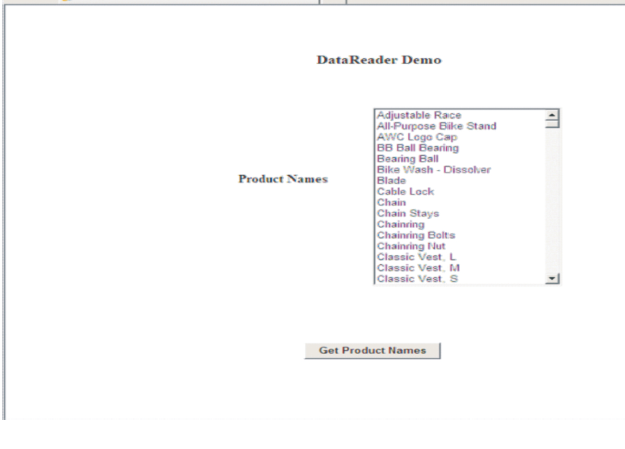
13 ) Click on the “Get Product Names” button and view the Output 2 below:

14 ) From the output above it is understood that the Product Names are fetched from the
database by the DataReader and they are displayed in the ListBox.
Posted on Utopian.io - Rewarding Open Source Contributors
Your contribution cannot be approved because it is not as informative as other contributions. See the Utopian Rules. Contributions need to be informative and descriptive in order to help readers and developers understand them.
You can contact us on Discord.
[utopian-moderator]
Downvoting a post can decrease pending rewards and make it less visible. Common reasons:
Submit