
Security should always be a priority. Especially with regards to software. All should give importance to protecting data from bad agents. Our last lesson touched on RESTful APIs. If we are going to continue using REST in our app, we should use safeguards to protect it from malicious characters while maintaining usability. Today, we will be focusing on learning OAuth 2.0 and how we can implement it using django-oauth-toolkit.
What Will I Learn?
At the end of this tutorial, you are going to be able to:
- Describe what is OAuth 2.0
- Implement OAuth 2.0 with django-oauth-toolkit
- Register an application to OAuth
- Retrieve access tokens using Advanced Rest Client
Requirements
- Python (latest version)
- Pip (included in the Python installer)
- Any text editor or Integrated Development Environment (IDE) of your choice
- Advanced Rest Client (If not using Chrome, use any Rest Client available in your browser)
- Curl (Optional)
Difficulty
This topic is fairly complex and will touch on user authentication and security frameworks. We will try to make the topics easy to understand. But if this is your first introduction to web development, it would be best to read on the previous topics. You can view the previous lessons by visiting the links found in the curriculum below. Also, we wont dive deeply on the details of OAuth2.0 and its rationale. Our bottomline is to apply OAuth2.0 to our app.
Tutorial Contents
What's wrong with the current API?
The previous tutorial thought us about how to make an API. However, we exposed our data to other parties by not requiring authentication. For an analogy, imagine our app as a company you are working for or a school you go to. Normally, before you can enter the premises and use the facilities, you need to present an ID or any form of identification that will verify who you are. This protects the office or school from non-employees or non-students that may want to destroy or steal the things inside. In the analogy, the office or school is our app and its data, the employees or students are the registered users, and the strangers are the bad actors that may have malicious intent with our property. What we lack with our current setup, is an authentication feature to check if the person accessing our API is indeed one of ours or not.
What's OAuth 2.0?
The OAuth 2.0 authorization framework enables a third-party application to obtain limited access to an HTTP service, either on behalf of a resource owner by orchestrating an approval interaction between the resource owner and the HTTP service, or by allowing the third-party application to obtain access on its own behalf. This specification replaces and obsoletes the OAuth 1.0 protocol described in RFC 5849.
Source: tools.ietf.org
Don't be confused on the term framework used in the definition above. OAuth 2.0 is not a technically framework like Django or ReactJS. OAuth2.0 is more of a protocol or a set of rules on how authorization/authentication should be done. This means that OAuth2.0 can be used for different languages and web frameworks. To be more concise, it enables our app to get limited access to user accounts on an web service like our API.
What's django-oauth-toolkit?
In programming, there is the so called "DRY" principle. It means "don't repeat yourself". We should not try to reinvent the wheel everytime. Somewhere somehow, a programmer has already did what you are planning to do. We should leverage every library available so that we can be more productive.
Building an OAuth2.0 from the ground up can be done but it surely is very daunting (especially if you are a beginner). This is where django-oauth-toolkit comes in. It is a package specifically made to implement OAuth2.0 for Django projects.
How do I integrate django-oauth-toolkit with my project?
To create a simple setup first, launch the commandline and activate virtualenv. Install django-oauth-toolkit by entering the command below.
$ pip install django-oauth-toolkit
After, open settings.py and add 'oauth2_provider' to the installed apps like shown below.
INSTALLED_APPS = (
    ...
    'oauth2_provider',
)
Still in the settings.py file, add the following code at the end of the file.
REST_FRAMEWORK = {
    'DEFAULT_AUTHENTICATION_CLASSES': (
        'oauth2_provider.contrib.rest_framework.OAuth2Authentication',
    ),
        'DEFAULT_PERMISSION_CLASSES': (
        'rest_framework.permissions.IsAuthenticated',
    )
}
Open urls.py (same directory as settings.py) and update the urls as shown below.
urlpatterns = [
    url('admin/', admin.site.urls),
    url(r'^api/', include(router.urls)),
    url(r'^o/', include('oauth2_provider.urls', namespace='oauth2_provider')),
]
Then, migrate the changes to the database by entering this command to the command line.
$ python manage.py migrate
To test it out, run the server by entering the command below. And test a GET request using Advanced Rest Client. You should see a 401 response like the one below.
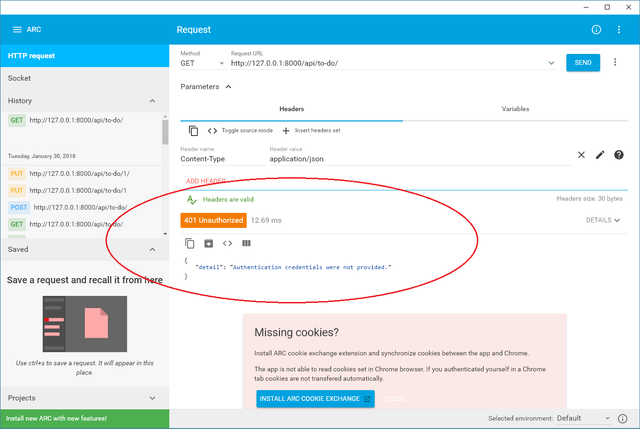
Dont panic! This means that we successfully implemented OAuth2.0. Now, our application will require anyone who wants to access the API a credential provided by us.
How do we create credentials?
For our credentials, what we need to do is create access tokens. Access tokens will serve as our ID and will grant us a permit for access. To do this, follow the steps below.
Login to admin. And click Applications in the DJANGO OAUTH TOOLKIT module.

For the entries to the form, enter these values and take note of the client ID and Client secret.
User: the user you created
Client Type: Confidential
Authorization grant type: Resource owner password-based
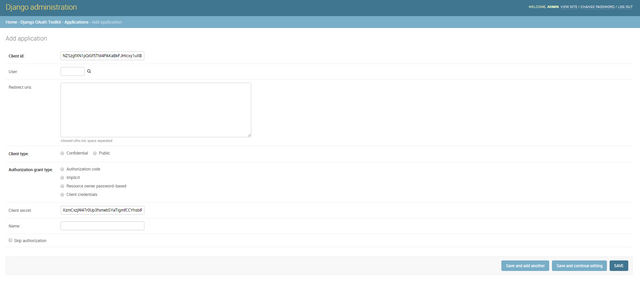
Hit save. To get access tokens, create a POST request using Advanced Rest Client like the one below. Set the header to "Content-Type":"application/x-www-form-urlencoded".
For the the URL, see example below. Replace client_id and client_secret with your own client_id and client_secret.
http://client_id:client_secret@localhost:8000/o/token/

As for the body of the request, replace "your username" with your username and "your password" with your password.
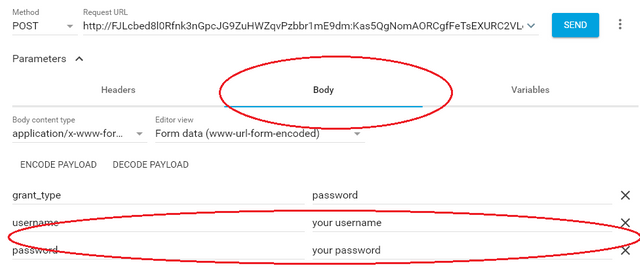
You can also use curl to test the API out. Enter the command below.
$ curl -X POST -d "grant_type=password&username=<user_name>&password=<password>&scope=read" -u"<client_id>:<client_secret>" http://localhost:8000/o/token/
If all went well, you will probably receive a message like the one below.

Take note of the access_token value since this will serve as our ID or credential for our API.
How do we use the tokens to access the API?
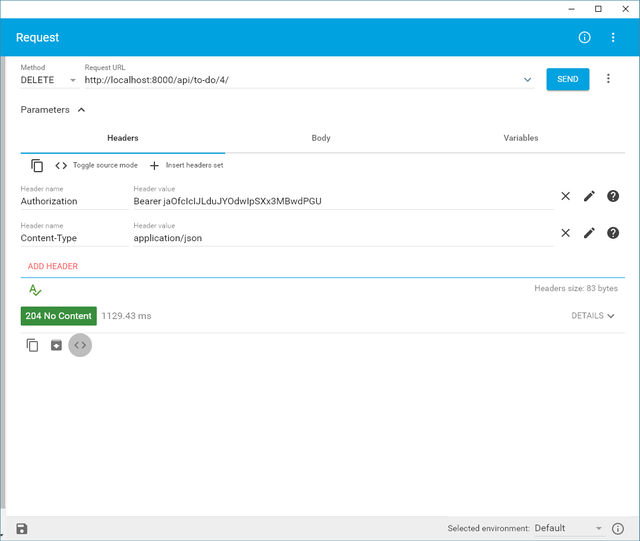
In order for us to access the API, we only need to add "Authorization":"Bearer access_token" to our header everytime we send a request. In advanced rest client, we can do this by pressing the "Add Header" button and enter the correct header type and value.
Please note: For the access token, use the access token returned by the server as mentioned on the last instruction.
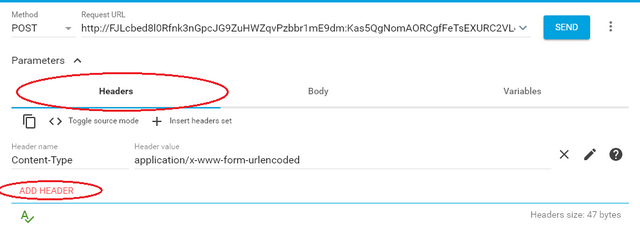
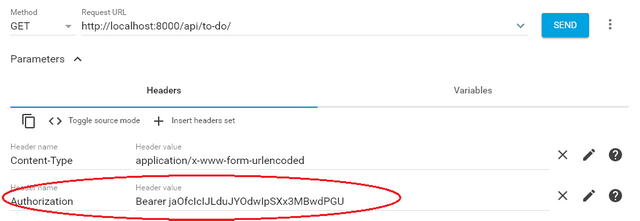
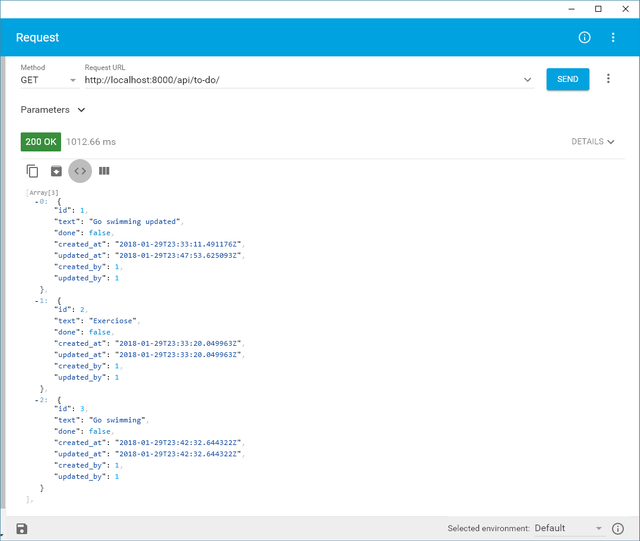
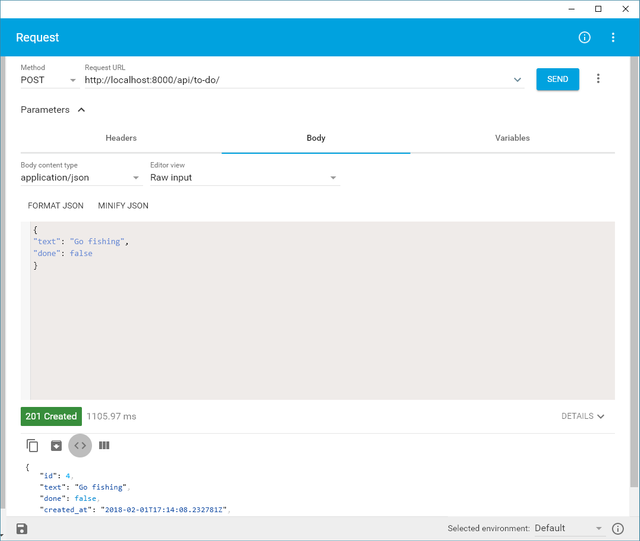
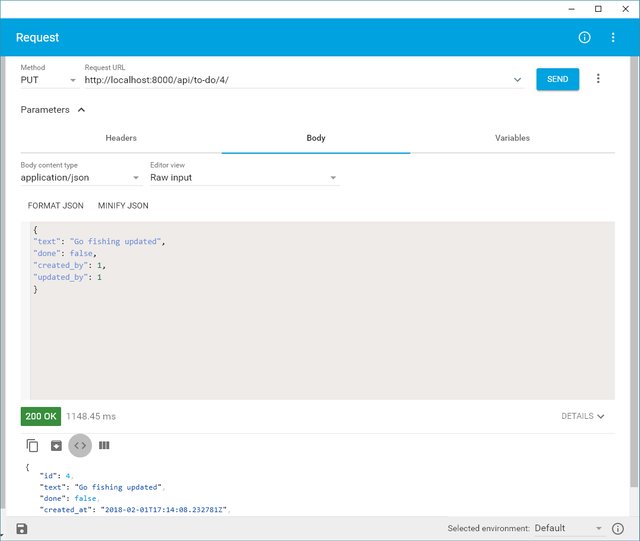
To create a HTTP requests, we don't need to modify the URL. We just need to add the access token as our header. Shown below are the result of HTTP requests.
GET Request
POST Request
PUT Request
DELETE Request
For now, we can't appreciate the value of our APIs since this is part of the application which the end users will not see. Tune in as we progress with the program and see how these APIs will prove vital to our app.
Curriculum
This is part 6 of the ongoing tutorial of building a single page application by using both Django and ReactJS. Next time, we will tackle the use of django-swagger and how we can further improve our API by using permissions and other forms of serializers.
Part 1: Installing Django with Virtual Env
Part 2: Django Deployment to Heroku Cloud
Part 3: Using the Django Admin + PostgreSQL
Part 4: Handling of Static Assets in Heroku
Part 5: Implementing RESTful API
Posted on Utopian.io - Rewarding Open Source Contributors
Thank you for the contribution. It has been approved.
I must say that reviewing your tutorials is a pleasure, keep up the good work!
You can contact us on Discord.
[utopian-moderator]
Downvoting a post can decrease pending rewards and make it less visible. Common reasons:
Submit
Thank you very much!
Downvoting a post can decrease pending rewards and make it less visible. Common reasons:
Submit
Hey @burdagay I am @utopian-io. I have just upvoted you!
Achievements
Suggestions
Get Noticed!
Community-Driven Witness!
I am the first and only Steem Community-Driven Witness. Participate on Discord. Lets GROW TOGETHER!
Up-vote this comment to grow my power and help Open Source contributions like this one. Want to chat? Join me on Discord https://discord.gg/Pc8HG9x
Downvoting a post can decrease pending rewards and make it less visible. Common reasons:
Submit