Repository
https://github.com/facebook/react
Welcome to the Tutorial of Creating Responsive Web Apps Using ReactJS, NodeJS and ReactiveX Part 4
What Will I Learn?
- You will learn how to setup ReactiveX in our Sketching Application.
- You will learn Using RxJS to work with stream of events in our sketching app.
- You will learn about the development of Real-time sketching components.
- You will learn how to select a sketch in the list of sketches.
- You will learn how to handle sketching events.
- You will learn how to publish events over the web socket.
- You will learn how to store sketching events in RethinkDB.
Requirements
System Requirements:
- Node.js 8.11.1
- Yarn
- RethinkDB
- Visual Studio Code or any similar editor for code editing
- A computer with basic functionalities and Web browsers
OS Support:
- Windows 7/8/10
- macOS
- Linux
Difficulty
- Intermediate
Resources
Required Understanding
- You need a good knowledge of HTML, CSS and JavaScript
- A fair understanding of Node.js and React.js
- A thirst for learning and developing something new
- Prior tutorials that are Part 1,Part 2 and Part 3
Tutorial Contents
Description
Since you know how to update server to store sketches. Also, You have learned how to manage client part to save list of sketches and how to setting up the socket logic and testing the list of sketches in the Third Part of the tutorial, if you don't check the third tutorial check the third part.
In this Tutorial, you'll use what you've learned in the previous tutorial to build the functionality to load up a sketching that the user can draw on and see other people sketching on it in real time.
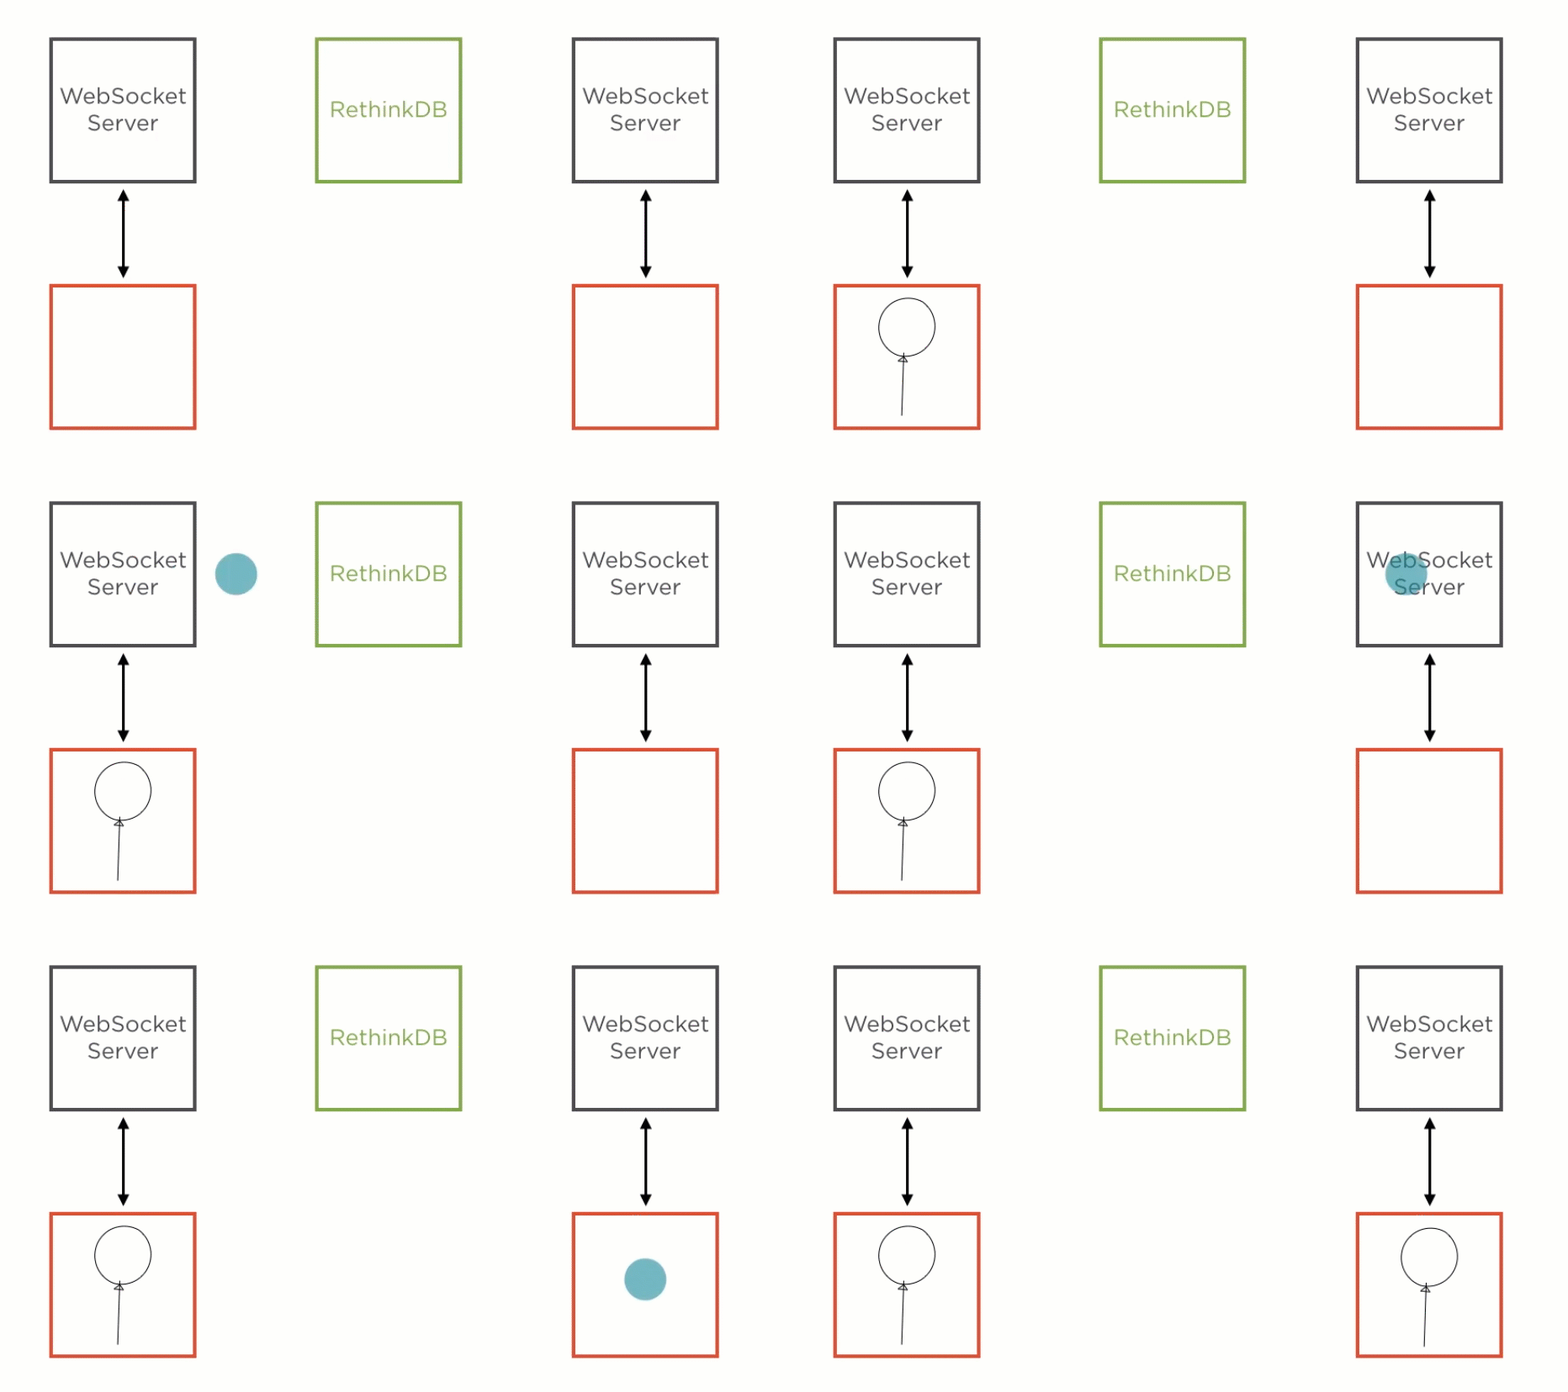
You'll do this by publishing lines that the user draws to the socket server, which will store it to RethinkDB. The updates to the sketchings will flow over RethinkDB queries over websockets onto the React sketching component. The sketching component is actually already part of your project
package.json file. You'll just plug it into the app and connect it up to the server.
You'll also start using RxJS in this tutorial in order to batch up the lines being synced to the React Sketching component. RxJS works really, really well when you have to work with streams of events, which is exactly what you have in your sketching app.
Loading a Sketch:
The first thing you'll need to do is create your React component that'll contain the canvas that the user will draw on. You're going to start by making it possible for the user to click on a sketching in the list of sketchings and then show a new sketching component with this related sketching coming through on its props. In the client code, create a new file called Sketching.js.
import React, { Component } from 'react';
import React, { Component } from 'react';
Import React and Component from the React module. Also import the npm module that contains the Canvas component.
import Canvas from 'simple-react-canvas';
import Canvas from 'simple-react-canvas';
This module was installed through the package.json file. Create a new class called Sketching, which will be your React component, so extend it from Component, and make this class the default export of this file.
class Sketching extends Component {
  }
export default Sketching;
Create a render function for the component. You're going to get a sketching through on props, but it might be null sometimes because the user might not have selected a sketching yet. So add a return with an immediate conditional where you check whether the sketching prop is set. If it is, then you return this, a div with a className of Sketching, and close that off. In the div, return another div, this one with a className of Sketching-title. And inside of this div, just use curly braces so that it outputs the sketching.name, which comes through on props.
render() {
    return (this.props.sketching) ? (
      <div
        className="Sketching"
      >
        <div className="Sketching-title">{this.props.sketching.name}</div>
  }
}
Now, add the Canvas component, and it has a sketchingEnabled prop, which you need to set to true. Good. And if the component did not get a sketching, then just return null from render.
<Canvas
          onDraw={this.handleDraw}
          sketchingEnabled={true}
          lines={this.state.lines}
        />
Now go get this sketching component into the app. Go over to the App component to do that. Import the Sketching component at the top just like other components.
import Sketching from './Sketching';
import Sketching from './Sketching';
You want to store this later sketching on state and pass it through onto props for the Sketching component, so add some default state for the component right at the top. You want to render the sketching if one is selected on state, and if none is on state, you want to show the sketching list so that the user can click on one. So first think about how the sketching will make it onto state.
state = { };
state = { };
It needs to happen through a function on this component itself, so start there. Add a function called selectSketching, and make it take a sketching parameter.
selectSketching = (sketching) => {
    this.setState({
      selectedSketching: sketching,
    });
  }
In this function, call setState and set a state variable called selectedSketching to the sketching parameter. In render, you want to show the form and list if the selected sketching value is undefined or null and the Sketching component if it does have a value. So create a new variable called ctrl, control, and set that to adiv.
render() {
    let ctrl = (
      <div>
        <SketchingForm />

        <SketchingList
          selectSketching={this.selectSketching}
        />
      </div>
    );
Inside of this div, add the SketchingForm and SketchingList components, which you can get from the bottom of the render function. So that's what this component will render if it doesn't have a selected sketching.
Putting Selected Sketch on New Sketching Component:
If the ctrl function select sketching then this is a good time to add the ifstatement, so check the selected sketching value on state. If it does have this value, set the control variable to the Sketching component and set the sketching prop on the Sketching component, which you get from the selected sketching variable on state. Even though this component is not in a list, you want to use a new component instance each time the sketching updates because you want the previous instance to be killed in order to get a clean canvas,
if (this.state.selectedSketching) {
      ctrl = (
        <Sketching
          sketching={this.state.selectedSketching}
          key={this.state.selectedSketching.id}
        />
      );
    }
So that's why you add a key on here. So you've got your conditional view based on the state variable. You just need to add it in the output, just below the header component.
{ctrl}
{ctrl}
So set the function on the SketchingList on a prop called selectSketching.
<SketchingList
          selectSketching={this.selectSketching}
        />
After this update App.js file will look like this;
import React, { Component } from 'react';
import './App.css';
import SketchingForm from './SketchingForm';
import SketchingList from './SketchingList';
import Sketching from './Sketching';

class App extends Component {
  state = {
  };

  selectSketching = (sketching) => {
    this.setState({
      selectedSketching: sketching,
    });
  }

  render() {
    let ctrl = (
      <div>
        <SketchingForm />

        <SketchingList
          selectSketching={this.selectSketching}
        />
      </div>
    );

    if (this.state.selectedSketching) {
      ctrl = (
        <Sketching
          sketching={this.state.selectedSketching}
          key={this.state.selectedSketching.id}
        />
      );
    }

    return (
      <div className="App">
        <div className="App-header">
          <h2>Our awesome sketching app</h2>
        </div>

        { ctrl }
      </div>
    );
  }
}

export default App;
Now that's done, head on over to the SketchingList component, and under li element, which each item in the list will have, add an onClick handler, which takes a function, which, when it's called, just calls the selectSketching function that it expects on props, passing in the sketching associated to the li.
onClick={event => this.props.selectSketching(sketching)}
onClick={event => this.props.selectSketching(sketching)}
Go test this out. Go to your browser at localhost:3000.
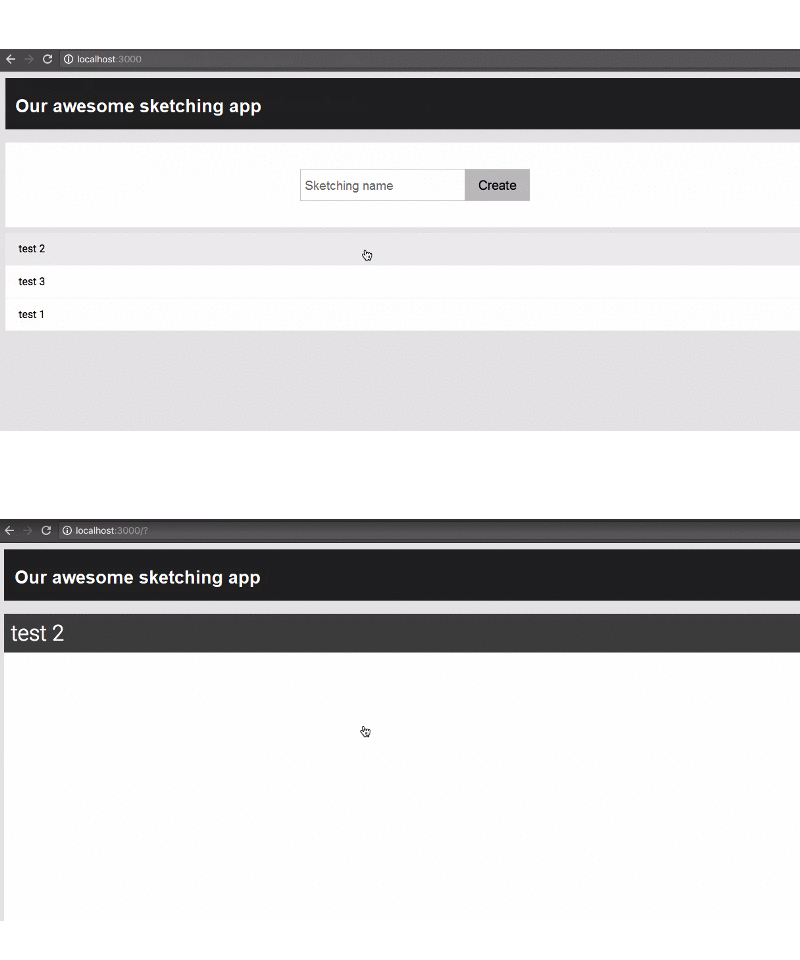
You should see the
sketching list and form, but when you click on a sketching, it should, great, it shows you the Sketching component, and it has the correct sketching on state, as you can see by the sketching nameAfter this update SketchingList.js file will look like this;
import React, { Component } from 'react';
import {
  subscribeToSketchings,
} from './api';


class SketchingList extends Component {
  constructor(props) {
    super(props);

    subscribeToSketchings((sketching) => {
      this.setState(prevState => ({
        sketchings: prevState.sketchings.concat([sketching]),
      }));
    });
  }

  state = {
    sketchings: [],
  };

  render() {
    const sketchings = this.state.sketchings.map(sketching => (
      <li
        className="SketchingList-item"
        key={sketching.id}
        onClick={event => this.props.selectSketching(sketching)}
      >
        {sketching.name}
      </li>
    ));

    return (
      <ul
        className="SketchingList"
      >
        {sketchings}
      </ul>
    );
  }
}

export default SketchingList;
Handling Our Sketching Events:
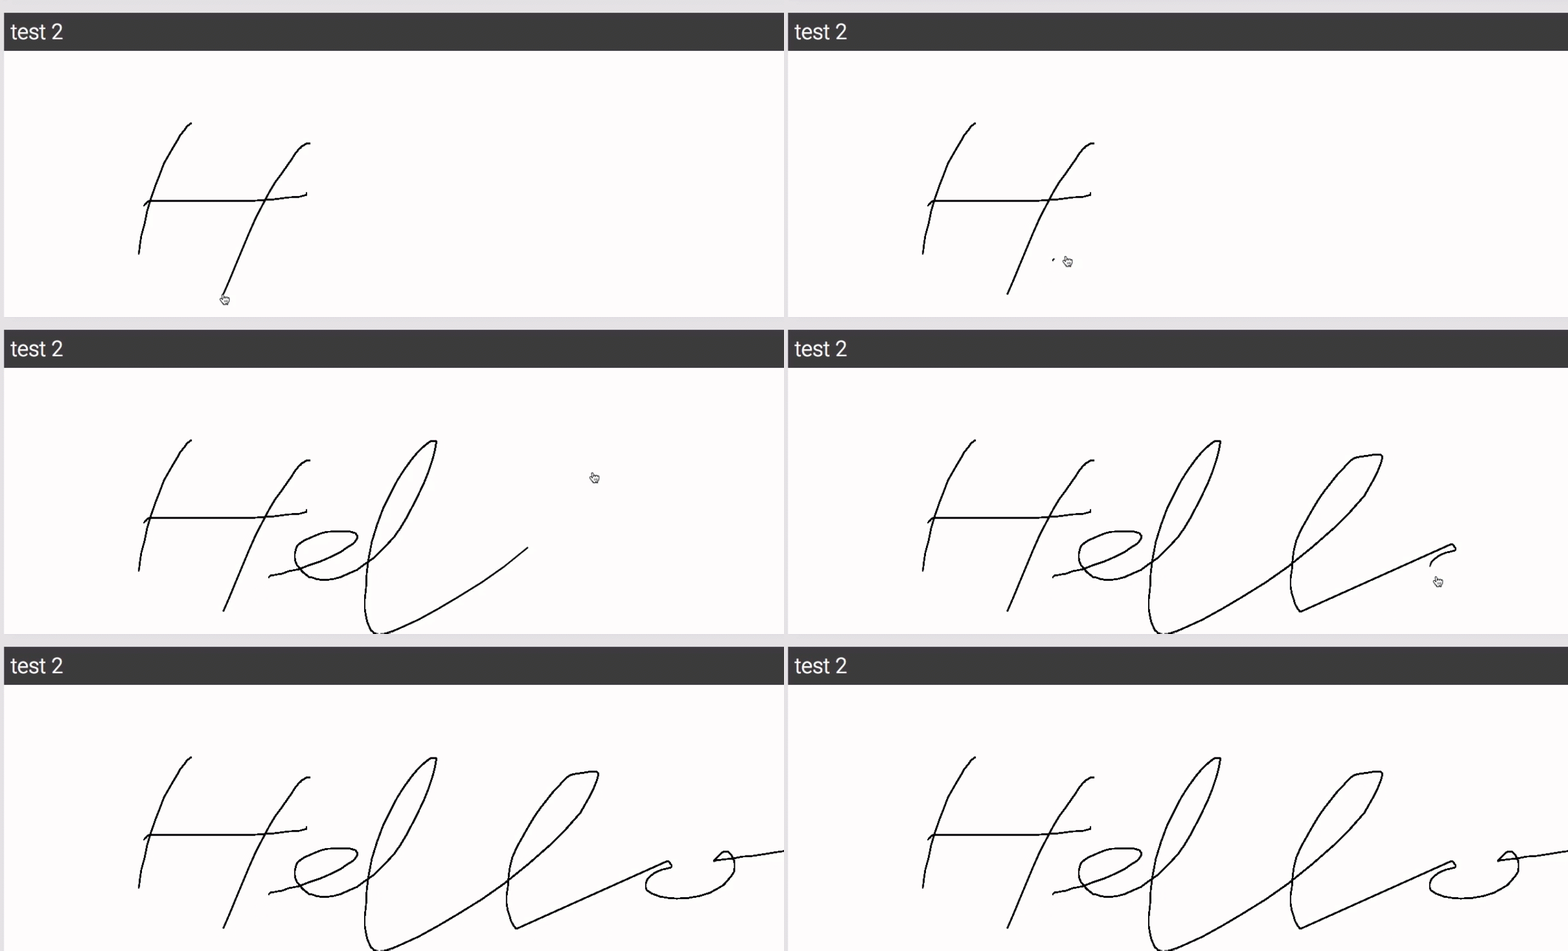
While the user can draw on the Sketching component at the moment, it's not getting saved to the DB and also not being shared with other users. Now you're going to wire it up so that the Sketching component handles an event on the canvas in the module, which it then publishes over a socket to the server.
Then in the server, you'll handle the event coming over the socket and store it in RethinkDB.
In the api file, add a new function called publishLine. This is what will send the event up to the WebSocket server. Make it take an object which has a sketchingId and a line.
function publishLine({ sketchingId, line })
function publishLine({ sketchingId, line })
You'll see what's in this line object soon enough. Now in this function, call the emit method on socket and specify an event with the name of publishLine, and to this send through an object with a sketchingId and expand the line object's properties onto that.
socket.emit('publishLine', { sketchingId, ...line });
socket.emit('publishLine', { sketchingId, ...line });
Now that this function is done, go and export it from this file. So now you can go use this function from the Sketching component.
export {
  publishLine,
  createSketching,
  subscribeToSketchings,
};
After this update Api.js file will look like this;
import openSocket from 'socket.io-client';
const socket = openSocket('http://localhost:8000');

function subscribeToSketchings(cb) {
  socket.on('sketching', sketching => cb(sketching));
  socket.emit('subscribeToSketchings');
}

function createSketching(name) {
  socket.emit('createSketching', { name });
}

function publishLine({ sketchingId, line }) {
  socket.emit('publishLine', { sketchingId, ...line });
}

function subscribeToSketchingLines(sketchingId, cb) {
  socket.on(`sketchingLine:${sketchingId}`, line => cb(line));
  socket.emit('subscribeToSketchingLines', sketchingId);
}

export {
  publishLine,
  createSketching,
  subscribeToSketchings,
  subscribeToSketchingLines,
};
In the Sketching.js file, first import the publishLine function that you just coded up from the api file.
import { publishLine } from './api';
import { publishLine } from './api';
Create a new method on the Sketching component called handleDraw, and this should take a line object, which the Canvas component will send through on this function. In here, call publishLine, and pass it a sketchingId, and set that to the id of the sketching that the Sketching component get through on its props. Also, pass through the line object. The publishLine function will combine these two parameters to send off to the server.
  handleDraw = (line) => {
    publishLine({
      sketchingId: this.props.sketching.id,
      line,
    });
  }
Publishing Events Over the Websocket:
The Canvas component takes an onDraw prop, so specify that, and pass through the handleDraw method that you just coded up.
onDraw={this.handleDraw}
onDraw={this.handleDraw}Now while all the code should be wired up to send this event to the server, we still need to handle it here, so head on over to the service index file, and in here create a new function called handleLinePublish, and the structure a connection and line object from the argument parameter.
function subscribeToSketchings({ client, connection })
function subscribeToSketchings({ client, connection })
Inside of this function, console.log, something like this, saving line to the db, just so that you can use it to troubleshoot if something doesn't work. Now to insert the line to the db, call the table method onr, and specify that you want the lines table, which you'll go and create soon enough. Call the insert method on it.
console.log('saving line to the db')
  r.table('lines')
  .insert(Object.assign(line, { timestamp: new Date() }))
In the next tutorial, you're going to want timestamps on all the lines, so let's also add a timestamp with the current date onto the line before passing it to the insert method. You can do this inline with an object assign or with a spread operator if you like.
.run(connection);
.run(connection);
Now call run on this, and pass the connection to that. Now that you have a function that should save the line to RethinkDB, you need to wire it up to the event coming over the WebSocket. Scroll down to where you are handling all the other events, and here add another client.on, specifying the publishLine event this time.
client.on('publishLine', (line) => handleLinePublish({
      line,
      connection,
    }));
To this pass your handler function in which you expect to be passed a line object. Then call the handlePublish function, which you just created, and pass it an object containing the line object first and then the connection object.
After this update index.js file of the server will look like this;
const r = require('rethinkdb');
const io = require('socket.io')();

function createSketching({ connection, name }) {
  return r.table('sketchings')
  .insert({
    name,
    timestamp: new Date(),
  })
  .run(connection)
  .then(() => console.log('created a new sketching with name ', name));
}

function subscribeToSketchings({ client, connection }) {
  r.table('sketchings')
  .changes({ include_initial: true })
  .run(connection)
  .then((cursor) => {
    cursor.each((err, sketchingRow) => client.emit('sketching', sketchingRow.new_val));
  });
}

function handleLinePublish({ connection, line }) {
  console.log('saving line to the db')
  r.table('lines')
  .insert(Object.assign(line, { timestamp: new Date() }))
  .run(connection);
}

function subscribeToSketchingLines({ client, connection, sketchingId}) {
  return r.table('lines')
  .filter(r.row('sketchingId').eq(sketchingId))
  .changes({ include_initial: true, include_types: true })
  .run(connection)
  .then((cursor) => {
    cursor.each((err, lineRow) => client.emit(`sketchingLine:${sketchingId}`, lineRow.new_val));
  });
}

r.connect({
  host: 'localhost',
  port: 28015,
  db: 'awesome_whiteboard'
}).then((connection) => {
  io.on('connection', (client) => {
    client.on('createSketching', ({ name }) => {
      createSketching({ connection, name });
    });

    client.on('subscribeToSketchings', () => subscribeToSketchings({
      client,
      connection,
    }));

    client.on('publishLine', (line) => handleLinePublish({
      line,
      connection,
    }));

    client.on('subscribeToSketchingLines', (sketchingId) => {
      subscribeToSketchingLines({
        client,
        connection,
        sketchingId,
      });
    });
  });
});
const port = 8000;
io.listen(port);
console.log('listening on port ', port);
Storing Sketching Events in RethinkDB:
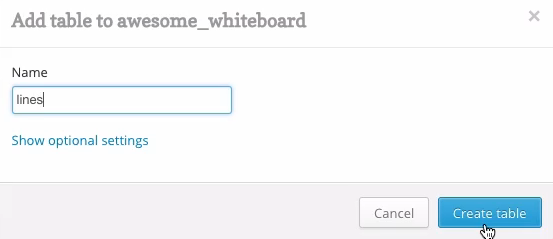
Last thing before you can test. Go to localhost:8080 to the RethinkDB console. At the top, click on the Tables menu item. Next to the awesome_whiteboard db, click the Add Table button, and specify lines for the new table now.
Now it should be working. Go to the browser at
localhost:3000, select a sketching, and draw something on the screen. When you check out of the console for the websocket server, you should see your console log message coming through here. To verify that the server code actually worked, go to the RethinkDB console again at localhost:8080. In here, go to the Data Explorer, and run this query,
r.db(‘awesome_whiteboard’).table(‘lines’)
r.db(‘awesome_whiteboard’).table(‘lines’)
Now run that. You should see a couple of lines in here.
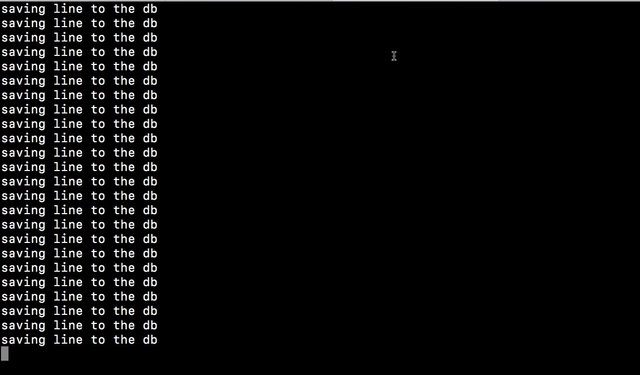
So when a user draws a line onto the sketching component, it gets published to over the
WebSocket and persisted to RethinkDB. Now you're going to change it so that the Sketching component can also subscribe to new lines for the sketching so that it updates in real time when someone else draws on the same sketching. That's kind of the whole point, and it's also the most exciting part of this course
Summary:
Great! In this tutorial, you've now got a working collaborative real-time whiteboard. The best thing is you can even run the WebSockets on a separate service because using RethinkDB allows you to scale out through the use of its live query functionality. You can imagine how useful this stack could be when you need to build out something real time. In the next tutorial, you will learn about subscribing to sketching changes in react component. Also, you will learn about the improvement of rendering time of sketching component.
Curriculum
- Creating Responsive Web Apps Using ReactJS, NodeJS and ReactiveX part 1
- Creating Responsive Web Apps Using ReactJS, NodeJS and ReactiveX Part 2
- Creating Responsive Web Apps Using ReactJS, NodeJS and ReactiveX Part 3
Project Repository
- Complete Source Code of Sketching-App Part 4
Thank you for your contribution.
While I liked the content of your contribution, I would still like to extend one advice for your upcoming contributions:
Looking forward to your upcoming tutorials.
Your contribution has been evaluated according to Utopian rules and guidelines, as well as a predefined set of questions pertaining to the category.
To view those questions and the relevant answers related to your post,Click here
Need help? Write a ticket on https://support.utopian.io/.
Chat with us on Discord.
[utopian-moderator]
Downvoting a post can decrease pending rewards and make it less visible. Common reasons:
Submit
Thank You Sir for you review and valuable suggestions. I will improve it in the next tutorial
Downvoting a post can decrease pending rewards and make it less visible. Common reasons:
Submit
Hey @engr-muneeb
Thanks for contributing on Utopian.
We’re already looking forward to your next contribution!
Contributing on Utopian
Learn how to contribute on our website or by watching this tutorial on Youtube.
Want to chat? Join us on Discord https://discord.gg/h52nFrV.
Vote for Utopian Witness!
Downvoting a post can decrease pending rewards and make it less visible. Common reasons:
Submit
Really good. Thanks for taking the time to write this. I’ll be having a go at following this tutorial in the next few days.
Downvoting a post can decrease pending rewards and make it less visible. Common reasons:
Submit