
What Will I Learn?
If you want to contribute or just try out various projects you often need a Linux environment. However, with windows still being the most distributed operating system this creates a hurdle of entry to many users. In this guide, you will learn
- How to download and setup VirtualBox
- Install a basic Linux distribution
- make initial configurations for accessibility
Requirements
You will need:
- A PC running windows with admin rights
- Internet access
Difficulty
- Basic
Tutorial Contents
This tutorial is aiming at novice developers trying to get it all started. Many examples and project require you to work in an Linux environment. To get familiar with the topic a virtual environment is well suited because it will give you a playground to get started.
Installing VirtualBox
Head over to the Download page of Virtual Box and get the latest package for your operating system.
Now install the package. It might warn you that your network is being restarted but that's ok.
You will be greeted with the initial VirtualBox screen:
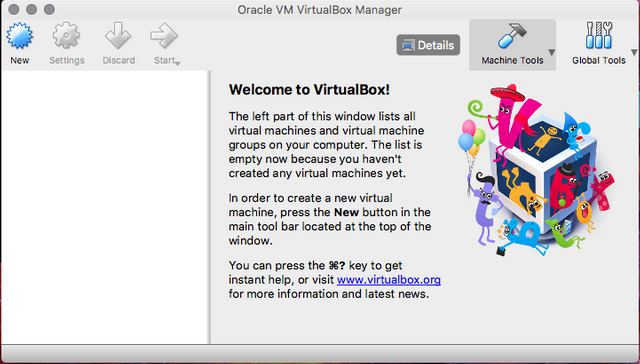
To get everything started we still need a linux image. I will focus here on a plain debian installation but you can repeat the following step with other distributions if you like. I would still advice to use a Debian based distribution since it will be mostly compatible with the rest of the guide.
Now open the Download page of the debian package and choose the amd64 link. I deliberately did not include the direct link so you get the latest version ;)
Creating your VM
We have now everything prepared to create the virtual machine. To continue open the VirtualBox windows again and click on “New”. Then on “Expert Mode” and you will see this screen:
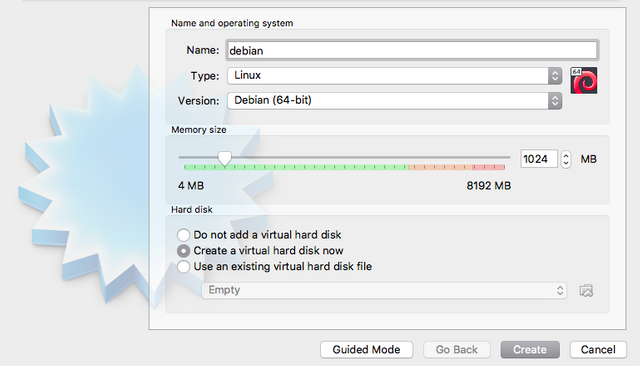
Enter “Debian” in the name field and it will automatically choose “Linux” as type and “Debian” as Version.
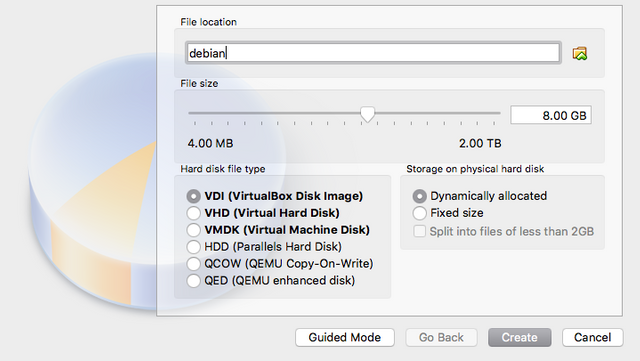
The memory size is up to you. I would suggest giving it at least 2-3 GB if you can spare it. Next click on create. It will show you the disk creation dialogue. You can select where the disk is stored or how big it should be but if you dont know better just click create again.
We now have to insert the “Virtual CD” into the vm. For this Open a context menu with a right click on the vm and choose settings:
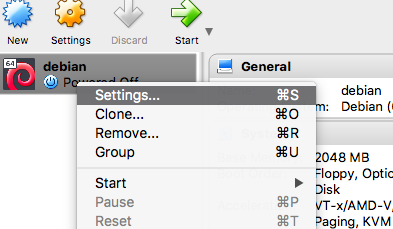
Here you have to do the following things:
Select “Storage” form the icons at the top
In the storage devices list select your “Empty” line
Then look to the right, there is a little disc symbol
Click on it and choose your debian disk file ( its most likely in your downloads folder )
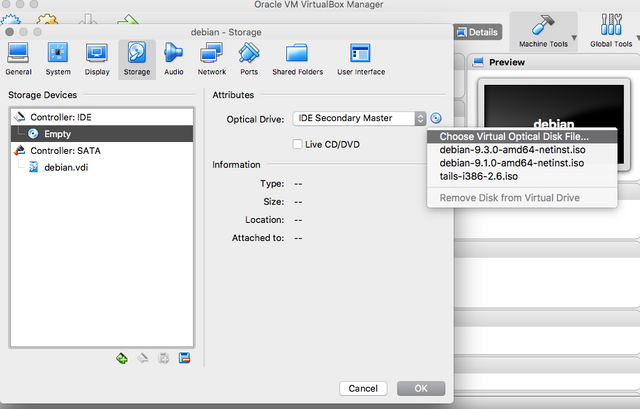
Ten “OK” and start your virtual machine
Installing the Operating system
The vm will greet you with yet more questions. We will follow up with the graphical installer
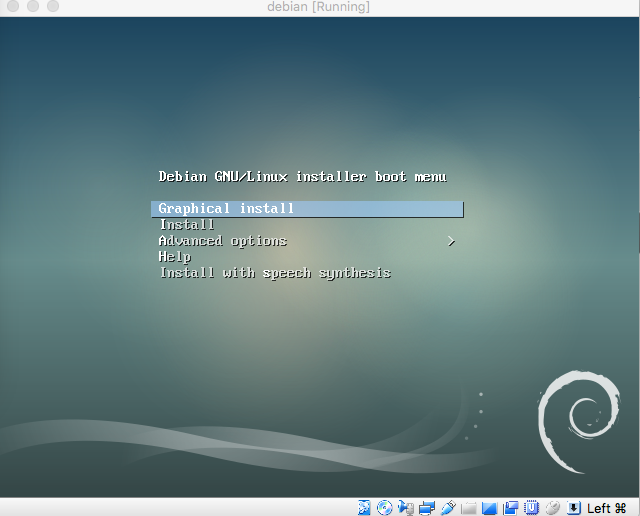
In the next steps:
Select your language ( or better english )
Select your location, county and a locales variable that matches your location ( or always english ;)
The keyboard layout is actually important so you can find what you are typing later on
Now you have to set up the network but can pretty much click though all dialogues without giving it much thought
Enter your root password, choose a username and anter its password
Since this is aimed at beginners i recommend to use the same password for your user and root which you probably don't want to do in a production environment
Now you click next until you are presented with this screen, which will prompt you to acknowledge the disk settings
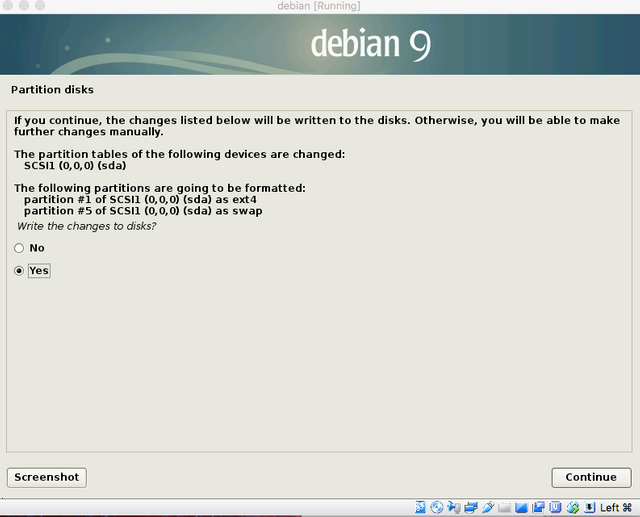
Change the selection to yes, then continue and we will start installing the actual system
After some more screen which you can just go through it will ask you which Desktop to install
Here you can try some out later on that you might prefer but we take the default “Debian desktop environment”
For the boot loader we take the default and on the next screen we choose /dev/sda as device
After 2 more continues the system will restart
installing Guest additions
Congratulations you got yourself your first linux vm. However it can be better. For ease of use we want to instal the VirtualBox guest additions. In order to do this you have to:
Select from the application menu “Devices” => “Insert Guest Additions CD image”
Your vm wil prumt for execution of some files but here we have to cancel and continue another way.
Go to your VM and select “Activities” then type in the search field “term” select the below icon of the terminal.
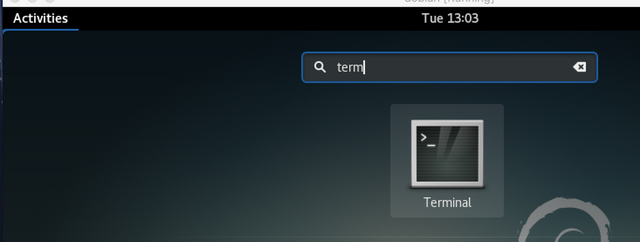
Enter “su -” followed by your chosen password
Then execute the following:
 apt-get install build-essential module-assistant sudo -y
 m-a prepare
 mount /media/cdrom
 sh /media/cdrom/autorun.sh
 reboot
Your vm will reboot once more.
Once more open the “Devices” menu of your VirtualBox application
Select “Shared Clipboard” and Bidirectional, this will enable you to copy and paste things in and out of your vm
You can also resize the window now on the fly for better access
Many examples need the sudo command which is not yet configured. Just run the following command to get this done:
echo "$USER ALL=(ALL:ALL) ALL" > /tmp/user ; su root sh -c "/bin/cat /tmp/user >> /etc/sudoers"
OK. We have finally set everything up that should allow you to use linux within your vm.
Posted on Utopian.io - Rewarding Open Source Contributors
@hoffmann, Upvote is the only thing I can support you.
Downvoting a post can decrease pending rewards and make it less visible. Common reasons:
Submit
that + the comment is at least money for the soul ;)
Downvoting a post can decrease pending rewards and make it less visible. Common reasons:
Submit
Congratulations @hoffmann! You have completed some achievement on Steemit and have been rewarded with new badge(s) :
Click on any badge to view your own Board of Honor on SteemitBoard.
For more information about SteemitBoard, click here
If you no longer want to receive notifications, reply to this comment with the word
STOPDownvoting a post can decrease pending rewards and make it less visible. Common reasons:
Submit
Your contribution cannot be approved because it is a duplicate. It is very similar to a contribution that was already accepted here
You can contact us on Discord.
[utopian-moderator]
Downvoting a post can decrease pending rewards and make it less visible. Common reasons:
Submit