Repository
Electron Github Address
https://github.com/electron/electron
AngularJs Github Address
https://github.com/angular/angular.js/
My Github Adress
This Project Github Address
https://github.com/pckurdu/Build-Application-Using-Firebase-With-Electronjs-Part-1
What Will I Learn?
- You will learn ElectronJs
- You will learn AngularJs and AngularJs-Routing
- You will learn create firebase project
- You will learn create firebase setting
- You will learn $routeProvider and config() method
- You will learn when() and otherwise() methods
- You will learn redirectTo
Requirements
- text editor (I used visual studio code)
- Basic javascript information
- Basic electron information
- Basic angularjs information
Difficulty
- Basic
Tutorial Contents
Hello to everyone,
In this tutorial we will develop electronjs application from scratch, the user can access the article list and add articles after the user login to our desktop application.
We will use Firebase-Firestore services and Firebase-Authentication for data insertion and listing operations.
You will also learn the Angularjs Routing at the end of the tutorial.
Let's start coding.
Create Electron Application
Let's create the package.json file so that the electron code can work.
In package.json
{
  "name": "electron-firebase",
  "version": "1.0.0",
  "description": "build application using firebase with electronjs",
  "main": "main.js",
  "scripts": {
    "test": "echo \"Error: no test specified\" && exit 1"
  },
  "keywords": [
    "electron"
  ],
  "author": "pckurdu",
  "license": "ISC"
}
So we set the main process for electronjs to main.js. In order to create a desktop application with electronjs, we need to write the necessary nodejs codes in main.js.
Let's create 800x600 window in mainjs.
In main.js
const {app, BrowserWindow,Menu,MenuItem} = require('electron')
const url = require('url')
const path = require('path')

let win

function createWindow() {
   win = new BrowserWindow({width: 800, height: 600})
   win.loadURL(url.format ({
      pathname: path.join(__dirname, 'index.html'),
      protocol: 'file:',
      slashes: true
   }))

   win.webContents.openDevTools()
}

app.on('ready', createWindow)
So when the application is opened the index.html page will open and the developer tool will open to help us.
We have created the minimal codes required for the desktop application using electronjs.
Let's create the index.html file and code it into the following code block.
In index.html
<!DOCTYPE html>
<html lang="en">
   <head>
      <meta charset ="UTF-8">
      <meta name="viewport" content="width=device-width, initial-scale=1.0">
      <meta http-equiv="X-UA-Compatible" content="ie=edge">
      <link href="https://stackpath.bootstrapcdn.com/bootstrap/4.2.1/css/bootstrap.min.css" rel="stylesheet"
      integrity="sha384-GJzZqFGwb1QTTN6wy59ffF1BuGJpLSa9DkKMp0DgiMDm4iYMj70gZWKYbI706tWS" crossorigin="anonymous">
      <script src="https://cdnjs.cloudflare.com/ajax/libs/angular.js/1.7.5/angular.min.js"></script>
      <script src="https://cdnjs.cloudflare.com/ajax/libs/angular.js/1.7.5/angular-route.min.js"></script>
      <script src="script.js"></script>
      <title>Firebase Application</title>
   </head>
<body>
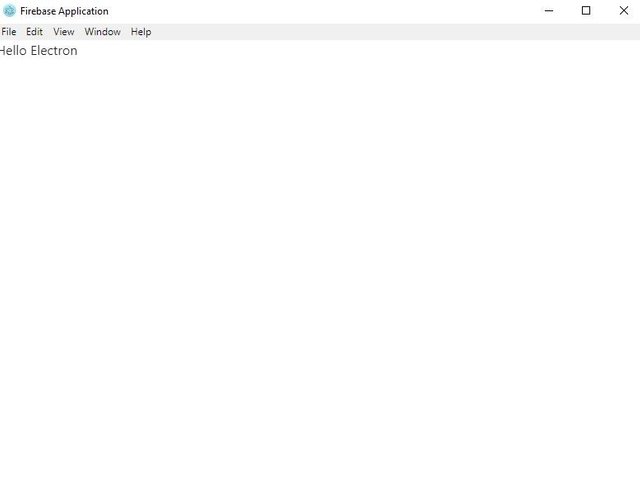
<p>Hello Electron</p>
</body>
I have installed Bootstrap cdn and angularjs and angularjs-routing cdn to design and encode the application in the above html page.
I also defined the script.js file, which will write routing codes.
We write electron . to run the application in command prompt.
Create Firebase Project
Let's open the firebase website and create a new project.
We will use firebase in authentication and firestore services.
Let's set the login method of firebase authentication to email / password.
After the project is created, the firebase generates the config codes for us to use in our applications.
Since we use electronjs, we will use these settings for the web.
Create Firebase Settings
In order to use firebase in our web applications, we need firebase config codes.
we need to define these codes in the script field and place them on their html pages.
I have placed the config codes for the firebase project I created below on the index.html page.
In index.html
<script src="https://www.gstatic.com/firebasejs/5.8.1/firebase-app.js"></script>
     <script src="https://www.gstatic.com/firebasejs/5.8.1/firebase-auth.js"></script>
     <script src="https://www.gstatic.com/firebasejs/5.8.1/firebase-firestore.js"></script>
    <script>
      // Initialize Firebase
      var config = {
        apiKey: "your_api_key",
        authDomain: "your_firebase_projectId.firebaseapp.com",
        databaseURL: "https:// your_firebase_projectId.firebaseio.com",
        projectId: " your_firebase_projectId ",
        storageBucket: " your_firebase_projectId.appspot.com",
        messagingSenderId: "your_ messagingSenderId"
      };
      firebase.initializeApp(config);

      const auth=firebase.auth();
      const db=firebase.firestore();

    </script>
We need firebase-app.js cdn for firebase app so we can initialize our config object.
We need firebase-auth.js cdn for authentication, thus we can produce objects for authication operations.
For example
const auth=firebase.auth();
In order to use cloud firestore methods in our application, we need firebase-firestore.js cdn. We need to create object from firestore for database operations.
Now our application is ready to use firebase methods.
Routing Settings
The config() method is set to perform the routing settings in angularjs.
Since we are performing the routing process with routing, we can set pages according to the url address of the page.
We need a $routeProvider object to routing. Provides the necessary infrastructure for routing operations with the help of the when() method in the routeProvider object.
The otherwise() method in the routeProvider allows us to set the page to be redirected by default.
Let's do a forwarding process for a dashboard page and a login page.
var app=angular.module('myApp',['ngRoute']);

app.config(function($routeProvider){
    $routeProvider
        .when('/',{
            templateUrl:'login.html',
            controller:'loginCtrl'
        })
        .when('/dashboard',{
            templateUrl:'dashboard.html',
            controller:'dashboardCtrl'
        })
        .otherwise({
            redirectTo:'/'
        })
});
RedirectTo feature '/' and '/dashboard' except the routing we want to direct the routing.
Proof of Work Done
https://github.com/pckurdu/Build-Application-Using-Firebase-With-Electronjs-Part-1

Thank you for your contribution @pckurdu.
After analyzing your tutorial we suggest the following points:
We suggest you enter comments in the sections of your code. Comments are very important to help less experienced readers better understand what they are developing.
Another suggestion is your tutorial to have some images of the results of what you are developing. The reader would have better precept than he is building.
Thank you for your work in developing this tutorial.
Looking forward to your upcoming tutorials.
Your contribution has been evaluated according to Utopian policies and guidelines, as well as a predefined set of questions pertaining to the category.
To view those questions and the relevant answers related to your post, click here.
Need help? Chat with us on Discord.
[utopian-moderator]
Downvoting a post can decrease pending rewards and make it less visible. Common reasons:
Submit
Thank you for your review, @portugalcoin! Keep up the good work!
Downvoting a post can decrease pending rewards and make it less visible. Common reasons:
Submit
its great to see more tutorials being posted on steem. Tweeted for extra visibility
Downvoting a post can decrease pending rewards and make it less visible. Common reasons:
Submit
Hi @pckurdu!
Your post was upvoted by @steem-ua, new Steem dApp, using UserAuthority for algorithmic post curation!
Your post is eligible for our upvote, thanks to our collaboration with @utopian-io!
Feel free to join our @steem-ua Discord server
Downvoting a post can decrease pending rewards and make it less visible. Common reasons:
Submit
Hey, @pckurdu!
Thanks for contributing on Utopian.
We’re already looking forward to your next contribution!
Get higher incentives and support Utopian.io!
Simply set @utopian.pay as a 5% (or higher) payout beneficiary on your contribution post (via SteemPlus or Steeditor).
Want to chat? Join us on Discord https://discord.gg/h52nFrV.
Vote for Utopian Witness!
Downvoting a post can decrease pending rewards and make it less visible. Common reasons:
Submit