 Tutorial

What Will I Learn?
I ended the last Tutorial stating that the next step is to add colour to the game!
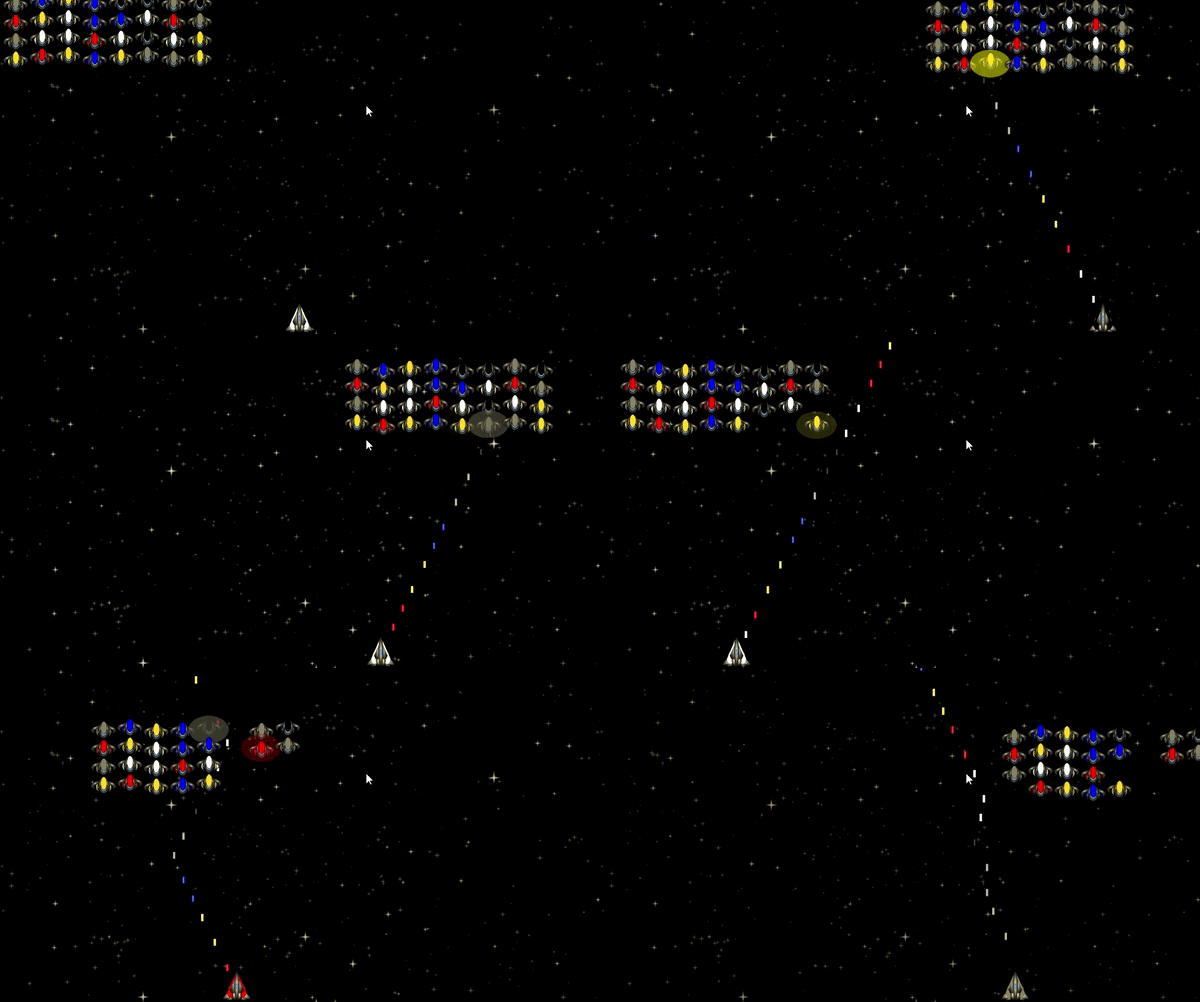
If you've tried the "Space Invaders" clone on itch.io, you will already be aware of what I mean by this; i.e. I've implemented a touch of colour!
The invaders begin with random colours and the player may select a ship colour, by pressing up/down. If an Invader is struck by a bullet of a matching colour, it is destroyed, otherwise, it raises its shield; thereby protecting it.
I'm going to show you how to add these features!
Assumptions
- You have installed Godot Engine v3.0
- You are familiar with GDScipt
- You are familiar with the previous tutorials
You will
- Add Screen Wrap Node to the player ship
- Change the screen to HD resolution
- Add multi-coloured Invaders
- Add colour to the Player's Ship
- Add colour to the lasers
- Add shields to the Invaders
Requirements
You must have installed Godot Engine v3.0.
All the code from this tutorial is provided in a GitHub repository. I'll explain more about this, towards the end of the tutorial. You may want to download this
Add Screen Wrap Node to the player ship
I've written a competent level article explaining how to build and apply an Asteroid style screen wrap to any Node2D class.
We shall take the code from its project and apply it to the Player Scene.
You will need to access the GitHub source files
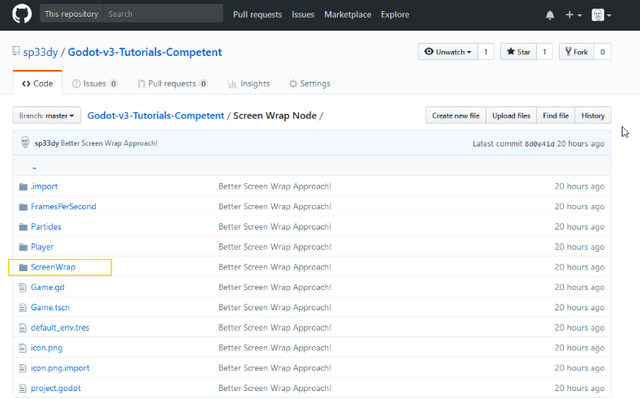
You require a copy of the ScreenWrap folder, along with its content; two files.
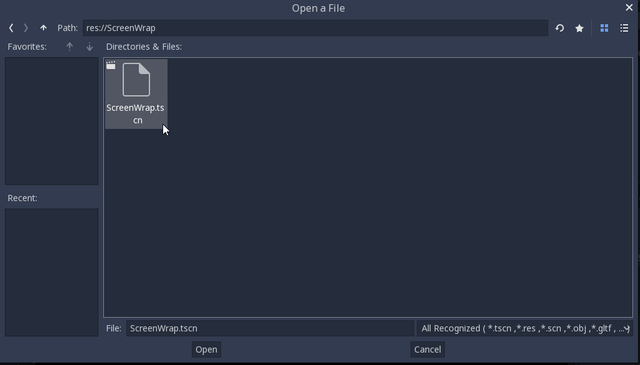
With this copied into place, open up the Player Scene and add a ScreenWrap instance:
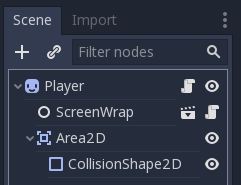
The following structure is formed for the Player Ship (I've moved the ScreenWrap instance up, but there is no necessity to do so; as long as it remains a child of the Sprite)
Try running the game now, does it work?
... the answer is no. Do you know why?
When we previously added the Player script, we deliberately restricted the player to the edges, because the ship was sailing off the edges.
Given we now have a wrap solution, we should remove the clamps.
Open the Player Scene and edit its script:
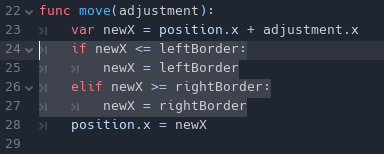
Remove the four highlighted rows 24 to 27, pinning the Ship to the borders.
Try rerunning!
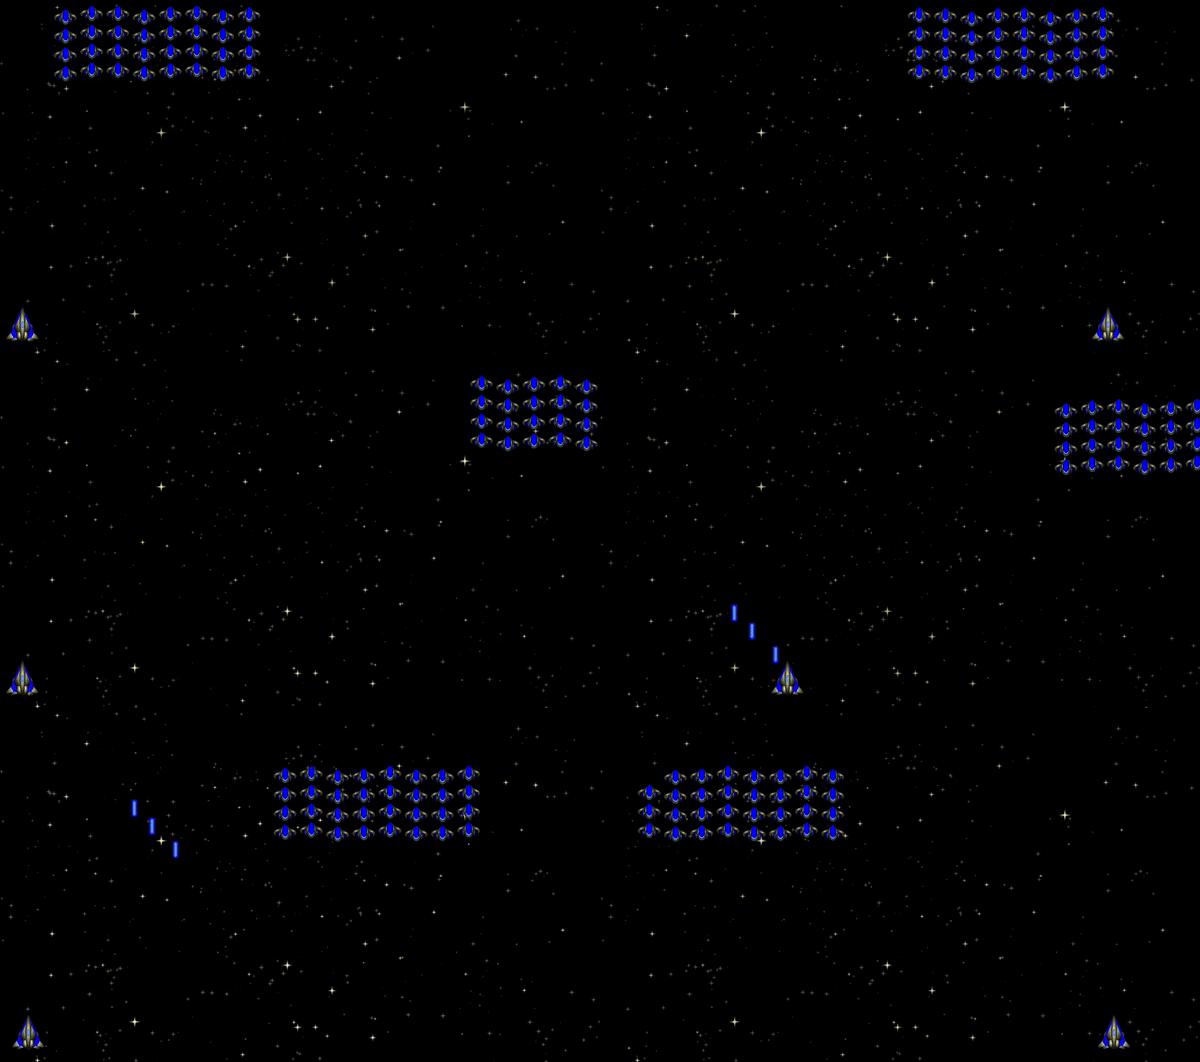
This demonstrates how easy it is to add the Wrap node into any project.
Let's tidy up the code a little more before we move on.
The Move function can be compressed to this:
func move(adjustment):
    position.x = position.x + adjustment.x
Given we aren't clamping to the borders, there is no need to maintain the additional variable
In the ready function, there is no need to calculate the borders, therefore we can delete the following highlighted rows

Rows 14, 15 & 16
You can also delete the two Class variables above the function; rows 8 & 9.
These small little improvements shrink and cleanse the script, making it much easier to understand.
Change the screen to HD resolution
Although the following steps weren't absolutely necessary for this tutorial. I felt an urge to remove my concern and issue with the game resolution.
I dislike the default 1024 x 600 resolution
Further to this, it doesn't lend itself to resizing for different devices; thus, fixing this now, will save pain down the road.
Please open up the Project Settings and set the screen to 1920 x 1080, the standard resolution for HD (High Definition).
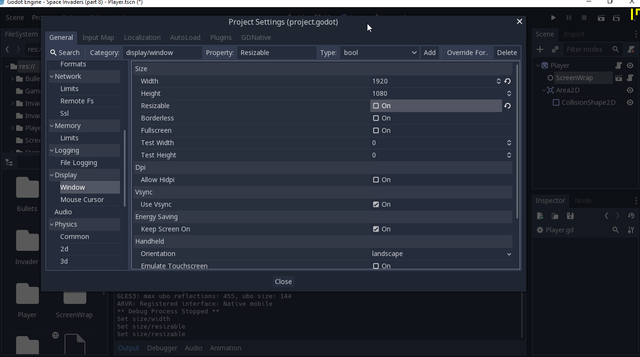
If you run the game again, you'll notice the screen becomes extremely wide and everything is misplaced.
Resolutions will be different on devices, i.e. an iPhone will be different to an Android, an iPad will be different to another Tablet, even a monitor will be sold with different capabilities.
What we need to do is build this 'Space Invaders' clone, with the capability of adapting to any device.
...but how are we going to do that?
The decision for this game is to build it to operate at a High Definition resolution and then scale up/down as required.
Godot Engine supports this for us, through its Project Settings.
Correct the stars
Since we changed to HD resolution, the star background is smaller than the screen size, we need to stretch it again:
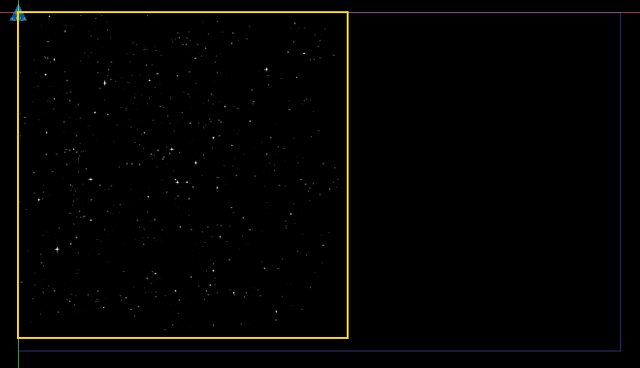
We will replace this fixed image for dynamic particles soon, but for now, open the Stars Scene. Click on the Sprite and change the Node Inspector property Transform/Scale to 2 x 2:
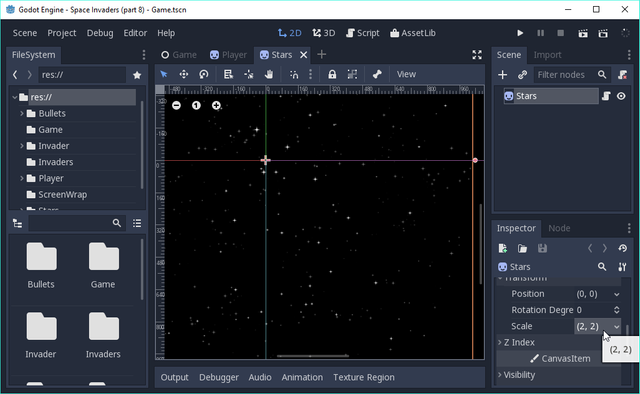
This will double the size of the image. When you save and return back to the Game Scene, it shall be filled with stars again!
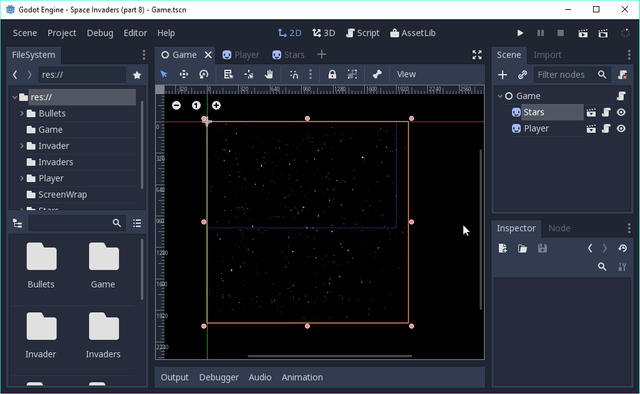
If you don't use 2 x 2, but instead use say 2 x 1, the Stars will fit, but will be squashed in aspect, i.e. you double its width but would retain its height (like one of those magic mirrors at the funfair)
When you run the game now, a massive window will open again, with the Stars present. However, it is all too large (unless you have a 4k monitor; lucky whats-it!).
Let's use one of the really neat features of Godot-Engine. It has the capability to correct the size by shrinking or stretching as required!
Scroll to the bottom of the Project Settings of the Window
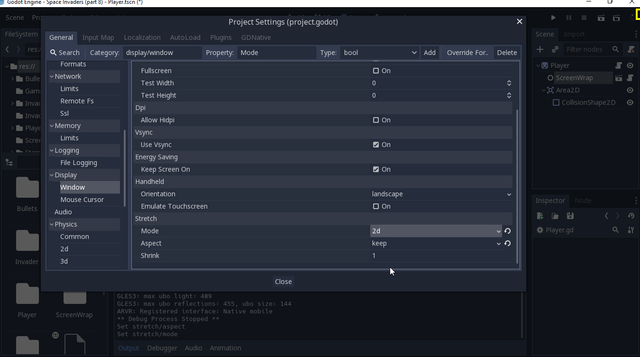
- Change the Stretch/Mode property to 2D
- Change the Aspect property to Keep (which is keep the aspect ratio based on both axes)
Scroll back up to the Size properties and enter 960 for Test Width and 540 for Test Height.
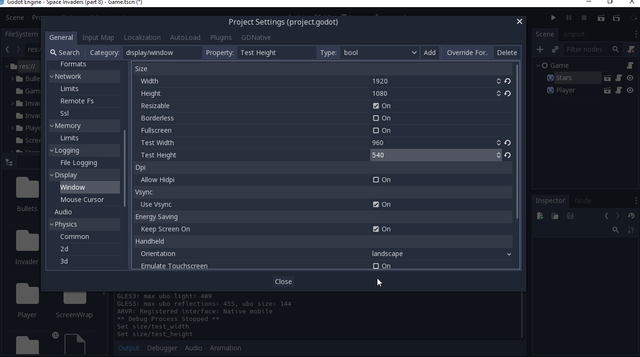
If you have the luxury (I don't) of a monitor with greater than HD resolution, I recommend you don't set this setting! You can develop in full HD mode; oh, how I lust for a 4K monitor.
Assuming you don't have a tiny monitor when you rerun, normality will return!
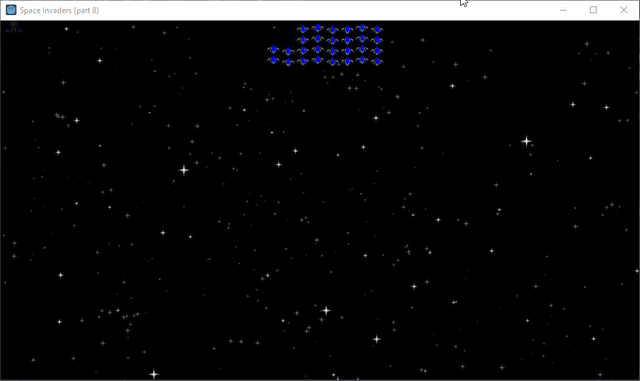
A sensibly sized window will display! In effect, we've increased our resolution to HD and then instructed Godot Engine to scale it to half HD size; this will be easily displayable by the monitor, although we've LOST half the quality of the graphics. For devices that do have the resolution, they benefit from greater clarity!
If you play with the test sizes, you'll see how Godot Engine deals with different resolutions. It will automatically scale and add black bars where it needs to, in order to preserve the screen aspect.
Aspect is measured and discussed as a ratio. I.E. take 1920 and divide by 1080, you get an aspect ration of 1.77 (recurring).
To fill the screen, the pixels cannot be square, or you would have a TV with an aspect ratio of 1.
Instead, the pixels will be wider than they are high!
I.E. for every vertical pixel it will be wider than a single pixel, in fact, 1.77-pixel size for HD Aspect! Therefore, if you draw a square of 10 pixels high, it will measure ~17.777 pixels wide!
When a game is loaded by a non-HD device, we want it to maintain these pixels. I.E. we've configured Godot Engine to keep to Both Aspects, but there are other options, i.e. maintain only horizontal or vertical, or ignore aspect etc! Have a play with the different settings.
Once the game is ready, we will enable FULL SCREEN.
The full resolution of the device would then influence how the game initialises. With our configuration, it would respect our Aspect Ratio, ensuring the design of our game remains good on any device, Albiet with potential black bars to pad it out!
Fix Player ship
With the new resolution, you will notice our Player now starts in the wrong place, let's move it by implementing a 'start position' in its script.
Here are the new lines of the script (top half of entire script):
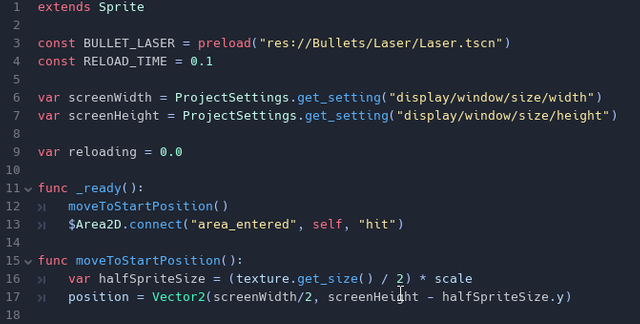
var screenWidth = ProjectSettings.get_setting("display/window/size/width")
var screenHeight = ProjectSettings.get_setting("display/window/size/height")
I've added the fetch for the screen height (line 7)
func _ready():
    moveToStartPosition()
    $Area2D.connect("area_entered", self, "hit")
I've added the call to the moveToStartPosition function to the ready function (line 12)
func moveToStartPosition():
    var halfSpriteSize = (texture.get_size() / 2) * scale
    position = Vector2(screenWidth/2, screenHeight - halfSpriteSize.y)
The new function calculates the sprite size, halves it and then scales the resultv(line 16)
The ship is then moved to the centre on the horizontal and a half a sprite height up from the bottom on the vertical axis (line 17)
However, if you run this, something very peculiar occurs!
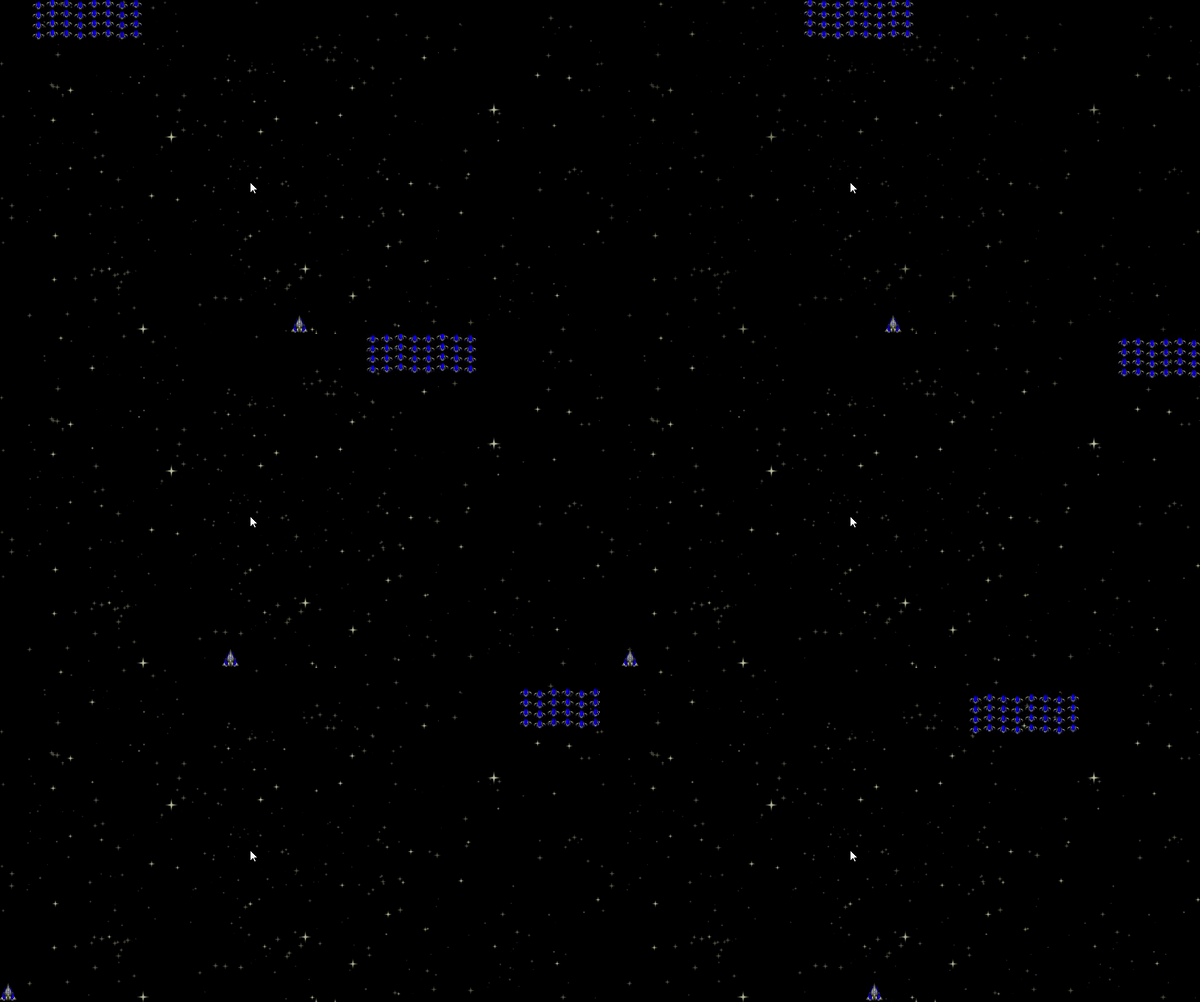
The Ship is restricted to the left and middle of the screen wrapping!
I've inadvertently discovered a BUG in the generic ScreenWrap Node!!!!!!
Given we are now using the Screen Stretching Aspect of Godot Engine, the generic code uses the get_viewport function to obtain the screen size. However, the viewport is the actual size of our Test Window setting or Device, NOT our intended Screen Size setting of the project Setting!
A fix is required in the generic Screen Wrap Node! Open the ScreenWrap script and change the initWrapArea function to this:
# Initialise the wrap area to screen size if not set
func initWrapArea():
    if wrapArea == null:
        var screenWidth = ProjectSettings.get_setting("display/window/size/width")
        var screenHeight = ProjectSettings.get_setting("display/window/size/height")
        wrapArea = Rect2(Vector2(), Vector2(screenWidth, screenHeight))
I've removed the get_viewport().size in the wrapArea assignment and replaced it with a new Vector2 create using the screen Width and Height, obtained from the ProjectSettings
If you run the game again, all is well in the world!
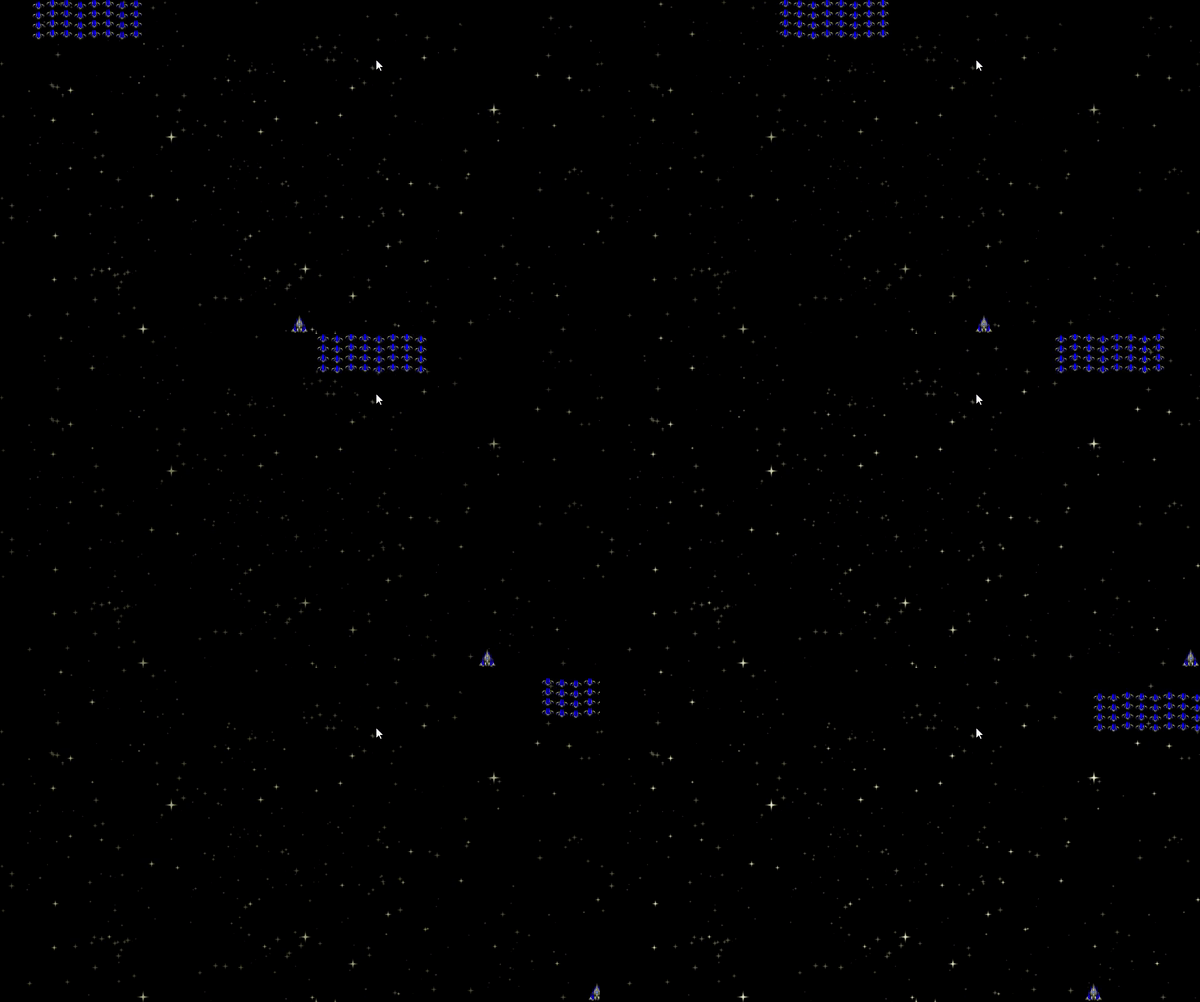
The automatic aspect is applied for us, but our Ship moves to the original dimensions (of HD)! This neatly illustrates my point! We can design the game at HD quality and Godot will automatically scale it to different resolutions, allowing us to forget about individual devices. This technique doesn't work for all games, but it does for the majority. If you need absoutely EVERY pixel of a specific game at a specific Aspect resolution, you would build each time individually.
IF I'd not thought of dealing with the device sizes today, I would have discovered the problem of my generic wrap node a long way down the development path. For which it might have been a LOT harder to rectify. So this is actually a good catch! Although, I hate making obvious errors like this.
Resize the Ship
Let's resize the ship to something that will look reasonable onscreen, safe in the knowledge it will look right when scaled to all devices.
I like the Ship scale set to (0.8, 0.8):
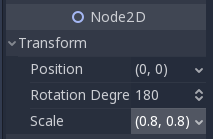
Feel free to experiment and set what you like!
Resizing works because we've included the scale value in our calculations. It is important to remember that Scale is applied to all textures. When I first learnt Godot, this and rotation, kept tripping me up!
Resize the Invaders
As with the Ship, let's turn our attention to the Invaders!
The current Invader image is relatively small, therefore I like the (1, 1) scale; but we'll revisit this when we add other types of Invader.
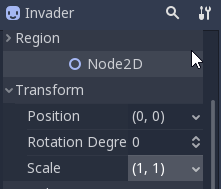
On running the game, I'm happier because it looks much better. A small tweak to the scale of the laser bullet (0.8, 0.8) completes the job!
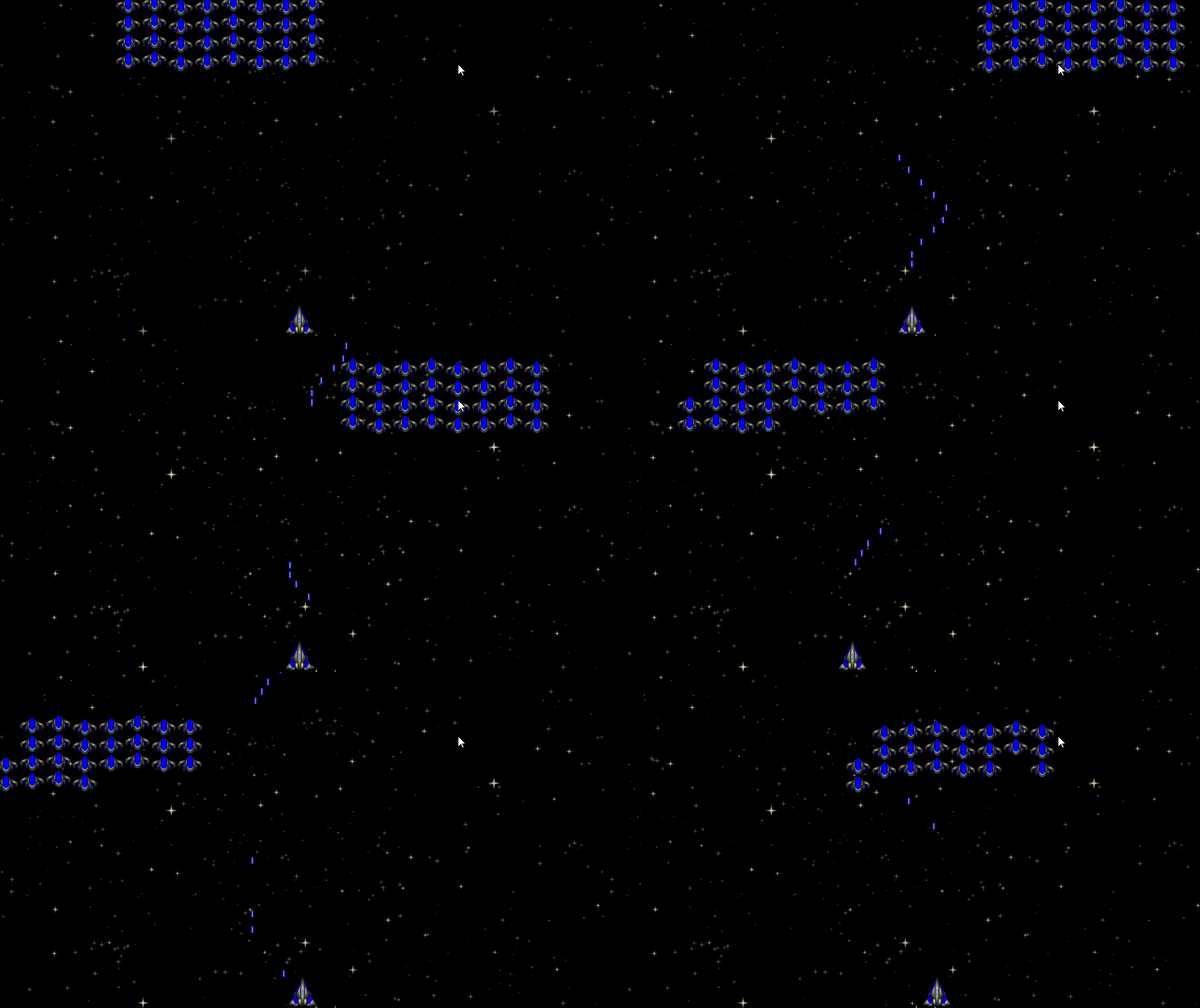
Looking at the result, I will increase the velocity of the bullets shortly; see if you can figure that out for yourself?!?!
Add multi-coloured Invaders
Finally, we join the mission at hand. Let's introduce coloured Invaders!
Making them different colours is a trivial task of amending the Invader Scene script.
First, we add in a constant variable that will preload each individual Invader image:
const INVADER_TYPES = [
    preload("res://Invader/images/spaceship-white-03.png"),
    preload("res://Invader/images/spaceship-red-03.png"),
    preload("res://Invader/images/spaceship-yellow-03.png"),
    preload("res://Invader/images/spaceship-blue-03.png"),
    preload("res://Invader/images/spaceship-grey-03.png"),
    preload("res://Invader/images/spaceship-black-03.png")
]
The preload does exactly that. It instructs Godot to load the image into its cache, ready for use by the script.
Given we have an array, we can pick an image at random, by referencing the array[position]! Thus, we can assign one of these to the Sprite's texture property and the correct Sprite with Colour will show.
Next, we'll add a property to Invader so that the colourType can be set.
export (int, "WHITE", "RED", "YELLOW", "BLUE", "GREY", "BLACK") var colourType setget setColourType
This variable is exposed as a property for the Node Inspector, because individual Invaders may be added via the 2D view. ... but I also wanted to show the possibilities that export provides! As you can see, I've listed each colour as a String, but when selected in the Inspector, an integer is returned, representing the position; i.e. 0 is White,1 is Red, and so forth.
func setColourType(newColourType):
    if newColourType != null:
        colourType = newColourType
        texture = INVADER_TYPES[colourType]
A setColourType function is required. This is called by either the setget condition, when the colourType is set by the tool or by other external classes.
It first determines if a new colour type (integer) has been provided, ignoring it if not; this is important because on an initialise, a null value can be received.
Given a value is present, set the local variable (because the setget doesn't do this automatically) and then set the Sprite's texture to the colour image found in the constant array.
func setSize():
    size = texture.get_size() * get_scale()
The size was originally calculated in the init function, but I've lifted it into its own separate function for clarity and reuse
func initType():
    if colourType == null:
        var pick = randi() % INVADER_TYPES.size()
        setColourType(pick)
A new initType function is added and called by the init function (below)
If the initialise stage is triggered and the colourType remains null, we will randomly pick a colour instead. Therefore the random integer function is called with the number of images in the array. This value is then sent to the setColourType function, which sets the texture!
func _init():
    initType()
    setSize()
The new initialise function ensures a type has been set before the size function establishes the Sprites size; if it isn't, there is no loaded texture and the initialise can't happen (i.e. there is nothing loaded to gauge a size from)
Running the game now results in what we expected:
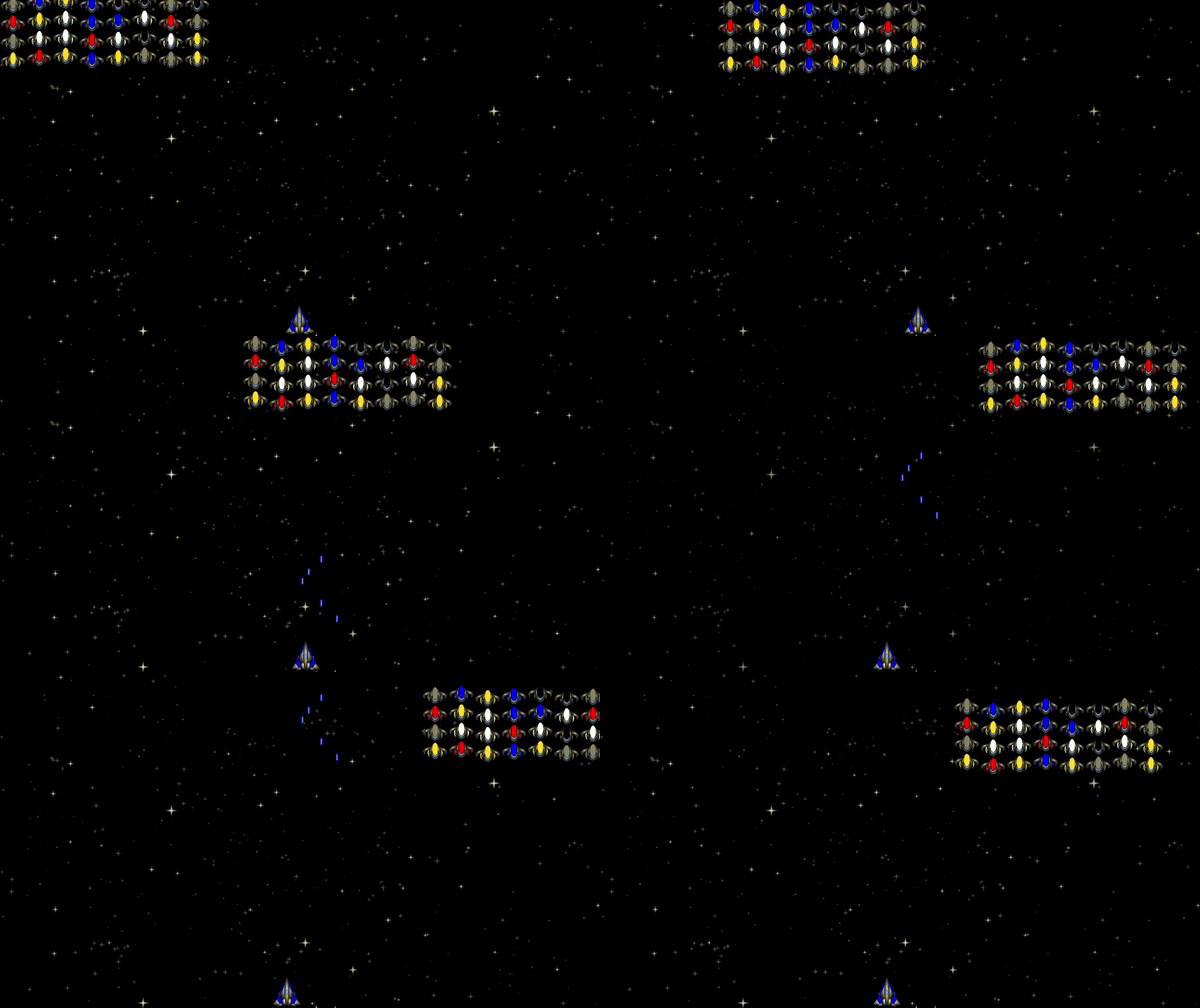
See if you can add colour to the Player ship; hint, it is very similar, but you need to think about the user control!
Add colour to Player ship
Adding colour to the ship is a similar process to the Invader. Add the constants and colourType, ensuring you set the correct image paths for the Player ship!
const PLAYER_TYPES = [
    preload("res://Player/images/spaceship-white-07.png"),
    preload("res://Player/images/spaceship-red-07.png"),
    preload("res://Player/images/spaceship-yellow-07.png"),
    preload("res://Player/images/spaceship-blue-07.png"),
    preload("res://Player/images/spaceship-grey-07.png"),
    preload("res://Player/images/spaceship-black-07.png")
]

export (int, "WHITE", "RED", "YELLOW", "BLUE", "GREY", "BLACK") var colourType setget setColourType
As stated, the preload is for the Player image, rather than Invader, but it looks similar
We also keep the colourType variable
func setColourType(newColourType):
    if newColourType != null:
        colourType = newColourType
        texture = PLAYER_TYPES[colourType]

func _init():
    setColourType(0)
We reuse the same setColourType function and ensure it is called by the initialise function; hardwiring it to zero (White)
If you run the game, you'll note the Player now starts in white!
...but how does the player change colour? We want them to use the up/down cursor key, so we need to adjust the Game script and add a function to the Player script to modify the colour.
Let's start by adding a function to the Player script:
func adjustColour(adjust):
    var newColourType = colourType + adjust
    if newColourType < 0:
        newColourType += PLAYER_TYPES.size()
    elif newColourType >= PLAYER_TYPES.size():
        newColourType -= PLAYER_TYPES.size()
    setColourType(newColourType)
This function accepts an adjustment value in colour, which is added to the existing value
It then wraps the colour round if it reaches the end
In the Game script, we add the following to the process function:
    if Input.is_key_pressed(KEY_UP):
        $Player.adjustColour(-1)
    if Input.is_key_pressed(KEY_DOWN):
        $Player.adjustColour(1)
This instructs the Player to change colour when either UP or DOWN cursor key is pressed
Try running it!
... it works, but!?!
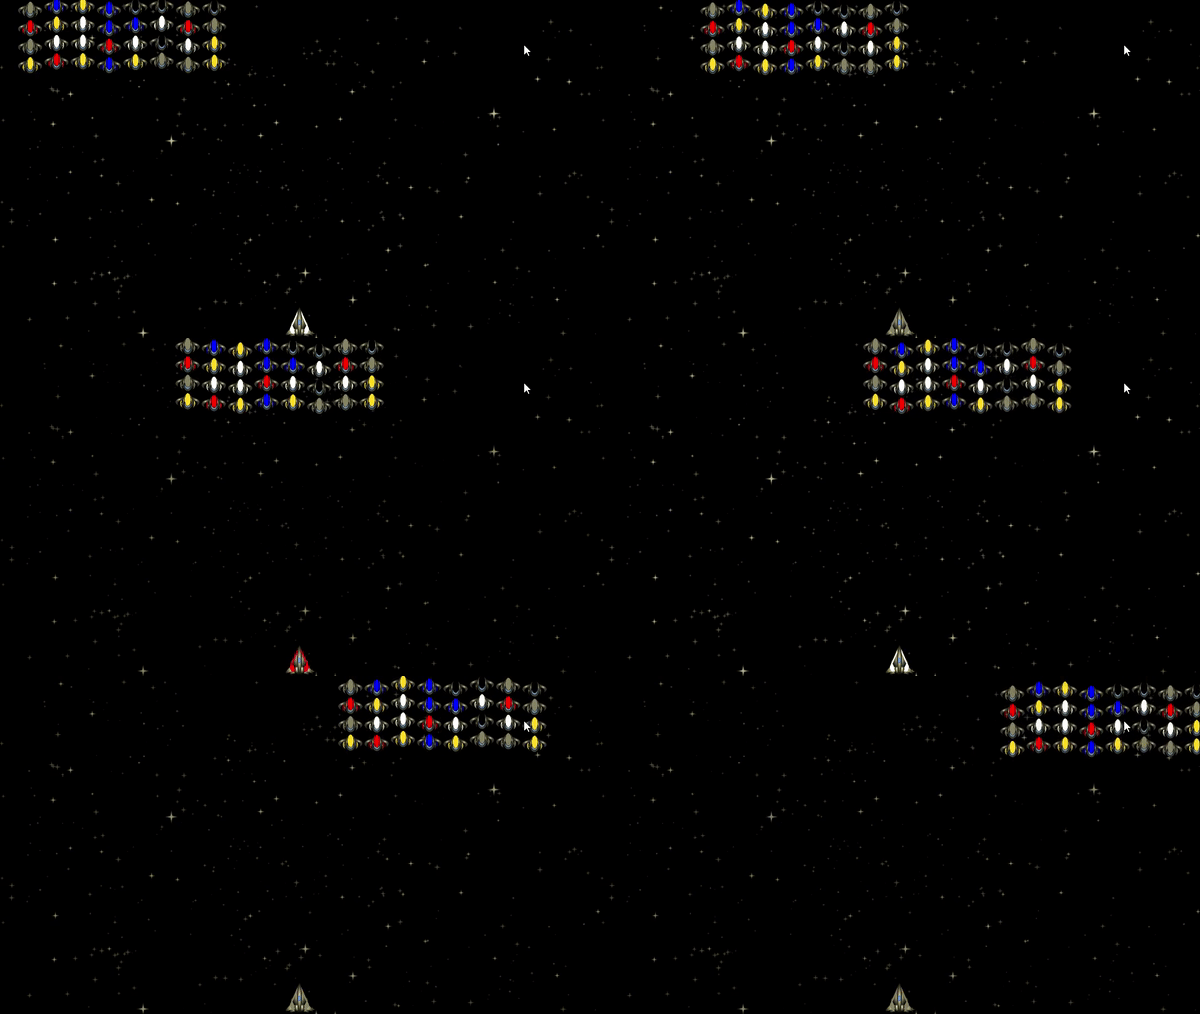
... Yes, we need to add a delay to the colour change. The Player script should only allow the change IF it is ready. So we need to introduce a counting variable , a decrement in the process function and a condition in the adjust function:
const CHANGE_COLOUR_TIME = 0.2
var changingColour = 0.0
Declared is the constant time between allowable colour changes and a counter variable of how long there is left before a colour change can occur
func _process(delta):
    reloading -= delta
    changingColour -= delta
In the process function, we now decrement delta from the changingColour counter
func adjustColour(adjust):
    if changingColour < 0.0:
        var newColourType = colourType + adjust
        if newColourType < 0:
            newColourType += PLAYER_TYPES.size()
        elif newColourType >= PLAYER_TYPES.size():
            newColourType -= PLAYER_TYPES.size()
        setColourType(newColourType)
The condition is added to ensure the colour change can only occur if the counter has run out
func setColourType(newColourType):
    if newColourType != null:
        colourType = newColourType
        texture = PLAYER_TYPES[colourType]
        changingColour = CHANGE_COLOUR_TIME
Finally, the colour change function resets the count down, to prevent another change in the period defined
Running it is now reflects expected behaviour:
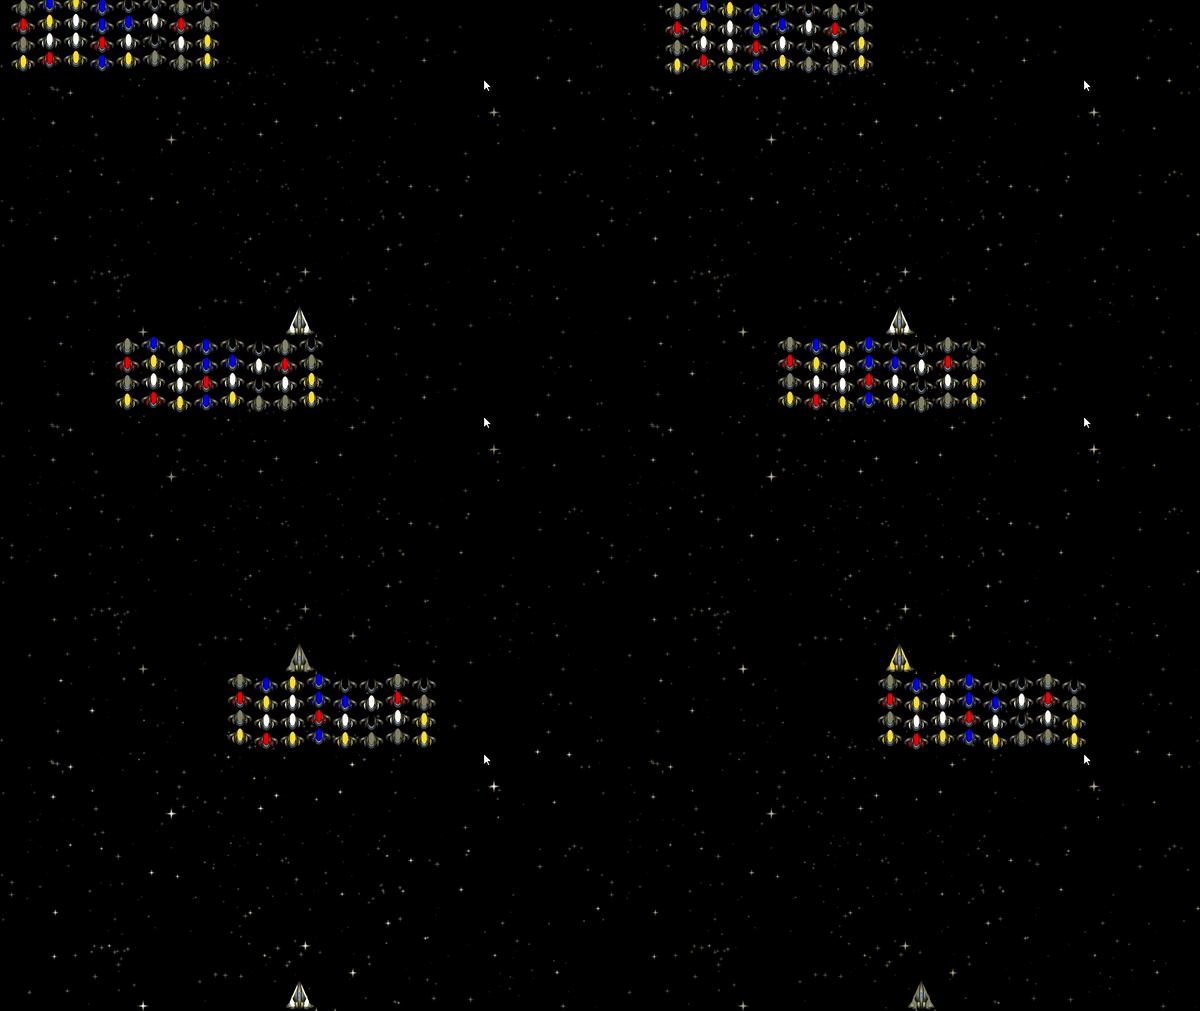
Add colour to lasers
The laser colour will depend on the Ship's colour, hence we either pass the colour of the ship to the laser or get the laser to check the parent. Given the ship 'could' change colour whilst a bullet is issued, it is best in this scenario to pass the colour when firing the bullet.
The changes to the laser script resemble those applied to the Ship.
const VELOCITY = Vector2(0, -600)

const LASER_TYPES = [
    preload("res://Bullets/Laser/images/laser-white-02.png"),
    preload("res://Bullets/Laser/images/laser-red-02.png"),
    preload("res://Bullets/Laser/images/laser-yellow-02.png"),
    preload("res://Bullets/Laser/images/laser-blue-02.png"),
    preload("res://Bullets/Laser/images/laser-grey-02.png"),
    preload("res://Bullets/Laser/images/laser-black-02.png")
]

export (int, "WHITE", "RED", "YELLOW", "BLUE", "GREY", "BLACK") var colourType setget setColourType

func setColourType(newColourType):
    if newColourType != null:
        colourType = newColourType
        texture = LASER_TYPES[colourType]
I changed the velocity whilst I was in this script, doubling its speed
The constants for the laser colour, along with the colourType and set function were added
We then modify the Player Scene script, because we shall set the Laser colour from it:
func fire():
    if reloading <= 0.0:
        var bullet = BULLET_LASER.instance()
        _bullet.colourType = colourType_
        bullet.global_position = global_position
        get_parent().add_child(bullet)
        reloading = RELOAD_TIME
In the fire method, we set the Bullet colourType to the colourType value of the Ship
Try running it!
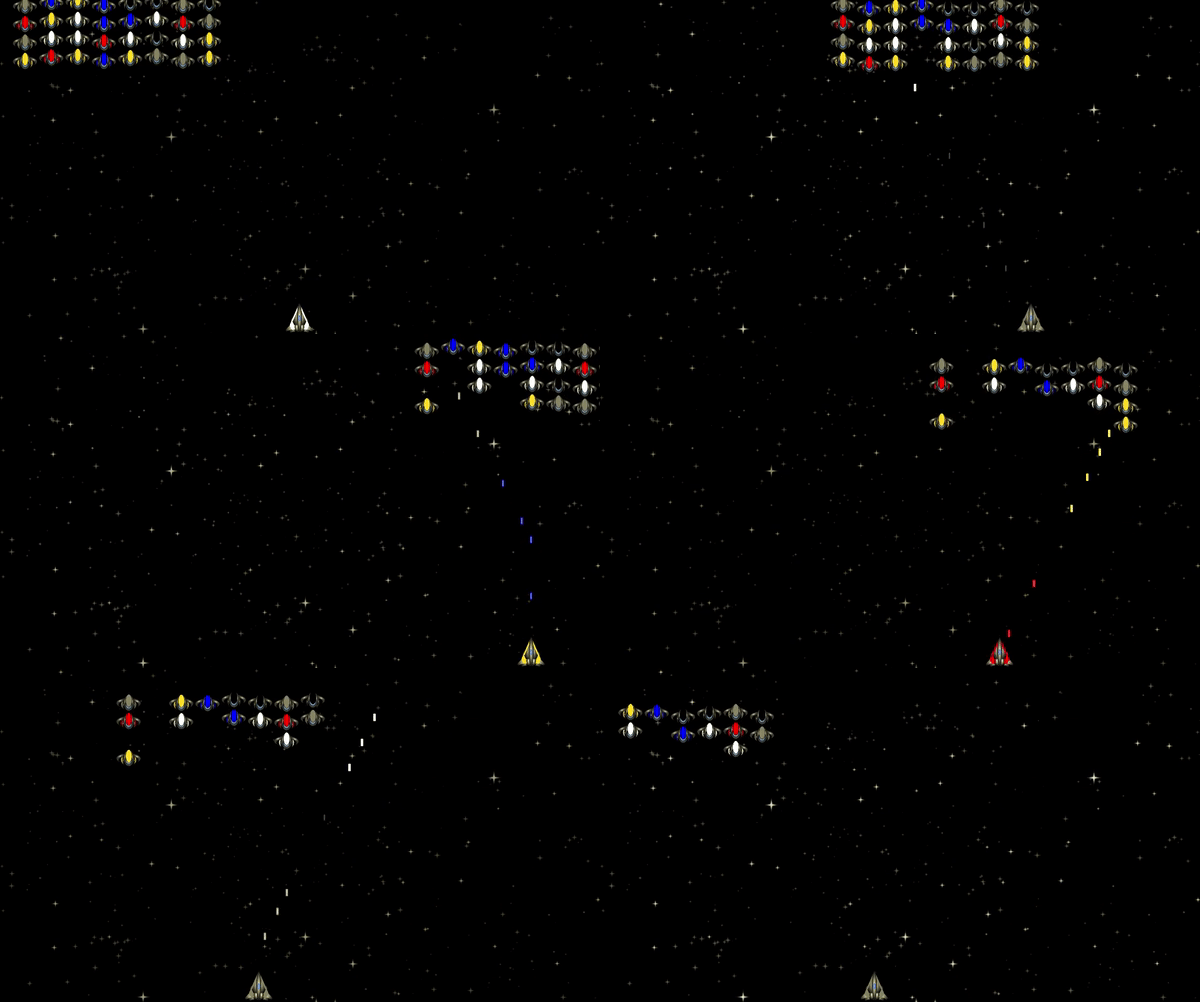
... all is good!
Can you guess how we implement the shield of the Invaders? Hint: think about the colourType variables, they will help you!
Add shields to the Invaders
This, for me, is the exciting bit!
The aim of game development is to make it unique and stand out. I don't want to build a clone of 'Space Invaders', I want to build my own twist on it. Something that people will pick-up and want to play!
Using colour is one differentiator, but I have other thoughts to explore too!
I asked in the last section if you could think of how to implement the shields of the Invaders. This is really quite simple!
When a bullet is detected by the Invader, the Area2D sends a signal to the Invader hit function. The call to the hit function includes the object that struck it, i.e. the Laser!
All we need to do is check the colourType against the Invader, if it matches, the Invader is destroyed. Alternatively, the shield shown and an automatic reduction of the shield alpha colour channel can be performed at each frame.
In the Invader script, the hit function is modified:
func hit(object):
    if object.name == 'LaserArea':
        if object.get_parent().colourType == colourType:
            queue_free()
The Invader is only removed if the object striking it was a LaserArea and that its parent (Laser Scene Script) was the same colour
Try running the game!
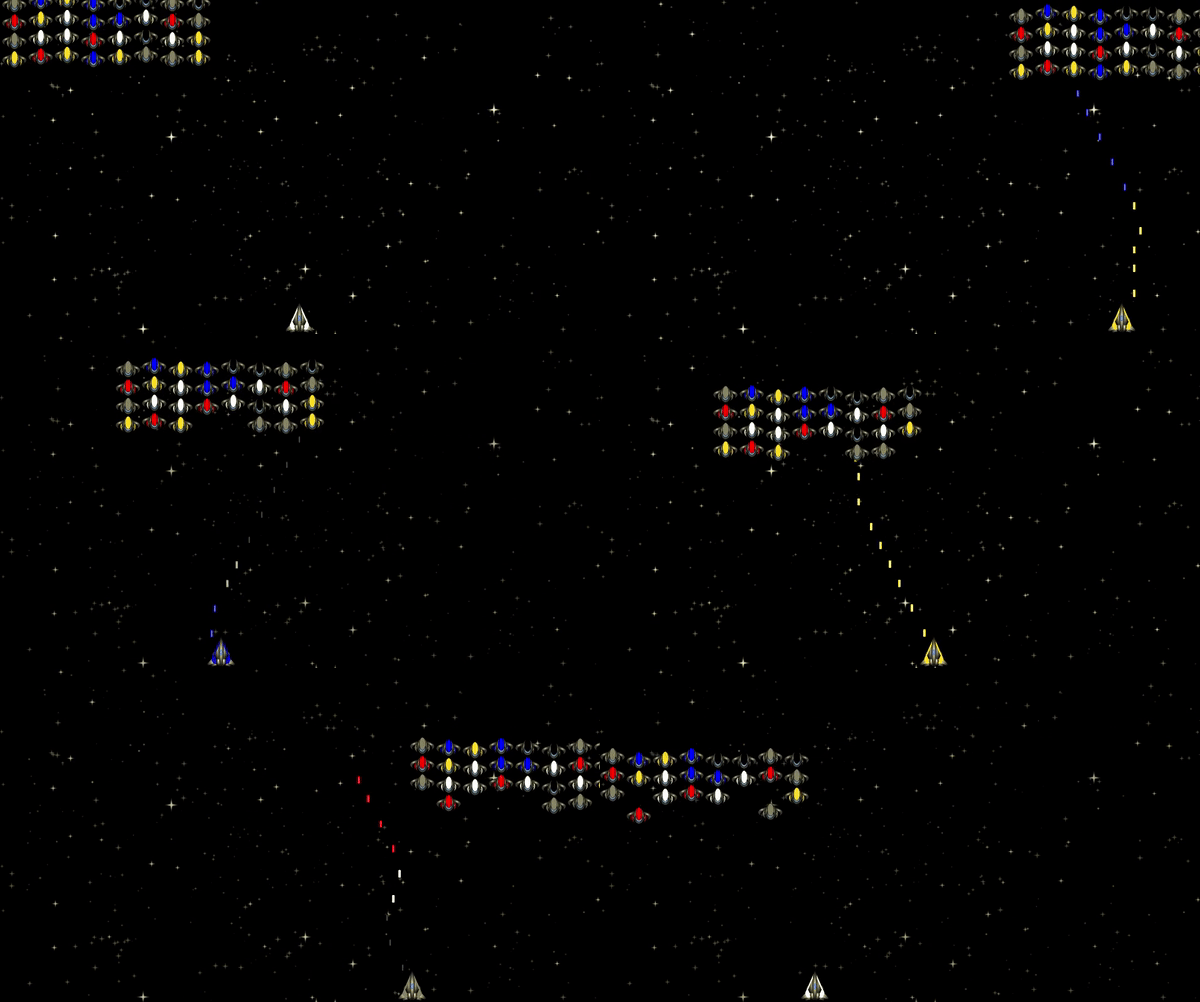
... half of the design is now implemented, but what about the other?
The Invaders can now only be killed by the correct bullet colour.
However, they need shields! The shield is purely a cosmetic special effect, to reflect back to the player the invicibility of the Alien!
A new Shield Scene was created, utilising new images with elipse shapes that have a slight opacity.
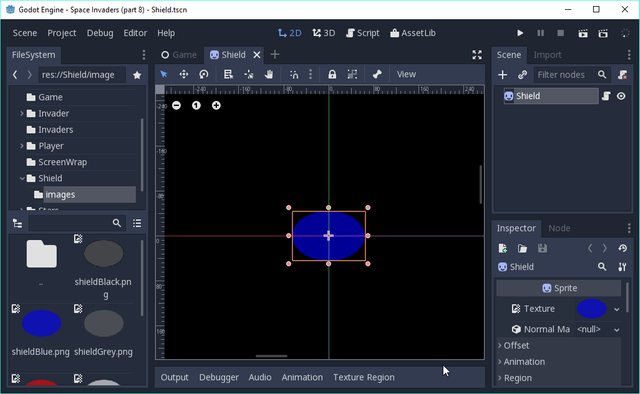
The Shield script was coded much like the other Nodes:
extends Sprite

const SHIELD_TYPE = [
    preload("res://Shield/images/shieldWhite.png"),
    preload("res://Shield/images/shieldRed.png"),
    preload("res://Shield/images/shieldYellow.png"),
    preload("res://Shield/images/shieldBlue.png"),
    preload("res://Shield/images/shieldGrey.png"),
    preload("res://Shield/images/shieldBlack.png")
]

var colourType setget setColourType

func setColourType(newColourType):
    colourType = newColourType

func _ready():
    if colourType != null:
        texture = SHIELD_TYPE[colourType ]

func _process(delta):
    modulate.a -= 1.0 * delta
The script displays the correct shield image and colour
It automatically reduces the opacity levels until it vanishes
The Invader script is modified to add a shield when it is ready:
const SHIELD = preload("res://Shield/Shield.tscn")
A constant variable is initialised for the Shield Scene
func addShield():
    var shield = SHIELD.instance()
    shield.colourType = colourType
    shield.modulate.a = 0.0
    add_child(shield)
A new addShield function has been added to instance a new Shield Node, setting it to the colour of the Invader and make the shield invisible. Finally it is added as a child to the Invader parent
The final amendment is extending the Invader hit function:
func hit(object):
    if object.name == 'LaserArea':
    if object.get_parent().colourType == colourType:
            queue_free()
        else:
            $Shield.modulate.a = 0.9
The additional else condition has been set for when the Bullet colour does not match the Invader.
In that situation, the shield's alpha channel is increased, thus revealing it onscreen, ready for its own process function to drain it again; therefore on screen, we see a flash of the shield!
Try running it again:

Success! The game delivers as expected (for now).
Finally
This tutorial took so much more time to write than the others! It was a simple solution for me to develop, but has been far more involved in describing. Maybe I've dropped into too low level, but my intention was to show how straight forward the implementation is! It's not complex in any shape or form, yet, the result looks good (well, in my opinion)!
My next intention is divided! I'm torn between showing 'formations' of Invaders swooping in, OR, getting the game life cycle running, i.e. a Splash Screen, Game and End. There is a need at some stage to create a 'game' and have the context between states. I'll ponder over this for now.
Don't forget to check out the game on itch.io. I'm publishing the game in advance of tutorials, so it is worth you checking it out periodically! You'll be able to guess what is coming up in my posts!
Please do comment and ask questions! I'm more than happy to interact with you.
Sample Project
I hope you've read through this Tutorial, as it will provide you with the hands-on skills that you simply can't learn from downloading the sample set of code.
However, for those wanting the code, please download from GitHub.
You should then Import the "Space Invaders (part 8)" folder into Godot Engine.
Other Tutorials
Beginners
Competent
Posted on Utopian.io - Rewarding Open Source Contributors
Thank you for the contribution. It has been approved.
You can contact us on Discord.
[utopian-moderator]
Downvoting a post can decrease pending rewards and make it less visible. Common reasons:
Submit
Hey @roj, I just gave you a tip for your hard work on moderation. Upvote this comment to support the utopian moderators and increase your future rewards!
Downvoting a post can decrease pending rewards and make it less visible. Common reasons:
Submit
Hey @sp33dy I am @utopian-io. I have just upvoted you!
Achievements
Community-Driven Witness!
I am the first and only Steem Community-Driven Witness. Participate on Discord. Lets GROW TOGETHER!
Up-vote this comment to grow my power and help Open Source contributions like this one. Want to chat? Join me on Discord https://discord.gg/Pc8HG9x
Downvoting a post can decrease pending rewards and make it less visible. Common reasons:
Submit