About Weebly
Weebly is a web-hosting service featuring a drag-and-drop website builder. More than 40 million entrepreneurs around the world use Weebly to grow their customer base, fuel sales and market their idea. Designed for any entrepreneur who wants to reach a global audience, Weebly gives everyone the freedom to create a high quality site and store that works brilliantly across any device.
Let's start building a wonderful free website in Weebly.com you can easily make a website using this website creator I wanna show you what are the basic step by step to create a simple but beautiful website. Three years ago I started to search a website editor for my online business and I saw a lot website editor but weebly is the most unique and easy to make a website because you don't more codes for your website you just simply used the drag and drop strategy and paste the embed codes or links. That's why I physically create a tutorial and share all of you the powerful of weebly.com. Let get's started.
• To Register:
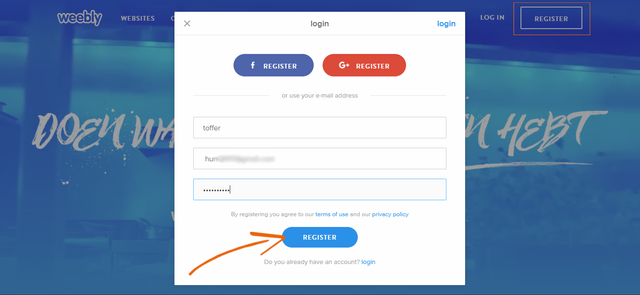
First is go to weebly.com you can sign up using facebook account or google + or you can register using your email account you put the following settings:
Username
Email Address
Email Password
• Select A Theme:
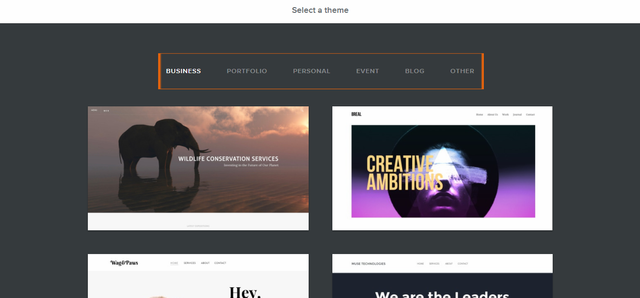
If your registration is 100% successful the Select A Theme settings is open you can select the a theme that you want remember first is you can know what about your website before you select your final theme. If your website is about for business select a theme for Business category there are 6 categories for theme this is the following categories:
• Theme Category:
Business: This category is for business like online business, restaurant etc.
Portfolio: If you are photography choose this category.
Personal: For personal use only.
Event: If you have a big events you can select this category.
Blog: If you are a blogger or if you want to make a website blog you are in the right place.
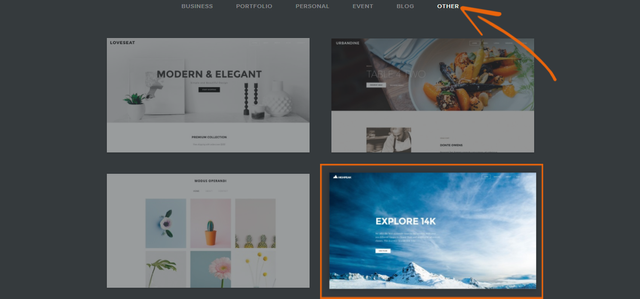
Other: If you don't see the theme in other category you can select this category and choose the theme that you want. I select Other category and I select this theme.
• Start Editing:
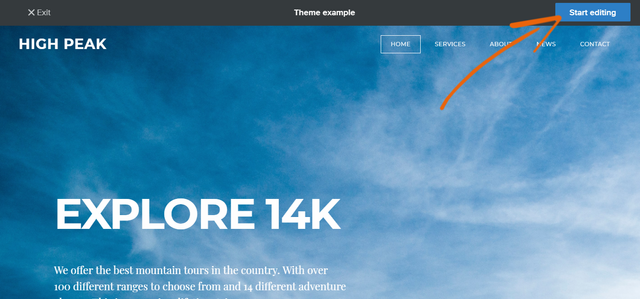
To start editing click the Start Editing on the upper right corner.
• Select Domain:
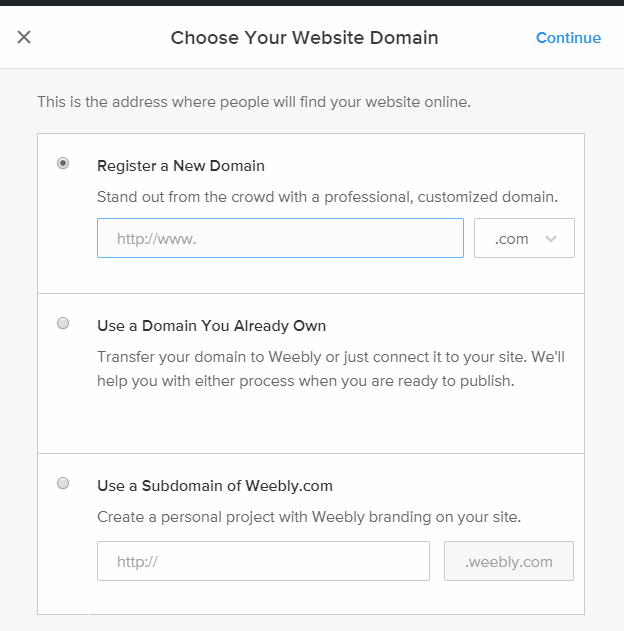
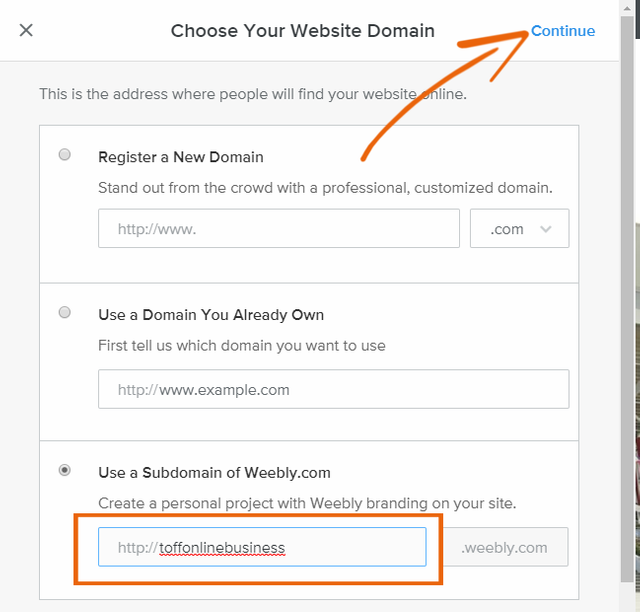
This is the address where people will find your website online. You can now choose your domain website. If you want to buy a domain choose to. Register A new domain. If you have a domain you can use your domain and if you want to free choose the sub domain of weebly.com
• Domains:
Register a New Domain: Stand out from the crowd with a professional, customized domain.
Use a Domain You Already Own: Transfer your domain to Weebly or just connect it to your site. We'll help you with either process when you are ready to publish.
Use a Subdomain of Weebly.com: Create a personal project with Weebly branding on your site.
• Sub domain:
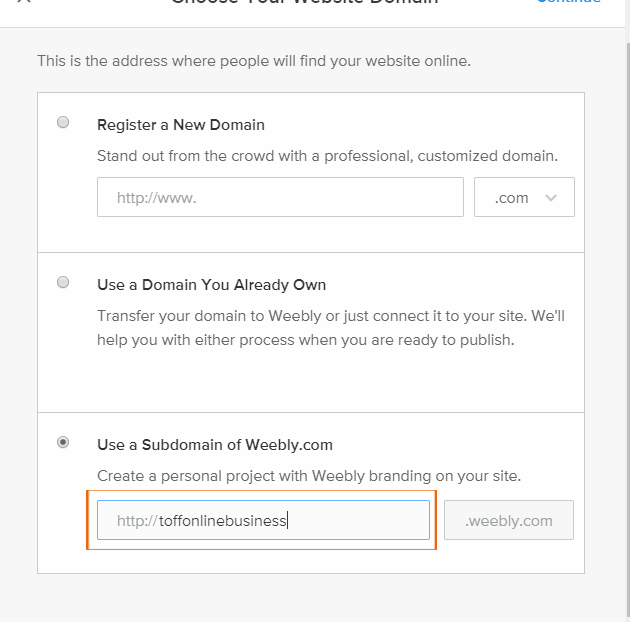
If you want free domain, choose sub domain and put your website domain name the advantage of sub domain is you don't have annual fee.
• Deleting Text:
If you want to delete the unwanted text or image I wanna show you how can you do that.
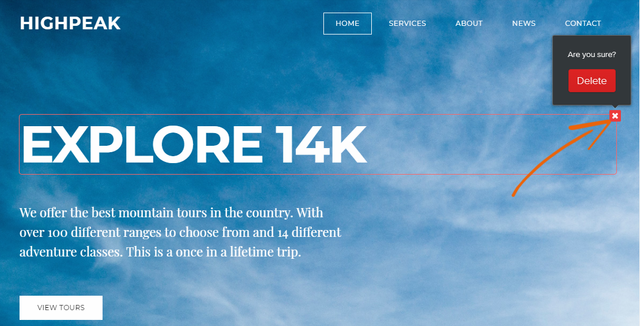
Put your mouse on the text if the text box is appear just click the X button and click the Delete button. If you delete all unwanted on your page just repeat the process.
• Deleting Image:
If you wan to delete all image just put your mouse in the image and the invisible box is open click the X sign and click Delete button.
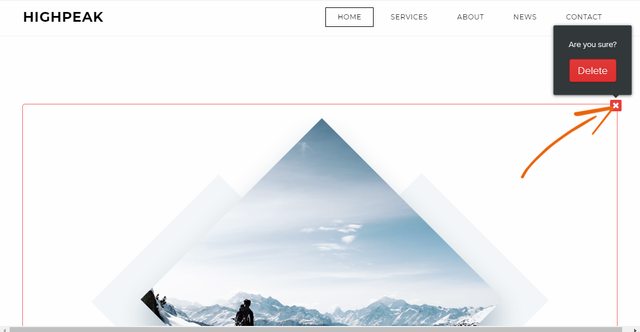
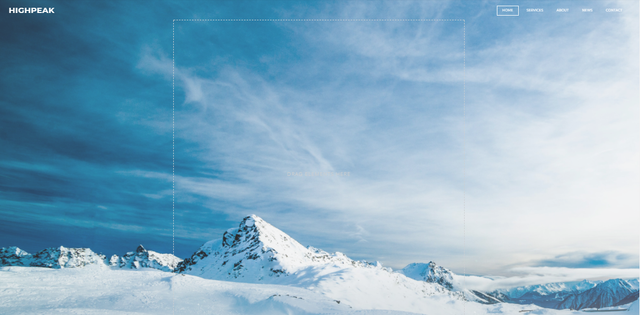
Now I have a blank page all unwanted things on page is already deleted now I wanna show to change the name of your logo.
• Change Logo:
To change your logo put your mouse over on the logo you can see three option if you don't want display the logo click the Off button, if you want your logo is text just click the Text button and if you want your logo is image just click the logo and import file on your images gallery.
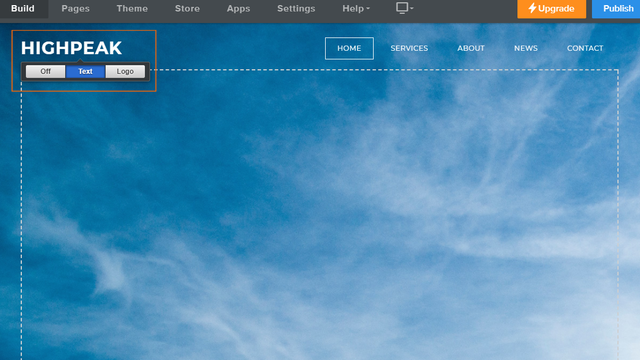
I choose text logo highlight the text and write your logo name.

• Change Header:
To change the header layout click the header page you can see to settings the Edit Background and Replace Header Layout:
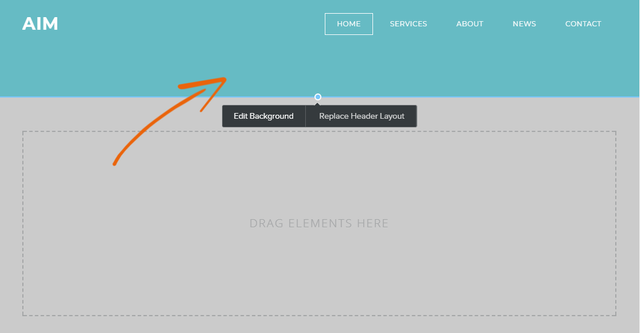
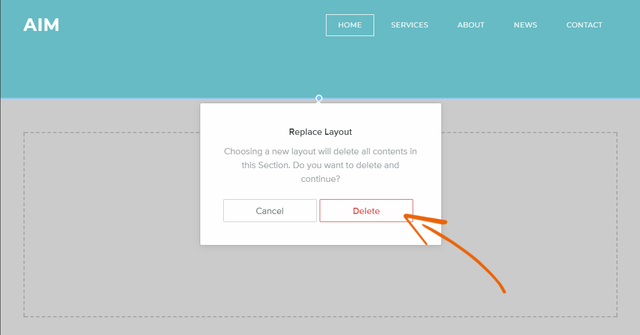
If you choose the Replace Header Layout you can delete all content by pressing delete you don't delete all content one by one.
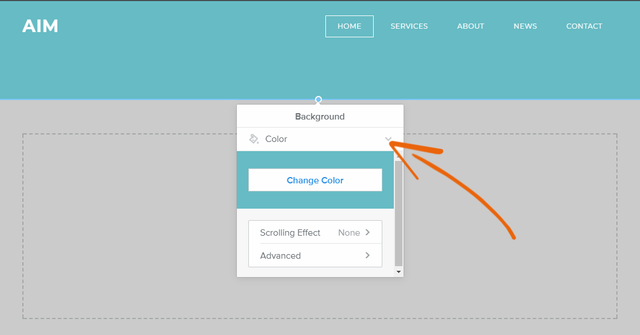
If you choose Edit Background you can change your Header background you can select a header background settings by clicking the down arrow.
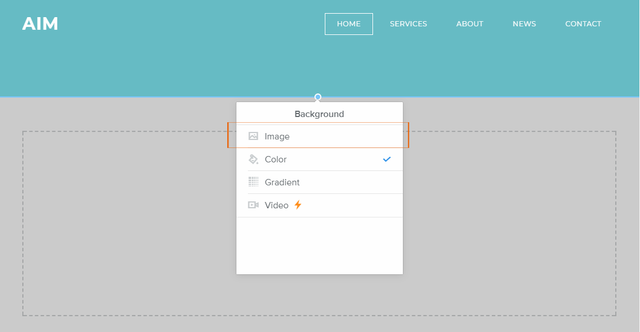
You can choose in 4 category of Header Layout the Image, Color, Gradient and Video.
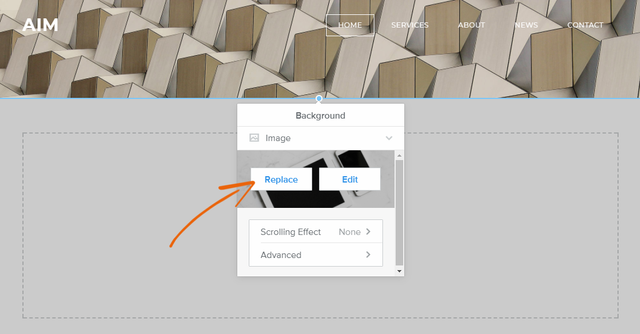
If you want select the image just click the image you can replace or you can edit the Header image I click replace.
If the image editor is open you can select the image that you want, they have category for images you can also upload your personal image background on your image gallery.
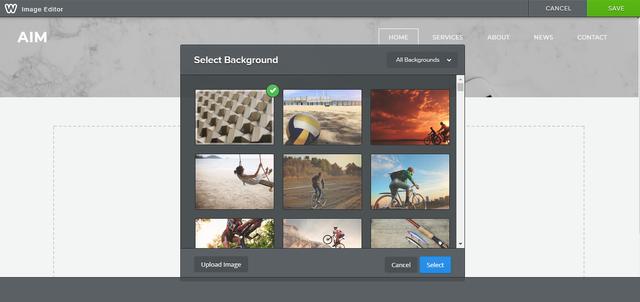
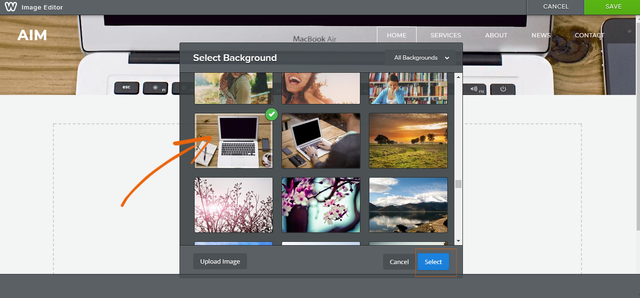
If you are already choose an image just click the image and click the select button.
• Add Title:
Now I wanna show how to add your text first is we are going to add your title. Go to your basic tools on the left corner choose Title.
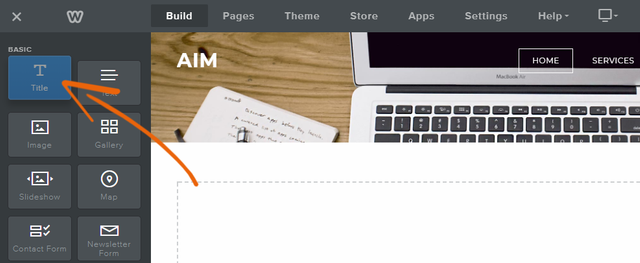
Drag your Title tool on your page and if you can the guide lines drop the title tool and release your mouse.

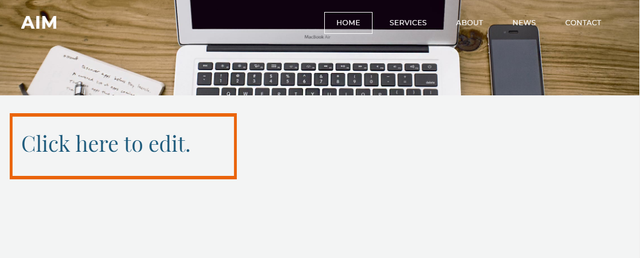
Now you can now the edit box of your Title just write your name of your website or business.
• Add Text:
To add text repeat the producer of how to add the title choose the Text tool and drag to your page.
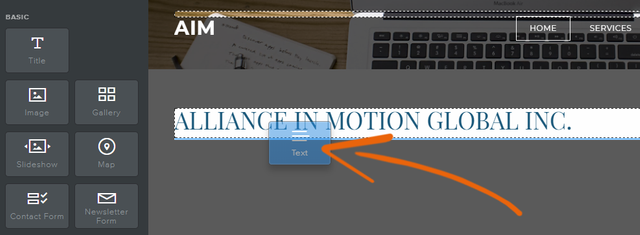
You can edit your text, just write or paste your text in text edited box.
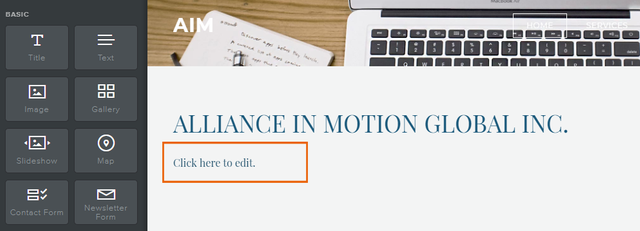
Now I have already a title and text. I want to add image I wanna show how to add image.

• Add Images:
To add image the procedure same to add title and text choose the image tool.
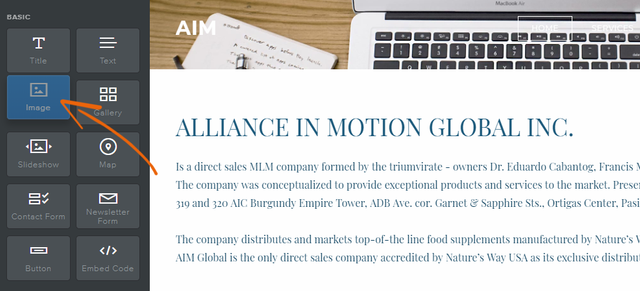
Drag your Image Tool on your page you can choose the location of your image either on top, left, right or bottom. I drag my image tool on the bottom of my text. To add image on your page click the image tool.(Important Note: You can change the location of your image anytime time just drag the image and drop it to location you want)
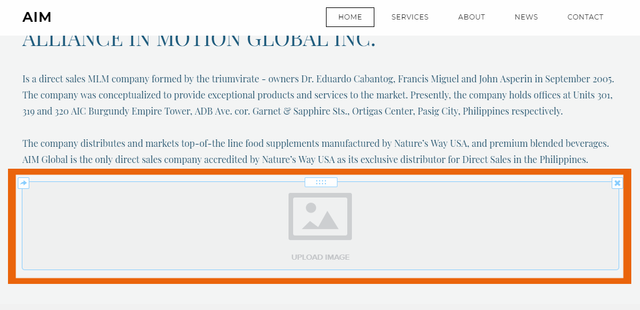
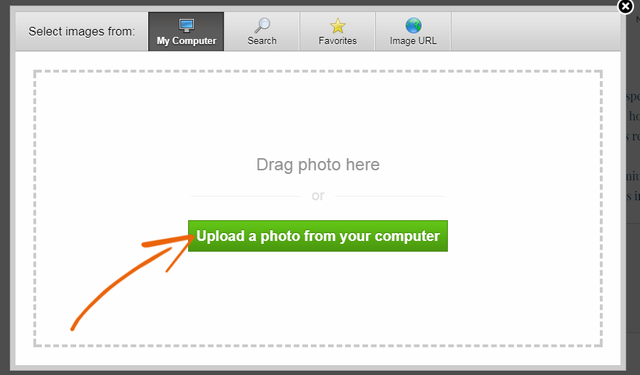
Click the upload a photo from your computer to upload your images.
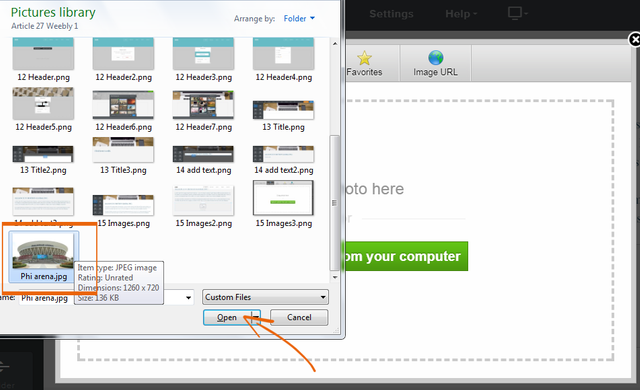
Go to your images gallery and select the image that you used.
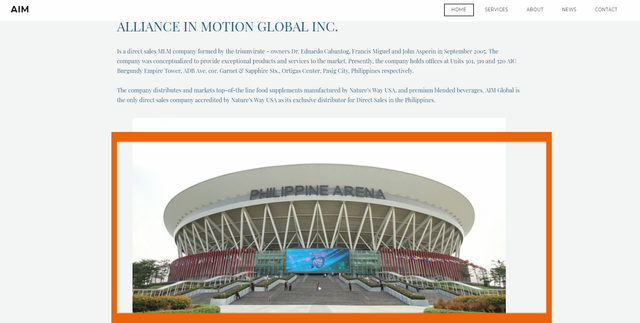
Now my image is already uploaded on my page.
• Publish Page:
If you want to see your page just click the Publish button on the upper right corner.
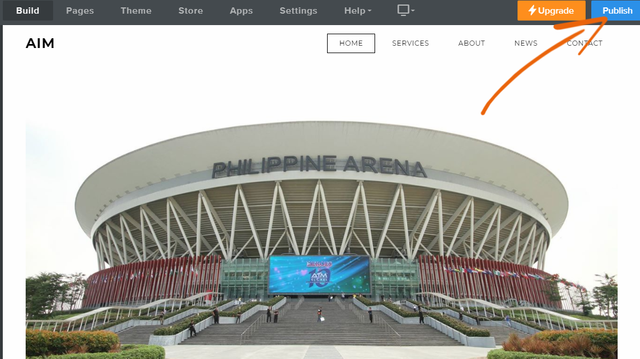
If the domain setting is open choose the domain that you used if your website is free choose the sub domain and click the continue.
The website published pop up menu is open to published your page, just click the link of your website.
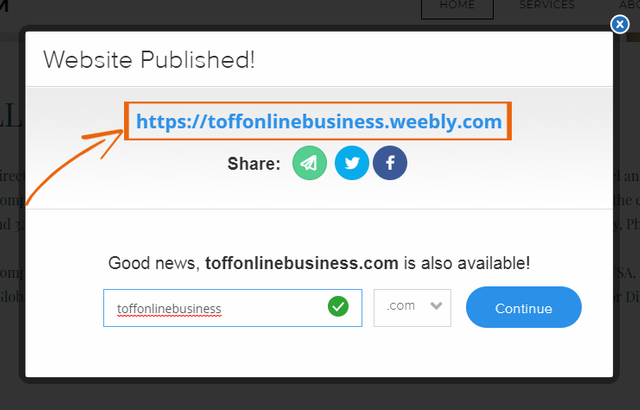
Now my website is already published in the public media, my website is already usable now.

In this tutorial you can learned the begginers guideline on how to get started to make a website with weebly.com and that's it for
the tutorial. If you want more tutorial about weebly.com I post everyday. THANK YOU!
If you want to see my website just click this link: https://toffonlinebusiness.weebly.com/
Posted on Utopian.io - Rewarding Open Source Contributors
Hello ! I just read your content, I love it. I thank you for this kind of publication. Follow me @meranie and I follow you too!
I want to have a free website, how can I process ?
Downvoting a post can decrease pending rewards and make it less visible. Common reasons:
Submit
Nice cool @meranie just go to weebly.com and follow my tutorial.. :)
Downvoting a post can decrease pending rewards and make it less visible. Common reasons:
Submit
Thank you for the contribution. It has been approved.
You can contact us on Discord.
[utopian-moderator]
Downvoting a post can decrease pending rewards and make it less visible. Common reasons:
Submit
Thank you for the approval mod @simnrodrguez
Downvoting a post can decrease pending rewards and make it less visible. Common reasons:
Submit
Nice tutorial, naalala ko ang weebly. :)
Downvoting a post can decrease pending rewards and make it less visible. Common reasons:
Submit
Thank you @zararina
Downvoting a post can decrease pending rewards and make it less visible. Common reasons:
Submit
Downvoting a post can decrease pending rewards and make it less visible. Common reasons:
Submit
Thanks @robabakhtir
Downvoting a post can decrease pending rewards and make it less visible. Common reasons:
Submit
Hey @toffer I am @utopian-io. I have just upvoted you!
Achievements
Community-Driven Witness!
I am the first and only Steem Community-Driven Witness. Participate on Discord. Lets GROW TOGETHER!
Up-vote this comment to grow my power and help Open Source contributions like this one. Want to chat? Join me on Discord https://discord.gg/Pc8HG9x
Downvoting a post can decrease pending rewards and make it less visible. Common reasons:
Submit
Thank you so much @utopian-io I already vote you as a witness :)
Downvoting a post can decrease pending rewards and make it less visible. Common reasons:
Submit
Yes
Downvoting a post can decrease pending rewards and make it less visible. Common reasons:
Submit
Good run-down on how to make a weebly site. You seem really knowledgeable, do you know if and how a steemit blog can be published to a weebly blog page?
Downvoting a post can decrease pending rewards and make it less visible. Common reasons:
Submit