In my last article, we saw how to create a 3D model. We will now give it a real existence through 3D printing.
For the creation of our model, we used CINEMA 4D. Admittedly, it is not a CAD software, it is more oriented visualization / illustration / animation, but if we know it well, it can largely do the trick in this area.
The format
The format we will use here is the STL format, which is accepted by all slicing software on the market. Other formats can be accepted as well, such as the OBJ, but the STL is considered the universal format in this regard.
We will isolate our 3D model in a new project, and assemble the wheels to the chassis through simple Boolean operations. They will not be mobile, but it is not vital for the example. Once done, I export my model in STL format.

CINEMA 4D
I pay attention to the scale of my model, so as not to find myself with a model a hundred times too big or a hundred times too small in my slicer. Once the model exported, I can open my slicer software.
Note that if you download a model on Thingiverse for example, it will be directly in STL format, so you can open it directly in your slicer.
The slicer
As we saw in a previous article, the slicer is the software that will generate the program to send to the printer from our 3D model. This program will be in GCODE format, which can be summarized as a series of basic commands sent to the printer:
- Heats the nozzle to 200 degrees
- Heats the bed at 65 degrees
- moves the nozzle 20 mm on X
- ...
- ...
- moves the nozzle 47 mm on Y
- moves the nozzle 0.01 mm on Z
- Back to zero
- Temperature drop
- End.

Cura, a free slicer
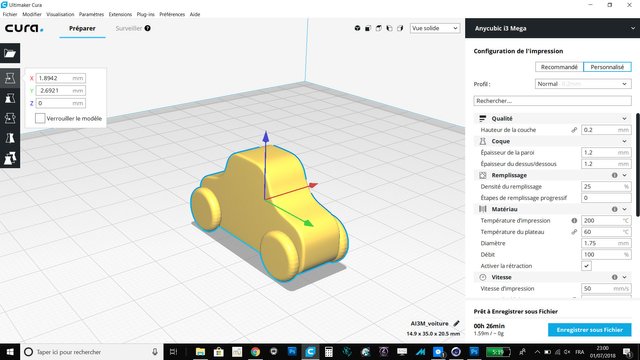
In order to have the cleanest print, we will have to adjust some parameters. First, we must tell the slicer the type of printer we use, and its maximum print volume. We can also tell him if the bed is heated, if the origin is in the middle of the bed or in a corner ... Then we open our model and we will determine the settings that are specific to him, for an optimized quality. All will not be detailed, some names speak for themselves.
- diameter of the nozzle
- nozzle temperature
- bed temperature (depending on the material used)
- print speed: the higher the speed, the lower the quality
- layer height: the lower it is, the smoother the model
- flow: the material flow, determined by the rotational speed of the extruder
- filling: the models are mostly hollow, a filling grid or honeycomb contributes to solidify. A more complete model will be stronger but much longer to print
- shell thickness: the thickness of the walls of the model, also plays on the stiffness
- retraction: avoids wires when passing the nozzle from one zone to another
- fans: to immediately cool the material at the outlet of the nozzle, essential for the PLA
- Supports: allows to correctly print overhanging areas
Be careful, some settings look attractive, but will increase drastically the printing time. This is mainly the case of filling and layer height. It is indeed very easy to literally double the printing time just by playing on these two parameters.
We will then be able to export the GCODE to a memory card or a USB key. Most slicers can control the printer directly via USB, but you should know that in this case a crash of the software or the computer, or a power failure can ruin an impression. Some printers allow printing to resume after an unexpected shutdown, but this is rarely the case on entry-level printers.

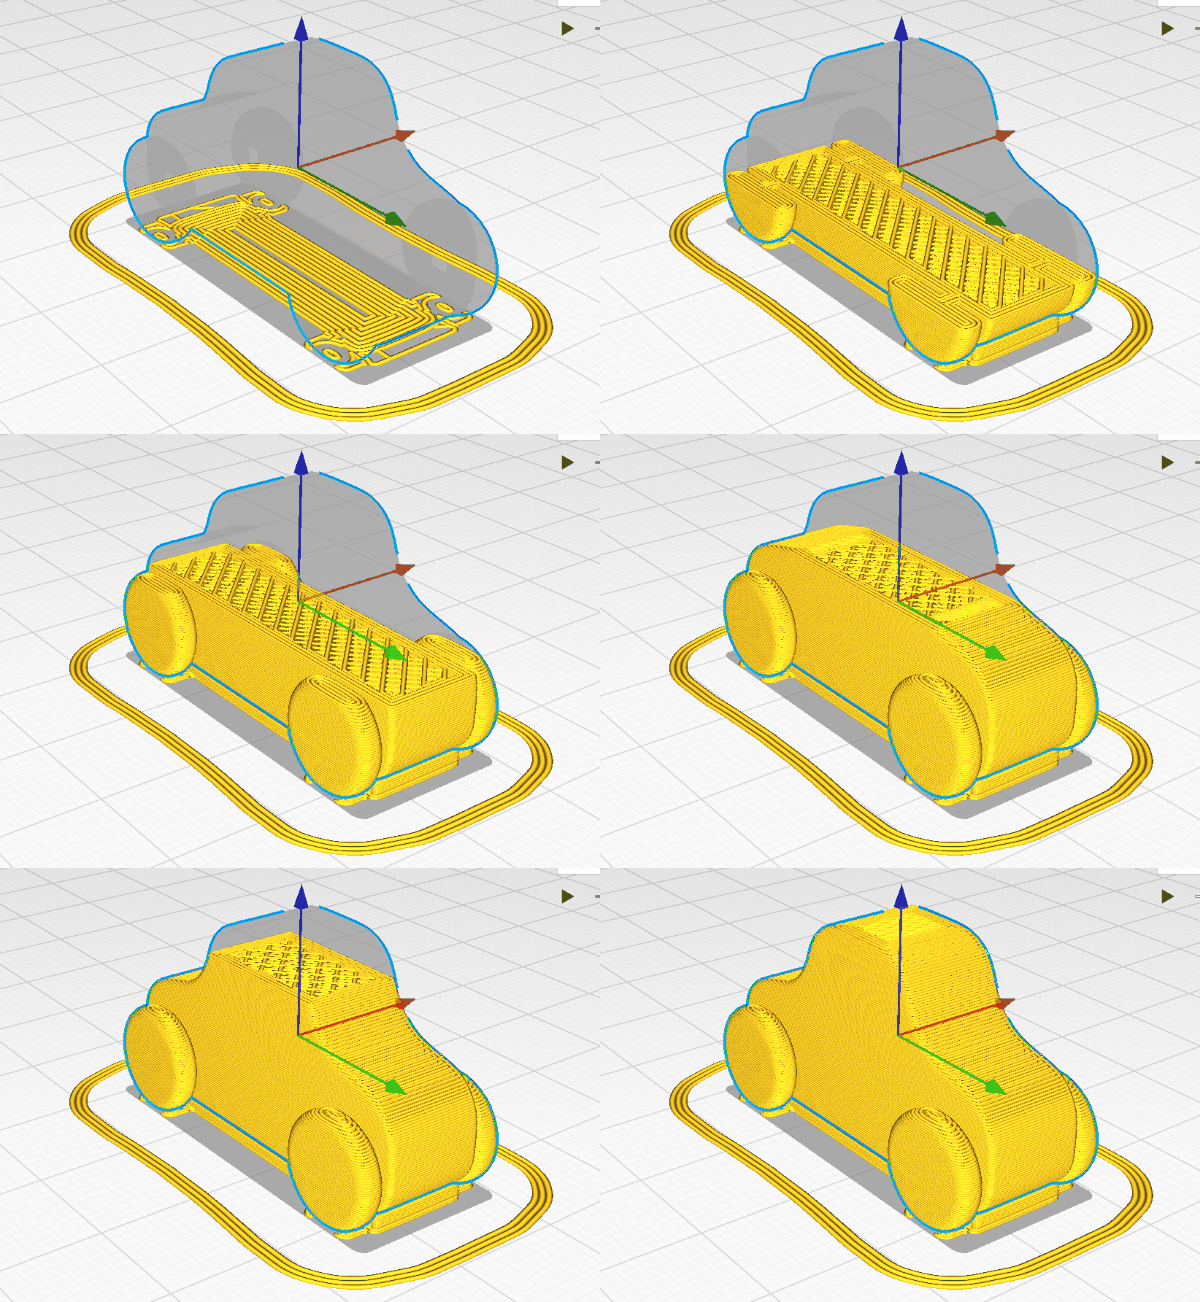
Print simulation on Cura
A word about materials
Most commonly, two types of materials are used, ABS, of petroleum origin, and PLA, of plant origin. I personally prefer PLA, for its biodegradability.
But you should know especially that these two materials are not used in the same way during printing, and require different settings at the level of the slicer.
- ABS works better when hot, very hot. We will therefore set a nozzle temperature of over 200 degrees, the bed around 100 degrees, no cooling, and if possible a enclosed printer to keep the heat as much as possible, otherwise the model is likely to suffer deformations.
- The PLA works best "cold", with a nozzle between 180 and 195 degrees, and a bed at 50-65 degrees. The cooling must be activated so that the material stiffens immediately at the outlet of the nozzle, otherwise it may be deformed.
For the beginner, I recommend the PLA, easier to implement and less subject to deformations. Indeed, enclose a printer to conserve the heat is a rather heavy operation if it is not so from its conception. The downside is that smoothing a printed PLA model is more difficult to achieve, I will come back in a future article.
The impression
Before starting the actual printing, you will have to adjust the bed level. This will ensure two things: the nozzle is at a constant distance from the bed, to avoid partial detachment of the model during printing, and close enough to the bed to have a beautiful first layer, which will be a guarantee of good adhesion of the model. For printers that do not have an automatic or assisted level adjustment, we will position the nozzle at height = 0, and pass it successively on the 4 corners of the bed. A piece of paper will be slipped between the nozzle and the bed. If the sheet slips too much, go up the corner until the sheet hangs slightly on the nozzle, then move on to the next corner. So we will have a bed properly levelled.
This done, we can load the reel of material, start printing, wait until the heat is over, and watch the layers succeed for hours ...
Posted from my blog with SteemPress : http://techno-bidouille.fr/from-3d-model-to-printed-model
Hi @sebbbl! We are @steem-ua, a new Steem dApp, using UserAuthority for algorithmic post curation! Your post is eligible for our upvote! Thanks for your contribution, keep up the good work, and feel free to join our Discord server!
Downvoting a post can decrease pending rewards and make it less visible. Common reasons:
Submit