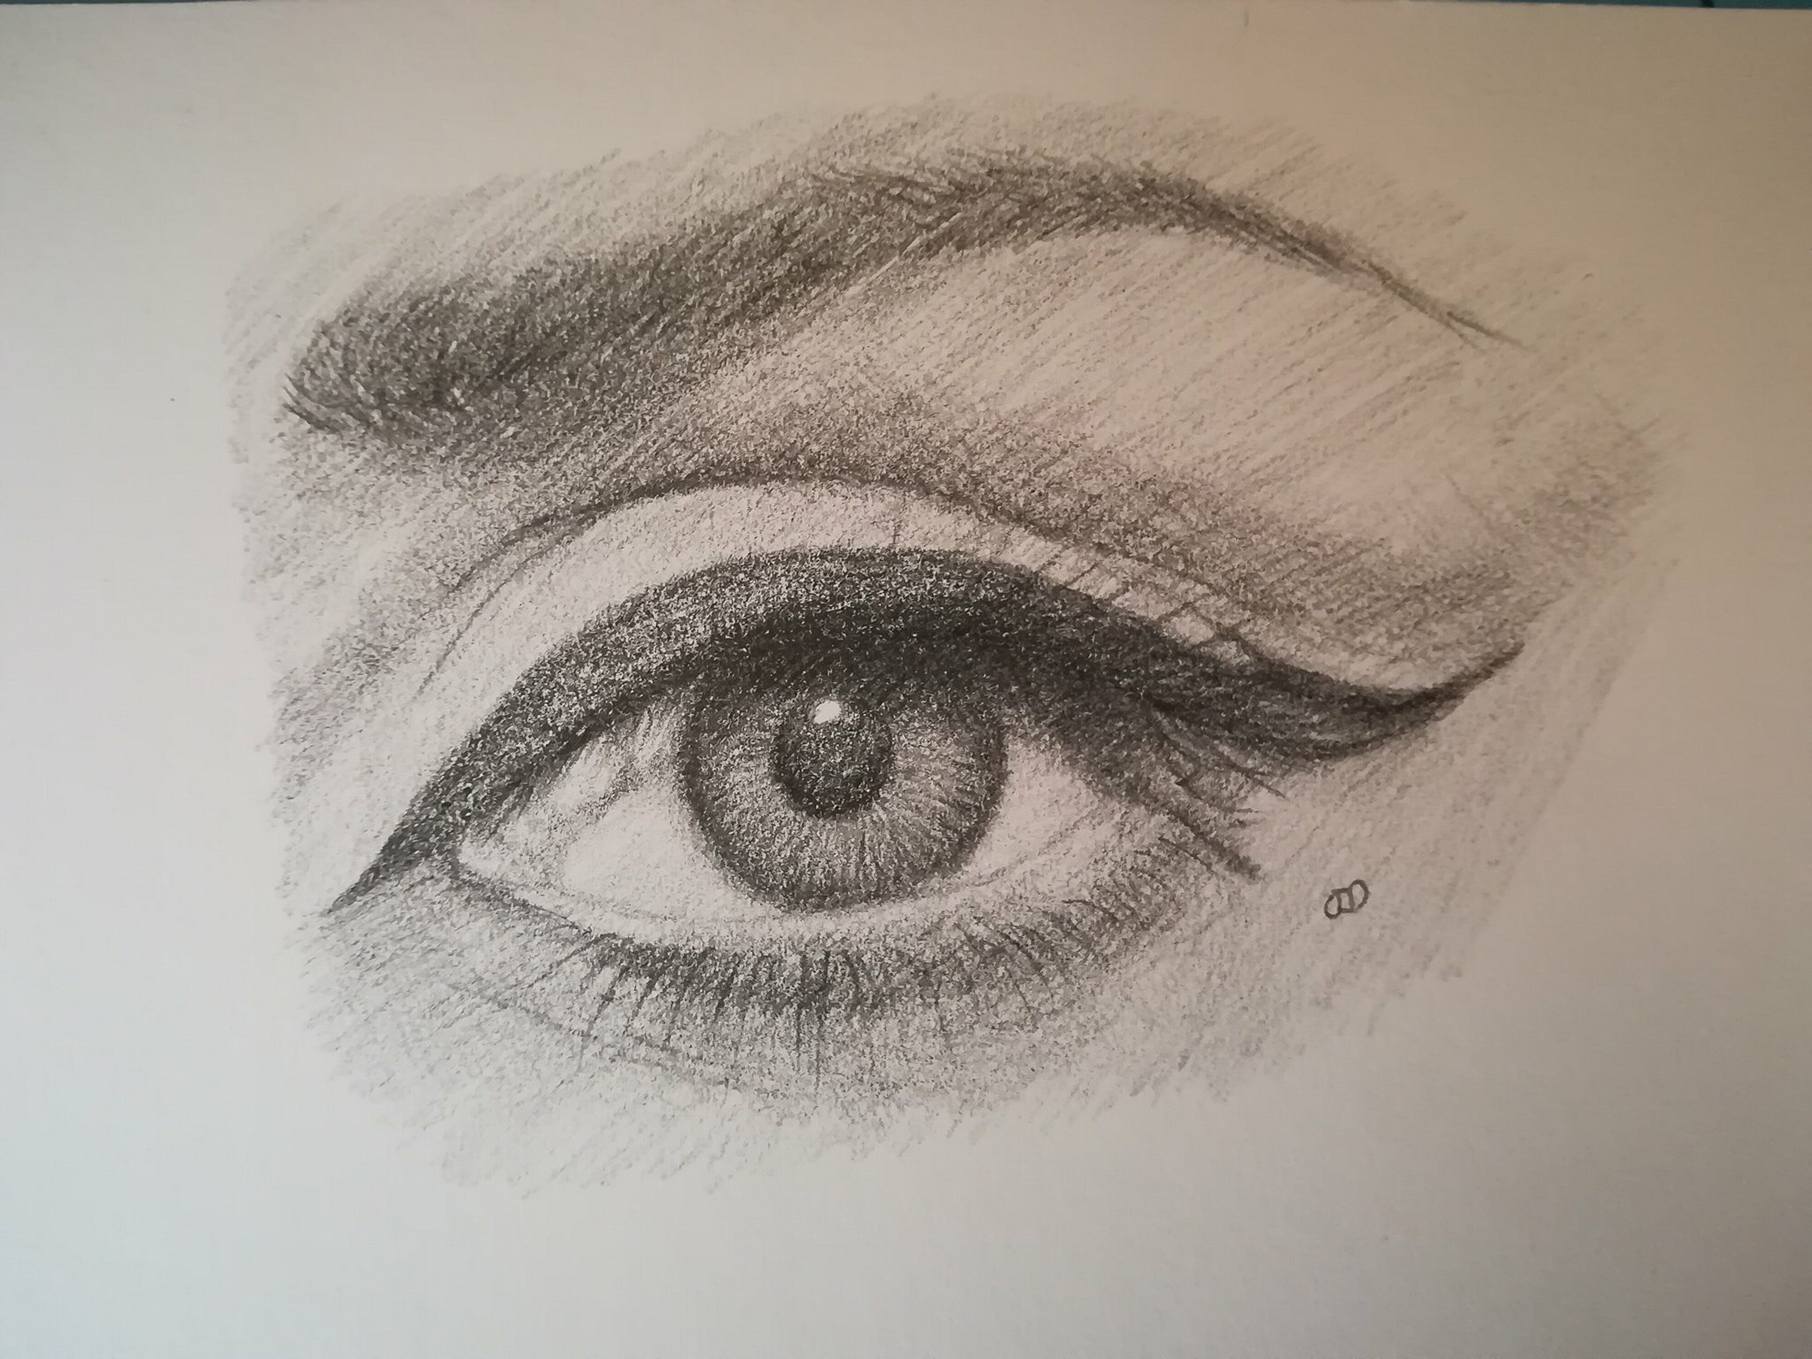
Hi all, in my post on Saturday I mentioned about working on a series of portrait sketching tutorials. This will be my second time posting portrait sketching tutorials. I made my first series of tutorials in August/September 2017. Unfortunately, Steemit upgraded its layout and most of the images in those posts were not showing anymore and that made the tutorials useless. Understandably, I was quite upset when it happened.
I won't make a full portrait tutorial this time around though. I just focus on different facial features for each post. Like for this tutorial, I am focusing on sketching the eye and the following tutorial will be the nose and so on.
Before we proceed I want to make it clear that this tutorial is not comprehensive. I will try to be as detail as possible. However, I will leave out some minor parts because it's impossible to capture every single detail. Always refer to your reference image and try to draw what you see. And most importantly don't feel discouraged if your sketch is not as accurate. It's perfectly normal. No one becomes good at something without practicing countless times. The key is to keep trying.
The materials
- Reference photo. Download the photo and print it in black and white.
- Drawing paper
- Pencils - H, 2B, 4B, 6B
- Art eraser
- Rubber eraser
Step 1
Draw the outline of the eye. I highly suggest you use the grid method to draw the outline. I won't go into the details here because there are many tutorials out there that teach you how to do this. Here's a Youtube video that explains this method. Try to draw it as accurately as you can. The eye is the most crucial feature of the face because it determines the likeness of your portrait. Use an H pencil to sketch the outline because it's easier to erase and won't leave undesirable marks.

Step 2
Sketch the eyebrow. Follow the lines of the eyebrow which is upward. If you notice, some of the lines are downward and slanting. Use a 2B pencil first before using a 4B pencil on the darker areas.

Step 3
- Use a 2B pencil to shade the skin area around the eye.
- Use a 4B pencil to darken the area below the eyebrow and above the eye.
- Use a 4B pencil to draw the line above the eye.

Step 4
I didn't realize the picture is blurry until I uploaded it to Steemit :(. Refer to your reference photo.
- Use a 4B pencil to sketch the eyeliner.
- Use a 6B pencil to darken the area above the eyeball (eyelashes).
- Use a sharp 2B pencil to draw the eyelashes. Start drawing them from the bottom of the upper eyelid and pull it upward (curve).

Step 5
- Use a 2B pencil to sketch the eyeball. Start with the iris. To create the textured look on the iris, start drawing from the edge of the iris to the pupil. Draw it line by line. Next, use a 4B pencil to darken the upper part and the edges of the iris. Lastly, use a 6B pencil to sketch the pupil and make sure to darken the bottom part of it.
- Use a 2B pencil to sketch the eyelashes' shadow and use a 4B pencil to darken the area nearest to the eyelid.
- Use a 2B pencil to sketch the shadow on the upper left corner of the eyeball. And make sure to use an H pencil to lightly shade the rest of the eyeball.

Step 6
- Use a 2B pencil to shade the area below the eye.
- Use a 4B pencil to sketch the eyelashes area, just beneath the lower eyelid. Make sure to lightly darken the skin beneath it.
- Use a 2B pencil to draw the faint wrinkles.

Step 7
And finally, use a sharp 2B pencil to draw the eyelashes. Start drawing them from the edge of the lower eyelid and pull it downward (curve). The final step is to add extra details or to lighten (use an art eraser to lift the excess graphite) or darken certain areas. Again, always refer to your reference photo and try to capture the likeness as best as you can.
And that's it!

Thank you for checking out my post!
My previous posts:
A Tribute Post To Four Amazing Mothers In My Life
Happy Mother's Day, Steemians!
My Sketchbook | Unity, Respect, Tolerance
Watercolor Stencil Painting | Tun Mahathir Mohammad
I am selling some of my paintings over on Artfinder. Shipping is FREE worldwide. You can check them out here: ARTFINDER.
My gifts & merchandise available at REDBUBBLE (international), Printcious & CreativeUnited (Malaysia).
Thank you!

My avatar was illustrated by @pinstory
art works great, I am impressed, is this the work of your own
Downvoting a post can decrease pending rewards and make it less visible. Common reasons:
Submit
Dear Artzonian, thanks for using the #ArtzOne hashtag. Your work is valuable to the @ArtzOne community. Quote of the week: Art, freedom and creativity will change society faster than politics. -Victor Pinchuk
Downvoting a post can decrease pending rewards and make it less visible. Common reasons:
Submit
beautiful!
Downvoting a post can decrease pending rewards and make it less visible. Common reasons:
Submit
You've been upvoted by TeamMalaysia community. Here are trending posts by other TeamMalaysia authors at http://steemit.com/trending/teammalaysia
To support the growth of TeamMalaysia Follow our upvotes by using steemauto.com and follow trail of @myach
Vote TeamMalaysia witness bitrocker2020 using this link vote for witness
Downvoting a post can decrease pending rewards and make it less visible. Common reasons:
Submit
Thank you for this tutorial. It will be very useful to me :)
Downvoting a post can decrease pending rewards and make it less visible. Common reasons:
Submit
Oh my God this is amazing girl !!!
I LOVE designing eyes [not even close as amazingly, but still :P ] so that's an awesome guide as well !!!
They say that people who like drawing eyes by the way [and usually only one, like here, and like I do] think a lot about what other people think about them... I don't know about you but for me it's actually true!!!
Downvoting a post can decrease pending rewards and make it less visible. Common reasons:
Submit
Great eye sketching tutorial @coloringiship!
Downvoting a post can decrease pending rewards and make it less visible. Common reasons:
Submit