Dear steemian!!
In this occasion, I want to share how to draw a portrait for beginner. It's very easy and simple, anyone can use the technique. The technique that I mean is Grid Maker technique, in my lates post, I've told a little about Grid. But today I took a time to tell it detailly how the proses.
Pada kesempatan ini, saya ingin berbagi tutorial bagaimana menggambar potret bagi pemula. Ini sangat mudah dan simple, siapa saja bisa menggunakan teknik ini. Teknik yang saya maksudkan disini ialah teknik grid, pada postingan sebelumnya saya pernah menyinggung sedikit tentang teknik grid. Namun hari ini barulah saya bisa menunjukkan bagaimana prosesnya.
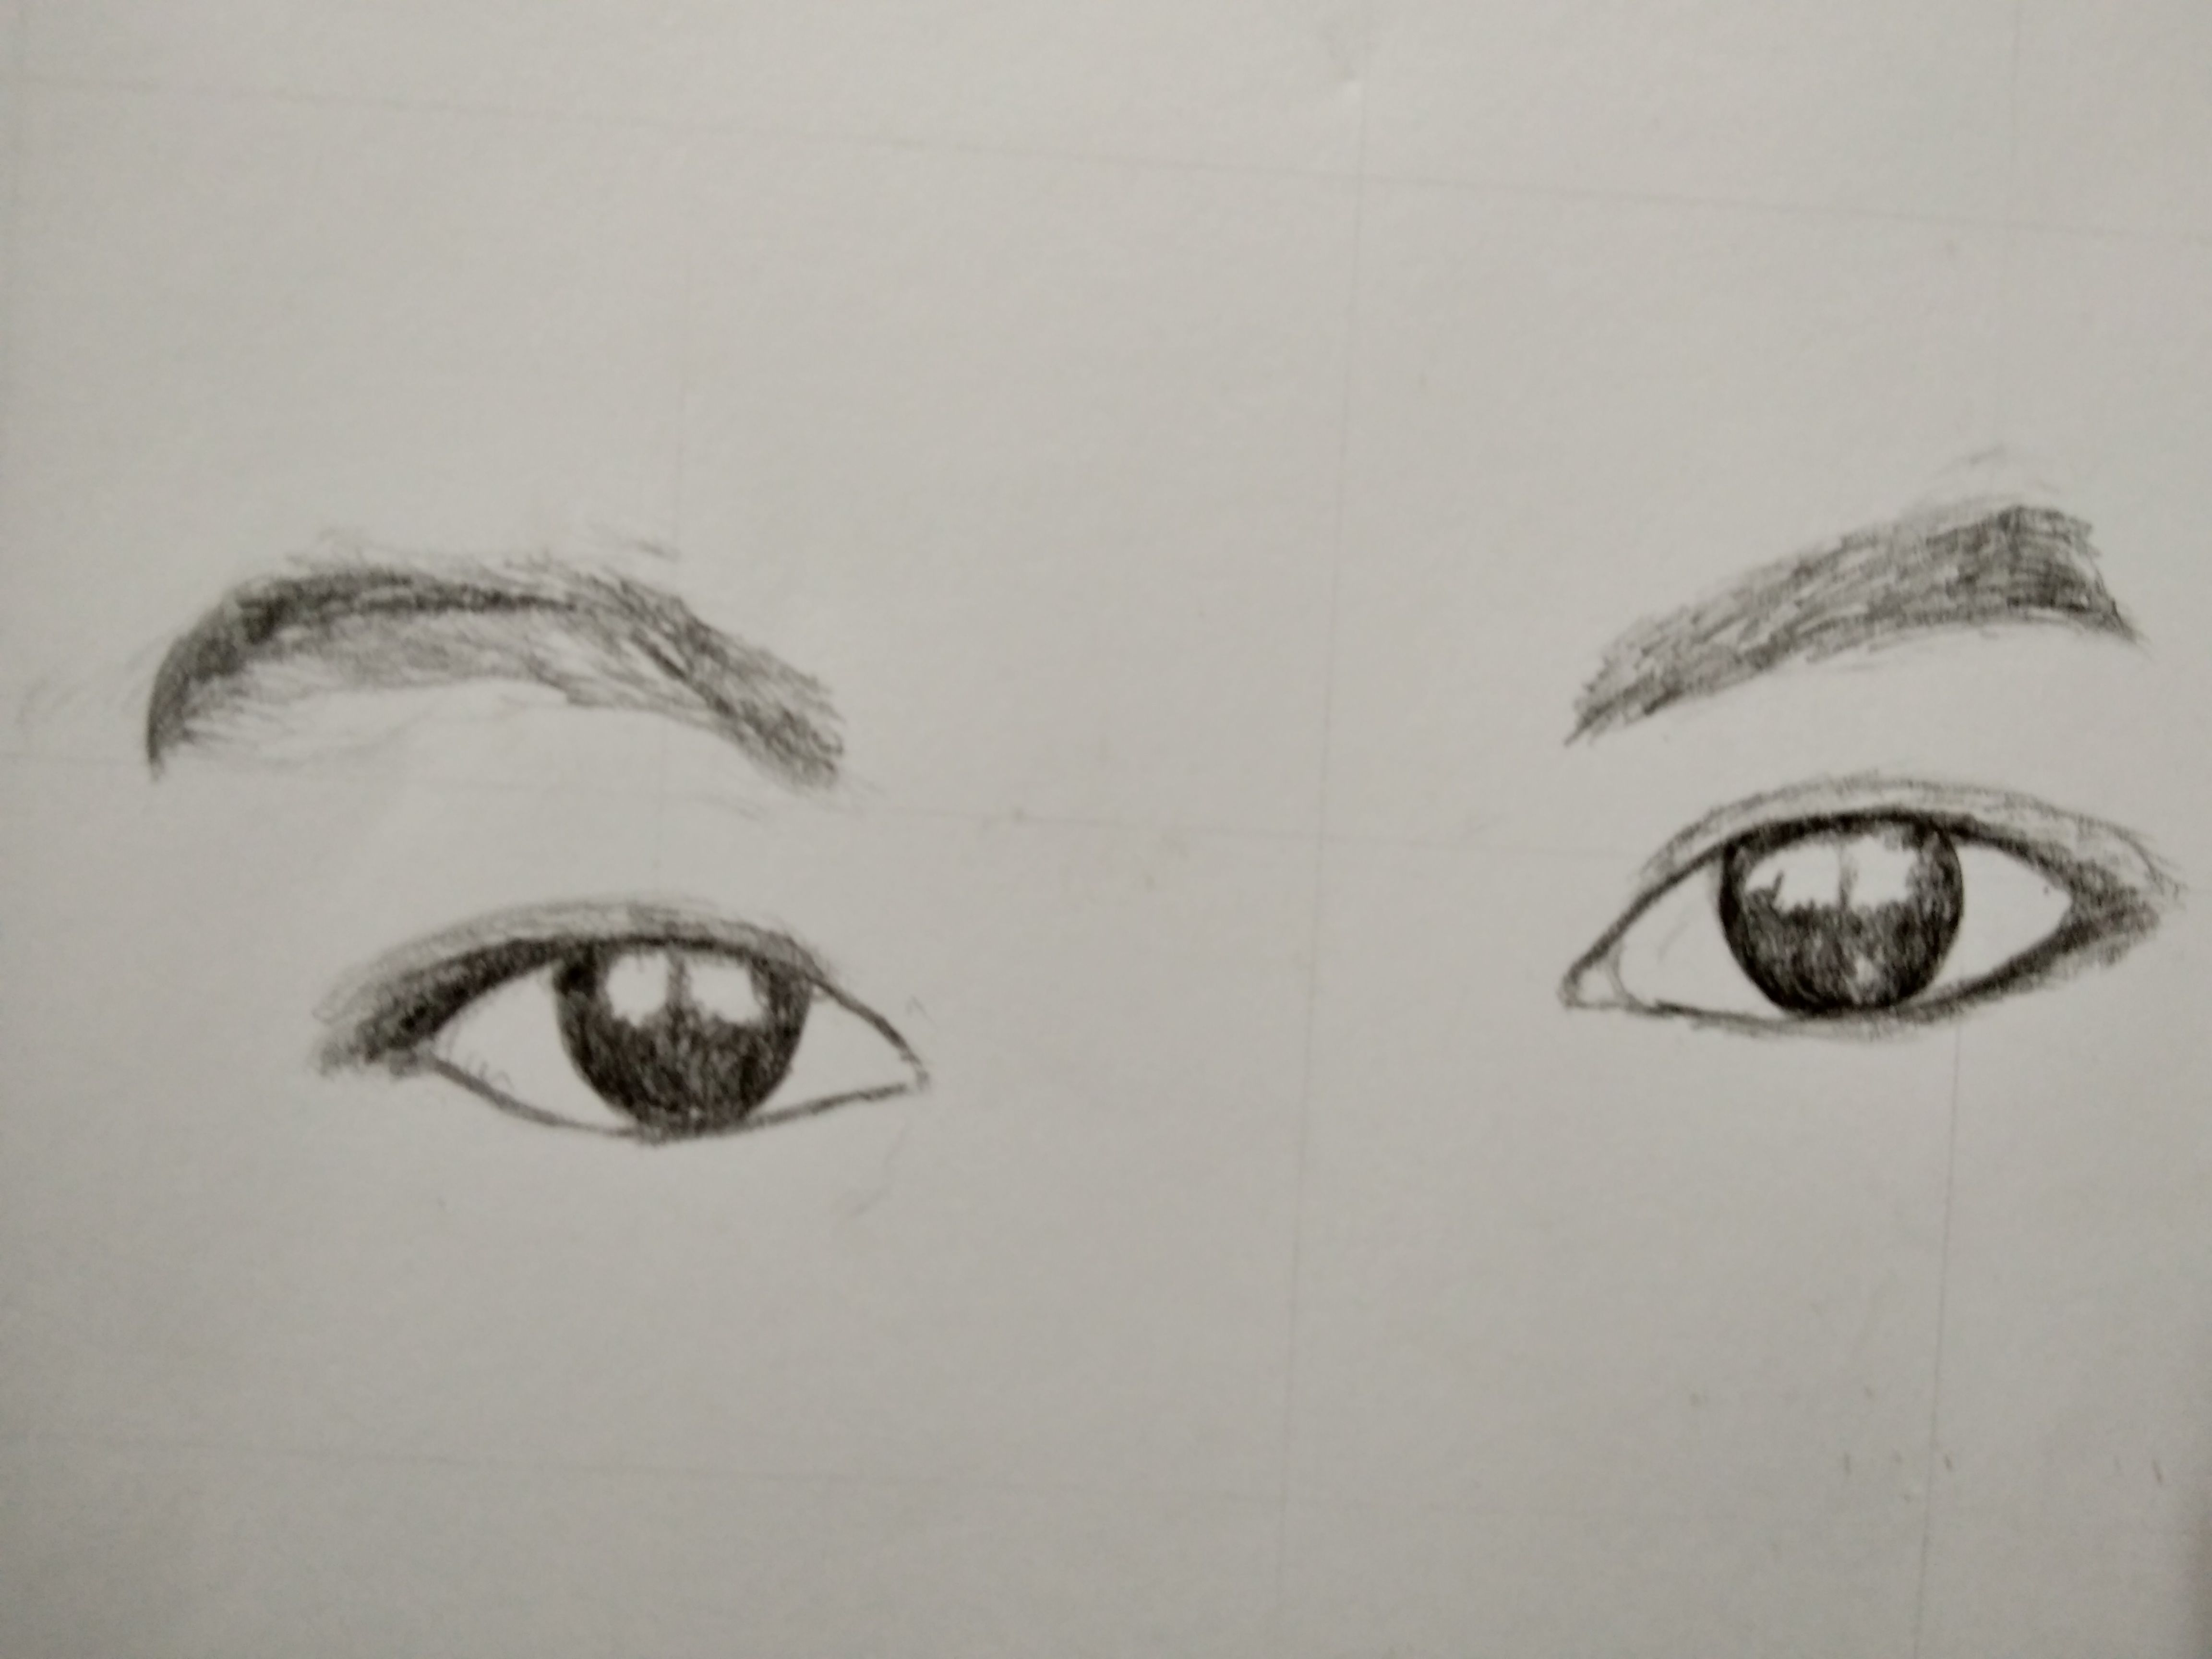
For example, I drew a portrait women with veils that was a request of someone to me to make a drawing.
Sebagai contoh, saya menggambar sebuah potret perempuan berhijab yang merupakan permintaan seseorang kepadaku untuk membuatnya sebuah gambar.
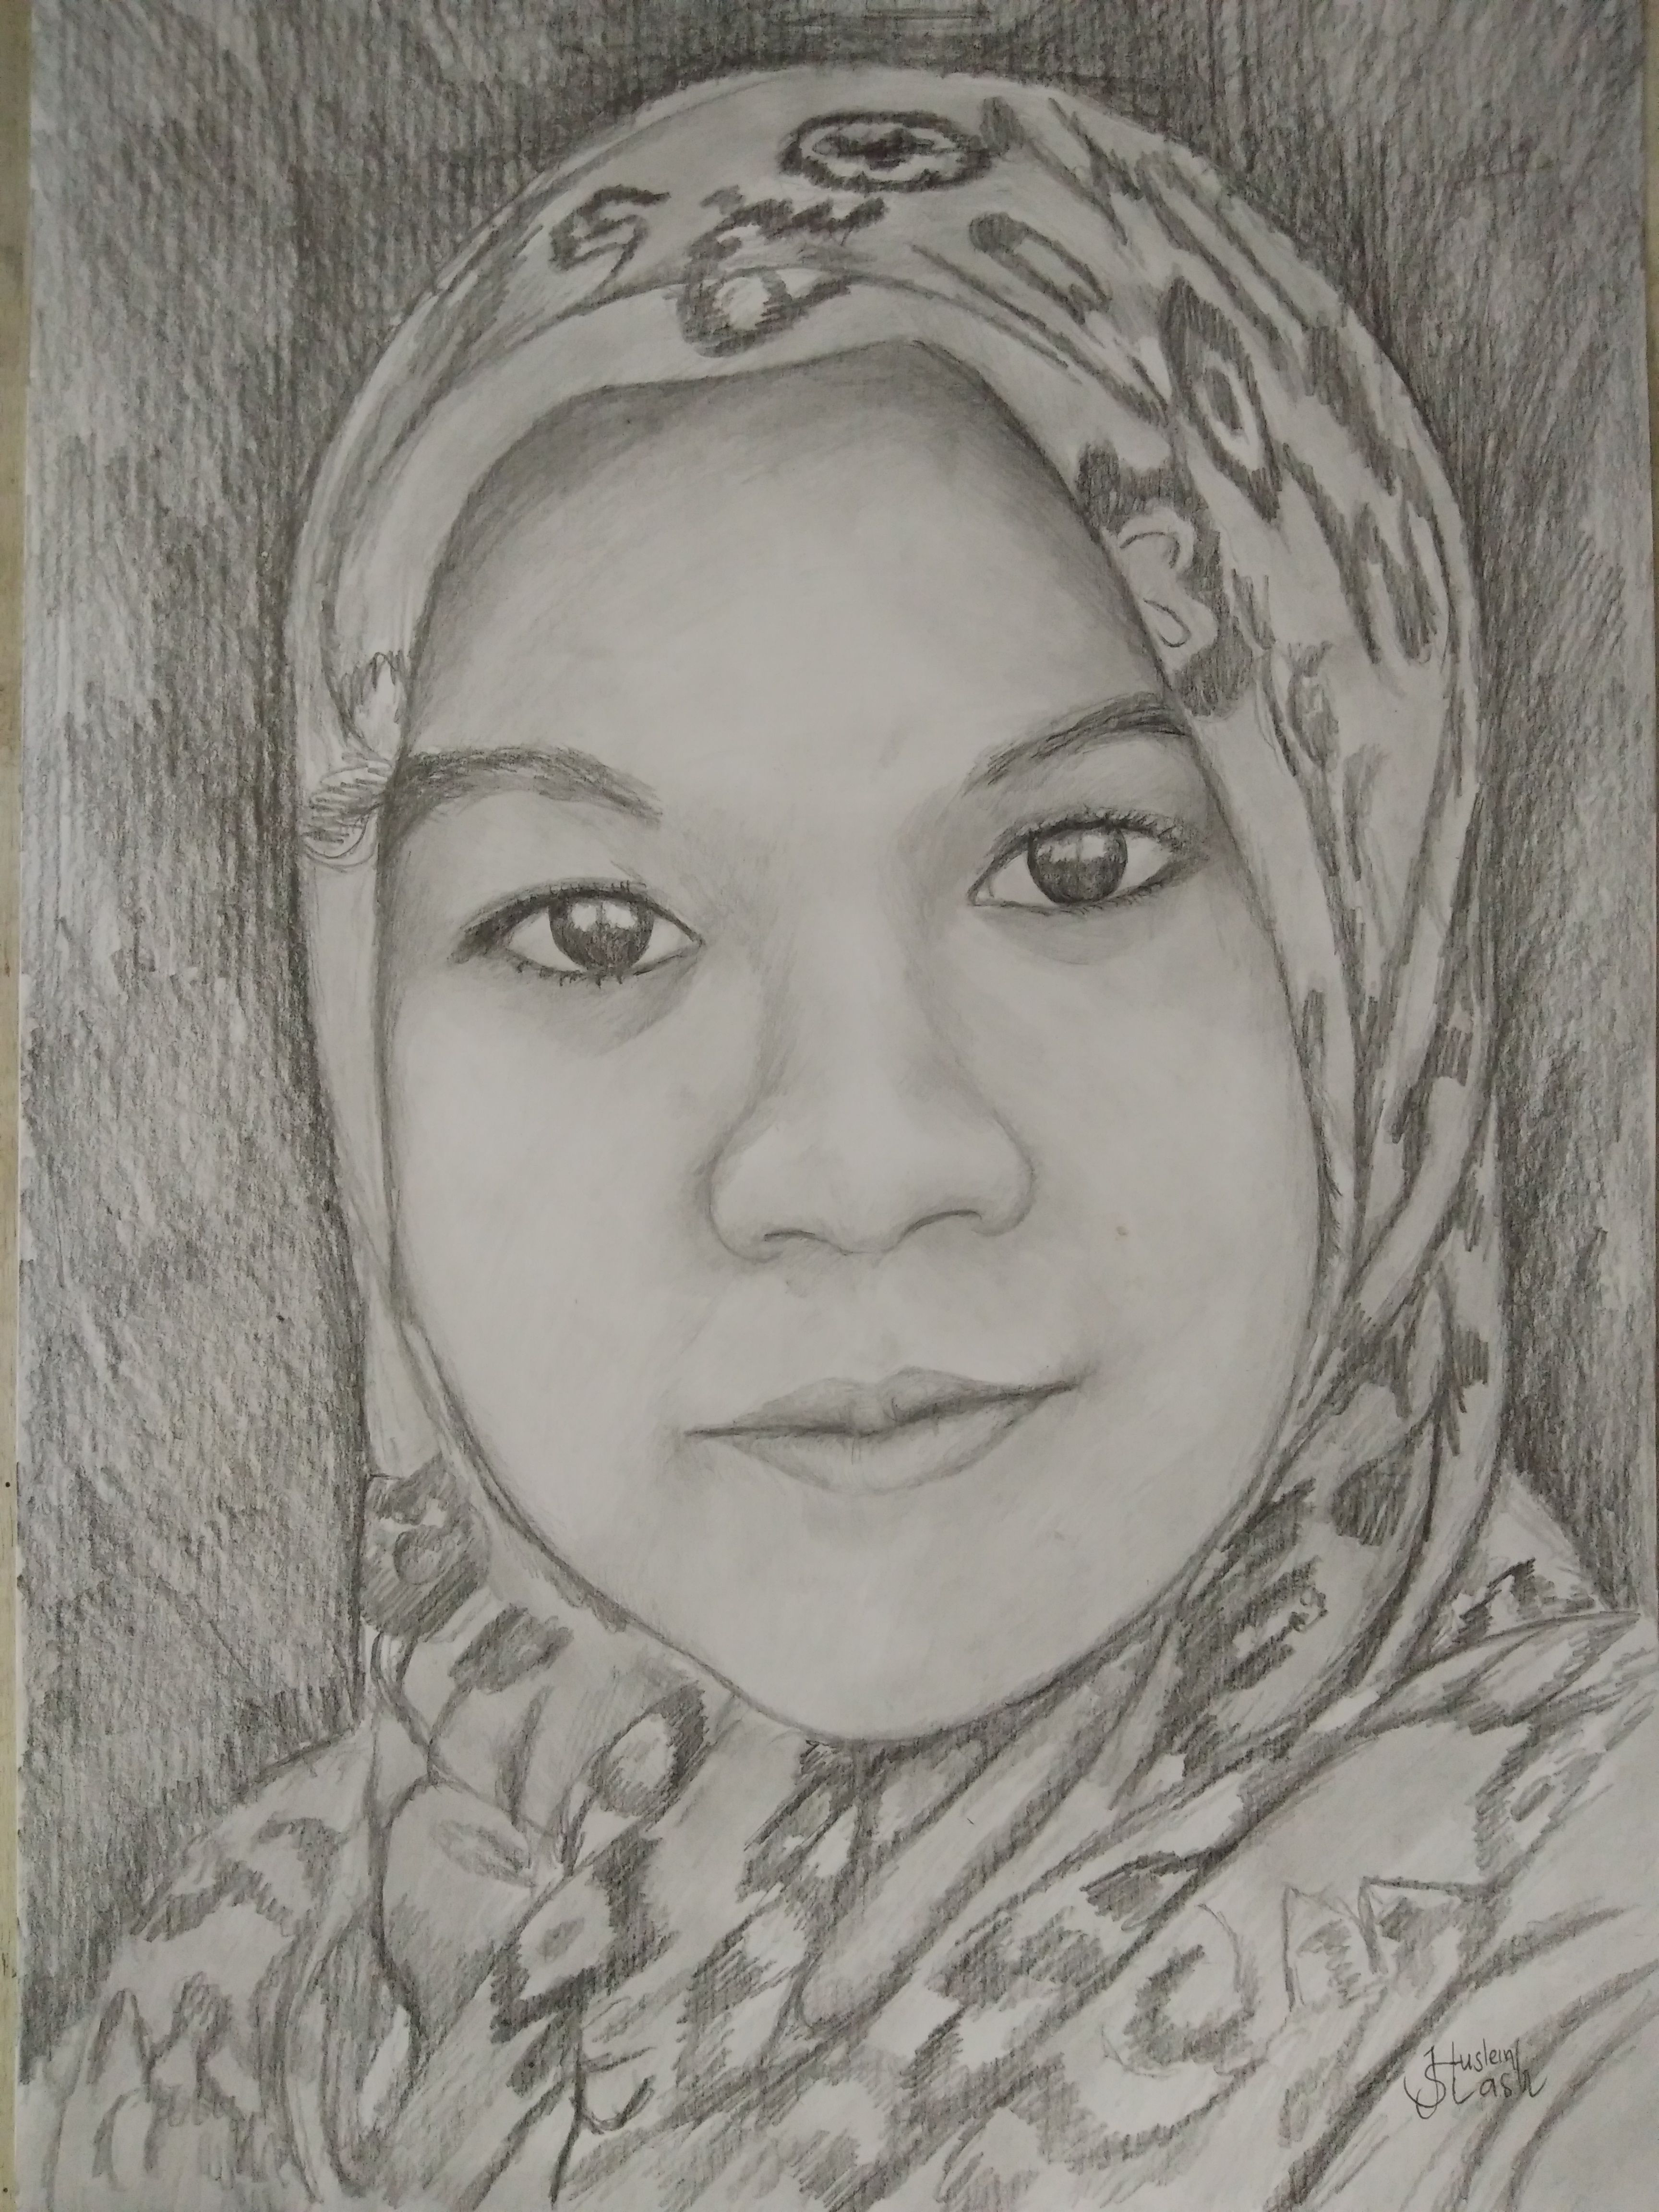
Make a grid it's very easy with app Drawing Grid Maker. For android user, you can download it in playstore here. With this application, certainly allows us to determine the scale and proportions of the image. For example, I made a drawing on lyra paper size 30x40 cm. Therefore we can directly determine what scale we need by dividing 5 cm each columns and cell. 30: 5 = 6, 40: 5 = 8 so the result cell is 6 and column 8.
Membuat grid sekarang pun sangat mudah dengan bantuan aplikasi Drawing Grid Maker, bagi pengguna android bisa download disini. Dengan aplikasi ini tentunya memudahkan kita untuk menentukan skala dan proporsi gambar. Sebagai contoh, pada gambar ini saya membuat gambar pada kertas lyra ukuran 30x40 cm. Oleh karena itu kita langsung bisa menentukan berapa skala yang kita butuhkan dengan membagi 5 cm perkolom dan baris. 30:5=6, 40:5=8 jadi hasilnya barisnya terdiri dari 6 dan kolom 8.
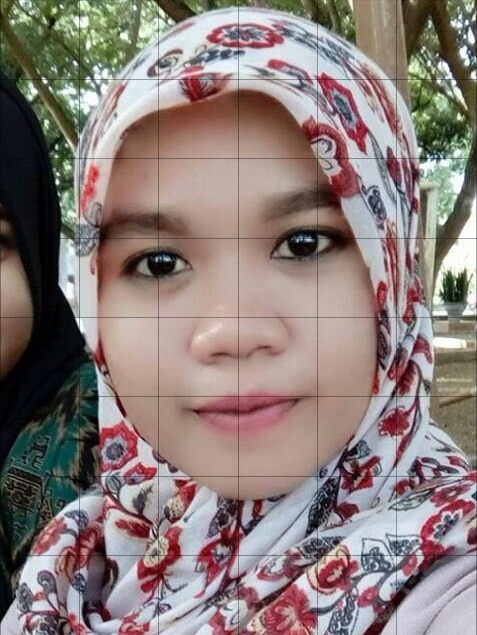
Prepare a paper with the size that I mentioned above and graphite pencil HB, 2B, 3B, 4B, 5B, 7B and mechanical pencil then apply like a sample image. To create a grid use a mechanical pencil HB for easy removal later.
Siapkan kertas dengan ukuran yang saya sebutkan di atas dan pensil grafit HB, 2B, 3B, 4B, 5B, 7B dan pensil mekanik. Terapkan seperti contoh gambar. Untuk membuat grid gunakan pensil mekanik HB agar mudah dihapus nantinya.
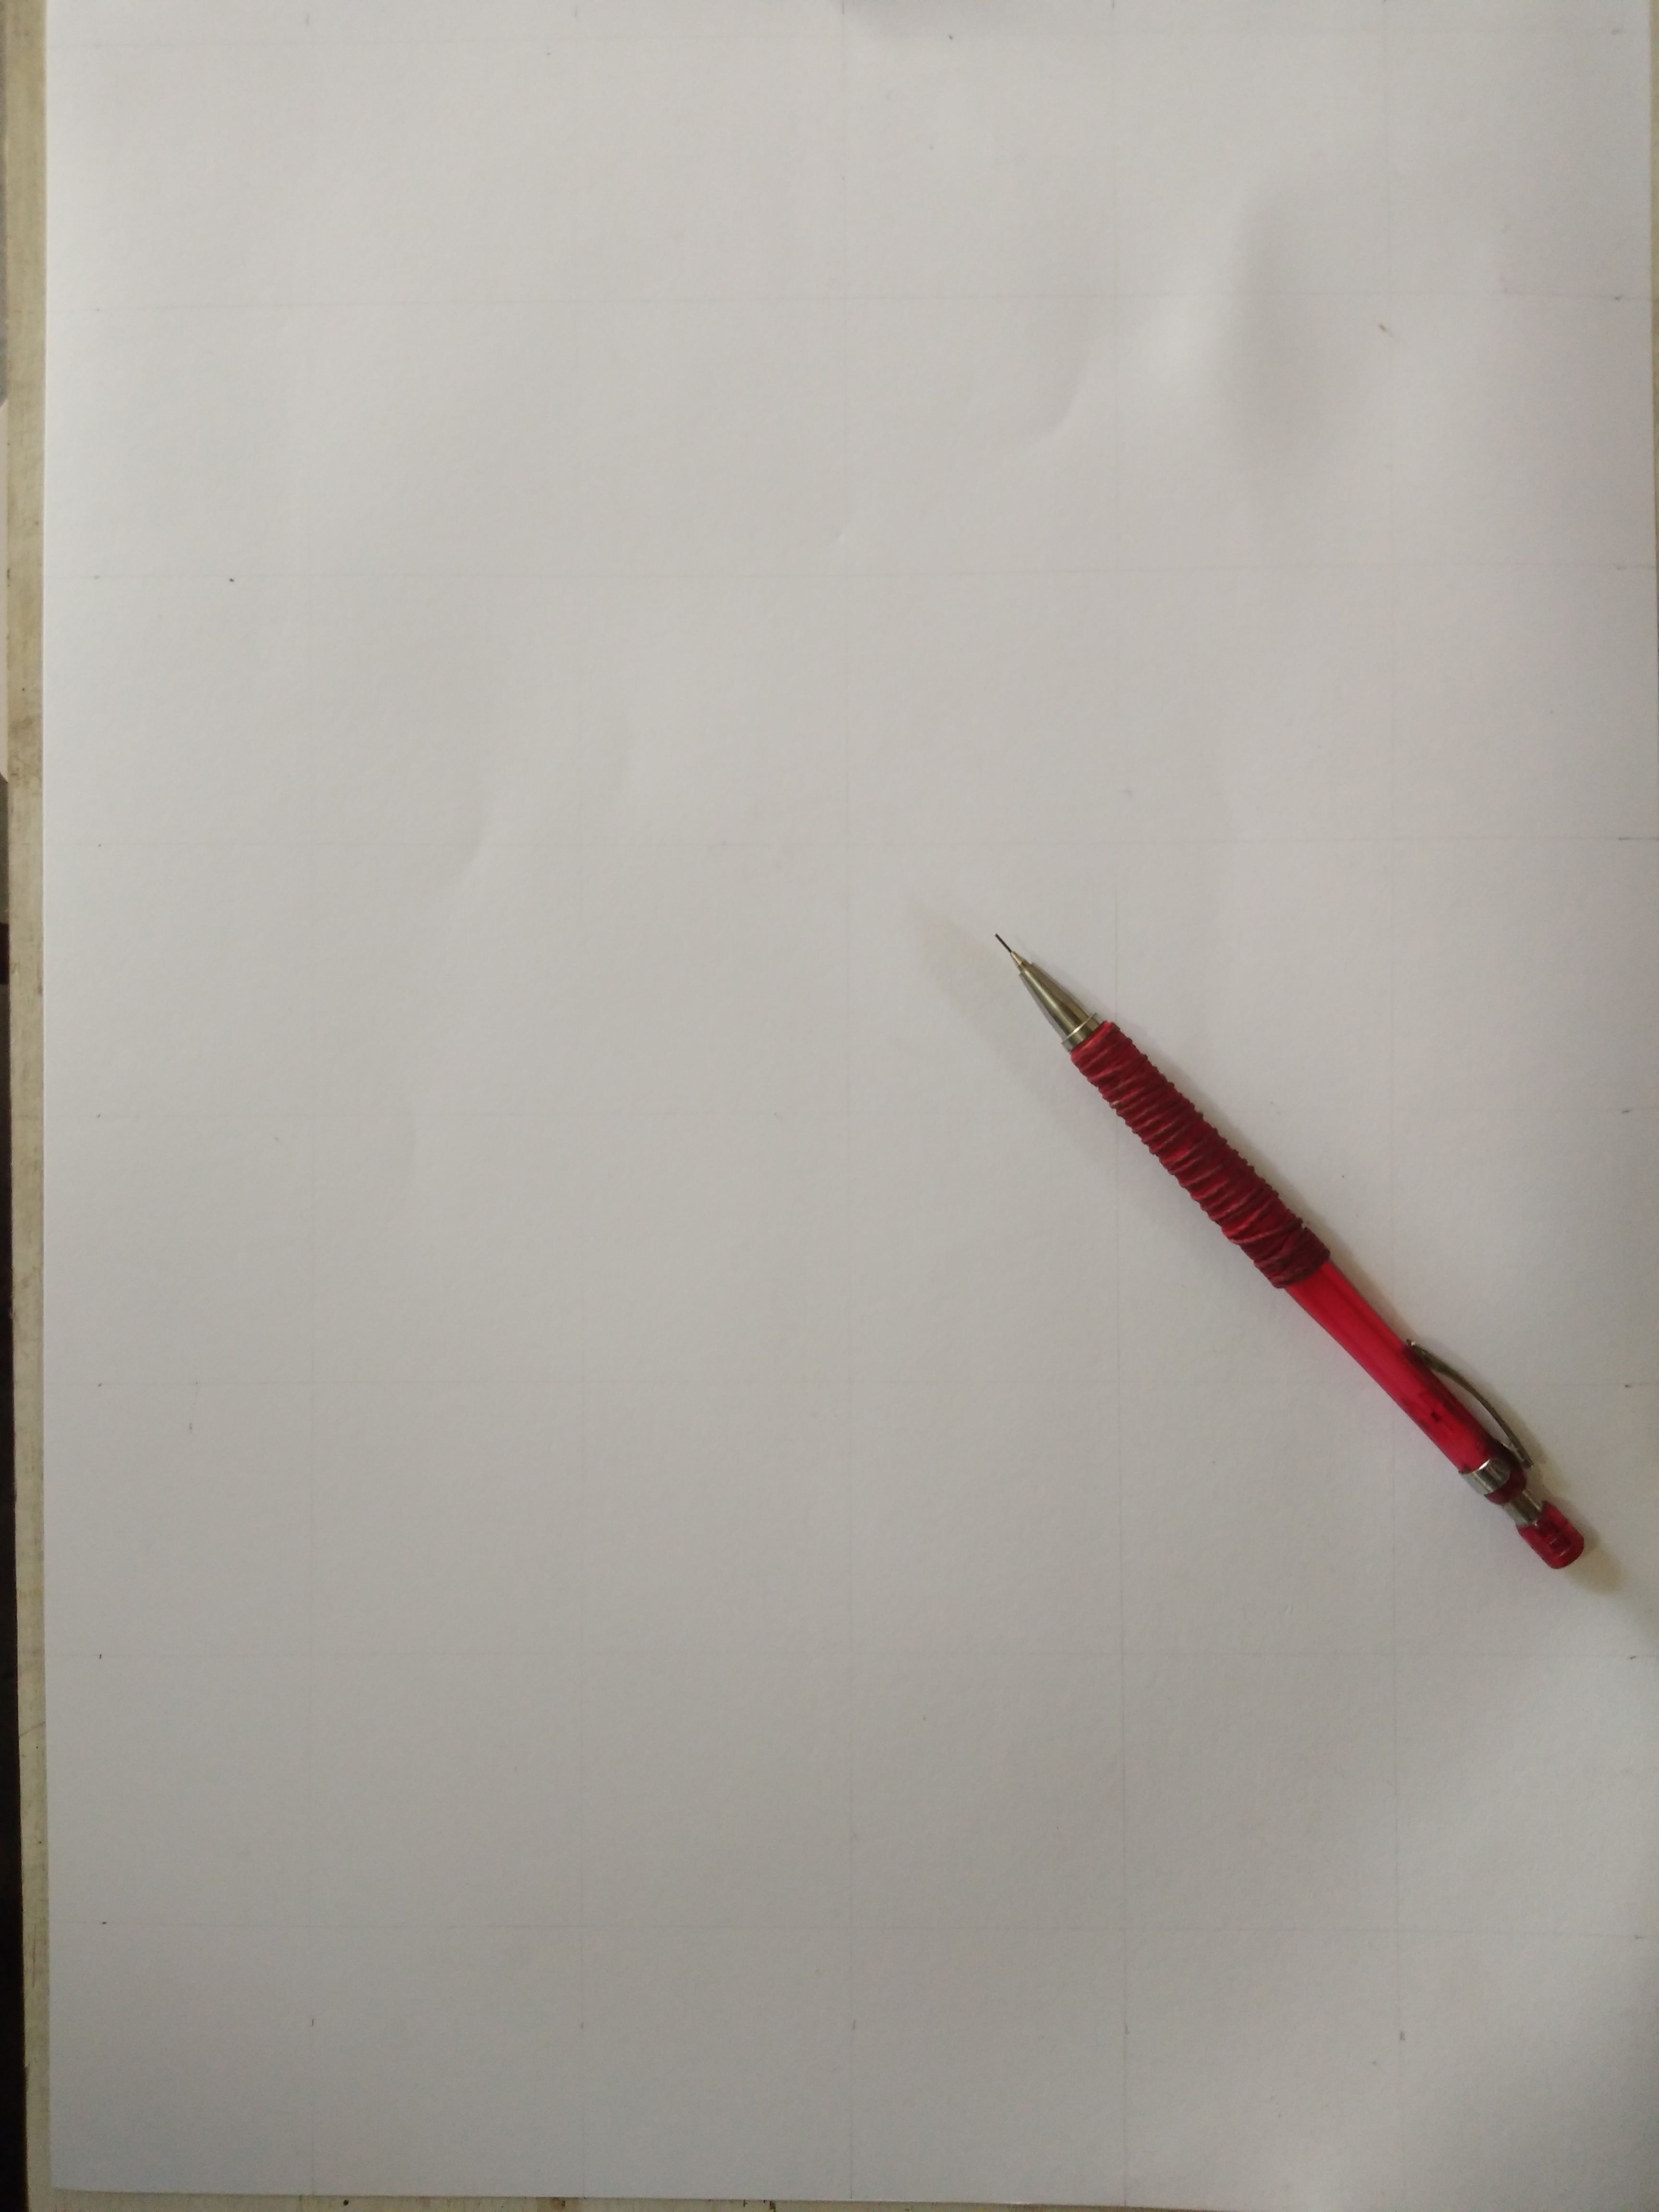
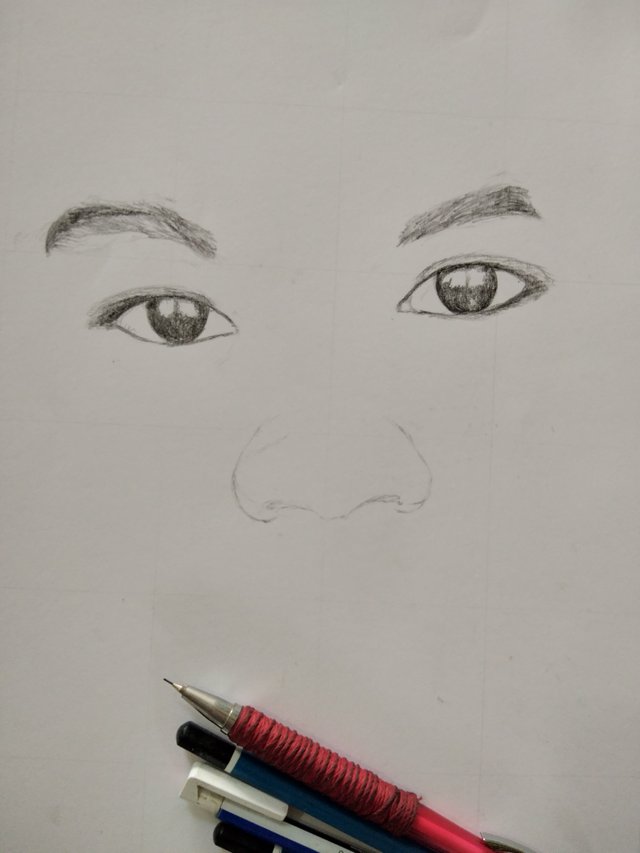
First I made a sketch of eyes and eyebrows with a 2B pencil. I blacked out his eyes with a 7B pencil and it line with a 5B pencil. So does it too with eyebrows.
Pertama saya membuat sketsa mata dan alis dengan pensil 2B. Saya menghitamkan bola matanya dengan pensil 7B dan garisnya dengan pensil 5B. Begitu juga dengan alisnya.
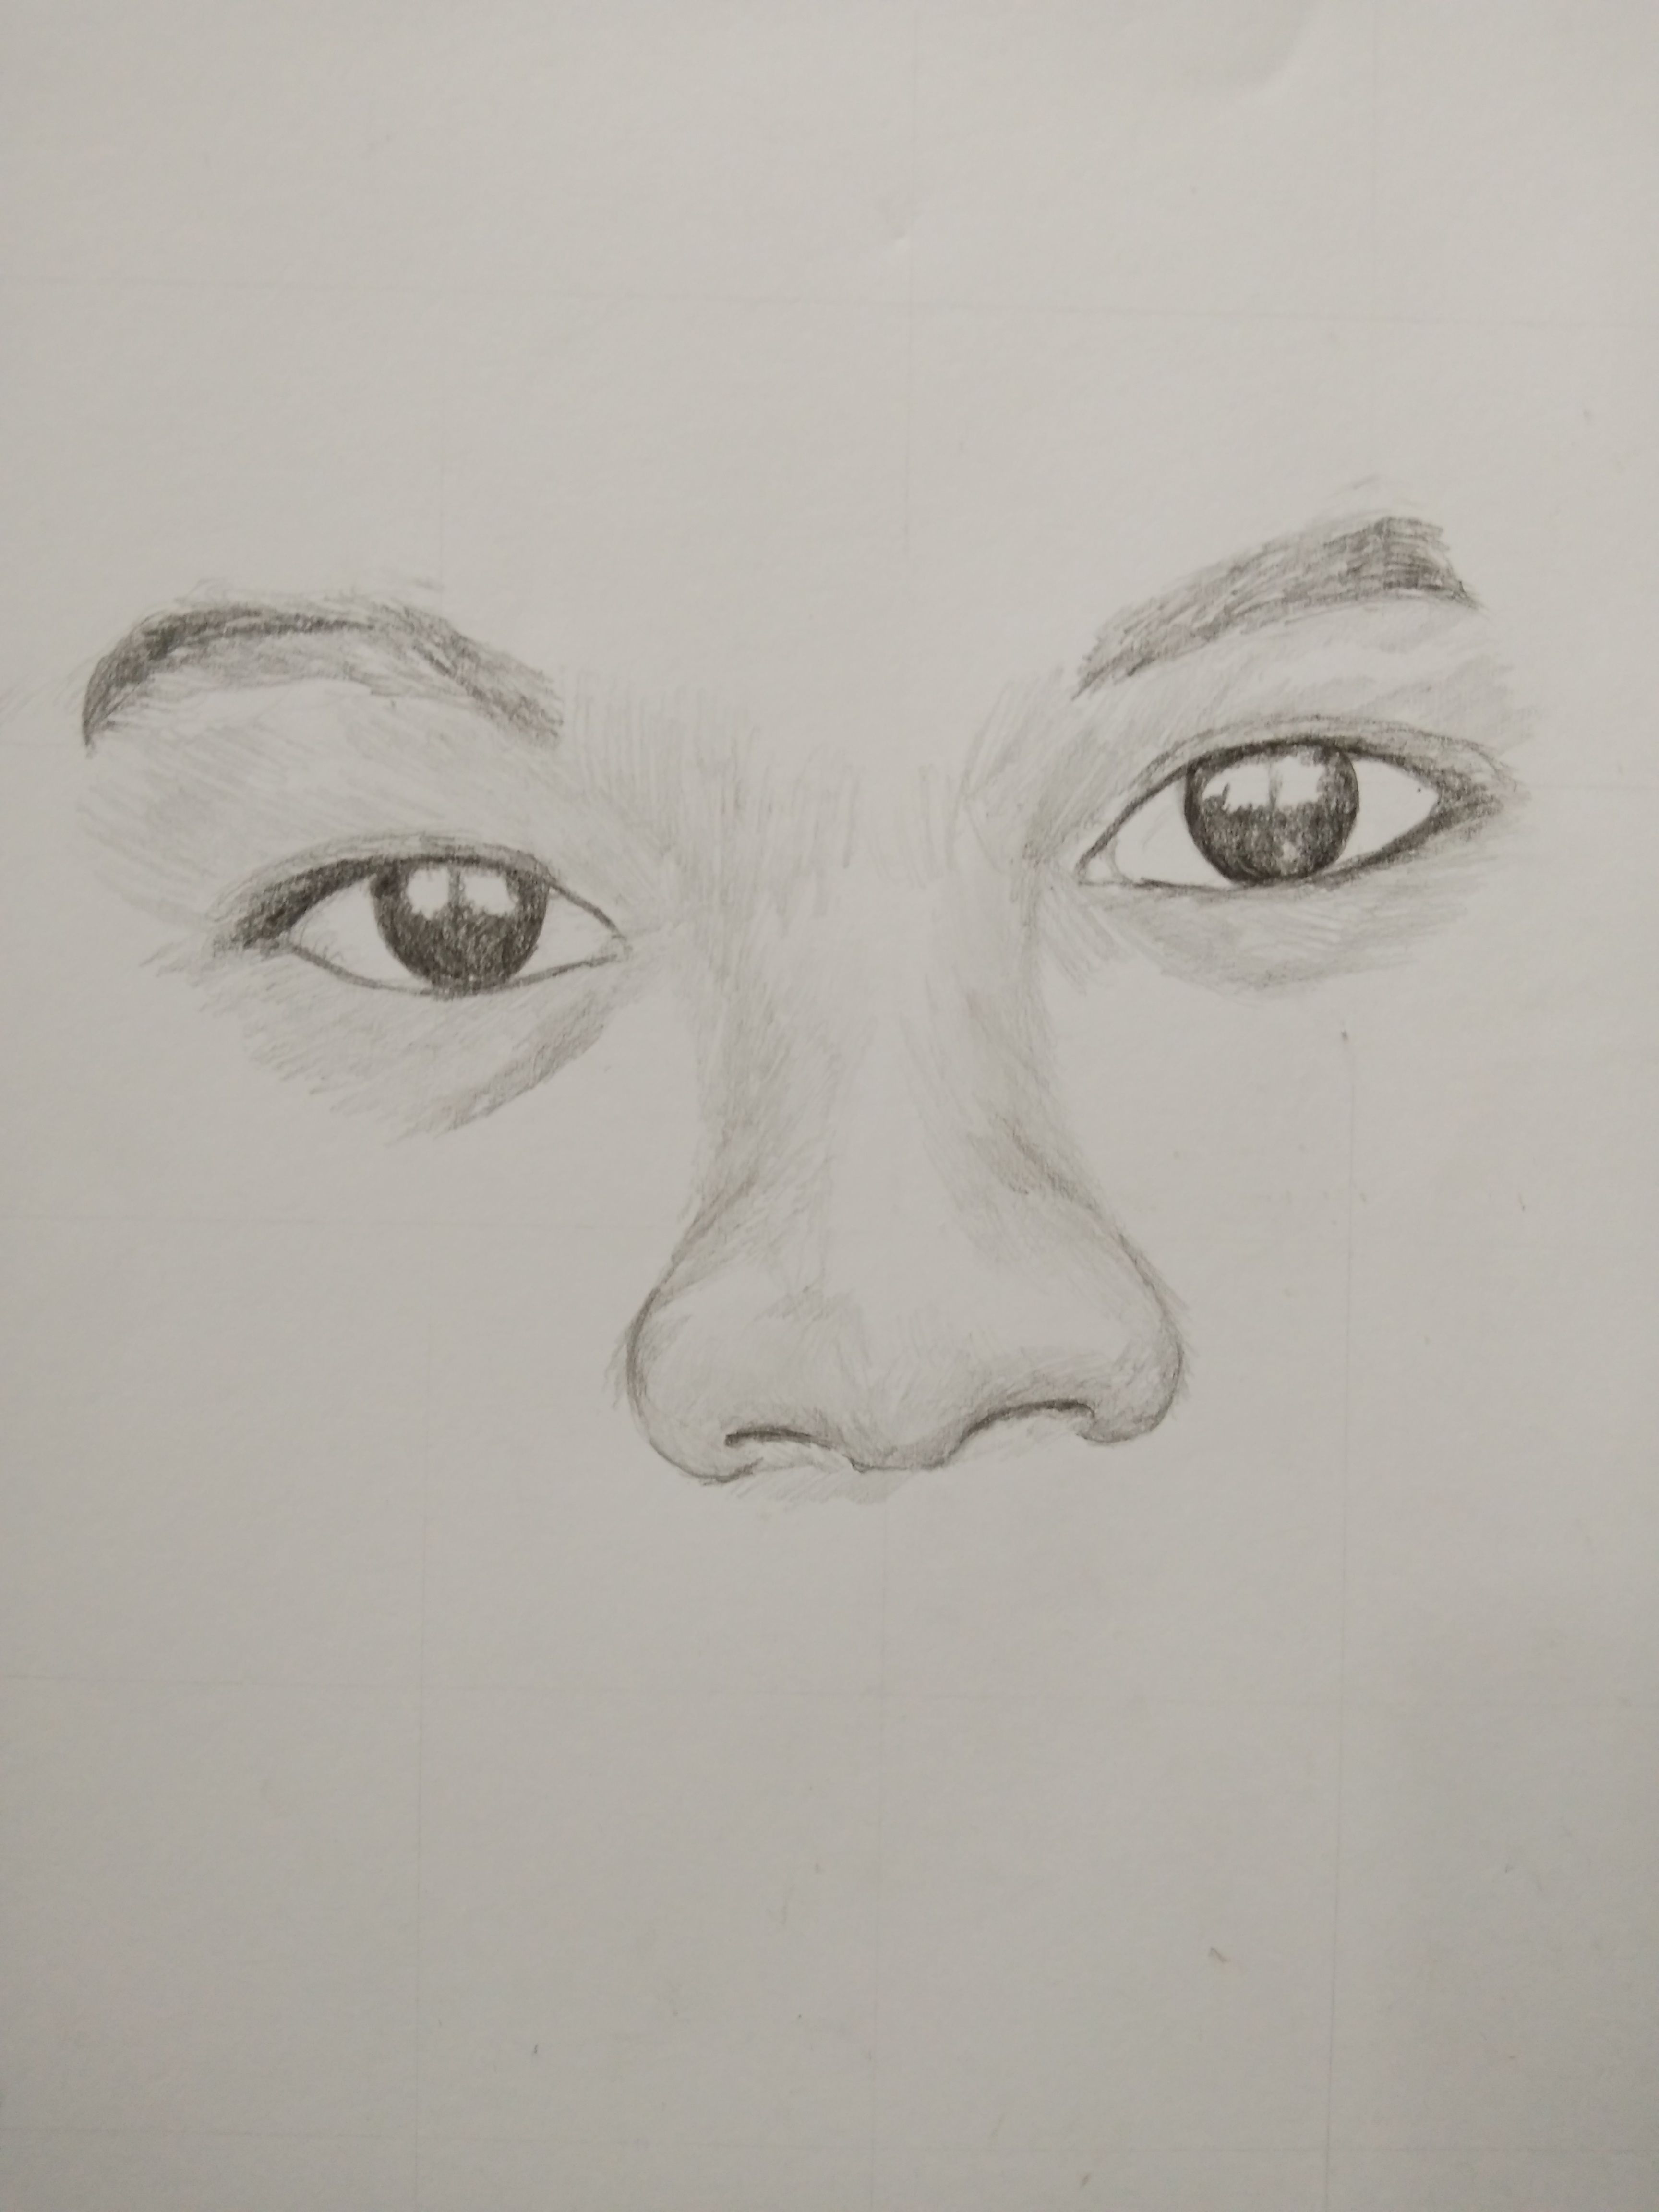
Secondly, I shaded the nose with 2B pencil then I proceeded with shading to the eyes area.
Kedua, saya mengarsir hidung dengan pensil 2B kemudian saya lanjutkan arsiran ke area mata.
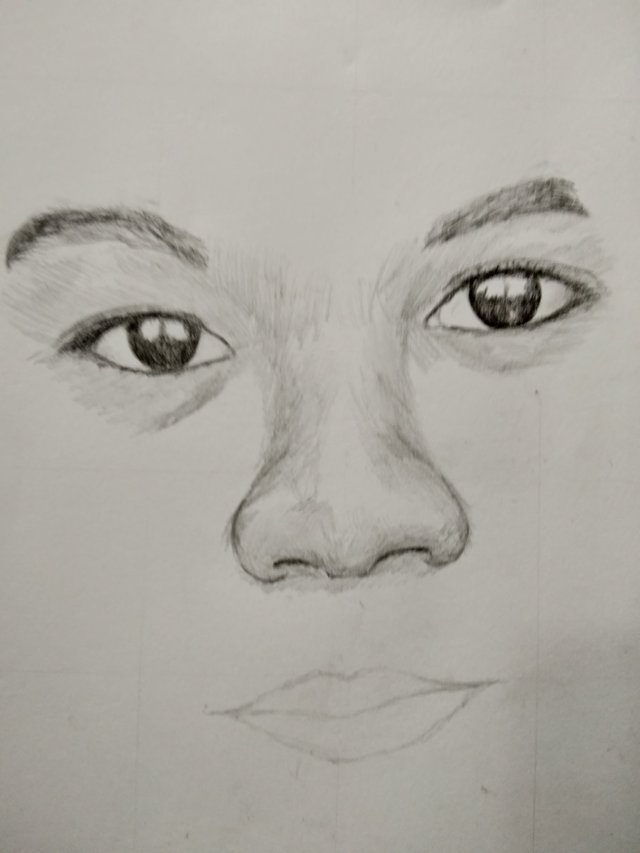
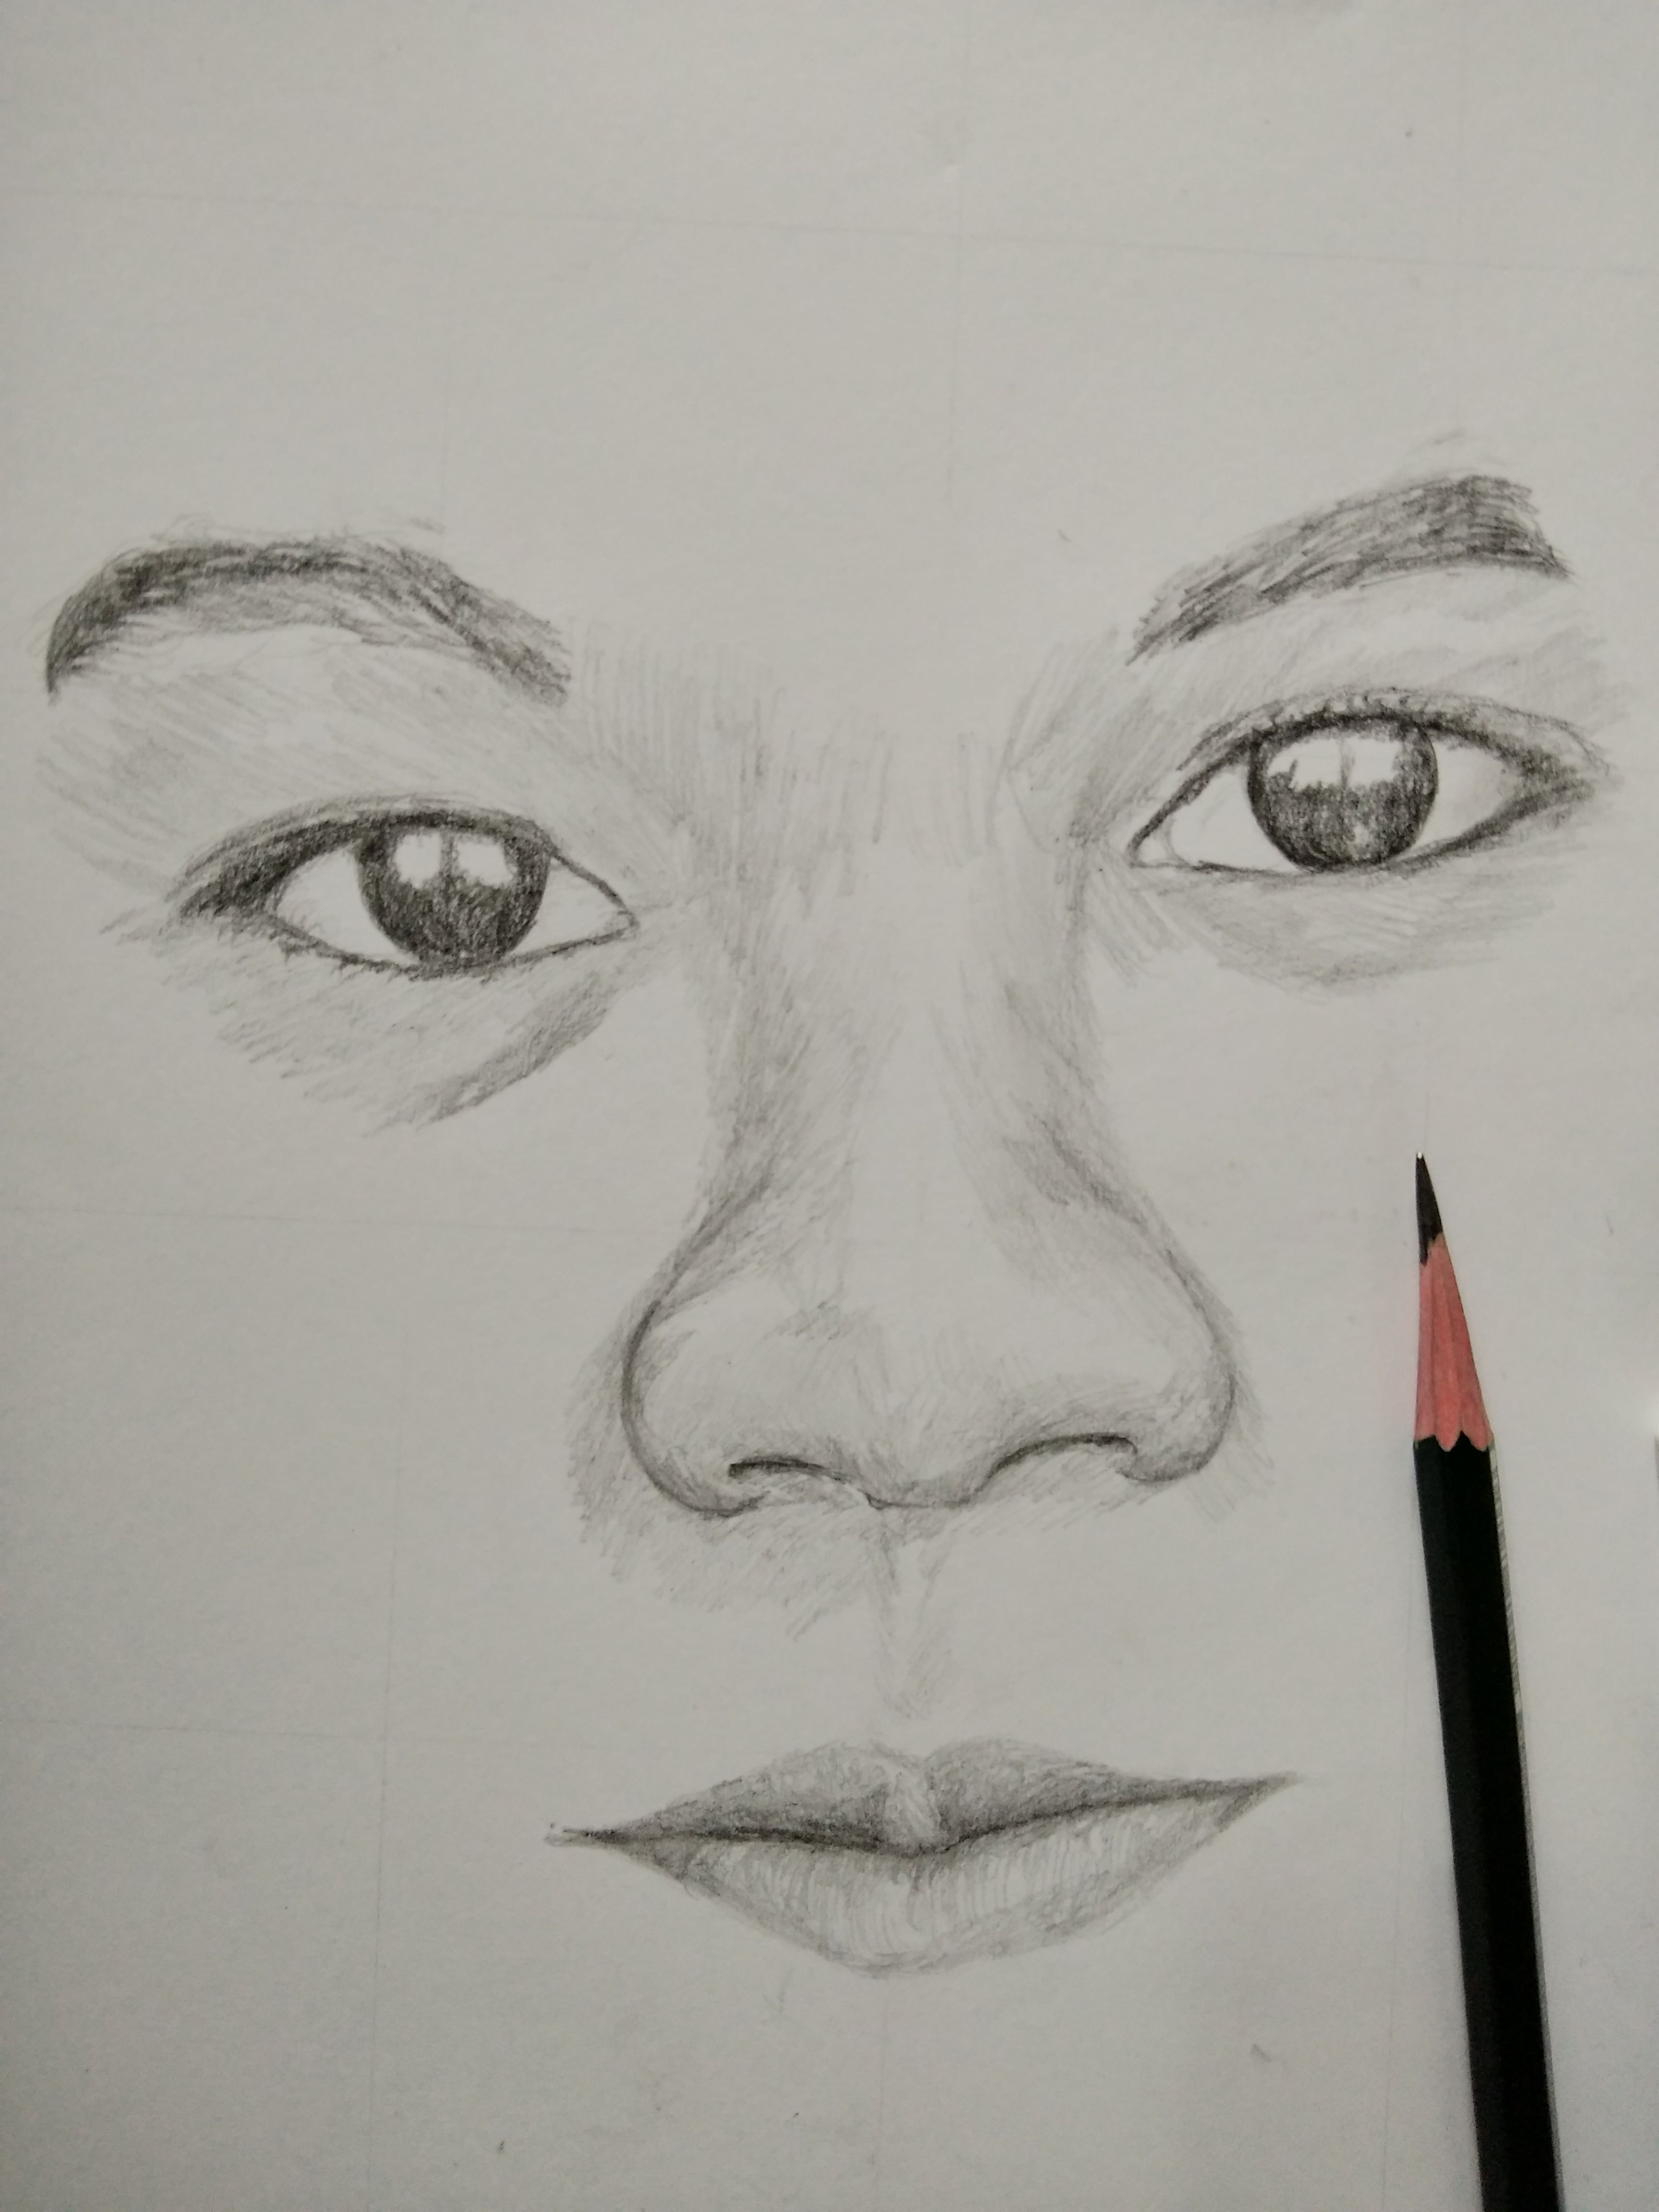
Next, I shaded the lips with 2B and 3B pencil
Selanjutnya menggambar bibir disini saya menggunakan pensil 2B dan 3B.
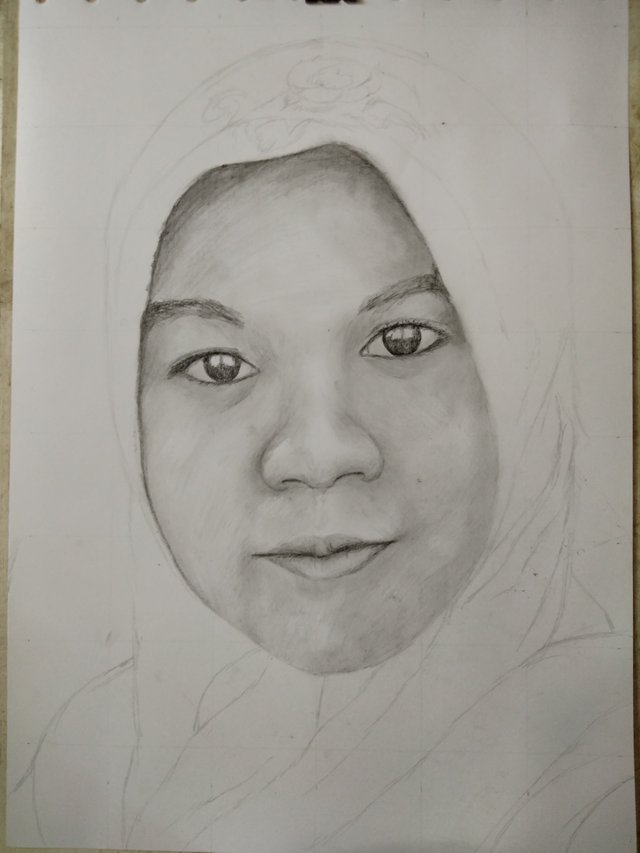
Then I made a face pattern, followed by shading the forehead with pencils 2B and 3B and rubbed it with cotton.
Kemudian membuat pola wajah, dilanjutkan dengan mengarsir bagian dahi dengan pensil 2B dan 3B serta mendusselnya dengan kapas.
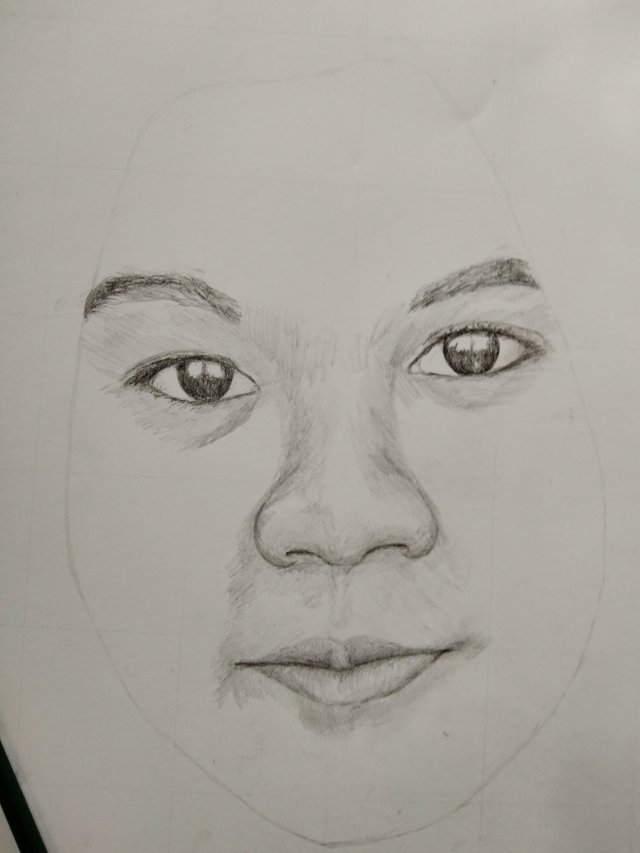
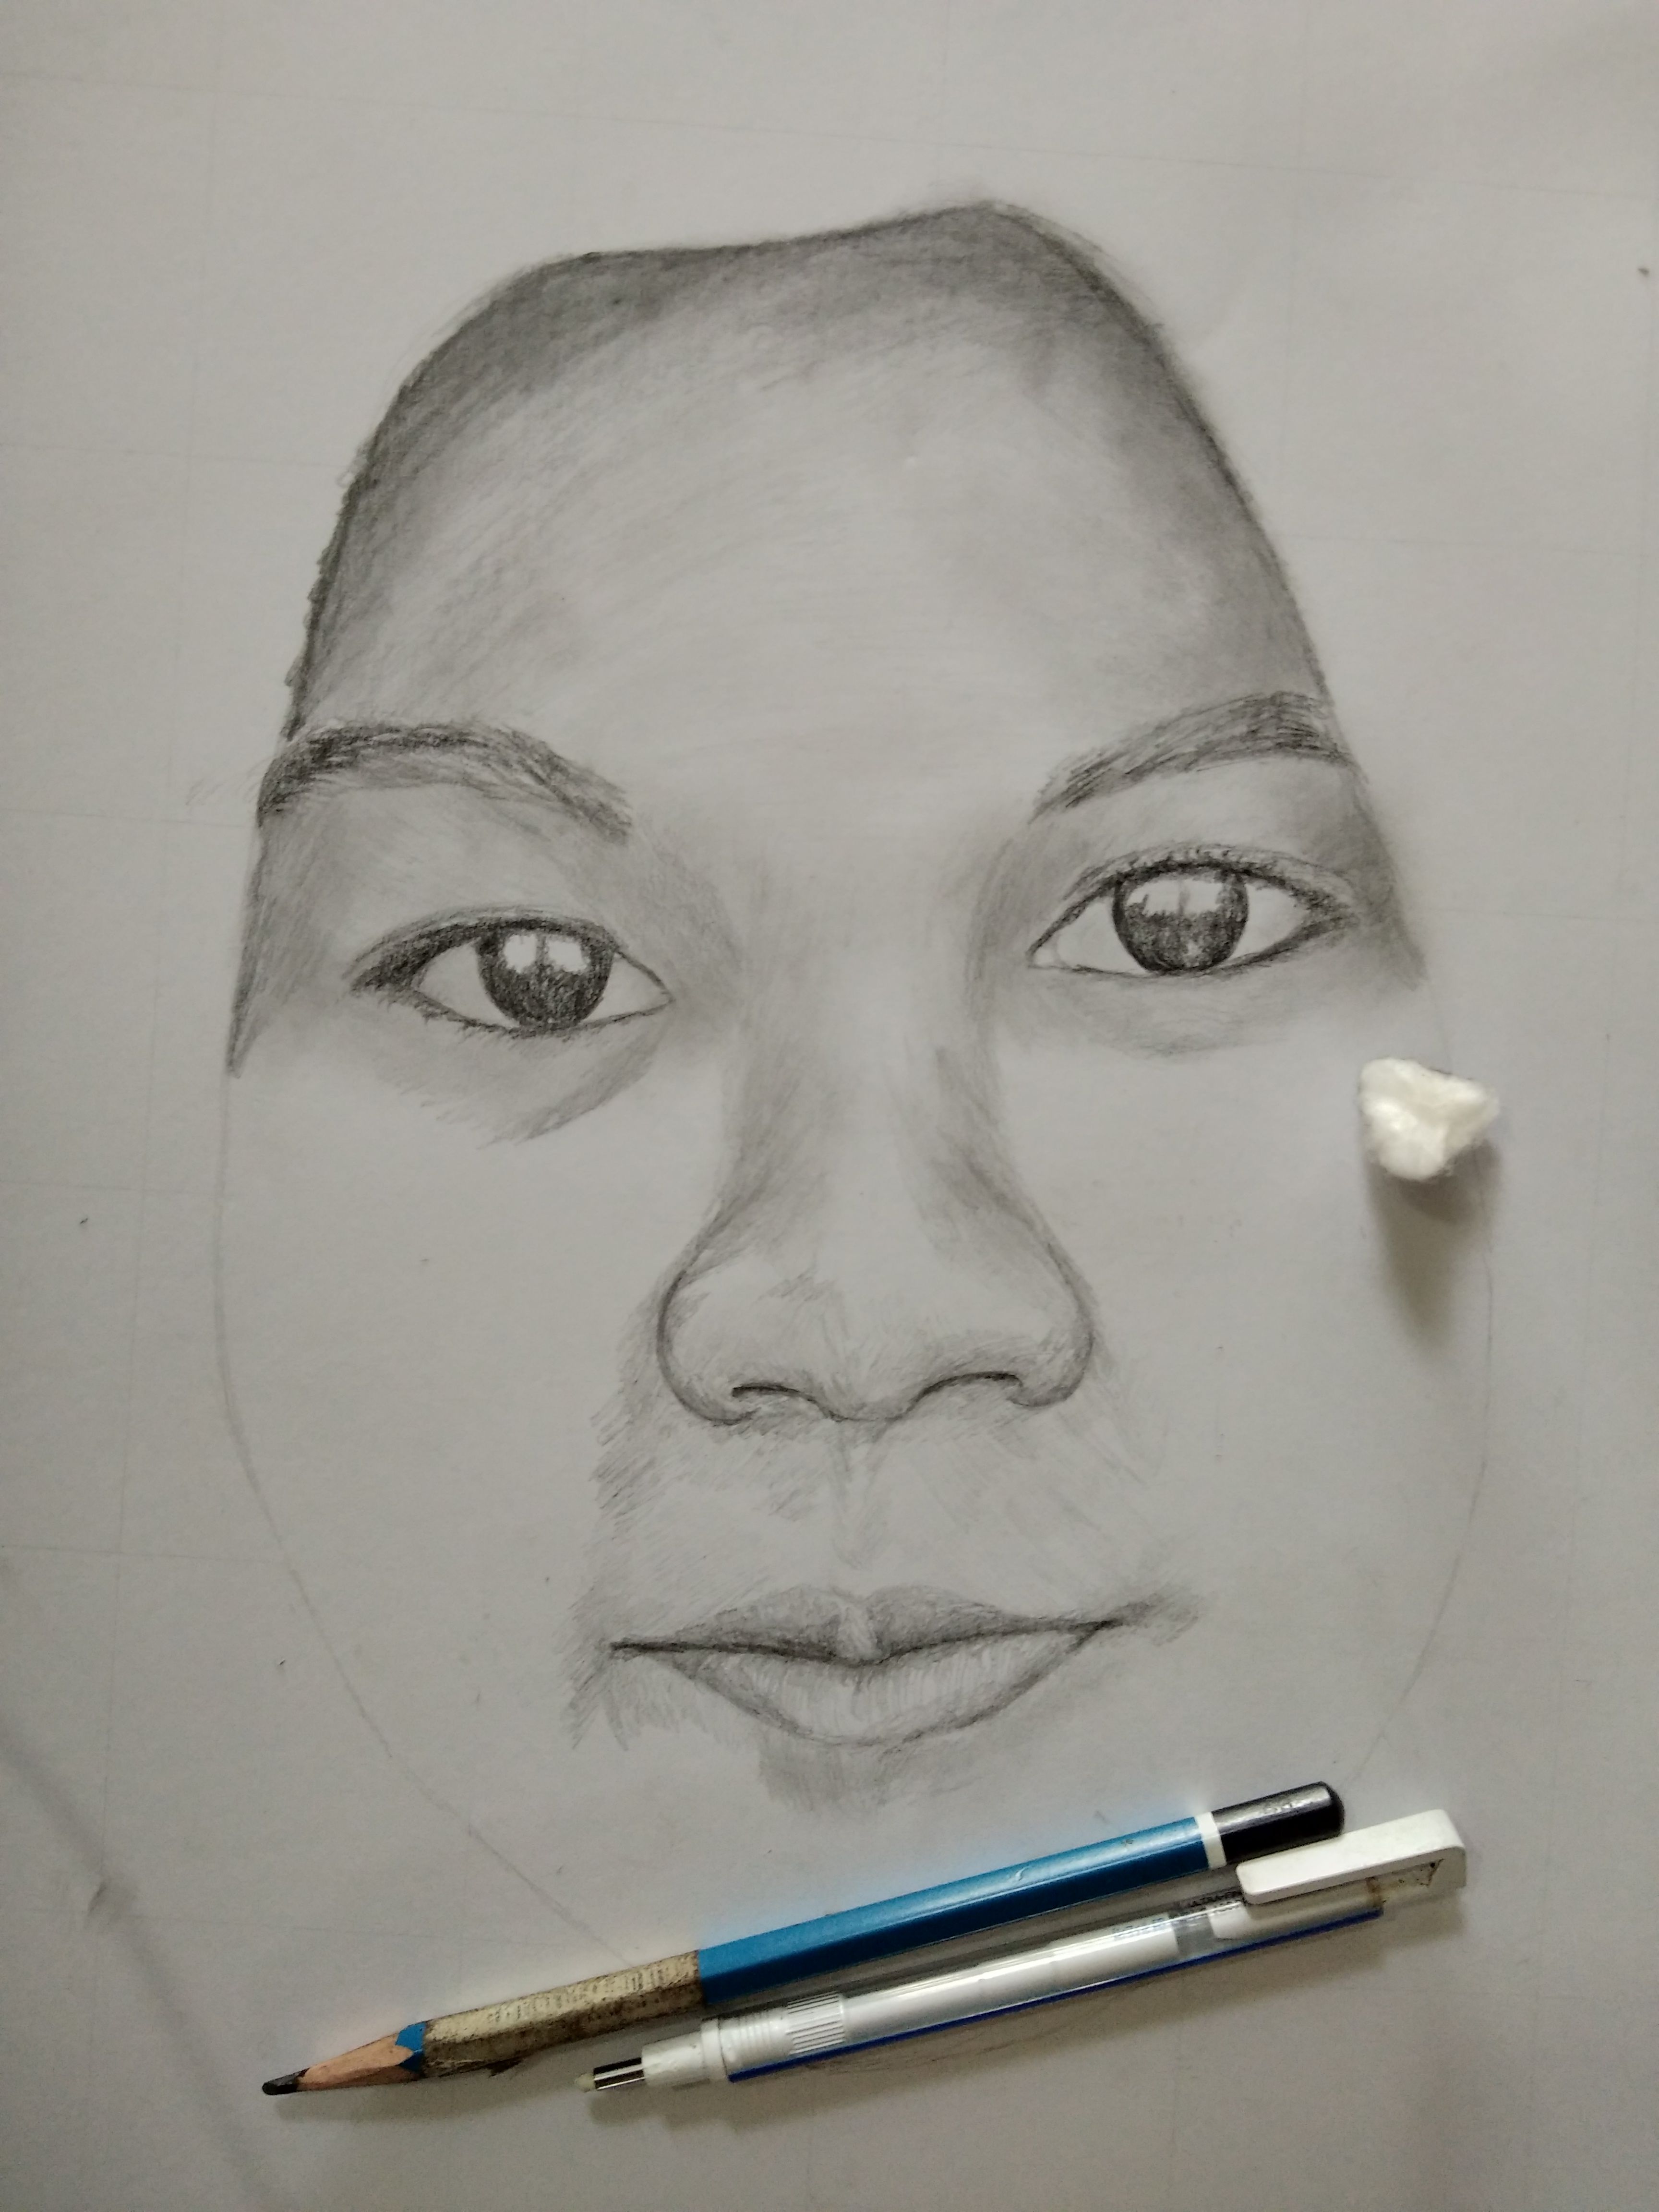
Do the same on the right and left cheeks.
Lakukan hal yang sama pada pipi kanan dan kiri.
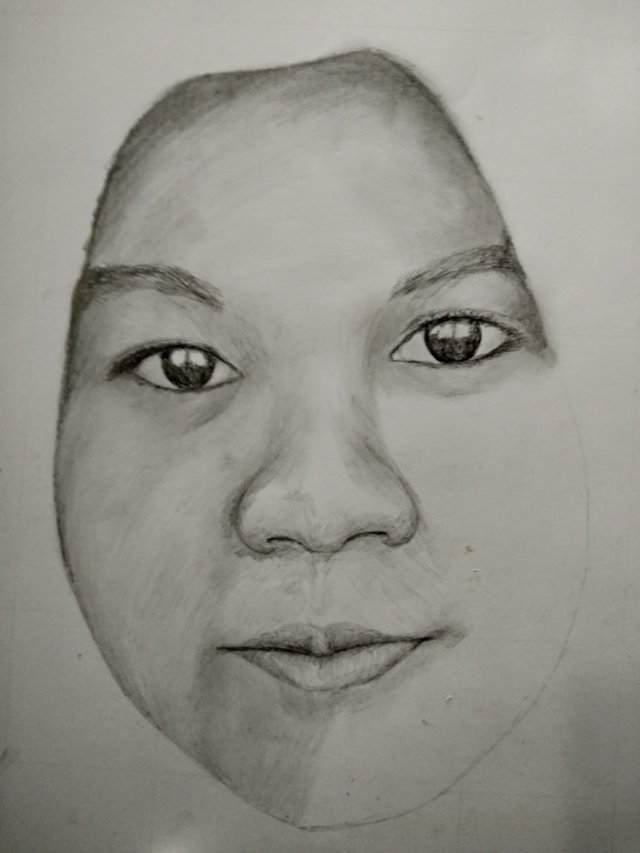
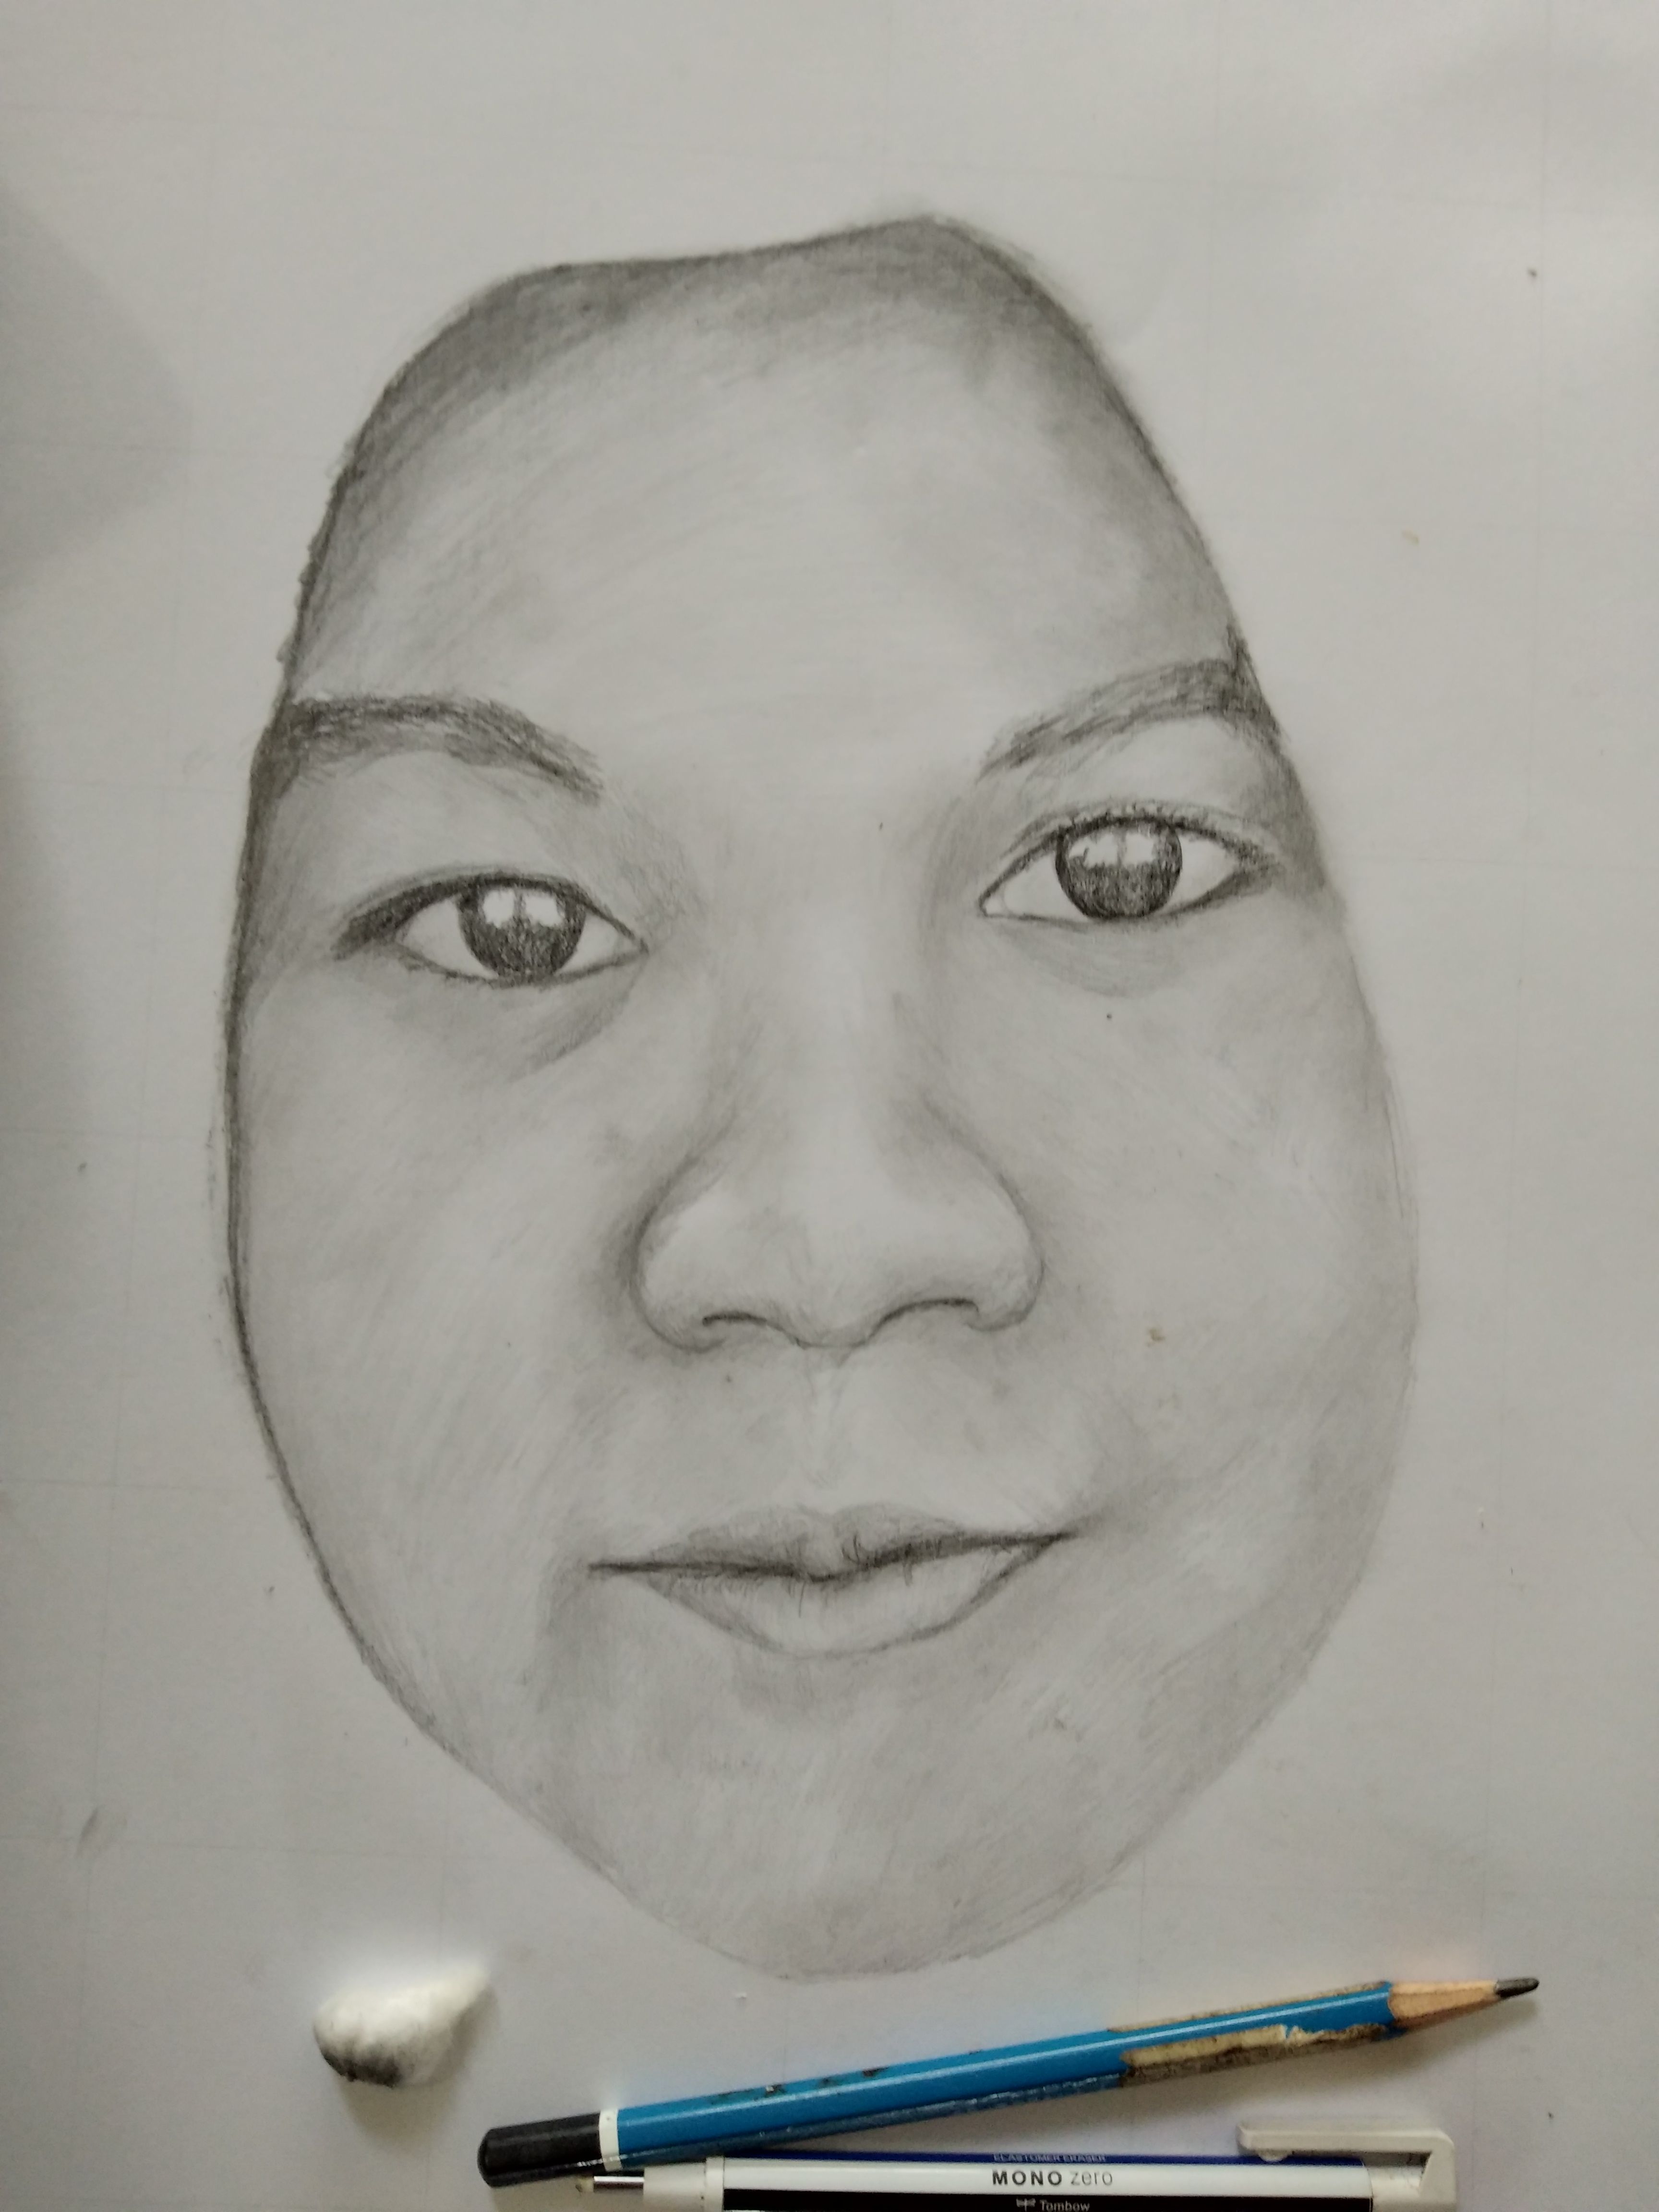
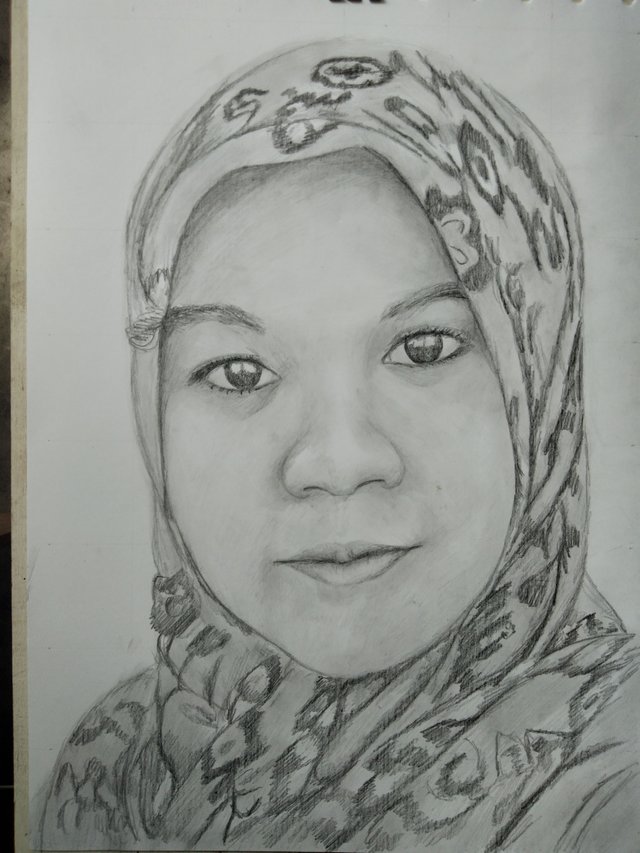
After that, sketched the shape of the viel with 2B pencil together with the motive of viels and shading motive with 4B pencil and the others with HB.
Setelah itu buat sketsa bentuk jilbabnya dengan pensil 2B sekalian dengan motifnya dan shading motifnya dengan pensil 4B dan yang lainya dengan HB.
The last step, I made the background used 4B and 5B pencils.
Terakir membuat background. Saya menggunakan pensil 4B dan 5B.
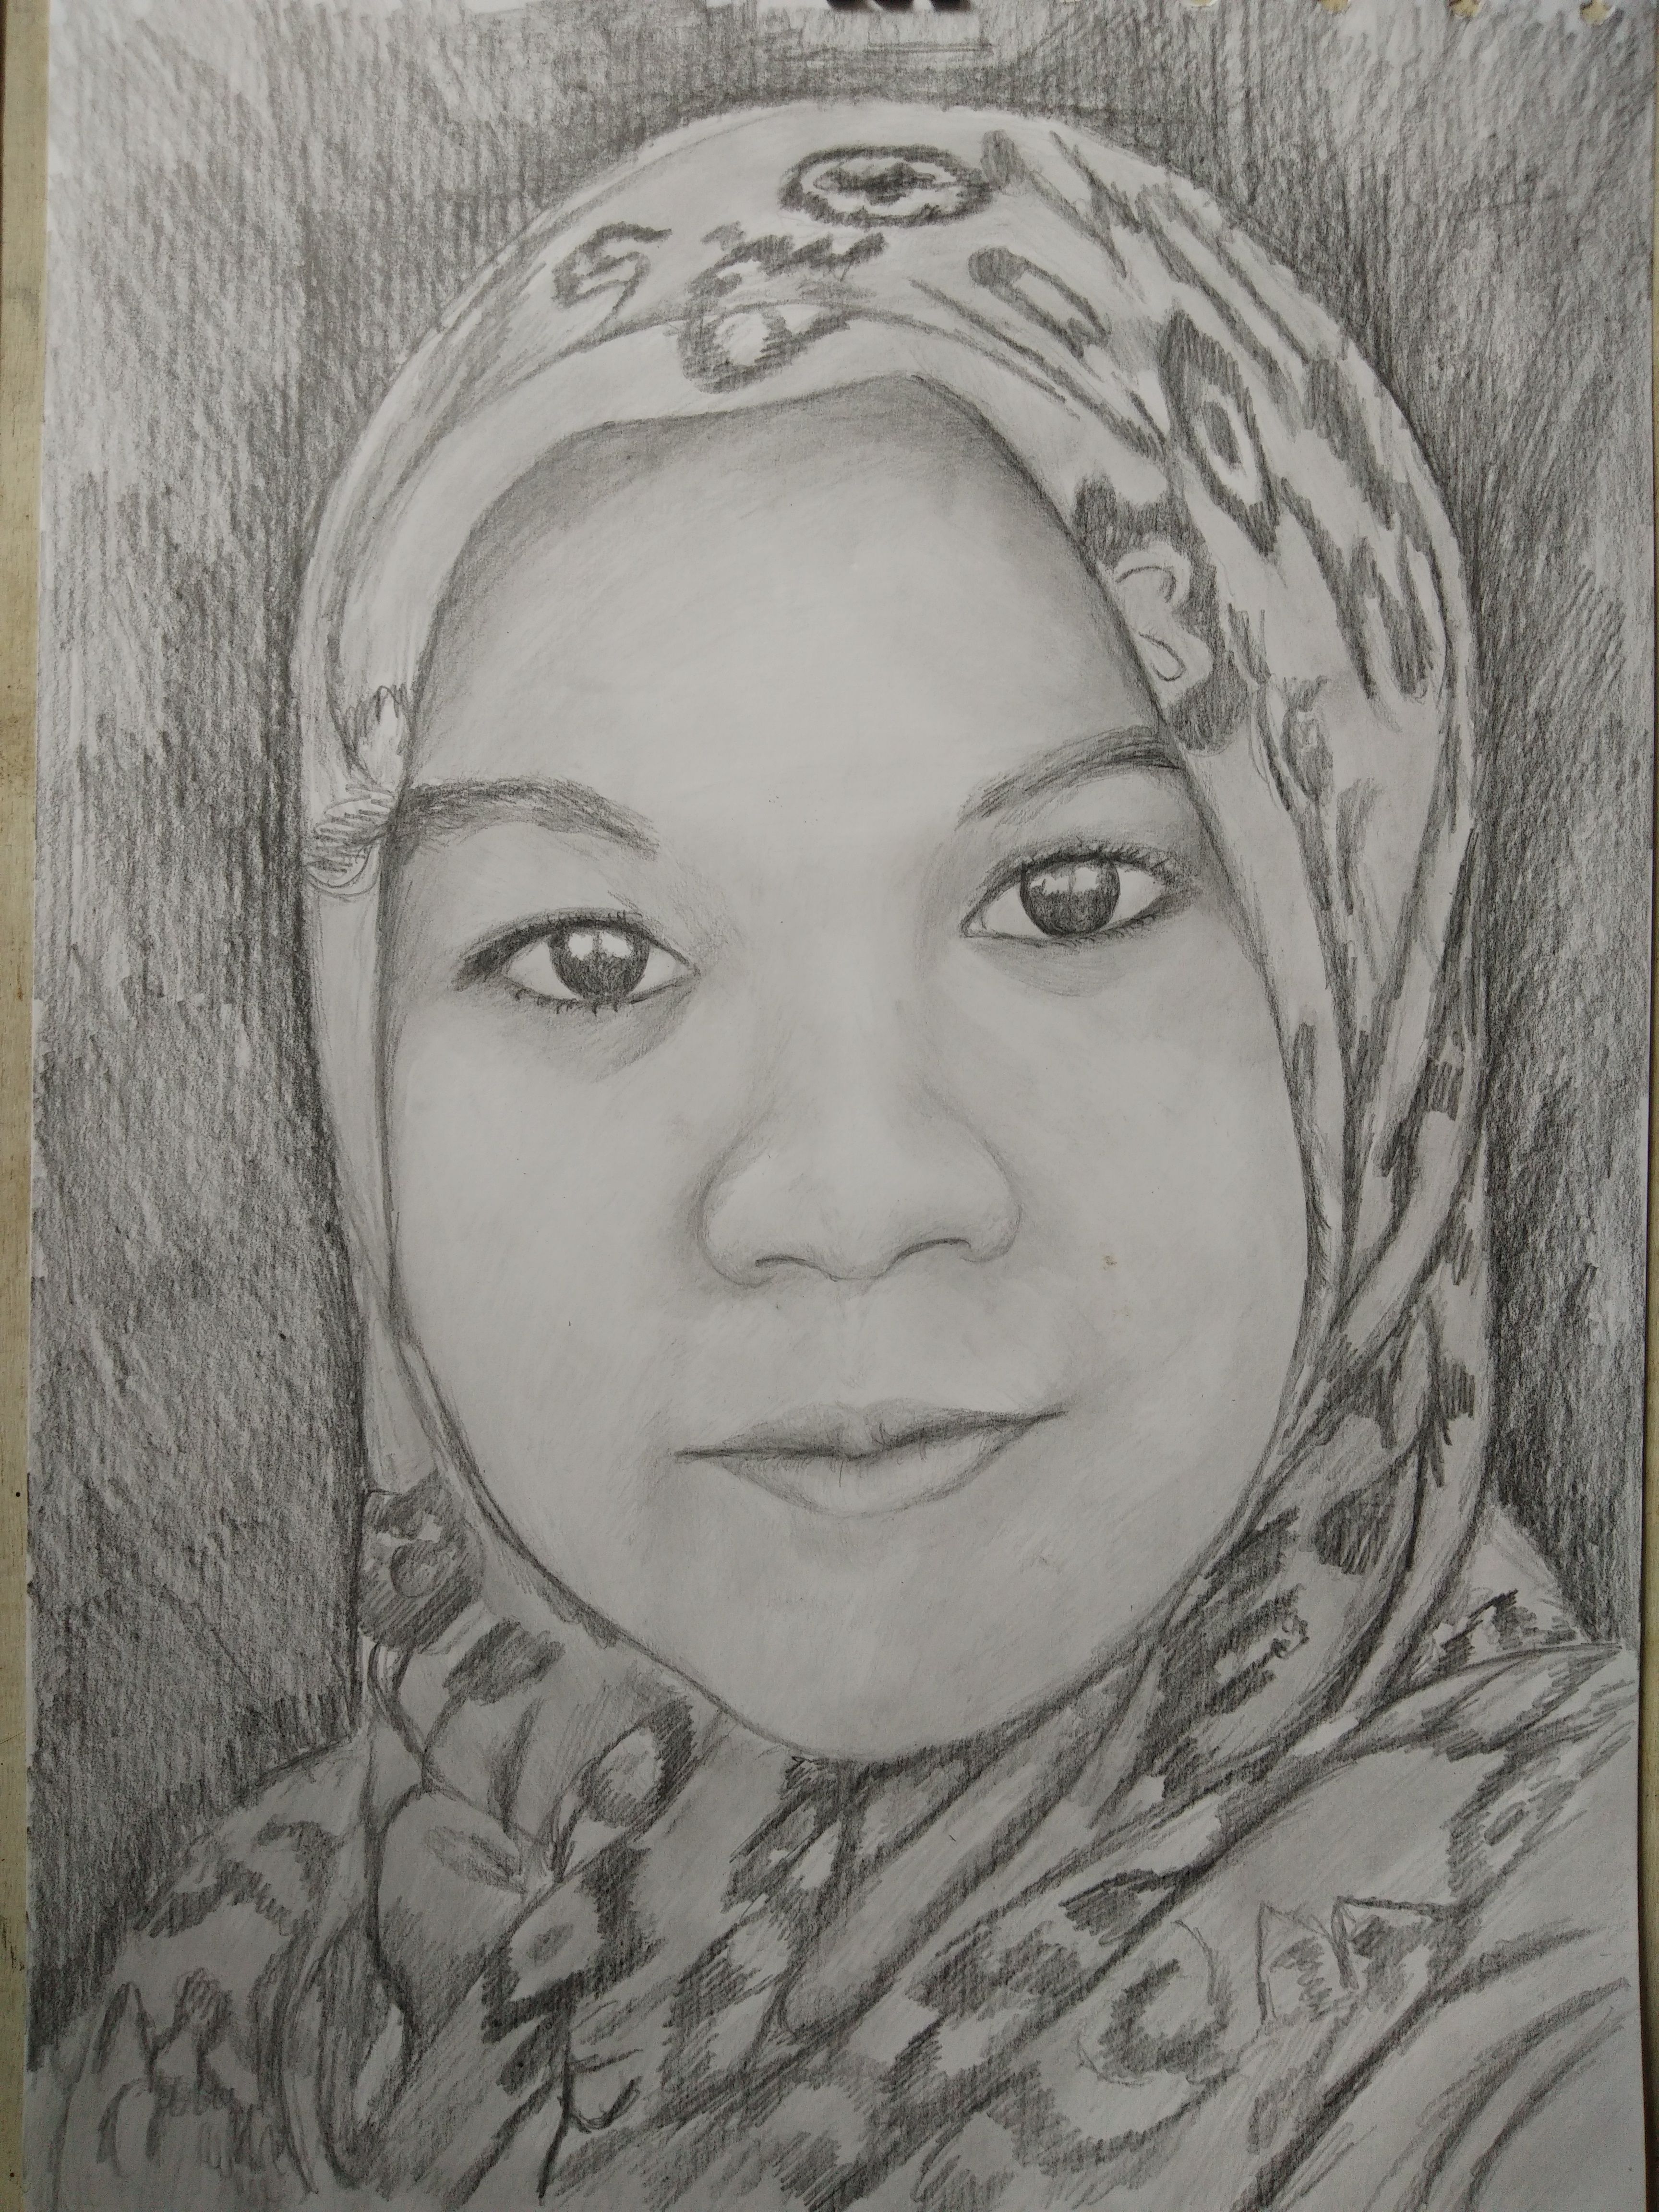
That's all my process of making it. Thanks for visiting my blog and hopefully you like my work and got inspired. I'm happy if you are interested to try drawing like I did.
Join Steemfollower to get upvote back for upvote. It's free, simple, and easy to find all contents that you may what to upvote and get your own content to be seen by other users and possibly upvote. But you must upvote at least 5 post that you like everyday, automatically our related post will be displayed.
Regard @huslein.slash
#thealliance

This post has been voted on from MSP3K courtesy of @isaria from the Minnow Support Project ( @minnowsupport ).
Bots Information:
Join the P.A.L. Discord | Check out MSPSteem | Listen to MSP-Waves
Downvoting a post can decrease pending rewards and make it less visible. Common reasons:
Submit
Siip bagus gambarnya, wah bisa seharian gambar foto ini ...sip! :)
Downvoting a post can decrease pending rewards and make it less visible. Common reasons:
Submit
Makasih mas. Aku cuma 5 jam buatnya mas, krn dah biasa. Hehe
Downvoting a post can decrease pending rewards and make it less visible. Common reasons:
Submit
Keren ih, perfec sekali step by stepnya.
Downvoting a post can decrease pending rewards and make it less visible. Common reasons:
Submit
Hehe makasih kak, pngen berbagai teknik aja
Downvoting a post can decrease pending rewards and make it less visible. Common reasons:
Submit
Really good tutorial !
Downvoting a post can decrease pending rewards and make it less visible. Common reasons:
Submit
Thank you
Downvoting a post can decrease pending rewards and make it less visible. Common reasons:
Submit
great planning and perfect drawing. Thank you for sharing your details :)
Downvoting a post can decrease pending rewards and make it less visible. Common reasons:
Submit
You welcome, I'm glad if you like it.
Downvoting a post can decrease pending rewards and make it less visible. Common reasons:
Submit
Mantap ilmunya,
Sangat bermanfaat sekali, keren
Downvoting a post can decrease pending rewards and make it less visible. Common reasons:
Submit
Thanks
Downvoting a post can decrease pending rewards and make it less visible. Common reasons:
Submit
Your Post Has Been Featured on @Resteemable!
Feature any Steemit post using resteemit.com!
How It Works:
1. Take Any Steemit URL
2. Erase
https://3. Type
reGet Featured Instantly � Featured Posts are voted every 2.4hrs
Join the Curation Team Here | Vote Resteemable for Witness
Downvoting a post can decrease pending rewards and make it less visible. Common reasons:
Submit
Makin berkembang aja nih wak sleash.....
Sukses trus wak!, semoga.ada penerus @huslein.slash!.
Downvoting a post can decrease pending rewards and make it less visible. Common reasons:
Submit
Makasih bg, masalahny ga ada yang mau dikasih ilmu padahal gratis. Haha
Downvoting a post can decrease pending rewards and make it less visible. Common reasons:
Submit
Yach tak naik pikirlah kalau gitu!. Hahahha
Downvoting a post can decrease pending rewards and make it less visible. Common reasons:
Submit
That is a great tutorial, you have done it very well, clearly explained and show on the example. I think people with patience and will to learn and create will find it useful.
Downvoting a post can decrease pending rewards and make it less visible. Common reasons:
Submit
Yeah thanks, I likr to share my technique for everyone to try like I did. I hope it useful.
Downvoting a post can decrease pending rewards and make it less visible. Common reasons:
Submit
Your drawing is fantastic! I found a program for ipad and am going to try this. Thanks for the inspiration. 😀
Downvoting a post can decrease pending rewards and make it less visible. Common reasons:
Submit
Wow, I'm glad to help other people. Nice to know, it will be easy.
Downvoting a post can decrease pending rewards and make it less visible. Common reasons:
Submit
Hi , very nice portrait work, you have good drawings, @huslein.slash , i followed you, i like drawing too also :)
Downvoting a post can decrease pending rewards and make it less visible. Common reasons:
Submit
Thanks yo so much I will follow you too
Downvoting a post can decrease pending rewards and make it less visible. Common reasons:
Submit
Yet another amazing post--keep doing what you’re doing, it’s incredible. I love checking out your work because of how detailed it is!
Downvoting a post can decrease pending rewards and make it less visible. Common reasons:
Submit
Thanks you if you are interested with my work. I'm very happy to hear it.
Downvoting a post can decrease pending rewards and make it less visible. Common reasons:
Submit
Congratulations! This post has been upvoted from the communal account, @minnowsupport, by huslein slash from the Minnow Support Project. It's a witness project run by aggroed, ausbitbank, teamsteem, theprophet0, someguy123, neoxian, followbtcnews, and netuoso. The goal is to help Steemit grow by supporting Minnows. Please find us at the Peace, Abundance, and Liberty Network (PALnet) Discord Channel. It's a completely public and open space to all members of the Steemit community who voluntarily choose to be there.
If you would like to delegate to the Minnow Support Project you can do so by clicking on the following links: 50SP, 100SP, 250SP, 500SP, 1000SP, 5000SP.
Be sure to leave at least 50SP undelegated on your account.
Downvoting a post can decrease pending rewards and make it less visible. Common reasons:
Submit
Keren banget sketsanya, bang. Ini kalau lagi menggambar gini, tangan ga boleh basah ya, bang? Kalau orang yang tangannya sering berkeringat, harus pegang handuk kecil kayaknya ya biar ga netes ke atas kerta.
Downvoting a post can decrease pending rewards and make it less visible. Common reasons:
Submit
Makasih bg. Iya klo tangan sering keringat agak susah sih pkek tisu atau lapisi pkek kertas lain tmpat tangan.
Downvoting a post can decrease pending rewards and make it less visible. Common reasons:
Submit