It's Tuesday, Art Day!
An Artistic Day Friends!
This is another episode of my paper art tutorial, which is just the 2nd. The 1st one was about Rose Napkin Folding in Easy Steps. I find it very helpful especially to those who are really fond of making something out of paper.
You might want to know why do most of my art blogs are all about PAPER arts. Well, the rationale below tells you everything towards this kind of art selection.
Rationale
I have chosen paper arts in my tutorial piece to show everybody that there are more than a hundred ways to turn paper into something valuable, especially those which we considered rubbish already.This is for everybody but i'm targeting more the teenagers and younger for I believe they are the ones who deal much with paper.
I also have noticed that there's also a greater percentage of paper leftovers that's considered as waste material immediately. And take note that these leftovers are still very usable. Some of the people just don't know how to get the best out of these.
I am positive that with this, the creativity that one possesses will be very much nurtured, and what's more is that we can be able to turn papers that we labeled as useless into something useful, thus lessen the percentage of these to be thrown into rubbish.
This is just one of those hundred ways of bringing the best out of papers. So, let's get started!
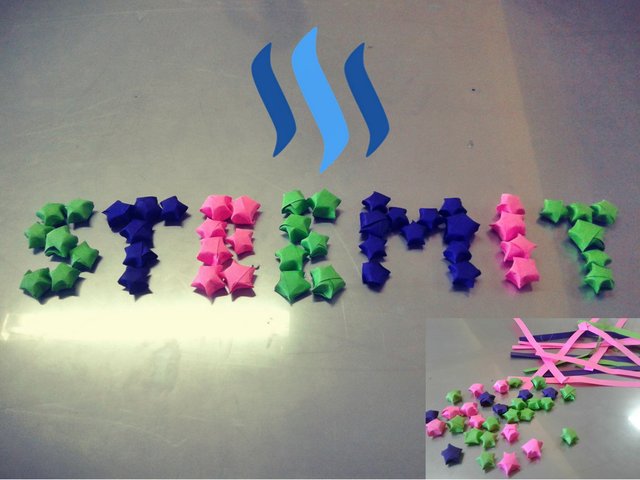
Lucky Stars Origami
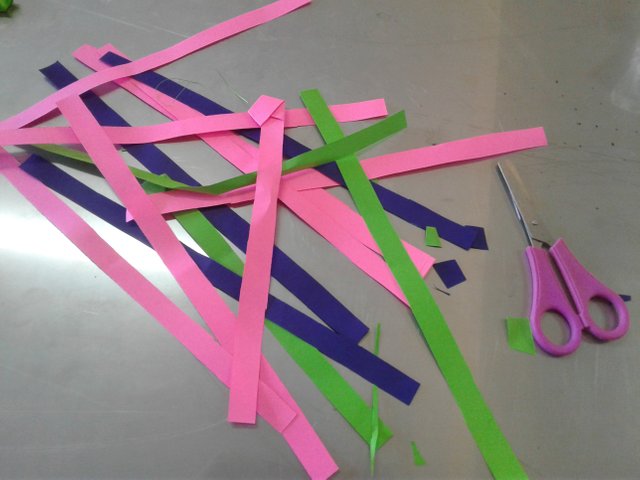
STEP 1 : Prepare the materials needed: STRIPS OF PAPERS of 8.5x11/8.5x13 inches long, and SCISSORS. You can select any color that you want but in here, I used different colors because I so love seeing them not in monochromatic colors.
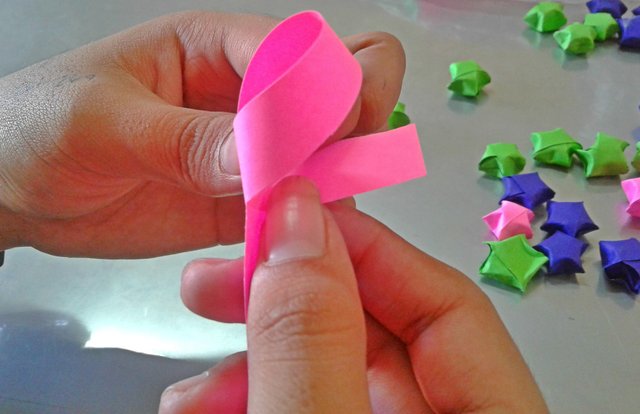
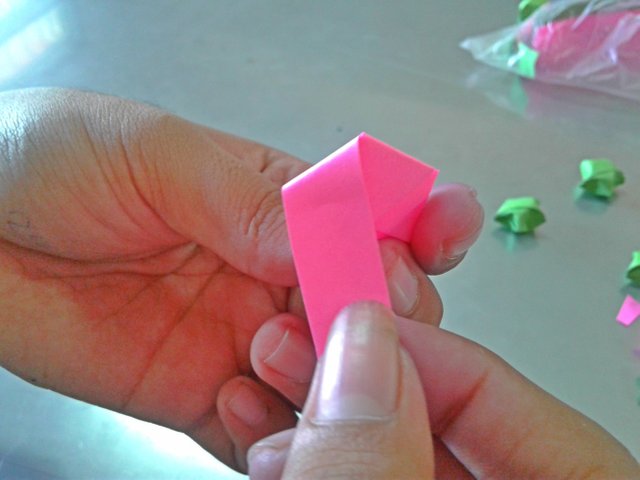
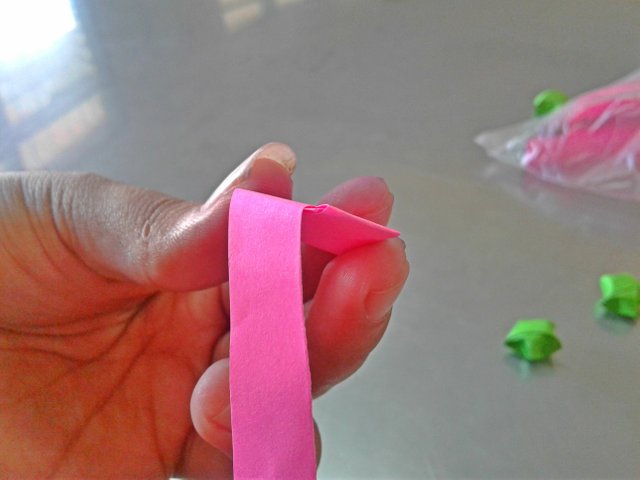
STEP 2: Start with a strip of paper. Tie a knot at the top as shown below.
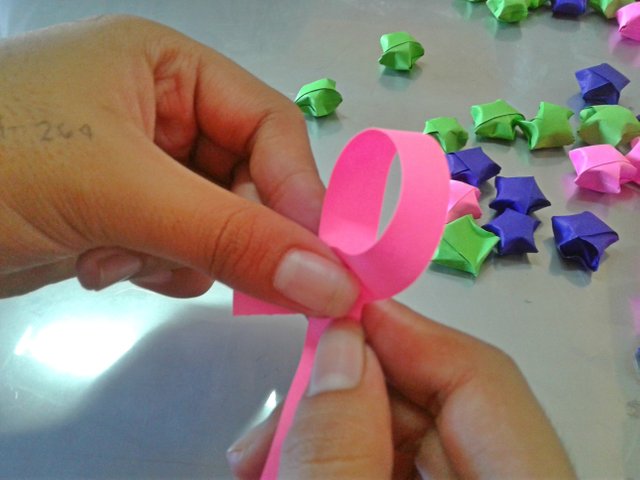
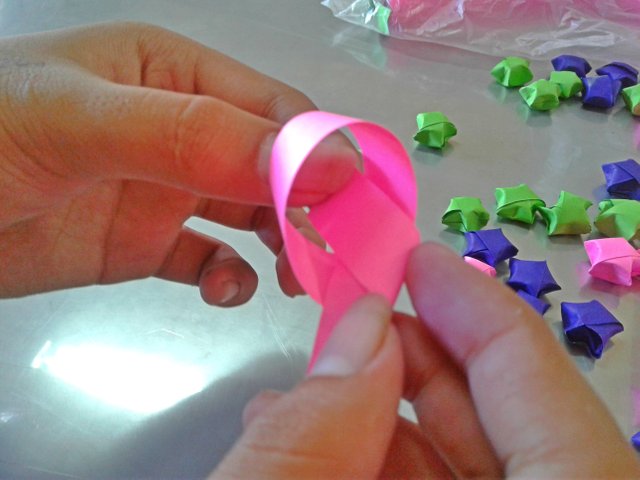
STEP 3 : Flatten the knot and make sure that it is not loose.
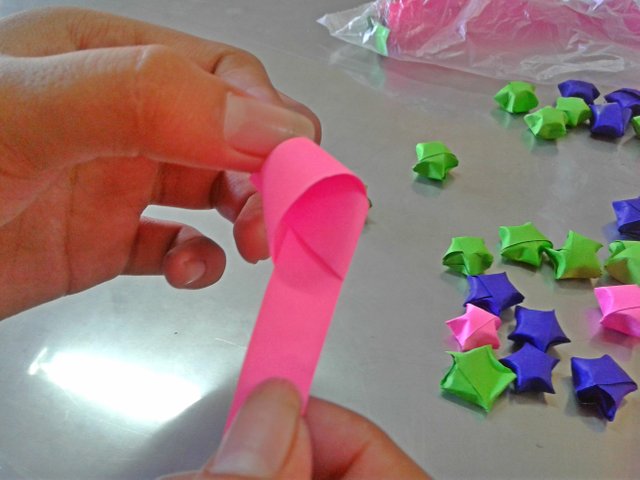
STEP 4 : Cut the loose end of the knot.
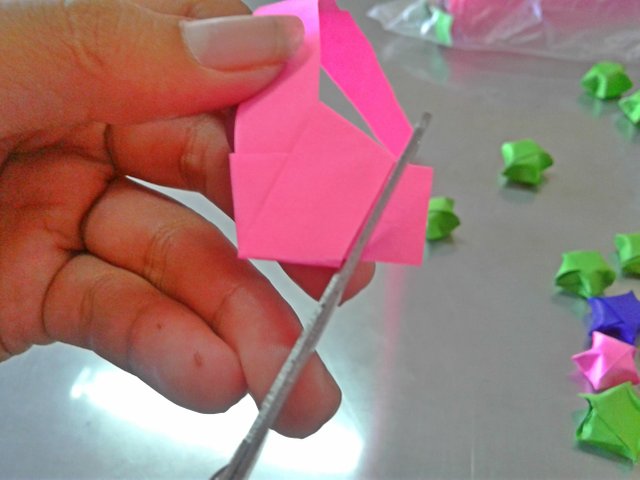
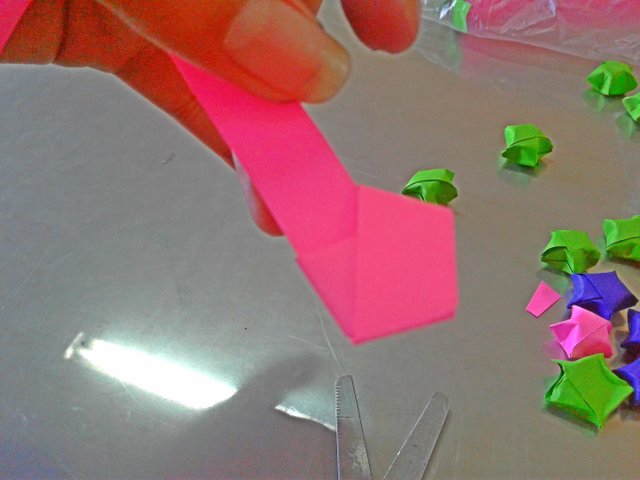
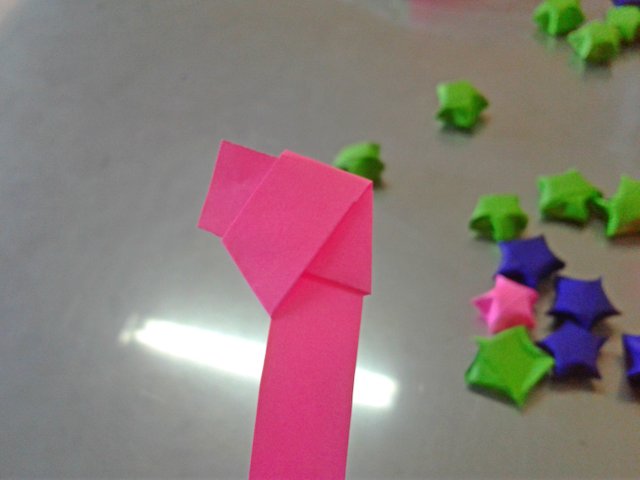
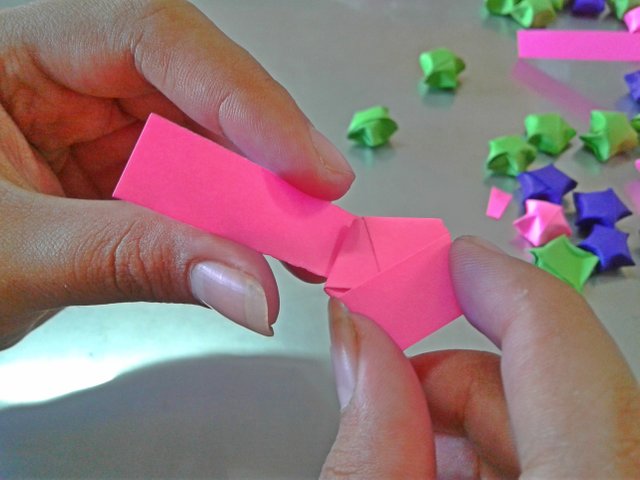
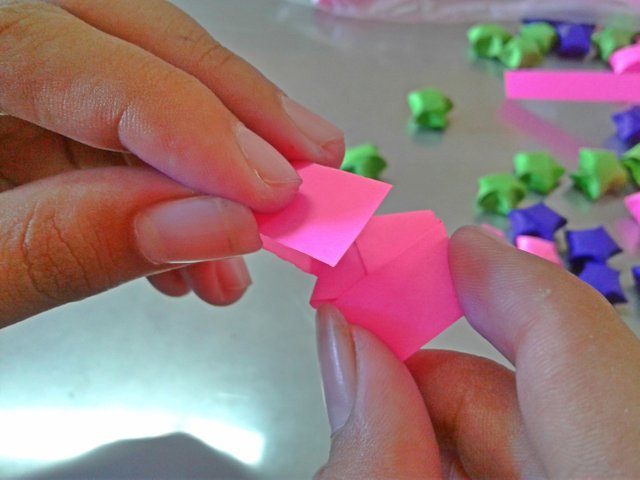
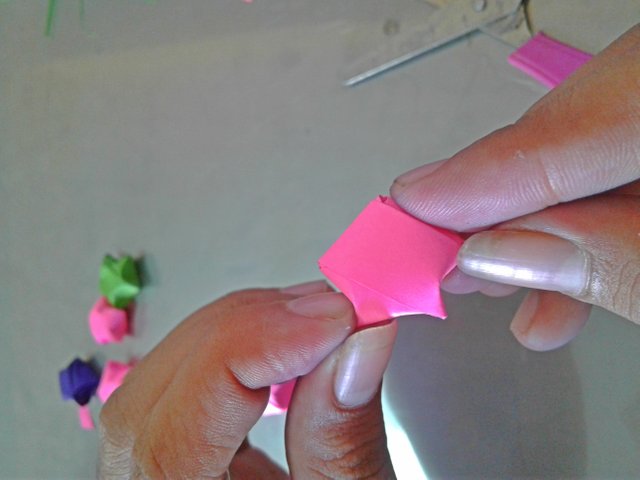
STEP 5 : Hold the strip with the knot at the top. Fold the long leftover strip at the edge of the pentagon in the manner that's shown below.
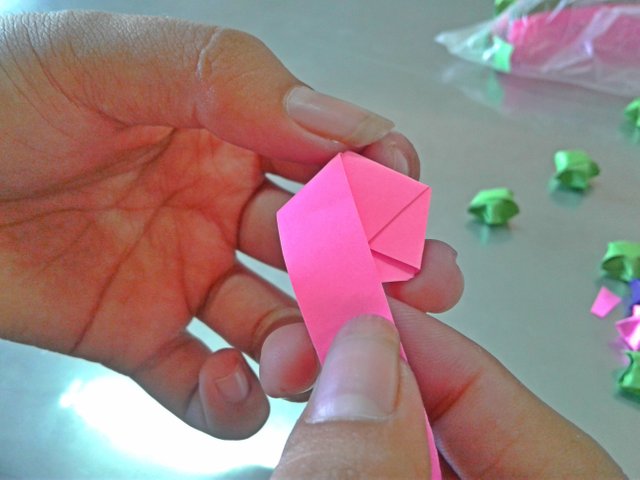
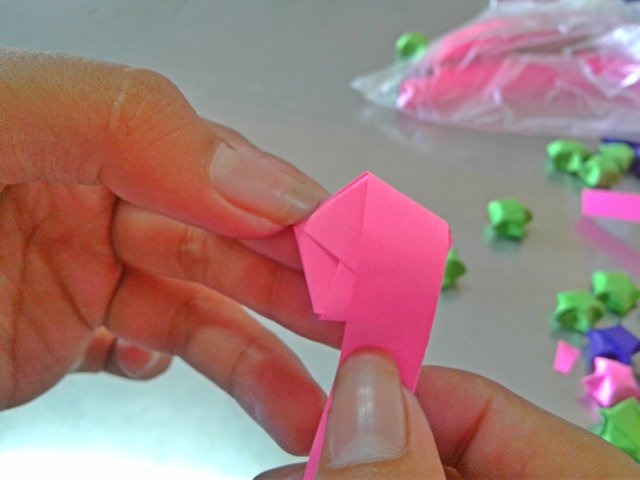
STEP 6 : Continue folding the leftover of the strip until you are left with a short strip that can be tucked into the pocket of the knot. See below.

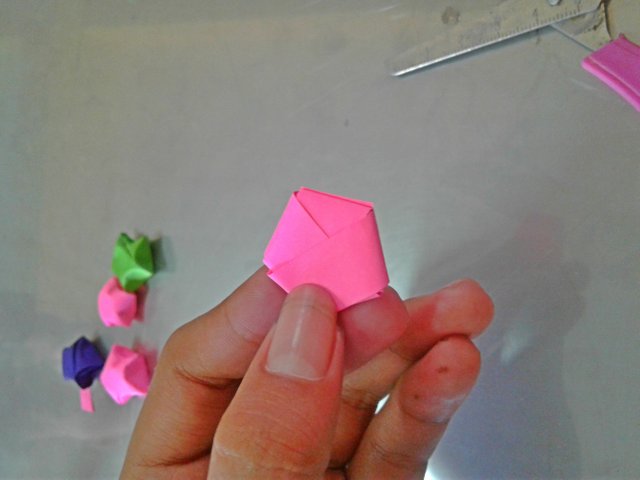
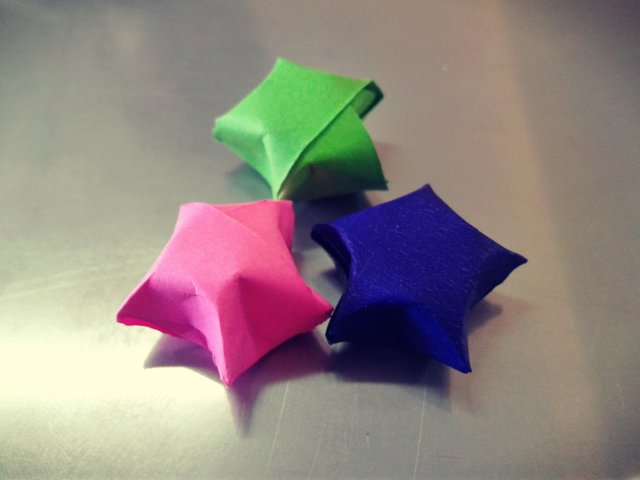
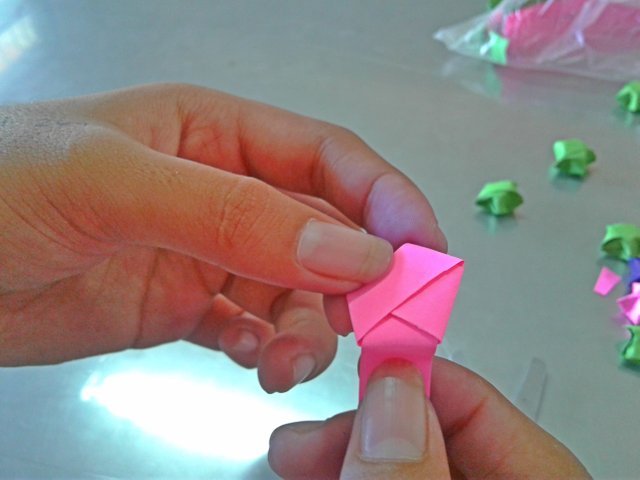
STEP 7 : Push the corners of the pentagon inwards to form a bulging paper star.
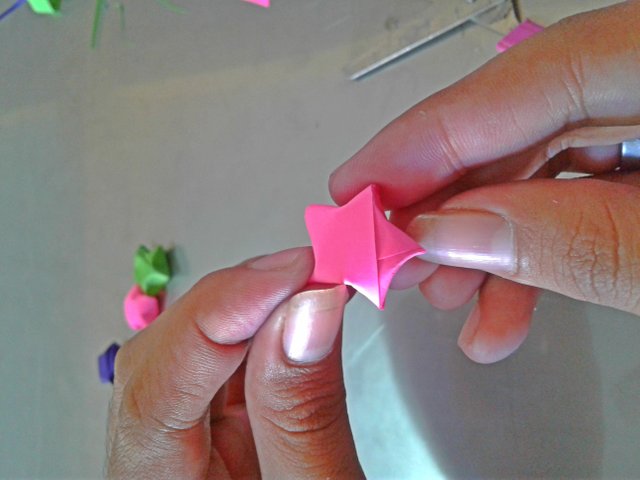
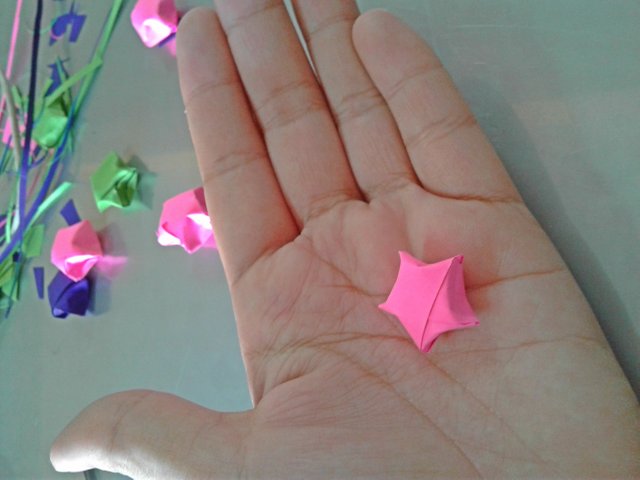
And we're done! Cheers!

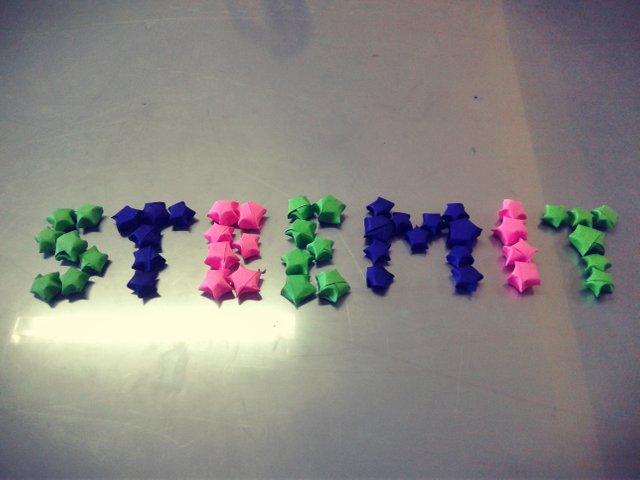
Uses: You can put them in a transparent jar and make them a centerpiece in your table. You may also hang them in your room's ceiling so that everytime you lie down, you can see these colors that I hope will somehow remind you that life is as colorful as these stars, as always.
Do you have fun? I hope you do!
Congratulations you made it!
tutor,
@jenesa
that's cool.
Downvoting a post can decrease pending rewards and make it less visible. Common reasons:
Submit
thanks @steemgigger
Downvoting a post can decrease pending rewards and make it less visible. Common reasons:
Submit
very beautiful steemit!
Downvoting a post can decrease pending rewards and make it less visible. Common reasons:
Submit
thank you @ahlawat
Downvoting a post can decrease pending rewards and make it less visible. Common reasons:
Submit
youre so creative. You already have a future.
God bless
Downvoting a post can decrease pending rewards and make it less visible. Common reasons:
Submit
thank you @razel
Downvoting a post can decrease pending rewards and make it less visible. Common reasons:
Submit
Wow!!!! @jenesa i'm gonna have to try this!!! Thanks for this guide :) :) :)
Downvoting a post can decrease pending rewards and make it less visible. Common reasons:
Submit
thank you @rosevillariasa
Downvoting a post can decrease pending rewards and make it less visible. Common reasons:
Submit
Perfect timing! I was looking for designs I could use for my creative report tomorrow, then I saw this. Thank for the info kabayan!
Downvoting a post can decrease pending rewards and make it less visible. Common reasons:
Submit
Hi @jenesa!!!
I loved it!!! I used to make these pretty little stars when I was in college... I'm gonna try making some again... Just reminded me so much of a distant happy past... thanks... :)
Downvoting a post can decrease pending rewards and make it less visible. Common reasons:
Submit