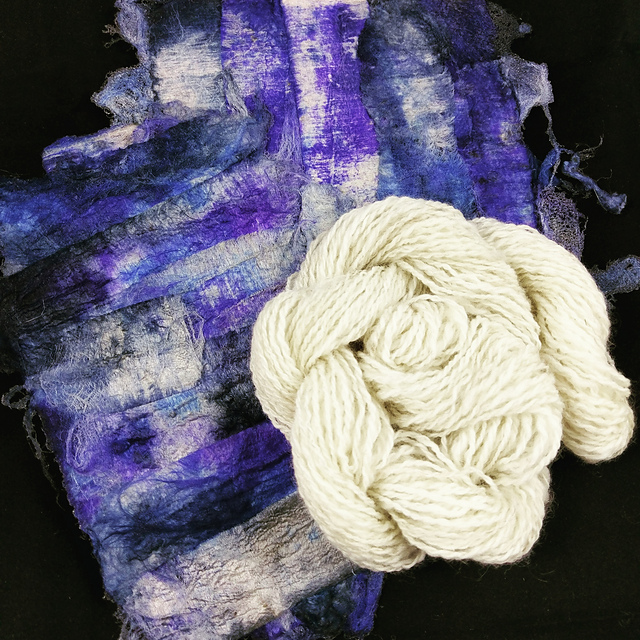
Carrier rods are the waste from the silk reeling industry. I won't delve too deeply into the world of silk processing in this post, but most of a silkworm's cocoon is one continuous strand. This is the part that is reeled off for textiles. At the center of the cocoon is some shorter, rougher strands of silk which form the beginning structure. This is what remains on a metal rod after the good silk is wound off. After several cocoons, the rod is covered in a layer of short strands and seracin, the "glue" that holds the cocoons together. This tube of fiber is then cut off the metal rod and is tossed as waste.
Fiber artists have found ways to incorporate carrier rods into their art and they can now be found both dyed and natural from many indie dyers. While I don't enjoy incorporating them into spinning projects, I love making silk paper. It creates a textured, and potentially colorful add-in for book-binding projects and paper crafts.
Because the carrier rods contain several layers of silk, the first step is to gently peel individual layers. Most carrier rods will produce 4-8 stiff layers. Next, each layer is dipped gently into warm water and laid on a non-porous surface. I use a plastic cutting board.
The silk is layered, overlapping, first a row of vertical strips, then a layer of horizontal strips. At this point, the fibers can be teased to fill in any holes or play with color arrangement.
The third step is where the magic happens. Lay a piece of parchment paper over top of your silk and iron it on the cotton setting until all the water evaporates. Do you remember me mentioning seracin, the "glue" of silk? Once you wet the carrier rods, the seracin is activated, loosening its hold on the fiber. As it dries again, it holds all the silk fibers together, forming the paper.
This art paper can be sewn over, bound, written on, incorporated into felt projects, and stretch your imagination. I'm not a fan of incorporating carrier rods into spinning projects, but is creates some interesting textures. The sample in the photo above is a piece I did last year. I left my edges relatively unblended, because I liked the look of the lines. I have been working with a colleague to learn more about bookbinding, and I plan to incorporate this into an art book in the future.
.png)
All photos and text property of @luthvarian
Can you write on this paper with anything, or does it require a special kind of ink? It's really beautiful!
Downvoting a post can decrease pending rewards and make it less visible. Common reasons:
Submit
It is on the stiff side and a bit thick. I would recommend a felt-tip pen. The bumpy texture doesn't lend itself well to rollerball style pens. Pencil works well on it, as does water color and pastels.
Downvoting a post can decrease pending rewards and make it less visible. Common reasons:
Submit
Really interesting post @luthvarian. I have never tried knitting or any crafts with textiles so enjoyed reading about it 🙂 I did practice carving when I was younger but I somehow fell out of practice and haven't picked up a chisel in years. Maybe I should pick up a knitting needle instead, I have heard it is quite meditative. 😉 Thanks for sharing your insights
Downvoting a post can decrease pending rewards and make it less visible. Common reasons:
Submit
Thank you, and thank you for the feedback as well! Inspiration comes from trying new things 😉 so if I can be an enabler in anyway, let me know!
Downvoting a post can decrease pending rewards and make it less visible. Common reasons:
Submit
I'm always up for a challenge @luthvarian. However, my ability with textiles goes about as far as being able to sew a button back on to a shirt 😉 Now bread making + baking, that I can do. I've been watching too much great British bake off. Unfortunately, when you get good at baking the only result is you get bigger around the mid section, hence the need for the button repair. Your welcome on the feedback btw's, it's always great to meet new steemians with interesting things to talk about 🙂
Downvoting a post can decrease pending rewards and make it less visible. Common reasons:
Submit