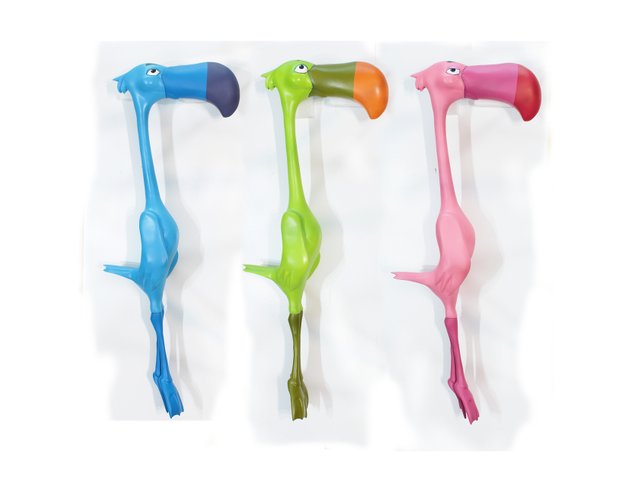
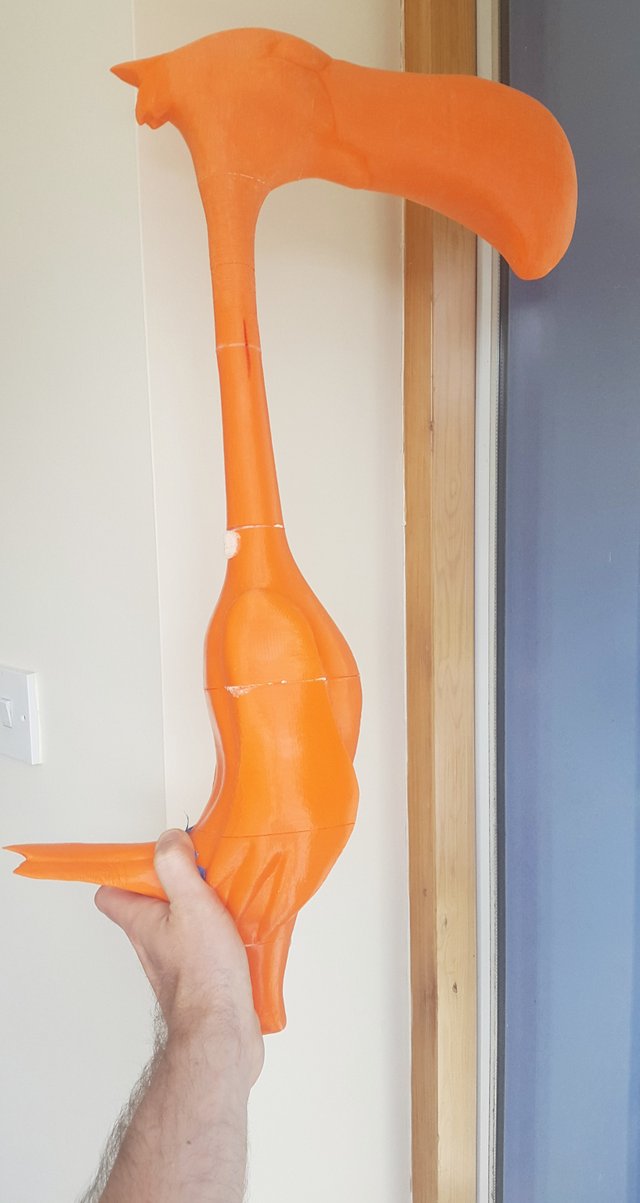
I would like to show you one of the projects I did for a customer, 3 full-scale flamingos from Disney Alice in Wonderland classic animated movie. They were going to be displayed in the children's hospital along with other projects I did for the same person. After I shipped them, I got news from a few people, that they were able to buy the pieces I did on Ebay for much more than I charged. Based on that, I am not sure, what will happen with them. I was angry for a short while that they did not serve the purpose but the silver lining is, I met this way 3 very nice collectors.
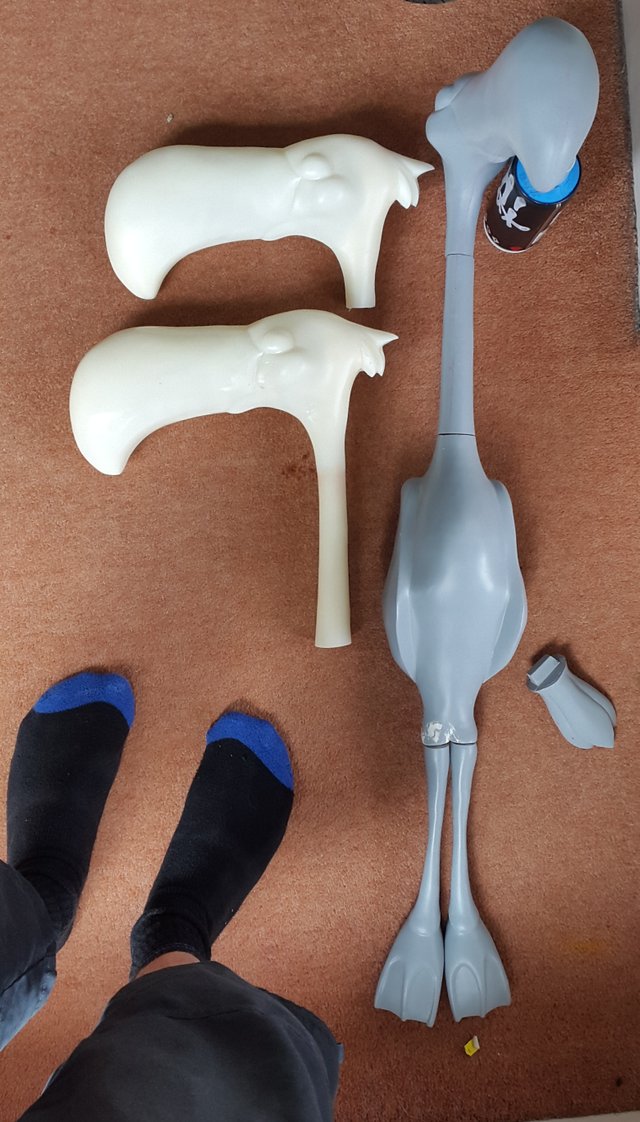
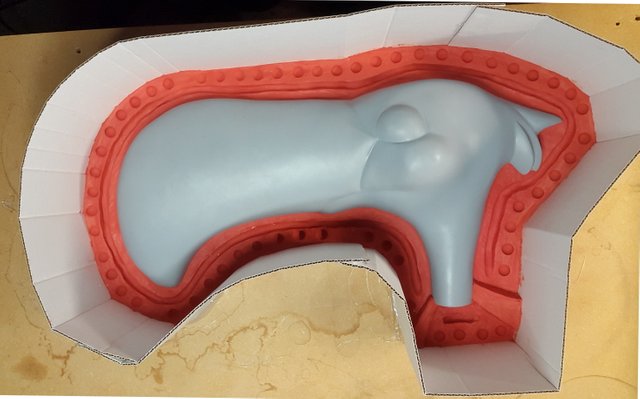
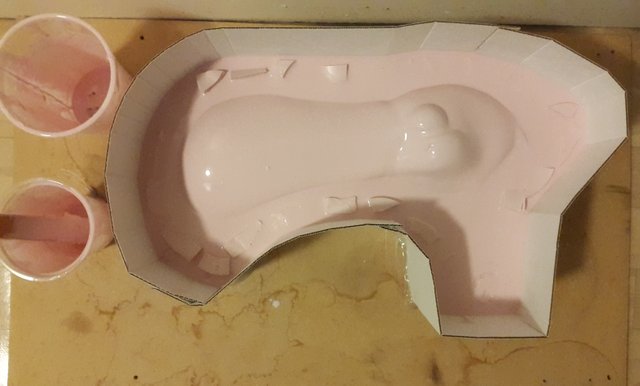
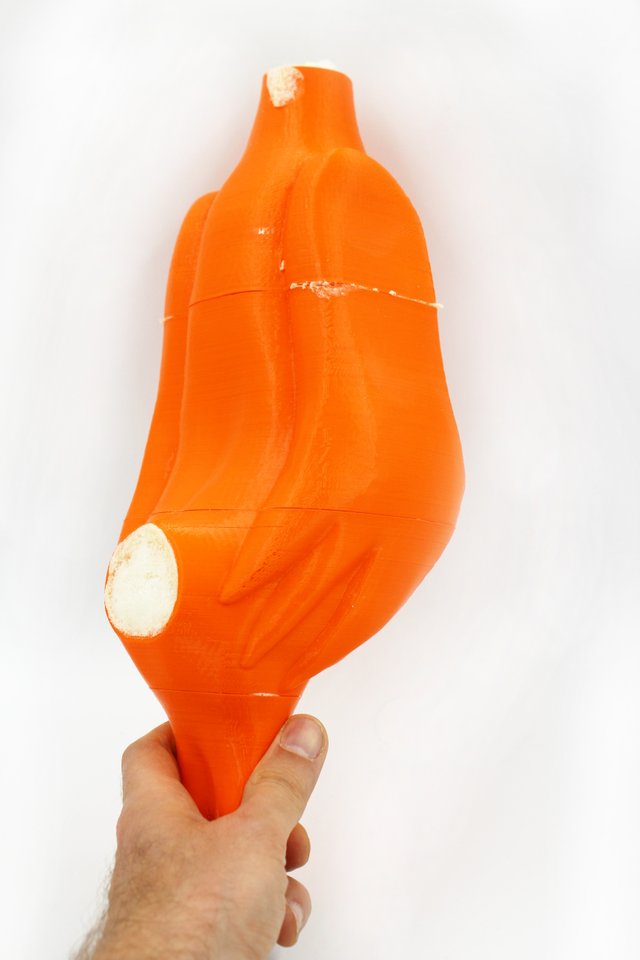
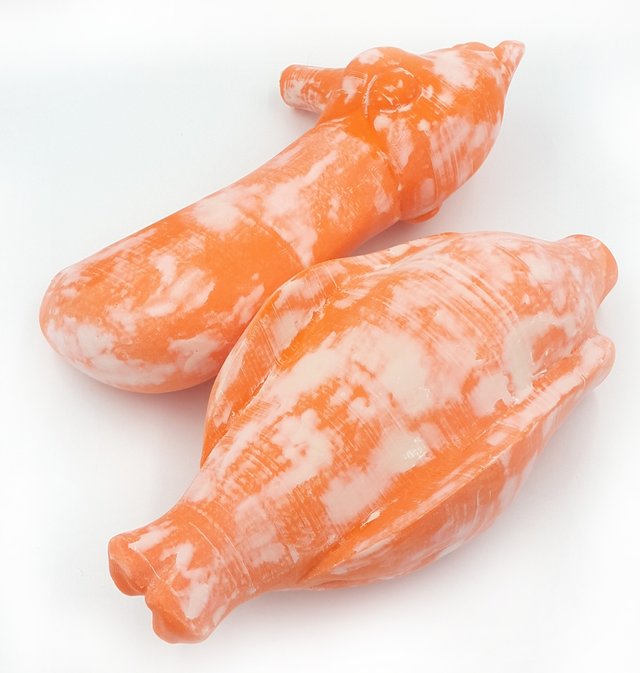
I took this project knowing there will be 3 color versions, so I need to make molds to produce multiple copies. I underestimated how big and heavy the molds will be and how expensive the silicone required will be. At least I reduced the amount of material for casting the pieces. I broke the figure to 3 pieces, head, neck and body for easier casting. I used a process called rotocastinIt requires much less resin and is perfect for big pieces like this. I poured half of cup of mixed resin to the mold and move the whole thing around to let the fluid flow to all areas creating a thin layer of plastic. I repeated the process 4 times to build up the walls. It was quite an exercise because each of the walls weight few kilos and I could not stop for a few minutes to avoid setting resin in one place.
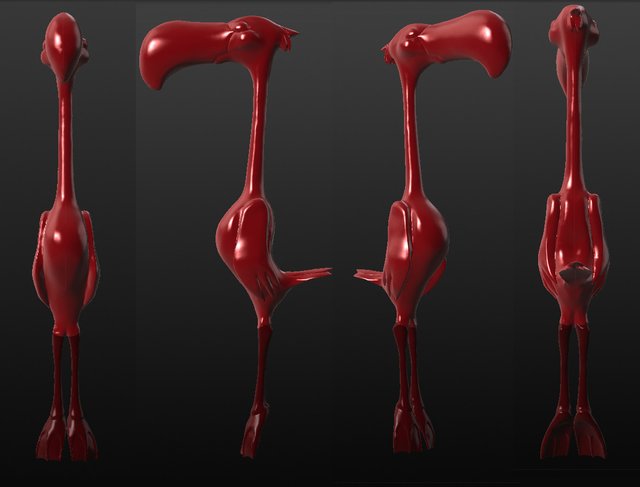
The prototype was made using my small 3d printers. I sculpted the model using Sculptris and then made it hollow in Meshmixer. I then cut it to many small sections which could fit on my 3d printer. I glued them all after printing. I knew that walls just 2 mm thick will be very fragile while sanding, so I filled the model with rigid polyurethane foam. It permanently glued everything without adding extra weight. I could then use all the required techniques to make it smooth and hide joints.
The whole model is big and areas easy to access with a sander. I used machines as much as I could to speed the process. It still required a lot of hours of filling and sanding with multiple coats of primer in between. I used car body filler for bigger holes and green stuff for small imperfections. Since then I discovered the inexpensive wood filler which works very well with PLA. I sued it to fill huge areas on my BB9E project and the did not crack or fall off yet.
For painting, I used sprays to get solid and vibrant colors. It required some masking but not too much. My biggest worry at this stage was, how to ship it securely. I decided to leave the legs apart to reduce the size of the box. I put each model on a rigid cardboard tray and secured it with lots of foam pieces hot-glued to the tray. The bird could not move in transit and stack of 3 reinforced the cardboard box side walls. It worked!
I learned many new things while doing this project like dealing with the scale and challenges of shipping heavy but delicate objects. I hope this will bring smiles to sick children as intended and not land on Ebay again. If you see that for sale somewhere, let me know here or at http://themodelmaker.net/ so I can take action. I only took this commission because of that and my price did not reflect the amount of work I spent building them. This is another lesson for me. I will probably cut the molds and recycle them in my other projects at some stage but if you want a copy, send me an email or comment through my blog. You can read about all of my Alice in Wonderland figures here : https://themodelmaker.net/alice-in-wonderland-creatures/
Thank you for reading and your support.
That is incredible! And it looks so cool! Thank you for sharing your process ut was really interesting being able to see your process:)
Downvoting a post can decrease pending rewards and make it less visible. Common reasons:
Submit
Thank you. Check out my other posts and anything I will be writing in future. There will be more behind the scenes material
Downvoting a post can decrease pending rewards and make it less visible. Common reasons:
Submit
This is seriously, so cool. Just watched Alice in Wonderland recently and these are spot on!
Downvoting a post can decrease pending rewards and make it less visible. Common reasons:
Submit
Thank you. Happy to hear that, I think with some reinforcement they could be used as golf clubs too :)
Downvoting a post can decrease pending rewards and make it less visible. Common reasons:
Submit
this work is so rad!!!! Thank you for sharing this to us... The piefcffe itself is detailed, it captures everything even the personality of the bird!
Downvoting a post can decrease pending rewards and make it less visible. Common reasons:
Submit
Thank you. I tried to stay close to original design while adding 3rd dimension to flat drawings
Downvoting a post can decrease pending rewards and make it less visible. Common reasons:
Submit
I meant piece there, I dont know why I ended up typing that
Downvoting a post can decrease pending rewards and make it less visible. Common reasons:
Submit
You got a 3.18% upvote from @postpromoter courtesy of @mitchhunter!
Want to promote your posts too? Check out the Steem Bot Tracker website for more info. If you would like to support the development of @postpromoter and the bot tracker please vote for @yabapmatt for witness!
Downvoting a post can decrease pending rewards and make it less visible. Common reasons:
Submit
Hello, i just upvoted your post. Also, $10 - $160 Reward is waiting for you in GBYTE crypto, please
follow instructions in this post:
https://steemit.com/steemit/@cryptomonitor/airdrop-how-to-claim-tutorial-byteball-bytes-airdrop-to-steemians-hot .
Join our Discord & enjoy happy STEEM community: https://discord.gg/qQZ7Eng
Downvoting a post can decrease pending rewards and make it less visible. Common reasons:
Submit
Thanks for your massive 7.4% from 65steem power upvote and spammy comment most likely automatic! I already took part in this airdrop.
Downvoting a post can decrease pending rewards and make it less visible. Common reasons:
Submit
Super dope
Downvoting a post can decrease pending rewards and make it less visible. Common reasons:
Submit
Very interesting. Thanks for sharing it :-)
Downvoting a post can decrease pending rewards and make it less visible. Common reasons:
Submit