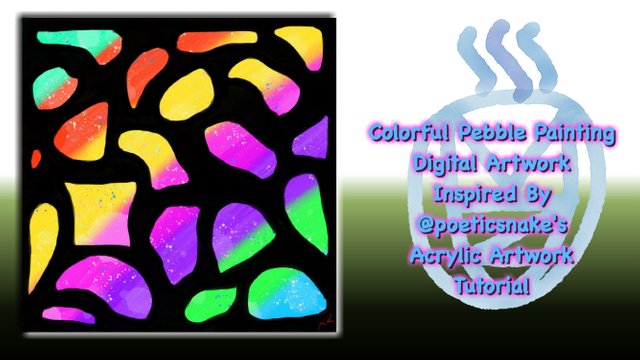
Today I decided to try my hand at visual art again, thanks to @poeticsnake's tutorial, How to create a colorful pebble painting with acrylic paint. As you all probably know by now, visual art isn't really my thing/I'm not really good at it, and my artistry falls more on the side of writing and singing. But I was reading her post and I thought her art looked so cool, so I decided to give it a shot!
The beautiful thing about technology is that it allows you to try things out without having to invest a lot of money into the actual thing. Thanks to my handy dandy iPad Mini 2 and an amazing app called Procreate, I was able to activate my visually artistic side and I tried to create something pleasant to look at without having to dish out a ton of money on actual, physical art supplies.
I just followed her tutorial as best as I could, and the end result was pretty cool. I guess I was happy with it, so I decided to make a post about how I managed to create art in a similar style, using the digital tools at my disposal.
First, I laid the base layer of the project:

To do this, I chose the Acrylic brush from the Artistic category.

I chose my colors and started painting sections, just like @poeticsnake showed in her tutorial. To blend the colors in better (they were pretty solid and not blending as well as I thought they would), I used the smudge tool (the little pointy finger thing in the upper toolbar) and rubbed in the areas where each color met the next one.

Then, I created a new layer on top of that initial colorful layer, and did the next step of her tutorial, to drizzle some specks of color onto the canvas in order to add some creative texturing to the whole thing.

In order to mimic the effect of randomly adding specks of color to the canvas, I chose the Flicks brush from the Spraypaints category and played around with the brush size as I went along to produce different specks.

Next, I added the water blotches, just like she did, to add even further detail/texture to the artwork.

To do this, I chose the Blotch brush from the Water category, which allowed me to mimic the effect of dropping water onto the canvas and then lifting it up with a paper towel. I created another new layer, then I played around with the brush size and opacity in order to create varying water blotches.

After that, following @poeticsnake's tutorial, I drew in the outlines for the "pebbles" (mine turned out not really looking like pebbles, haha).

In order to do this, I chose to use the Narinder Pencil brush from the Sketching category so that I could draw in light outlines that would not intrude on the main piece. I created a new layer for this as well, just in case I made mistakes or wanted to change things around. In digital artwork, layers are so important.

When I finished drawing the outlines for the pebbles, it was time to start filling in the dark areas. I started out by creating a new layer, and then I traced the outlines of the pebbles with the Acrylic brush from the Artistic category.


I even followed @poeticsnake's advice to add more than one layer of black in order to make it darker.

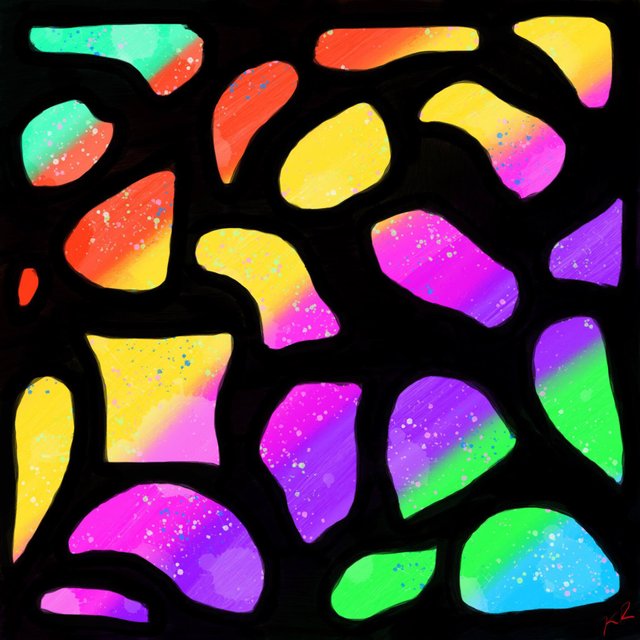
In the end, this is what I came up with:

Check out @poeticsnake's post to see her original artwork and see how much nicer it looks :P I never would have tried this out if I had not seen her awesome tutorial post today, so if you liked my own work, make sure you check out her post and show her some love too! (^_^)
Here is a time lapse video of the process:
Thank you so much for checking it out, please let me know what you think! And seriously, go check out @poeticsnake's amazing art tutorial and show her some love too! She always posts such phenomenal pieces, so I hope you'll consider following her if you like what you see!

Check out some of my other posts!
What You Need to Know About Telling Veterans "Thank You" on Veterans Day
How The Minnow Support Project Helps You Achieve Your Dreams on Steemit
How I Achieved 200 Followers in My First Month on Steemit
Why I Chose to Invest $100 in Steem
How To Set Up Your Steemit Profile
The Dawn of The Dancing Dreamers
The Dawn of Friendship In a New Age
I'm Just an Island Boy Living in Utah who Loves EDM


!steemitworldmap 40.754539 lat -111.902618 long Salt Lake City, Utah local Steemian! d3scr
Cool art dude! YOu just transformed a brush paint to a digital one!
Downvoting a post can decrease pending rewards and make it less visible. Common reasons:
Submit
Thank you so much man!! It's pretty cool the things that technology can do haha
Downvoting a post can decrease pending rewards and make it less visible. Common reasons:
Submit
I love it! That's why I love steemit, we should use it more as an excuse to try new things ^^
Downvoting a post can decrease pending rewards and make it less visible. Common reasons:
Submit
Thank you @paps! Yes, it really helps me to go out of my comfort zone and try new things!
Downvoting a post can decrease pending rewards and make it less visible. Common reasons:
Submit
excellent art. i like your post.
Downvoting a post can decrease pending rewards and make it less visible. Common reasons:
Submit
Thank you, I appreciate it!
Downvoting a post can decrease pending rewards and make it less visible. Common reasons:
Submit
hi guys, nice to meet, i made it using Adobe Photoshop and Adobe Illustrator Applications
Downvoting a post can decrease pending rewards and make it less visible. Common reasons:
Submit
You made it? No...I'm pretty sure I made it. lol
Downvoting a post can decrease pending rewards and make it less visible. Common reasons:
Submit
Nice idea, I would enjoy this as a texture to one of my works I do, come check it out on my blog. You'll see why.
Downvoting a post can decrease pending rewards and make it less visible. Common reasons:
Submit
Thanks, it wasn't my idea though, it was @poeticsnake, like I said in my post and in the title of my post lol
Downvoting a post can decrease pending rewards and make it less visible. Common reasons:
Submit
Beep! Beep! This humvee will be patrolling by and assisting new veterans, retirees, and military members here on Steem. @shadow3scalpel will help by upvoting posts from a list of members maintained by @chairborne and responding to any questions replied to this comment.
Downvoting a post can decrease pending rewards and make it less visible. Common reasons:
Submit
Ahhhhh thank you for the veteran support as always humvee bot :P
Downvoting a post can decrease pending rewards and make it less visible. Common reasons:
Submit
Congratulations, Your Post Has Been Added To The Steemit Worldmap!
Author link: http://steemitworldmap.com?author=rodeo670
Post link: http://steemitworldmap.com?post=digital-artwork-colorful-pebble-painting-inspired-by-poeticsnake-s-tutorial
Want to have your post on the map too?
Add the following inside your post:
!steemitworldmap xxx lat yyy long description d3scr
(replace xxx and yyy with latitude and longitude)
Downvoting a post can decrease pending rewards and make it less visible. Common reasons:
Submit