A surprising number of people seemed to like the knife picture I posted in my opening post, so what the hell, here's more knife-pr0n. :-) I was taking pictures all along the way as I made it so that I could post a process story at some point, and this seems as good a place as any.
Warning: Red hot metal ahead...
This isn't the railroad spike it started from, because I totally forgot to take a picture of it first. But it's the same type of spike. Railroad spikes are pretty cheap, low-grade steel, probably around 1030 carbon but who really knows. Good for practice, lame for a really good working blade.
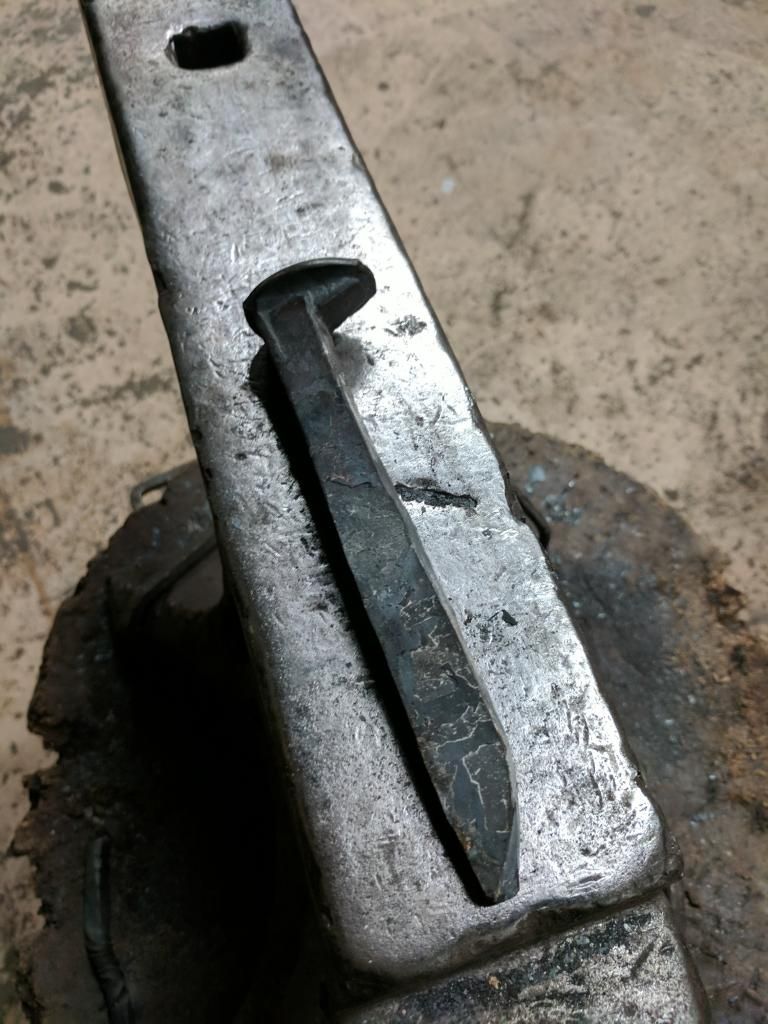
The first step was annealing it, which means heating it up to orange hot and then letting it cool in ash very very slowly. That allows the carbon to shift to the outside of the iron lattice structure, making the overall object softer and easier to shape.
After that, heat it up and hot cut the head off so that I can work with the rest. The head later on became the guard of the knife, but we'll get there. After that, just start forging the spike itself to shape. (Forging is technically just the "heat it up and hit it really hard" part of the process.)
Here it is after the first night:
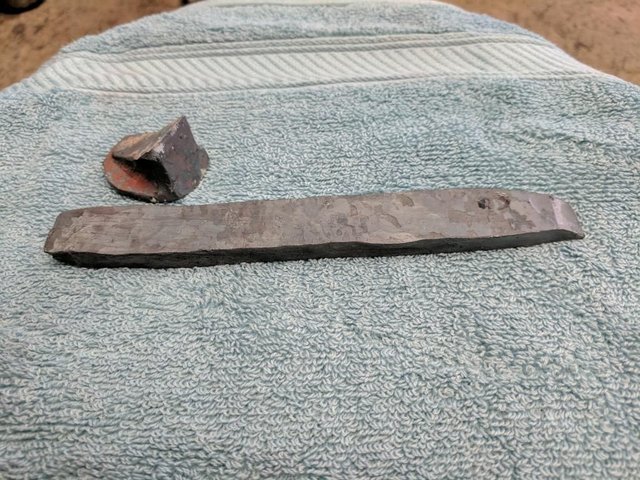
It took 2-3 sessions, I think, to get it to the thickness I wanted, and to shape the tip, sort of. The next step was to split off the tang. That involved using a set of pinchers (I don't have a picture of them) and hitting the blade between them to form an indentation on both sides, and then drawing the metal out thinner on one side of it. End result after one night:
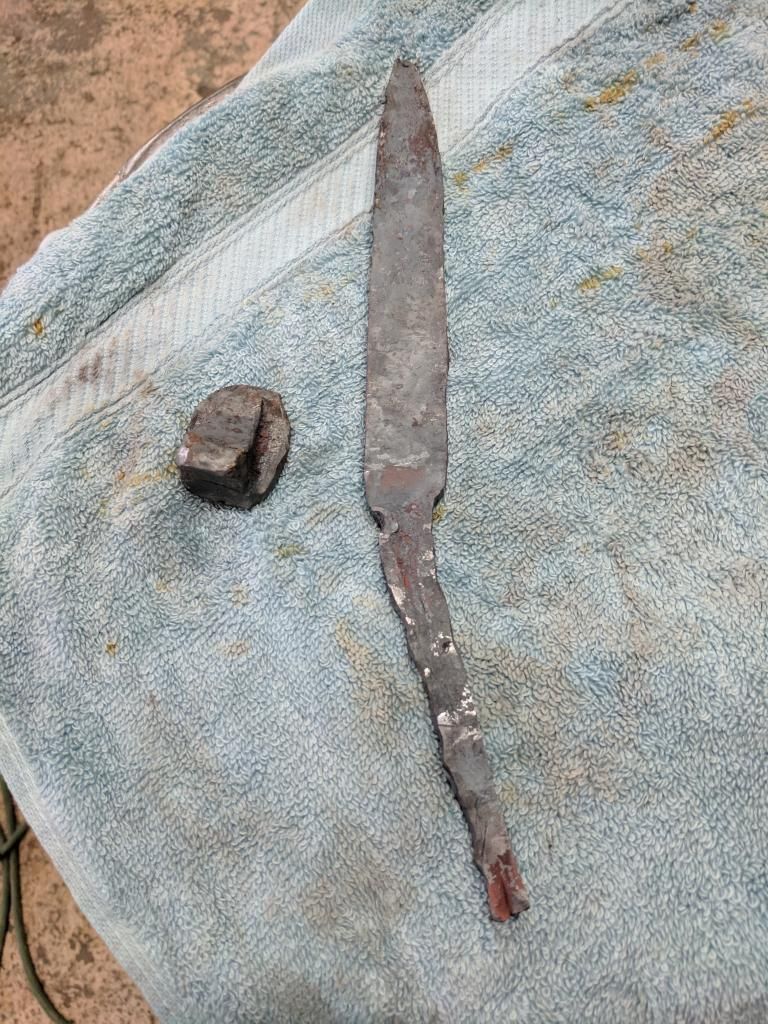
It took a while to get it straight and in the rough shape I wanted, and to get the blade to the right shape, etc. After that, I hammered on an edge on the blade on one side. Meanwhile, I was also hammering the head of the spike flat to use as the guard.
I have to say, flattening out the head is probably my second least favorite part of the process, and I will probably not bother again. Trying to grip something that oddly shaped well enough to hammer it, using just a pair of tongs, sucks balls. After a long long time to get it vaguely flat it became much easier, since I was able to get a firm grip.
Here's the red hot metal I promised you:
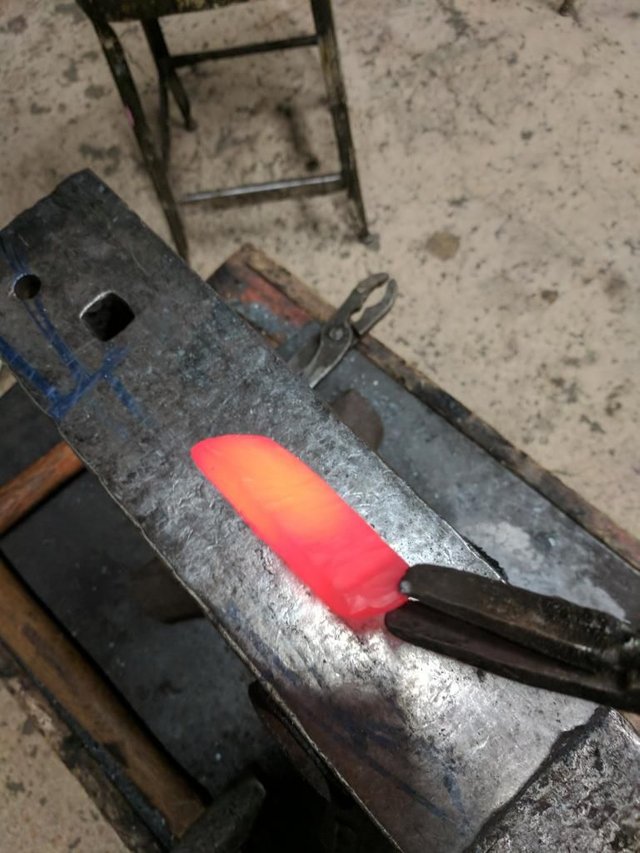
Which brings us up to roughly here, for both pieces of metal:
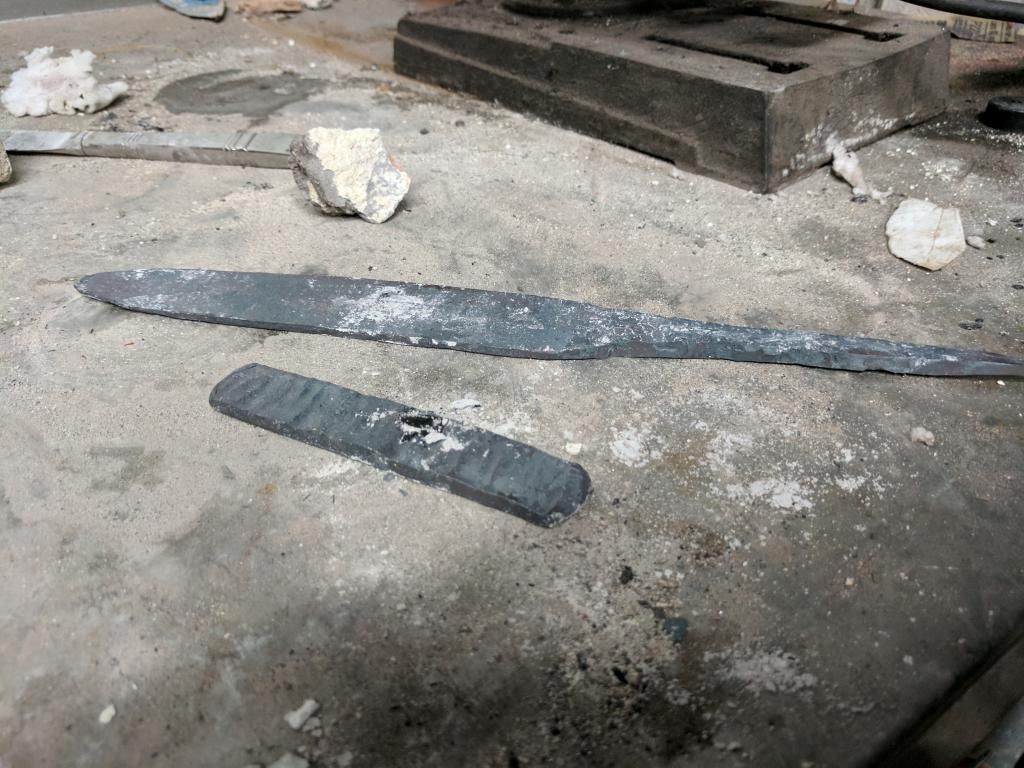
The next part was the worst: Filing. The purpose of filing the blade is twofold. One, it flattens out the surface and eliminates all the myriad pits and dents and inconsistencies in your hammering. Two, it reveals in literally painful detail just how bad and uneven your hammering is, when you have a tiny piece of low metal but have to file off a bloody millimeter of metal to get everything else even to it. My arms hate me.
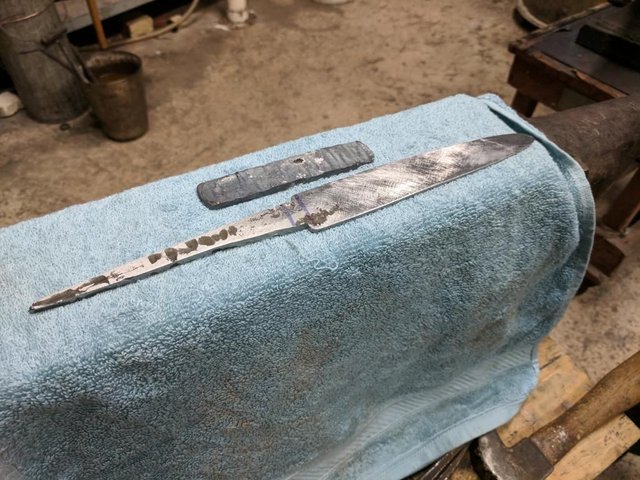
Fortunately my instructor decided to let me use the belt grinder to finish that off. Unfortunately that meant I had to refile the whole damned thing again afterward because the belt grinder doesn't give you a perfectly flat grind. I also ground/filed the shoulders of the tang/blade junction to nice right angles.
The next step was sanding. Now that it's flat, I had to make it smooth. That meant cross-sanding with increasing grits of sandpaper: 60 grit, 120, 220. It's both a lot easier to sand metal than you think and a lot harder. Easier to start messing up the blade, but much much harder to get it back to a smooth, consistent grain in the direction you're going. Each grit you are turning at a 90 degree angle, so that you can see your scratches against the layer below you. You're not done until you can't see the scratches from the previous layer, even when looking really really carefully. Then you do it all over again with the next higher grit. Sigh.
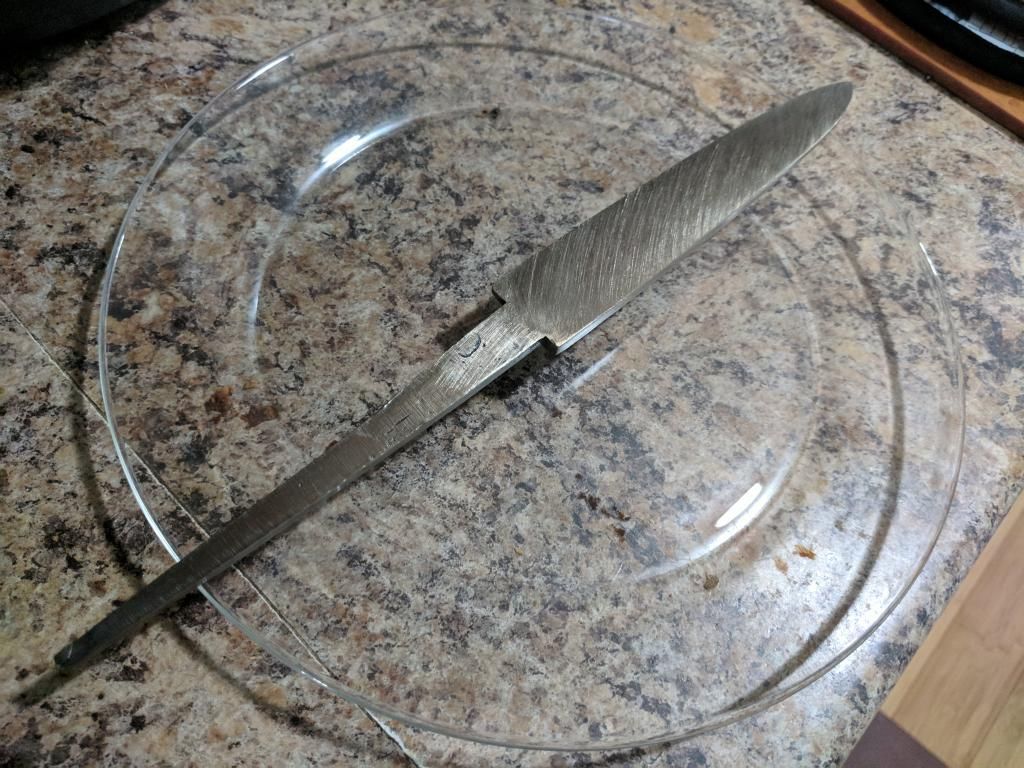
This was at 60 grit:
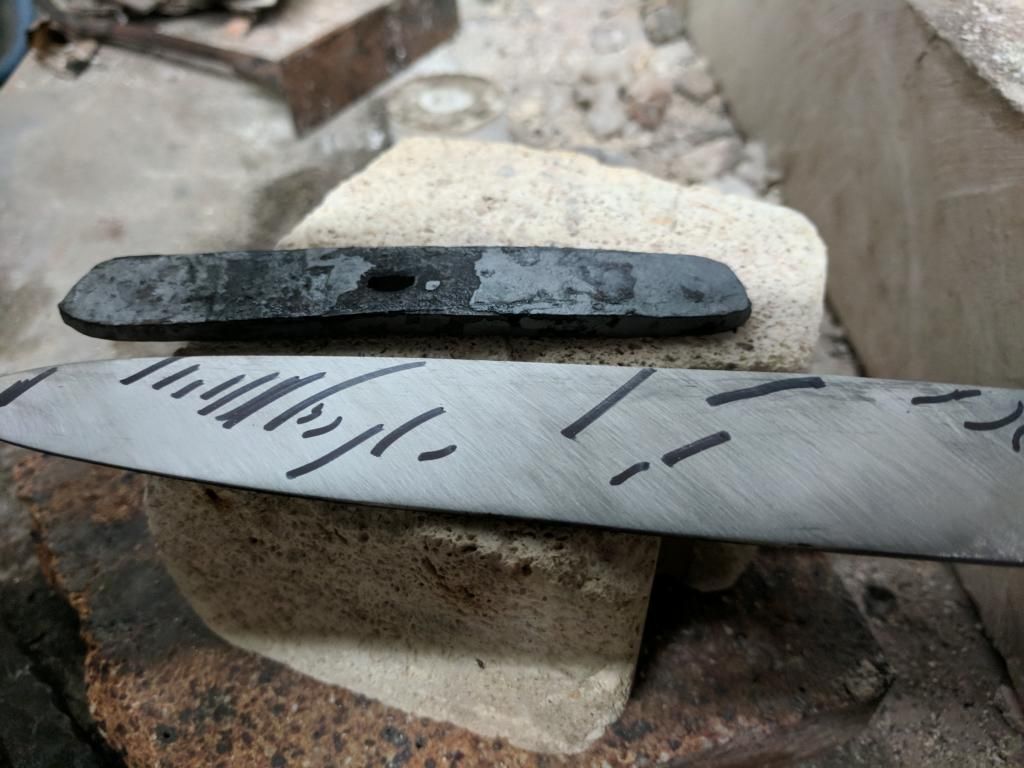
Most of the filing and sanding I did at home to save time. Fun fact: I wear a Pebble smart watch, and after a few hours filing and sanding it told me I'd walked about 4 miles, while sitting on my back porch. Oh technology.
Anyway, finally it was up to 220 grit:
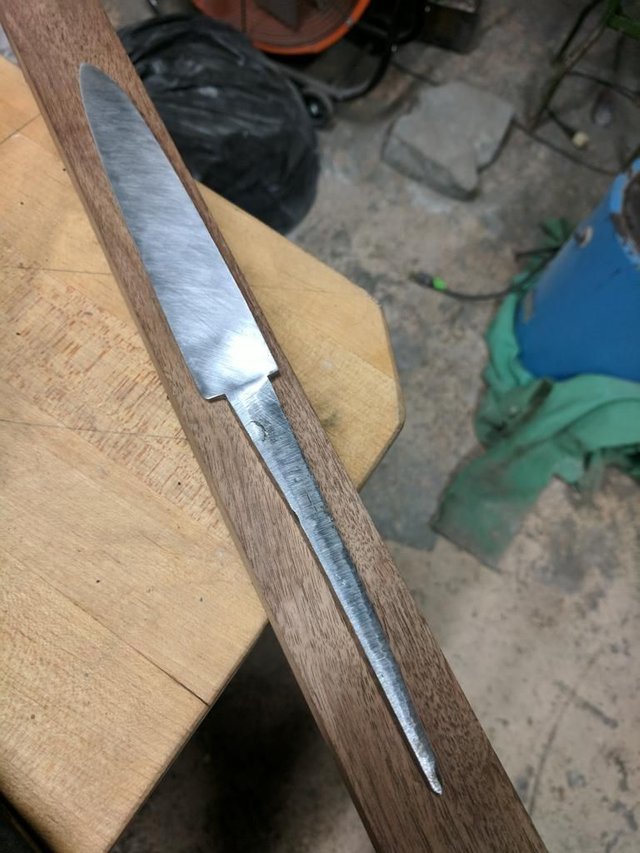
Which meant time to cut some wood for the handle. I borrowed a chunk of walnut wood from someone else at the forge. (You can see the full piece in the previous picture). After cutting to length I burn-fit it to the tang.
First I drilled a small guide hole through the wood. It wasn't straight but it was close enough. Then I put the blade in a vice and heated the tang with a blowtorch, then put the wood over the tang with the tang through the hole. The hot metal literally burns away at the wood in exactly the right shape, giving you a nice tight fit. I don't have a picture of that, unfortunately, but the video look really sweet. :-)
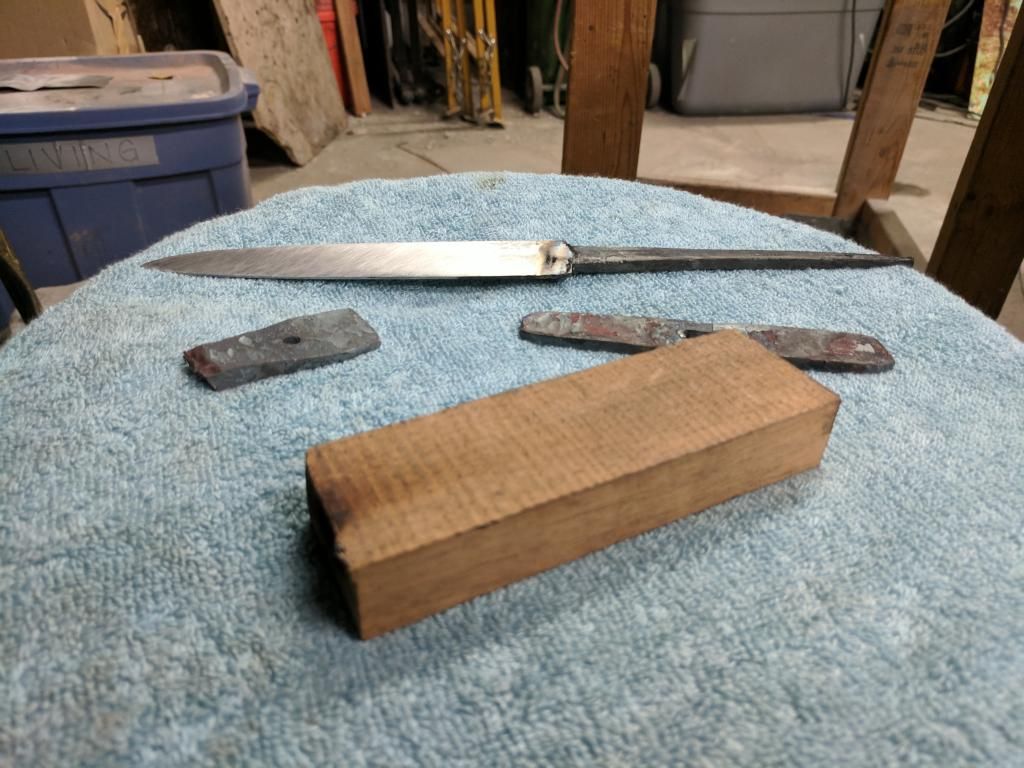
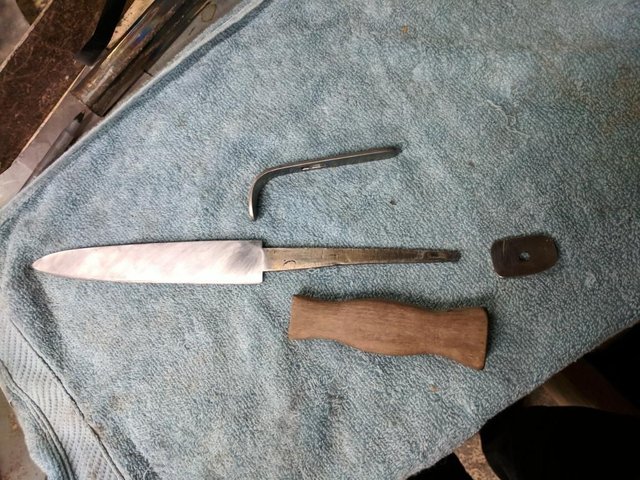
Here's where everything is at now. The extra piece of metal on the left is the end cap, which is just a random piece of mild steel we had lying around that I cut a piece off of and flattened. The holes in both the end cap and the guard were formed by essentially hammering an awl through it, then following up with a flat triangular wedge that was pounded through the opening to stretch it out. Also note the edge is starting to look kind of, well, edgy.
The next step was fitting the guard. That involved a similar process, only this time I heated the guard and pounded it down over the tang to let the tang stretch out the metal in the guard for a perfect fit. (Note: Fit was not perfect, especially since I had not filed the guard yet. Once I did it was too loose, but that was resolved later.) I unfortunately don't have a picture of that, but it did necessitate building my first blacksmithing tool:
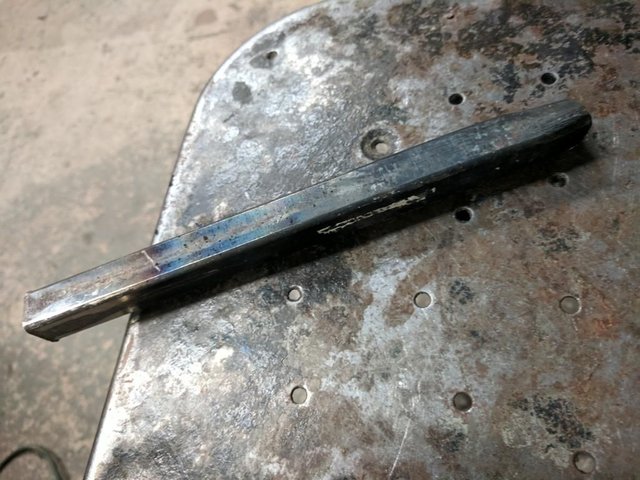
That's a simple piece of square hollow metal, kinda like what you see for the racks at clothing stores. My instructor ground off the zinc coating on it (Warning: Heating zink produces toxic fumes; DO NOT PUT IT IN THE FORGE!), then I hot cut a foot or so off of it and hammered the hole back open at one end. It fits nicely over the tang. That means I could put the guard over the tang, put the tube over that, and then hammer the back of the tube and get a nice even force around the center of the guard without warping it (much).
Here it is all assembled to this point:
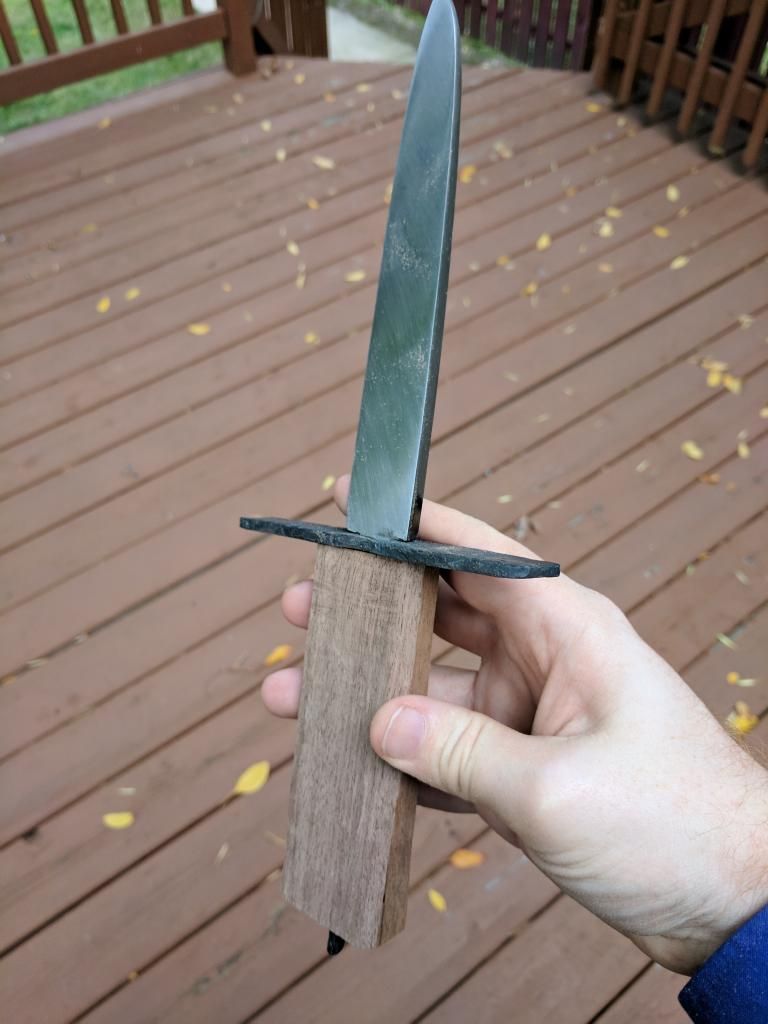
Next step, sand the handle down to the right size. Because the hole wasn't perfectly centered this involved a lot of wood removal. I mostly used my small hand Dremel. I also needed to file and sand the guard, which sucked just about as much as it did for the blade itself.
Next was heat treatment. This is the most black-magic part of blacksmithing. There's 3 parts to it: Normalize, Quench, and Temper. There are literally hundreds if not thousands of different steel alloys with different levels of carbon, chrome, nickel, and various other metals, and every single one needs a slightly different heat treatment process. I did a basic generic version which was no doubt suboptimal for the metal I was working with, but given the metal I was working with was scrap doing anything fancier would have been a waste.
Normalizing is basically re-annealing the blade multiple times to different temperatures. The first time you want it past the "critical temperature", which is the temperature at which the metal ceases to be magnetic. Let it air cool and then do it again, this time to a slightly lower temperature. Depending on the metal you may need to do this anywhere from 2-5 times, I think; I did 2 because I wanted to finish the blade before I left on vacation, so it saved time.
The purpose of normalizing is to remove the stress from all the hammering. At this point since the blade has never been actually melted the solid lattice structure of the iron atoms is all bent out of whack and screwy, with some parts twisted and under tension while others are not. You don't want that. Normalizing lets the iron atoms shift around back into a comfortable even structure (more or less).
Quenching is the part you see in movies. (Side note: Most movies and video games totally epically fail at representing anything even close to real blacksmithing.) Heat the blade back up to critical temperature, then flash-cool it quickly. That does the opposite of annealing. As the metal heats up, the carbon atoms slide in between the iron atoms. When you cool it very rapidly the iron contracts around the carbon, trapping it and forming a much tougher, harder material. Depending on the material you can quench in water, oil, or air. Oil is the safest bet for most steel (it's the least likely to cause it to crack from the rapid cooling), and the forge I go to has a tall vat of leftover oil from local fast food restaurants that we use. So yes, I heated the blade up and dunked it into what's left over from making french fries. Good times.
Here's where we're at now. The black crap on the blade is dried oil. I didn't realize it at the time but the tang did warp a bit during quenching (it happens) and I didn't catch it before it cooled completely. That means there's a slight sideways lean in the blade as the tang wanders off to one side. It's not obvious if you're not looking for it but it's there. But if that's the worst mistake in my first blade, I'm doing rather well, TYVM.
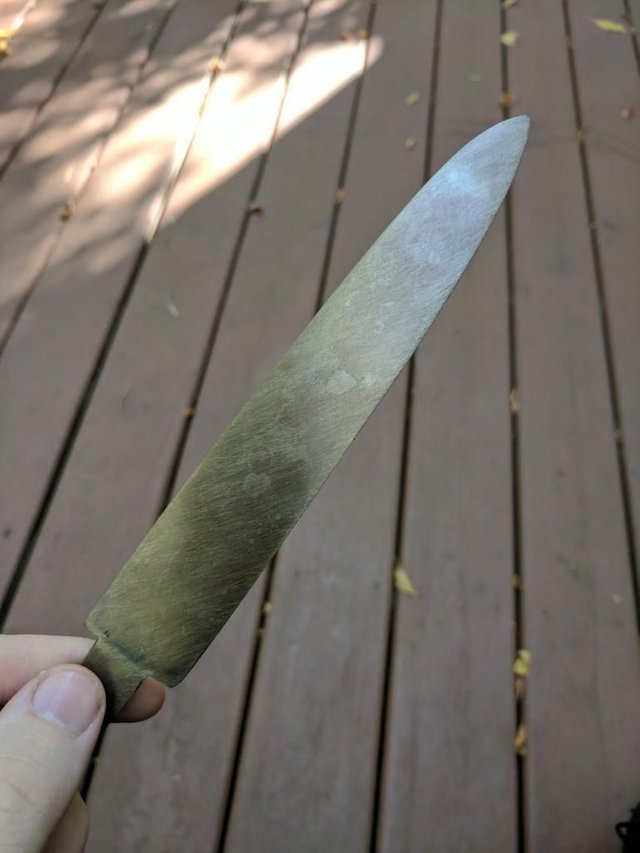
The third step of heat treatment is tempering. That means heating the steel back up, slowly, just enough that the carbon atoms can shift around just a little. Quenched steel is rather brittle. Tempering creates "spring steel", which means it's, well, springy. That lets the blade bend without breaking. I'm not fully clear on all of the metallurgy of it just yet, but you want to heat it until the metal turns a really pretty gold color. My oven at home worked well enough for that, after I cleaned off the oil crud.
(Side note for the Conan fans in the audience: The "secret of steel" they make so much about in the 1982 Schwarzenegger movie and toss away at the beginning of the 2011 version is basically referring to heat treatment. It takes both fire and water (quenching), hot and cold, to produce good quality steel that can bend but not break. Balance in all things, duality, and so and and so forth. Nice and amateur poetic, and like most amateur poetry completely ignores that getting that balance right is ridiculously hard, involves lots of guesswork and trial and error, and the fact that the ingredients that go into the metal can determine a blade's destiny long before you think about heat treatment. There's probably some irreverent philosophical point to be made there, too, but that's for another time.)
I then had to file on a sharp edge. Frankly I didn't do a great job of it the first time; it's far too steep an edge so it didn't cut well, but, meh. Here's a before and after of the blade, mostly to show off that cool goldenrod color. I've decided that at some point I need to make a blade where tempering is my absolute last step so I can keep that color, because it looks sweet.
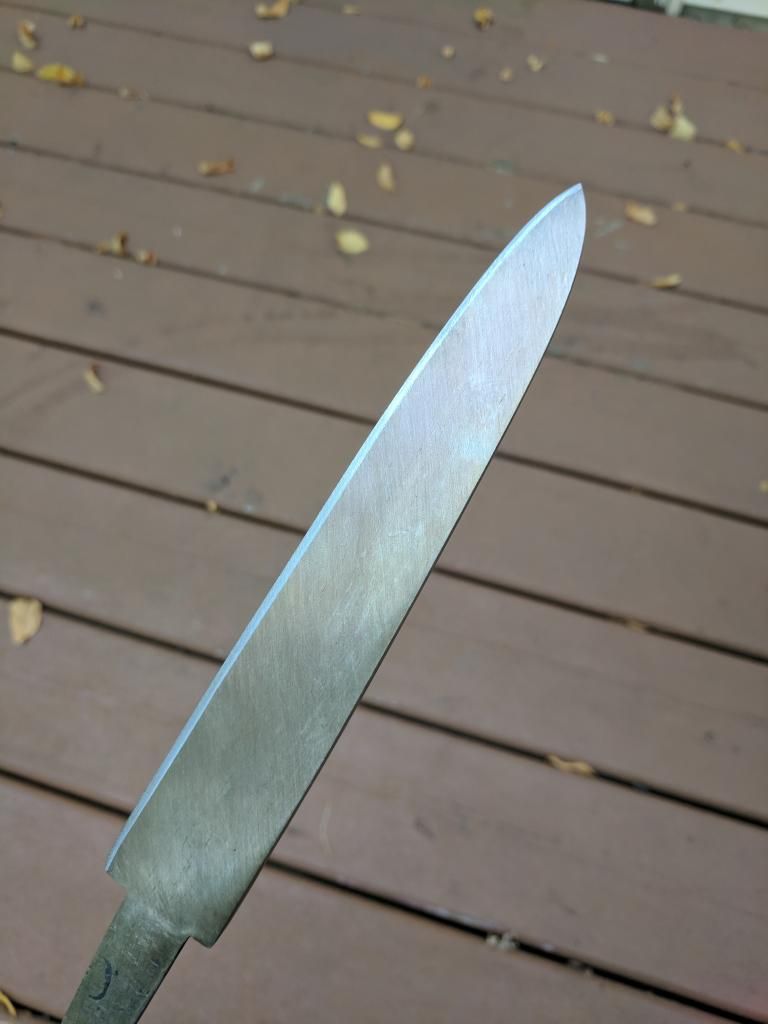
The next step: Sanding again! My thumbs do not like this part. This time I took the blade through 60, 120, 220, 400, and 800 grit sandpaper. Then back at the forge I heated up the guard on one end and hand-bent it into a curve on the forward side, mostly just for style because I thought it would look good. I think I made it a bit tight for my hand, but it doesn't touch my fingers so it's fine.
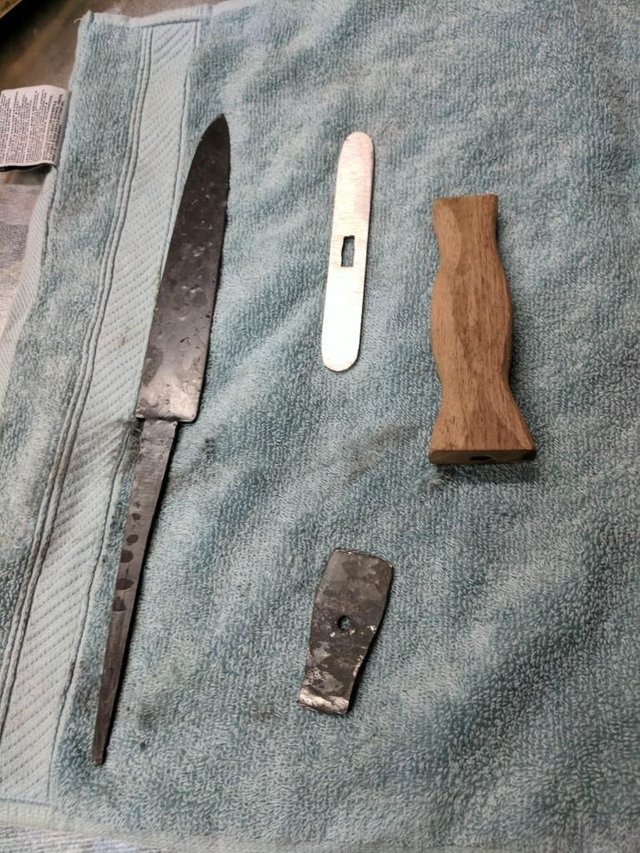
Here's everything ready to assemble.
Everything fit together... mostly. The guard was a bit loose, the handle was almost a perfect fit but not exactly, etc. After grinding the end off of the tang it was barely a millimeter longer than where the end cap sat. Fortunately I was holding the whole thing together with glue. Slather the tang with quick-dry epoxy, stick everything on in the right order, and then use a ball peen hammer to flatten out the last millimeter of the tang like a mushroom over the top of the end cap. The result:
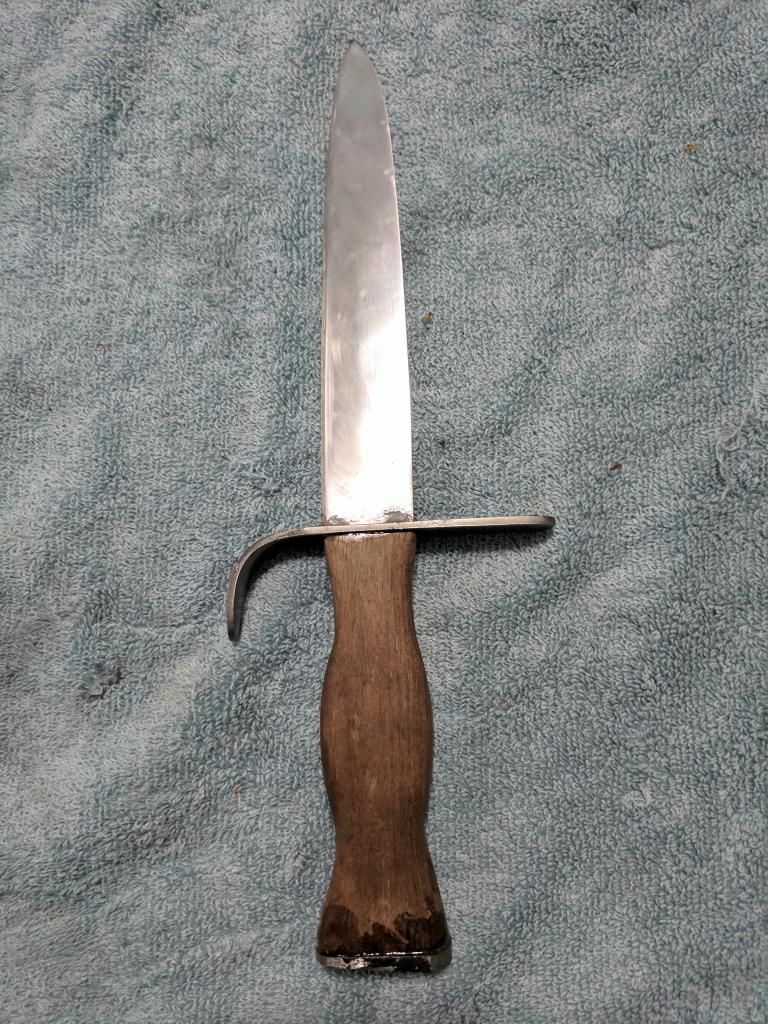
Habemus knife! Covered in glue. Meh. An x-acto knife and more sandpaper made quick work of that. I brought both the handle and the blade up to 1500 grit, which isn't quite a mirror finish but on the way there. I actually had to do that several times as the vice and x-acto knife kept scratching the blade. I also had to clean up a mark that my instructor made while trying out the sharpening tool for my Dremel (ಠ_ಠ), and tried re-edge the blade at a steeper angle. It would probably cut skin (I've not tried), but it's not cutting paper on its side yet. I blame a mix of poor quality steel and poor quality skill. I also rubbed some boiled linseed oil into the handle wood to help seal it.
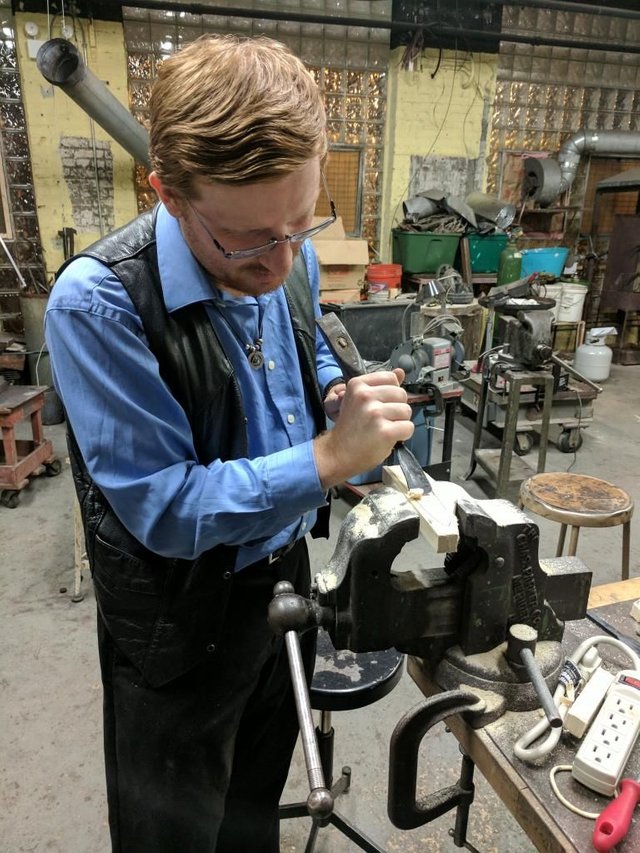
But wait, there's more! I also wanted to make a scabbard for it, to be complete. For that, I used a thin poplar board. After tracing out the blade on it I borrowed the instructor's gouge and carved out the blade shape on two pieces of wood, then glued them together with basic wood glue. Add belt sander to bring it down to shape, sandpaper to smooth it out, and some basic wood stain to give it color.
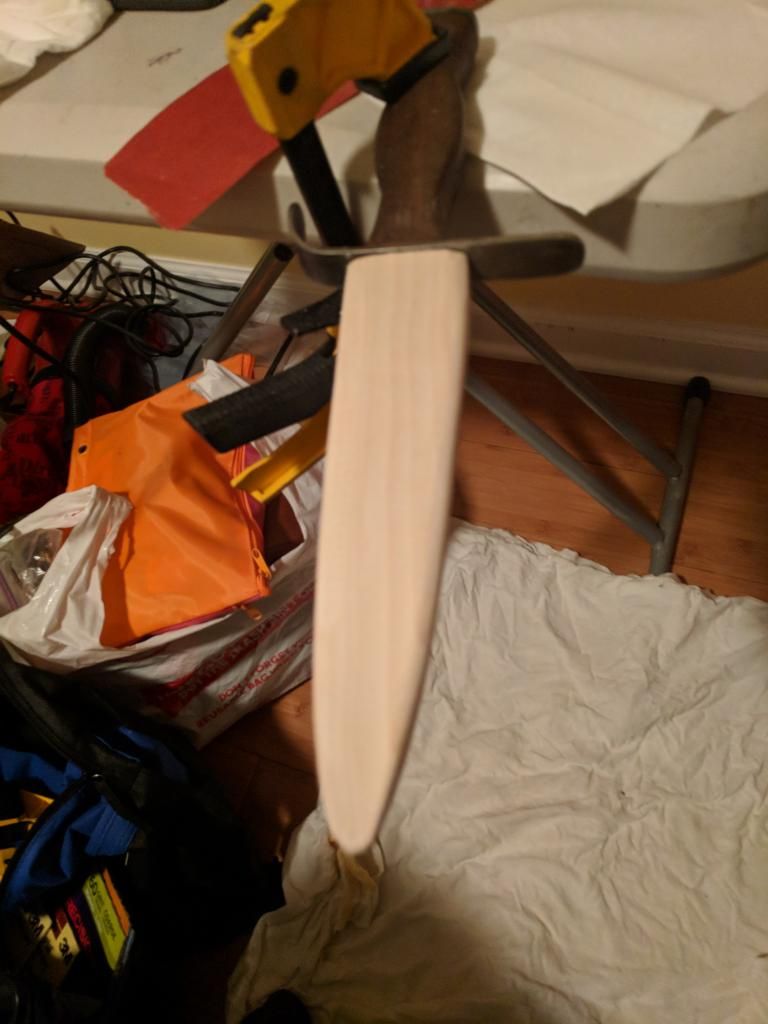
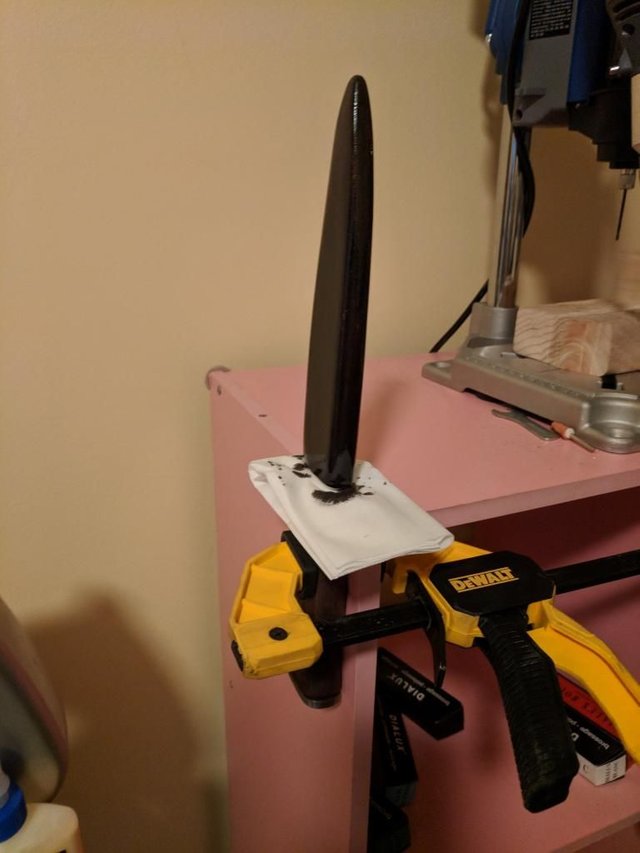
Oops, too much color. The "dark walnut" stain came out black, so I had to sand it off and try again with "special walnut". I don't know what's so special about it but it matches the handle decently well.
And here's the final product:
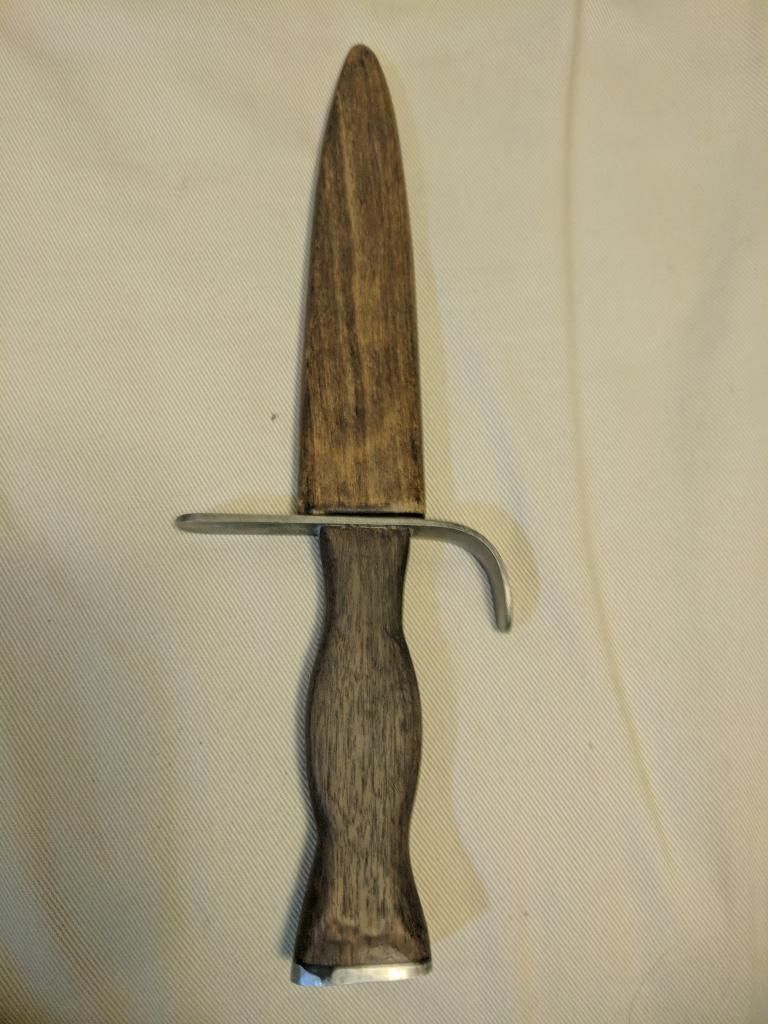
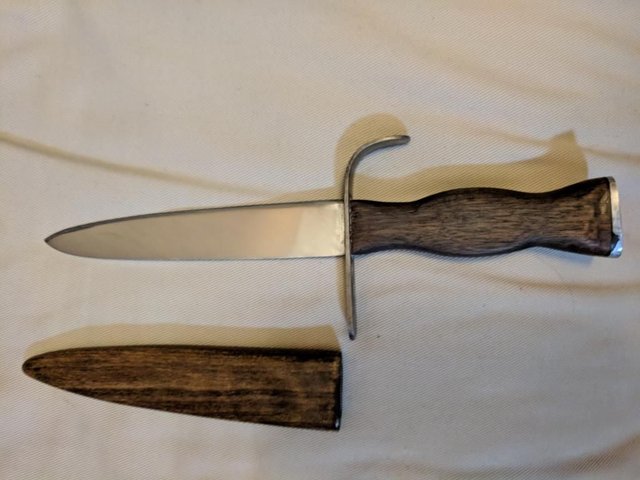 )
)
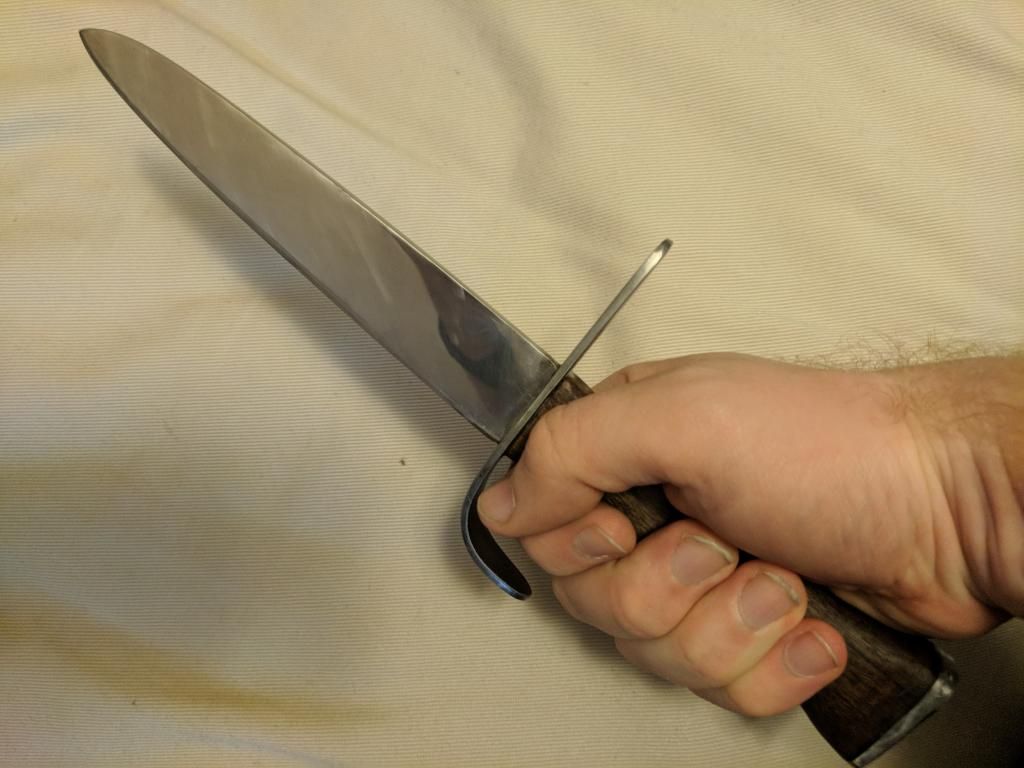
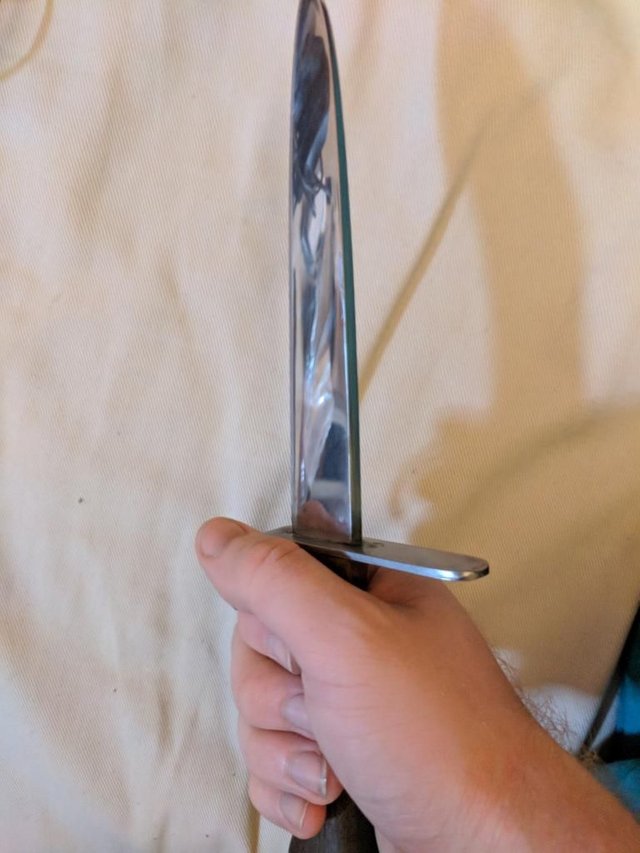
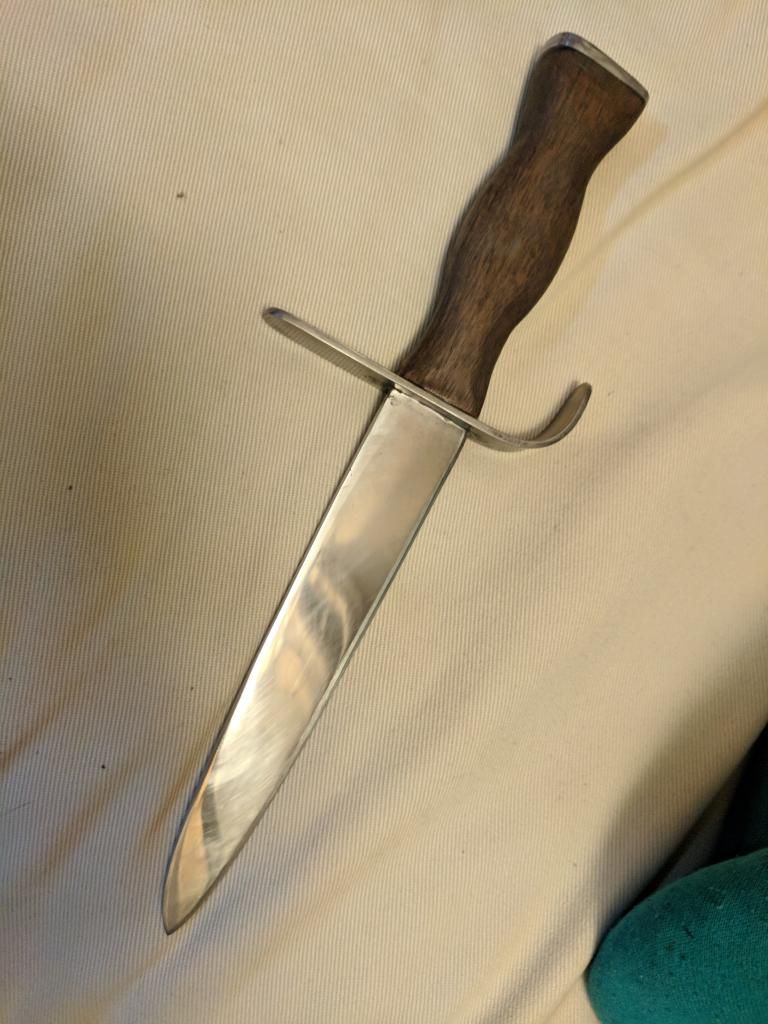
And that's a wrap. Oy! If people are interested I will do another of these writeups when I finish my second blade; it's currently in the "file and sand" stage. This one is a curved blade with exposed tang, also a railroad spike, but probably the last railroad spike piece I'll do. Higher quality steel is pretty affordable from what I've seen.
Anyway, I hope that was at least somewhat educational or entertaining or both. Let me know if it was. Cheers.
Wow, that's pretty freaking cool. I read the whole thing and learned quite a bit. I'm curious if this great post will get noticed or not. My hunch is probably not, but we'll see. Content discovery isn't that great around here (yet).
As for videos, you can embed both YouTube and Vimeo.
Seems like a ton of work. All that sanding reminds me of maintaining the boat, sending, varnishing, cleaning... ugh. Would be easier just to walk those 4 miles. :)
Downvoting a post can decrease pending rewards and make it less visible. Common reasons:
Submit
It would certainly be better quality exercise!
Other than tweeting, what's a good/polite marketing mechanism around these parts?
Downvoting a post can decrease pending rewards and make it less visible. Common reasons:
Submit
You know, I've been here a year and a half and I still don't really know the answer there. In many ways it's like joining any new social media platform. Without followers it's like tweeting to no one. Gaining followers? Well, that's tricky. I think it takes time, writing skill, and regularly contributing value to the content of others. I recently surpassed 10,000 posts and comments so I've put in a lot of effort here, but for me it has really paid off. With more users involved now, maybe doing what I did would be much harder now. Not sure. Links in comments isn't (usually) discouraged as long as they are completely on point and relevant while adding value to the discussion.
I put some thoughts together on this post which links to three others, though there probably isn't much there you wouldn't already know from other social media platforms you've been involved in: #SteemitIsToMe: Relationships, Reputation, and Rewards
Downvoting a post can decrease pending rewards and make it less visible. Common reasons:
Submit
Also, yes it is a lot of work. I'm going to stick with it for a while, though. It's one of the few times I fully disconnect and focus on something completely non-digital. Even if I'm basically just making art pieces at this point rather than useful knives/swords/tools/weapons/things, it's nice to have something in my life so, well, analog.
(And it's way cheaper than a boat.)
Downvoting a post can decrease pending rewards and make it less visible. Common reasons:
Submit
Definitely way cheaper than a boat! Hahah.
Downvoting a post can decrease pending rewards and make it less visible. Common reasons:
Submit
Congratulations @crell! You have completed some achievement on Steemit and have been rewarded with new badge(s) :
Click on any badge to view your own Board of Honor on SteemitBoard.
For more information about SteemitBoard, click here
If you no longer want to receive notifications, reply to this comment with the word
STOPDownvoting a post can decrease pending rewards and make it less visible. Common reasons:
Submit