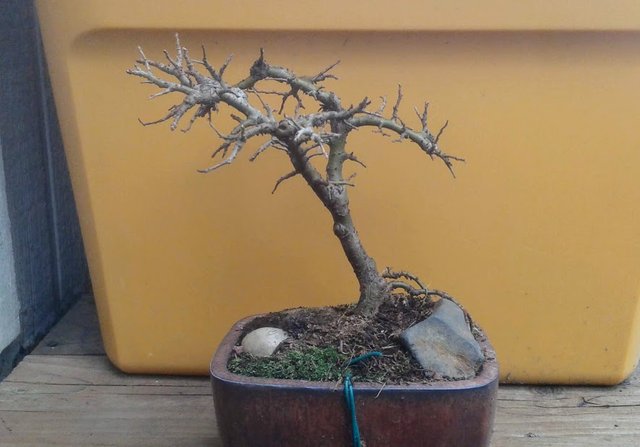
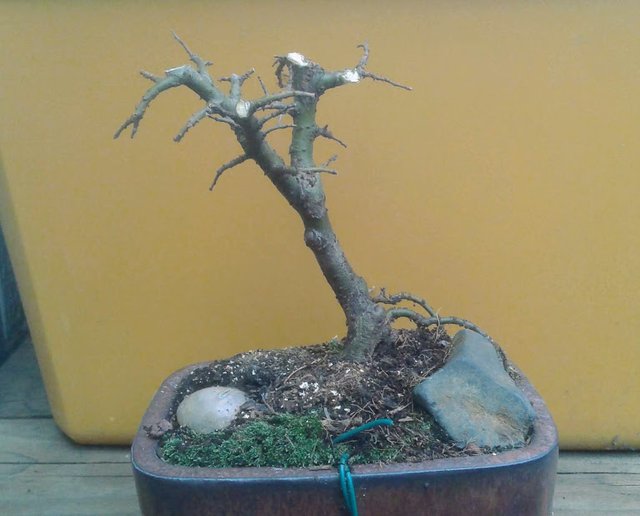
This is Chinese Elm. Known for having small leaves ideal for bonsai.
This past March, my tree looked like it was ready to undergo the major pruning work I had been planning all year.
Top View
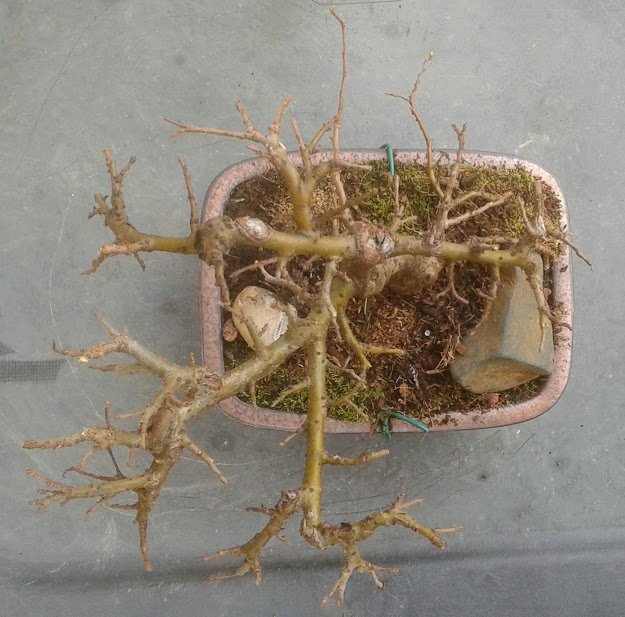
This tree tends to grow very long and straight limbs unless trained very early with wires. This can be challenging because new stems are very fragile and will snap like a pea pod with very little pressure.
Looking at it from the top it is easy to see how many branches have thickened up to dominate the tree's energy. Some of the top limbs are even thicker than the base of the tree.
Problem Areas
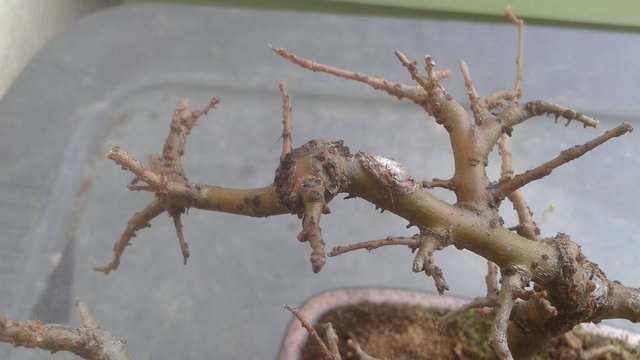
The top left branch bends at this area where an old cut mark has healed over. The thickened area seems to promote growth beyond this point. This is one problem area for the design of the tree that I will be dealing with.
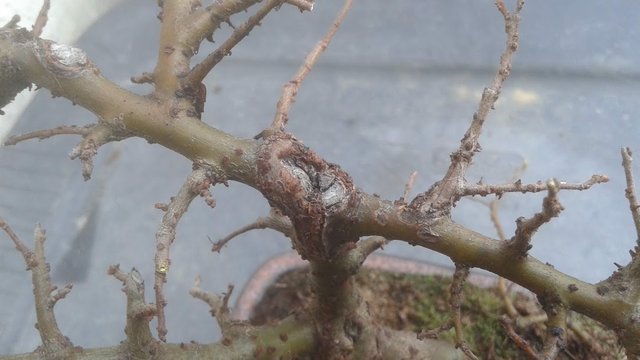
The split in the trunk is a weakness in the tree. Potentially it can introduce disease. The attached limbs are more likely to break at this point because the deadwood in the center provides no strength support.
This is a challenging area, as it supports the design I am developing, but I realize the potential problems it may introduce. I am actually considering leaving this area alone for now. I may let this remain as a permanent design feature as long as the wound mark does not continue to fatten up excessively.
I might be able to do something about the tissue growth on top of the wound that is mounding over. With the pruners, I can reduce the area in size.
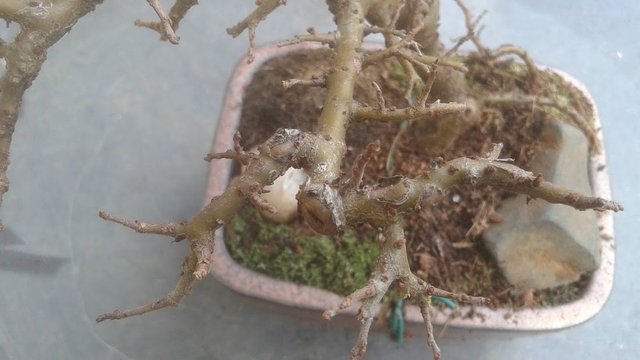
The front branch has a very unnatural angle, and ends with a thick calloused wound where it was pruned. I'm definitely planning to prune this area away.
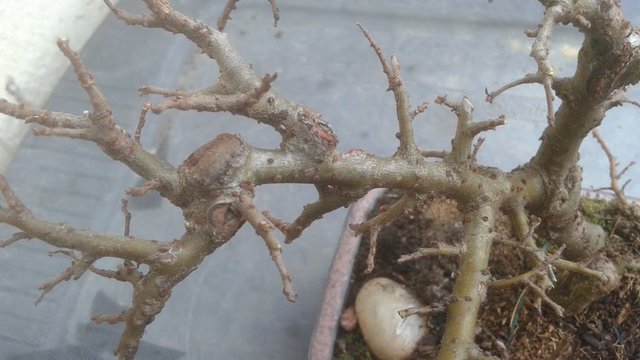
Another problem area in the photo above. This thickened knob has three branches extending out from the same location. All of those connected branches will only add to the swelling of this location. It needs to be removed. Fortunately there are many developing branches below this mark, and they will happily grow quickly to occupy this space.
One of the nice things about making these decisions on the tree right now is that all of the new buds are visible. They look like scabby freckles on the tree. Chinese elm develops buds practically everywhere, along all healthy wood tissue. This makes this tree very ideal for practicing pruning on, as I am doing here. If a mistake is made, the tree forgives me, and pushes out new branches to replace the ones lost.
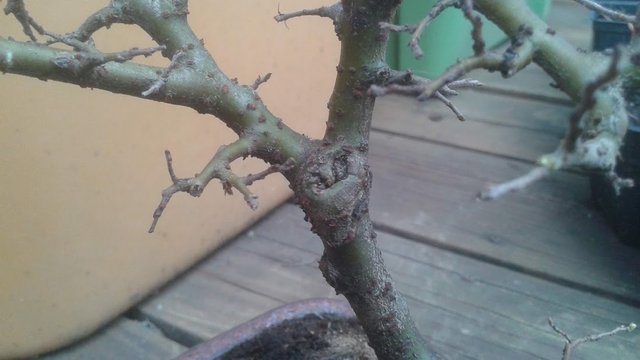
Further down, I see where the trunk splits into the first two main branches. I actually like this feature because the wound has healed so cleanly. One day I may need to separate one of the main limbs off, to favor a more tapered trunk design. Currently the tree has a very even thickness from top to bottom, which is unnatural. Trees look best when the top branches become thinner than the lower trunk. With regular annual pruning, I think I can start to develop this better.
Initial Clean-up Pruning
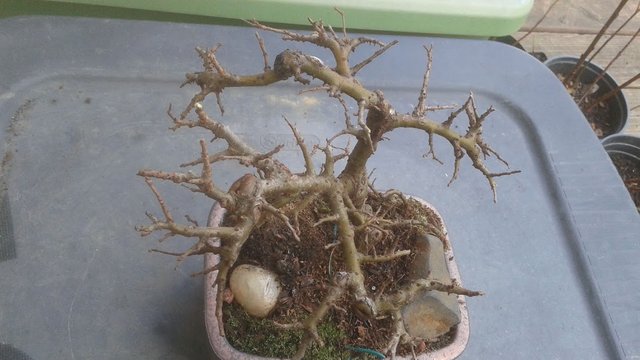
The first minor pruning has begun. Here I have made cuts to smallest unnecessary limbs.
Stems growing out of an old wound are good candidates to remove, because they will cause abnormal thickening to the surrounding area.
Also branches that had three or more stems extending from a single point were thinned, making sure that I allow no more than two limbs to extend from a single point. Too many branches joining a single location causes the area to thicken, which is a problem already dominating most of the primary branches of the tree.
Symmetrical branches extending from opposite sides of a central branch also need to be tactically dealt with. It is better to only allow an alternating pattern of branches, for the same reason I remove triple-junction branches. Asymmetry is also valued as a more natural design shape in most trees.
Unnecessary buds are also scraped off easily with a fingernail in places I do not want new branches to form.
Examining the Roots
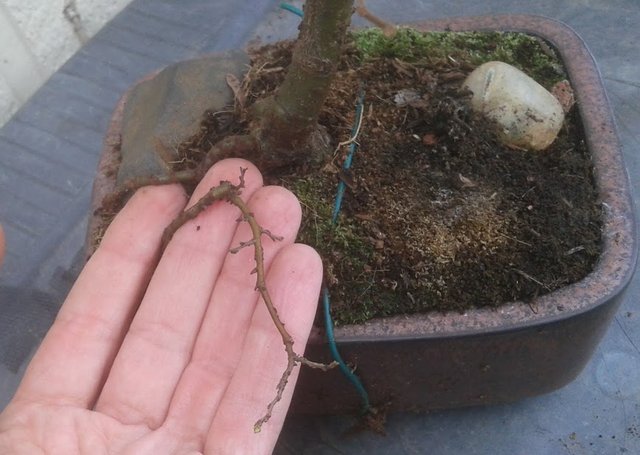
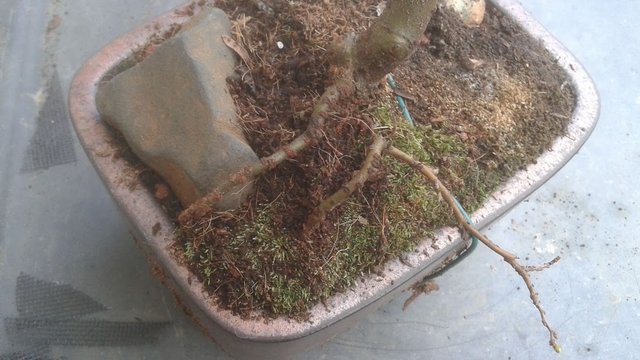
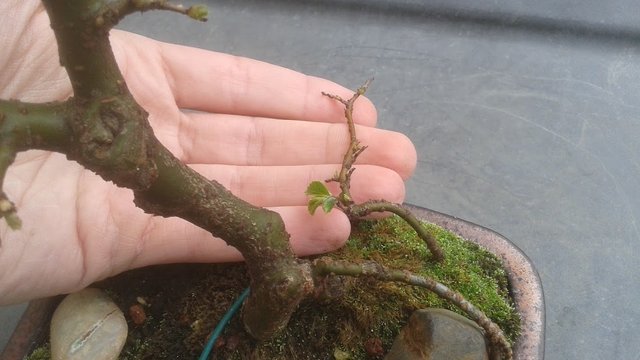
The most fascinating feature of this tree is the roots. The last time I repotted this tree, I folded the thick upper roots over a rock, because I liked the bend of the roots.
During that first season, one of the roots split off the tree, but it kept growing leaves. That root is still buried here and alive. Its shape shows an interesting story about the location on the tree it originated from.
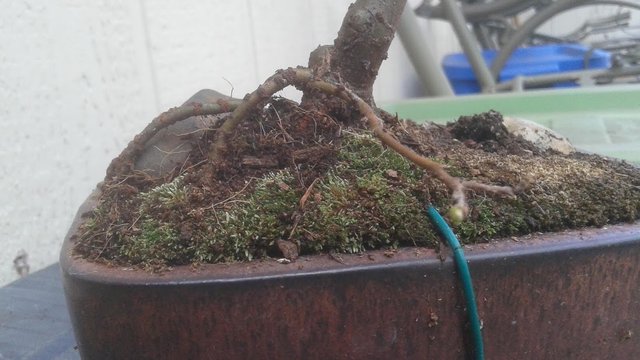
Although I do enjoy this low root branch, I will be pruning it slightly to reduce its length slightly. By promoting the buds closer to the base to develop, I can keep it small in size, and encourage the branch to grow thicker without becoming too long.
Making the Cut
Below I make the first major cut.
It is easy to see how unproportional the removed portion was. The lower branch it was attached to is so much more narrow in size.
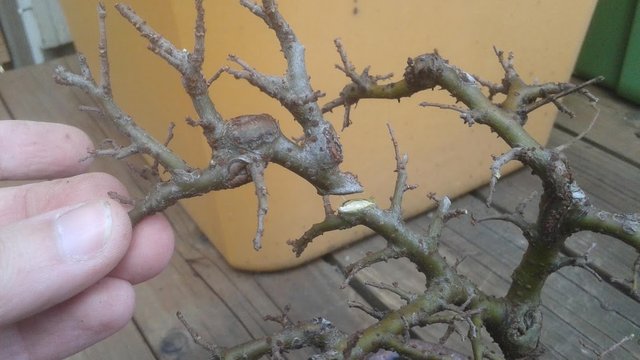
Next I remove the branch that ends with a thickly abnormal bend.
These thicker branches, I quickly discovered I could not manage to get a clean cut slice using my bonsai branch cutters. This is because the bark was so green and fleshy, like a fruit rind. Even with sharp pruners, it still pinched the wood and squashed the surrounding tissue into uneven shreds.
I decided to switch to using a small hand saw to gently allow the teeth of the blade to shred through along a more even cut line.
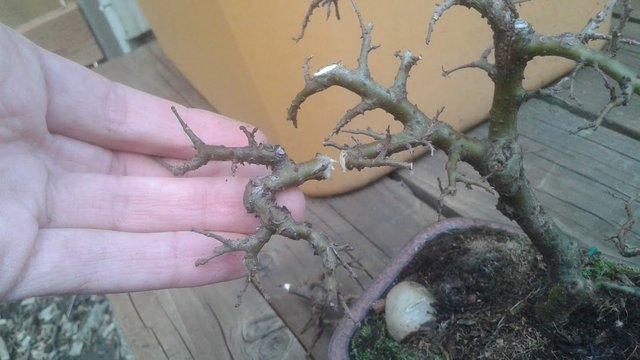
The reason I chose this next cut was because I found a parallel branch growing that was much smaller in size that could easily replace the entire removed top branch. The new branch has a much better narrow, tapered shape, and it doesn't have the multi-branch problem spiking around at the end.
Not that I am against having many small branches. In fact, I want to promote this. However, great care must be taken that most of the small branches are not conglomerating together into a single location. Small branches will be much more appealing if they develop with leaves evenly throughout the tree.
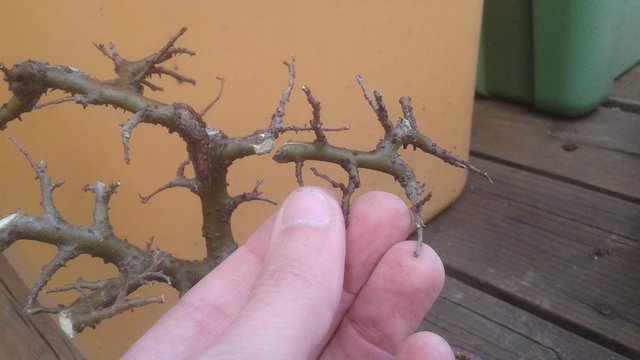
With one last major cut, I saw right through the deep scar where the tree was previously topped. The attached narrow branch will be allowed to remain and help heal this fresh wound. It also has many buds which will extend into the direction of the lost limb.
With the bonsai cutters, I chip away at the tough interior wood as much as possible to allow the green bark to heal over, and leave as small of a wound as possible.
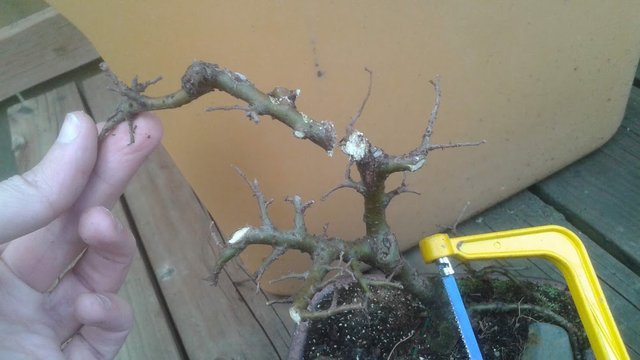
Final Results
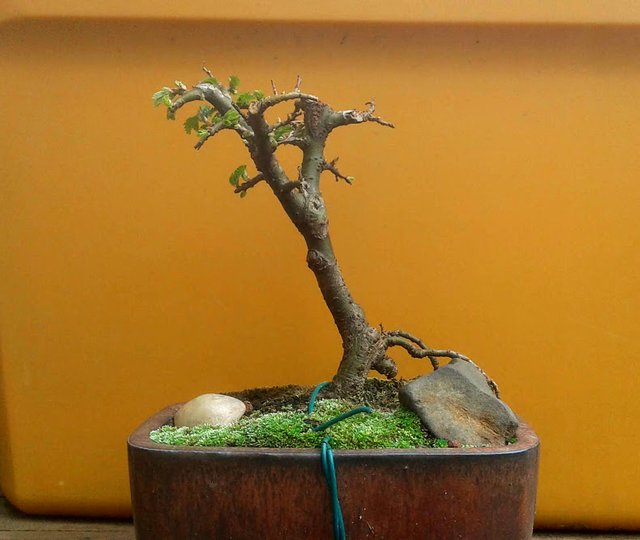
Now that the top of the tree has been reduced in size so drastically, I can encourage all of the buds to quickly fill in the top of the tree with fresh new stems that will become the new crown of the tree. They will take a few years before they thicken up to the size of the limbs that I reduced.
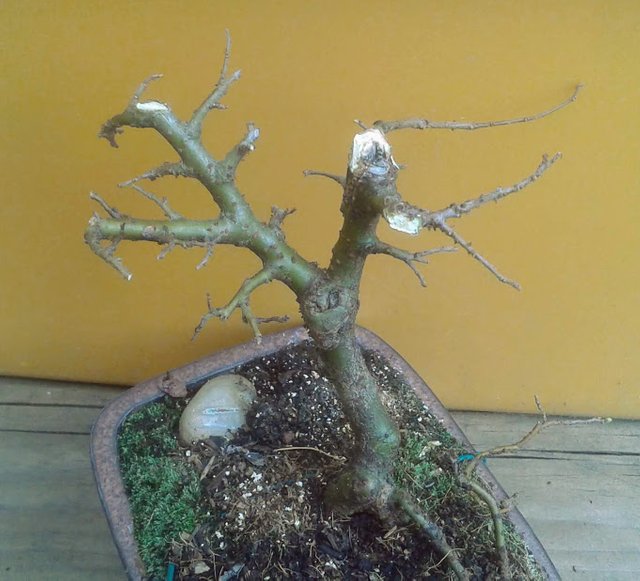
No, it is not the prettiest tree right now. They never do look good at this time of year. Summer should remedy that when the new serrated green leaves soften up the rugged edges of this skeletal tree shape.
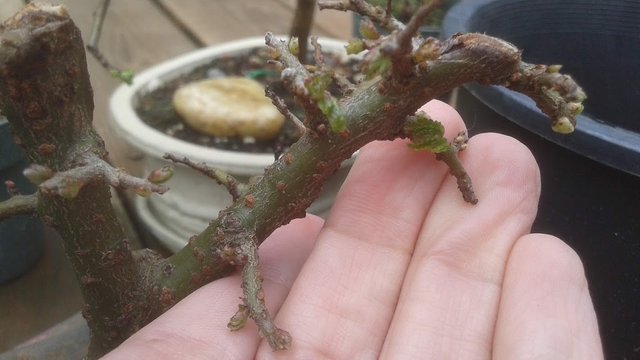
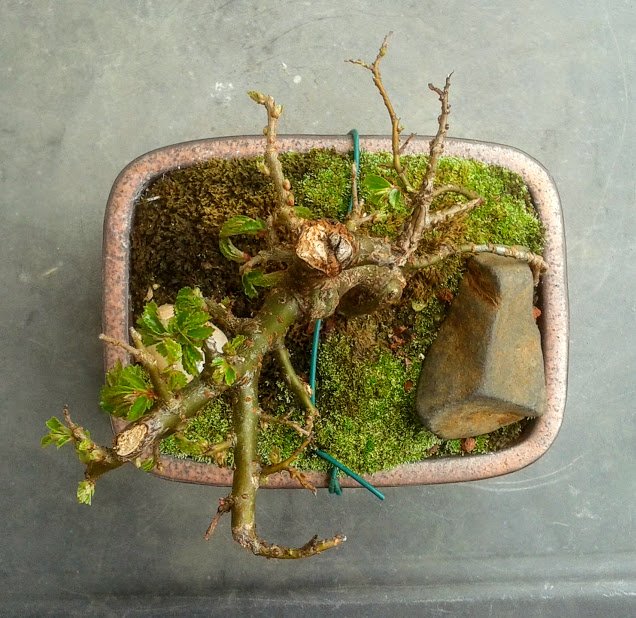
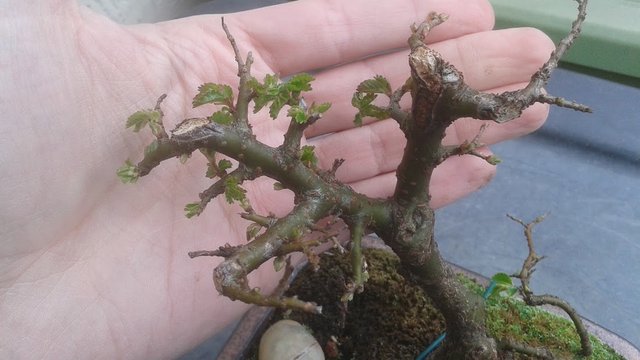
Three weeks later, and the buds are already starting the swell and pop open. The buds closest to the trunk and roots always seem to open first.
With Chinese Elm it can take over a month before the buds finish opening, and the new leaves and stems will be extremely delicate, able to snap off at the slightest touch. For the month of May, I'm going to be tempted to prune off overly long stems, but it will be better for the tree if I stay hands off for a while. On other trees, this usually helps to redistribute energy to weaker buds that have not opened, but on Chinese Elm, I noticed it tends to rob so much energy from the pruned branch, that the whole area can stop growing, and reduce the growth rate of the entire tree.
Tomorrow is Easter Sunday, and I'll hopefully be able to attend my local bonsai club meeting, but I am feeling sick with a cold at the moment.
At the meeting they are planning an activity for people who want to bring trees that need to be re-potted. I have a tub of sand filled with cuttings from this Chinese Elm, and various other trees that can be easily re-potted. Look forward to photos of this exciting activity from me in the future.
Photos in this post are all #originalworks by @creativetruth, unless stated otherwise.
Find me on discord and chat with other tree growers, bonsai enthusiasts, and gardeners. We have quite a few accredited experts filling out our ranks, and a helpful Spanish-speaking community.
#art #creativity #tree-pruning #elm #tree-buds #roots #rootoverrock

It has a lot of branches and I think it will be a good-looking Bonsai soon @creativetruth
Downvoting a post can decrease pending rewards and make it less visible. Common reasons:
Submit
Well done on the tree. Looks good. Might I suggest two things to consider?
First you should seal wounds where branches were removed with a sealant just to keep moist out as this is the perfect breeding ground for mold and fungus. It also on some trees cause the tree to rot as water weakens the wood and it rots away.
Second If it was me I would plant the tree in a bigger pot for now just to grow faster and heal over. After that you can pot it into a bonsai pot again. Trees develop faster in nursery containers or big seeding trays.
That’s what I would have done. But there is nothing wrong with what you did. 😉
Nice move with using a saw to cut through the tender bark.
Downvoting a post can decrease pending rewards and make it less visible. Common reasons:
Submit
I need to get some different sealants, and find out what works best. Some of them stain the tree, and I need to learn which ones do this permanently and which ones are only temporary. As my collection grows, I have more trees I can practice test trials on, to see which options will work best on my main trees.
Recently, I did concoct my own wound treatment formula. Tea tree oil, peppermint oil, cinnamon, and castor oil. Seems to be working to keep fungus and insects away, but not very strong to hold in moisture. Uses it on forsythia and willow, both which heals quickly anyway.
Any good tools for carving out the interior hard wood that stick out from a cut? Maybe knob cutters or a rotary dremmel to grind it out? Some of these tools, along with proper bonsai wire and wound sealant I have not had the funds to invest in... yet.
Downvoting a post can decrease pending rewards and make it less visible. Common reasons:
Submit
All good. Tools are expensive and it takes a while to build up a collection of tools.
I use a cheap wound sealer made by effekto called steriseal. Don’t know if it is available in you region.
Downvoting a post can decrease pending rewards and make it less visible. Common reasons:
Submit