Ever wanted to change a bush into a bonsai tree? This post is for you.
Way back in August, 20107 I introduced this tree from my bonsai collection for the first time here on steemit. I wrote about it in this post titled: Emerald Queen, Saphire Sorceress, and a romantic gesture from Aphrodite.
Back then, this was the third post I had made since joining the blockchain. It had 6 votes, valued at $1.32, including my own tiny vote. The only comment I received was from @steemitboard, a bot. I had a reputation of 25 back then, and only $25 steem delegated to me. I kept plugging away and making posts about bonsai trees, and eventually I grew stronger.
I've come a long way since then, and made a lot of nice friends along the way.
They say that bonsai trees are good luck. It's always been my wish that I might own a bonsai tree that might help me to increase my fortunes.
So let's take a fresh look at this tree.
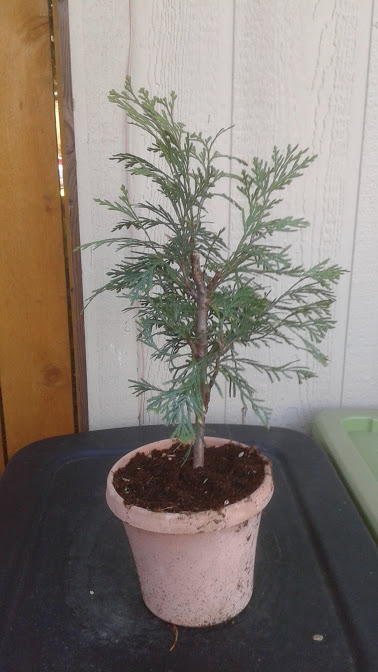
Arborvitae
In this post I'll be covering these main points:
- How the tree grows
- Inspiration from Nature
- Strategy for Clean-up and Pruning
- End Results
- Bonus Photos
How the tree grows
New growth is beginning to show on this tree, although you cannot see the color very well in this photo. The tips of the needles on the outside of the tree turn light green in the areas where new growth can be expected.
This type of tree will backbud along branches and the trunk as long as it receives sunlight. As it becomes bushier, only the tips of the needles gain sunlight, and so only the tips will form new buds and needles.
Sometimes the needles fork out in alternating directions, and the central stem becomes a true branch over time.
Needles on this tree are scale shaped, and have soft rounded edges.
The bark is somewhat strong and smooth like leather, and the interior wood is very flexible even when it is very thick. A heavy wind wouldn't bother this tree at all, because it flexes back to perfect posture so easily.
Inspiration from Nature
This past Sunday I took a nature walk, and managed to take dozens of photos in the park. There were many old growth trees. When I looked up at the types of conifers growing here, I noticed one type of tree was extremely plentiful, and resembled the characteristics of my common Arborvitae. To me, the Western Red Cedar looked like the type of tree I wanted to model my tree after.
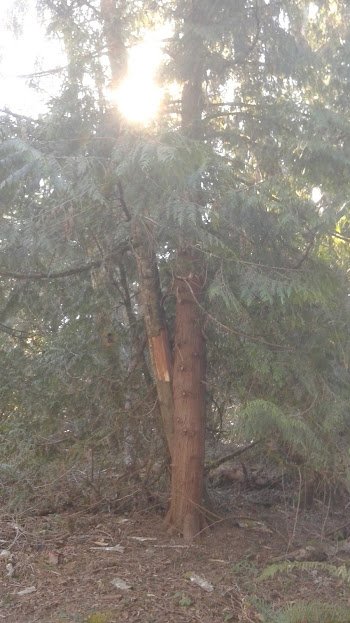
On a mature tree, the weight of the lush needles cause the branches to curve downward, and upward at the ends where the weight is the least heavy. The shape of the needles drape down on both sides of the branch like a blanket, and they taper in from wide to narrow at they grow towards tip of the branch.
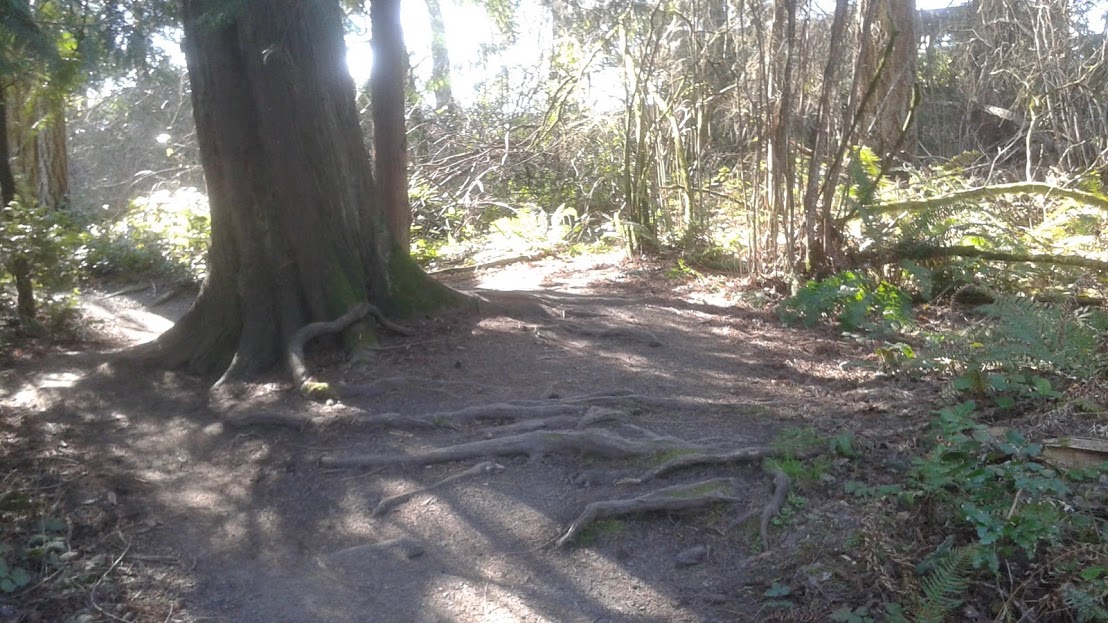
Here you can see the base of the tree widens into the soil surface, and the roots that were once underground have started to surface. This is because the soil line reduces down over the years as material deep in the ground decomposes, and in some cases the tree presses itself up out of the soil if there are rocks and boulders cramping it for space underground.
Something about Cedars that always fascinates me is that nothing seems to grow on the soil under the branches. It releases an acidic scented chemical that prevents mold, insect infestations, and growth of weeds. Yet the soil is often very earthy and rich in organic material.
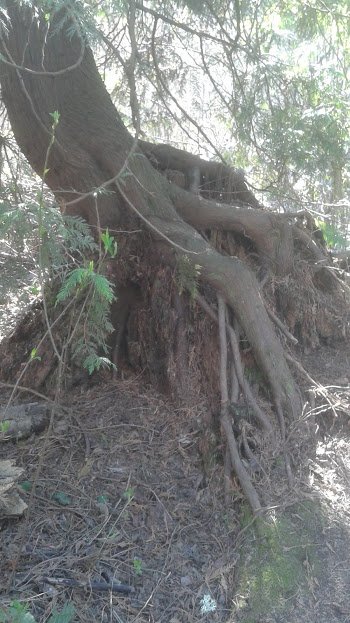
Even after a landslide that unearths the tree roots, it adapts. The flexible wood allows the tree trunk to grow towards the sun from any angle it needs to.
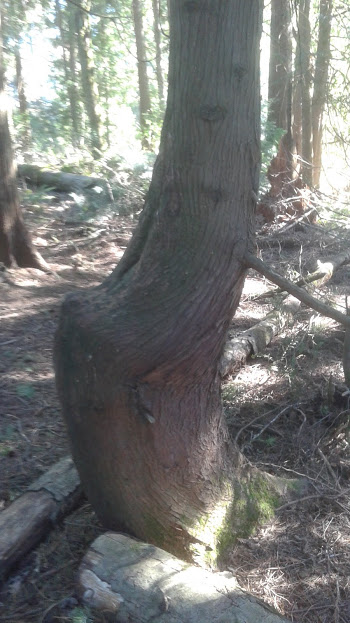
The trunk can be a sculptural art.
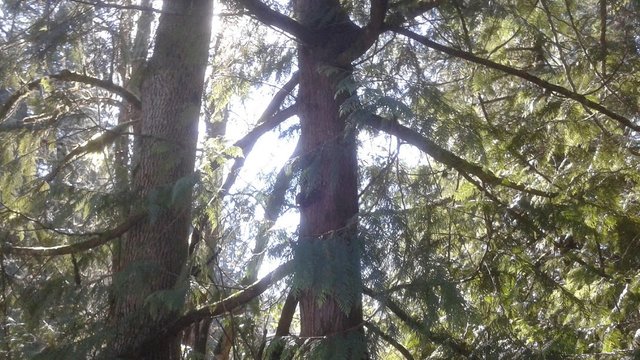
Thick growth looks wonderful on these trees when they are supported by many strong outward angled branches.
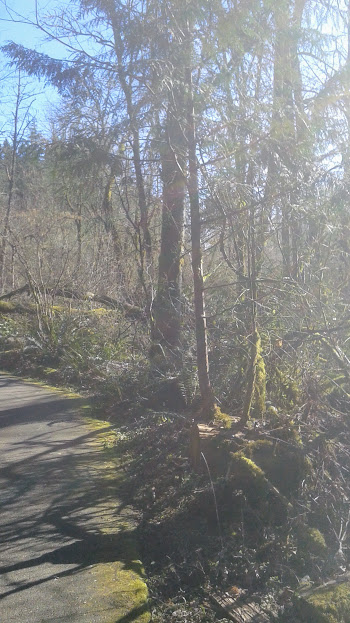
Cedars are strange trees. They will grow in soil that looks completely dead of life. They will even grow from a fallen timber. Here you can see the cut log was not yet dead, because the old branch survived and became a new trunk. Somehow it managed to grow new roots so it could survive.
Strategy for Clean-up and Pruning
My Arborvitae tree was originally just a little tuft of needles barely spreading out into a few thin branches. While I did foster a few dominant branches to thicken up, by removing nearby branches, I have done very little pruning over the 4 or 5 years that I've owned it. My goal was to let it thicken up, to let it fill out more fully to a width that I thought was appropriate for the desired tree height I wanted. Now that the tree is high, wide, and full enough for my preferences, let's go to town on it!
Things to remove first:
- Dead wood, and dead branch ends left over from past pruning.
- Brown needles.
- Weak/small buds growing along the trunk, or between the branch connections.
- Branches too tall or too long, extending beyond the range I want the tree size to be.
Define the branches:
- Remove buds and needles along the length of the branches. I want to see curved branches, not pom-poms.
- Select branches from the trunk to be maintained, and which branches to be removed. Ideally branches are spiraling around the tree evenly, with more space between the branches at the bottom, and branches more close together near the top.
- Remove more needles from the larger bottom branches to make the branches appear longer.
- Eliminate any side branches that fork into the direction of other branches, or back toward the trunk.
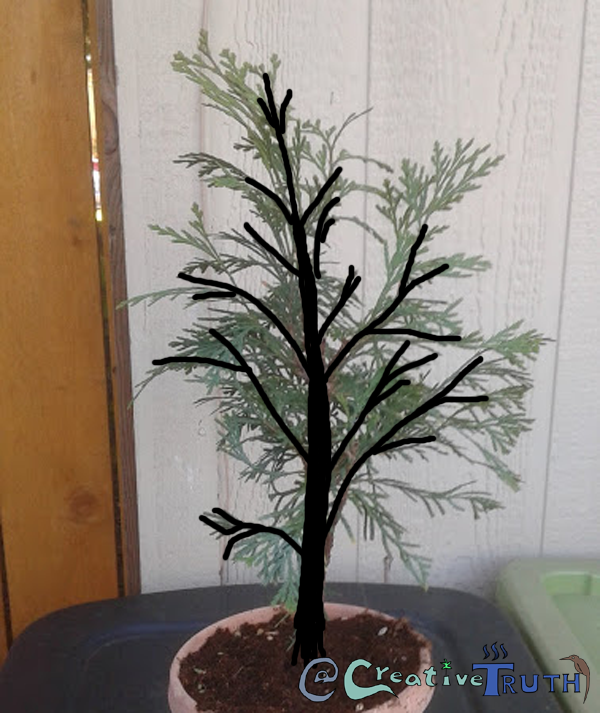
My tree has a thick cluster of many spreading needles competing for space and sunlight in the middle of the tree. Those needles are also taking vigor away from the other nearby branches, because these needles are trying to absorb sunlight so they can become strong branches too. For the design I want, those areas will be opened up so you can only see a few dominant branches in that middle space, and not a mess of needles blocking the trunk.
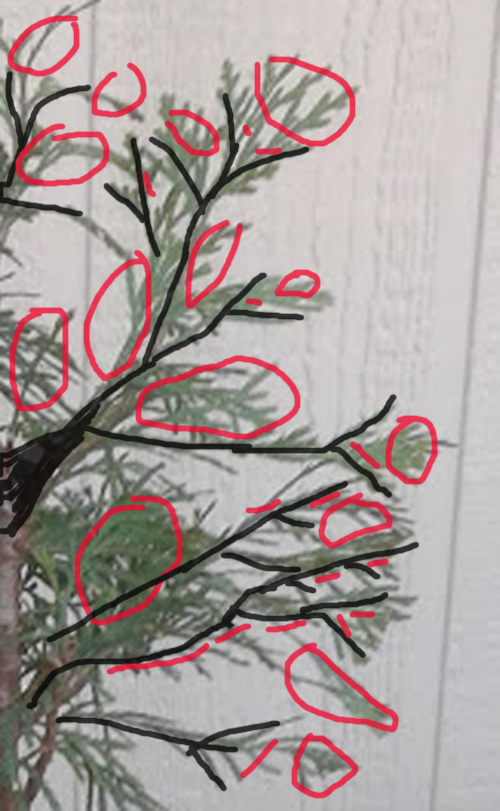
Detailing the needles:
- Change the look of spreading needle fans into separated branch fingers, by eliminating redundant needles between other needles. I want needles to define into small branch divisions, and not form a pillow of crowded needles on one fattened branch.
- Reduce the number of the needles on the upper side of the tree, so they are slightly less plentiful than the lower side of the tree. The goal is a conical shaped tree, with most of the needles growing on the oldest low branches, and fewest at the very top.
- Even out the amount of needle growth from branch to branch. Make it look like the correct amount of needles are growing on a branch. Reduce the amount and size of needles on a branch to make it look not too thick compared to the amount of needles on the other branches on the opposite side of the tree.
- Remove anything hanging down into the foliage of other branches. Long needles growing on the underside of branches can go too.
End Results
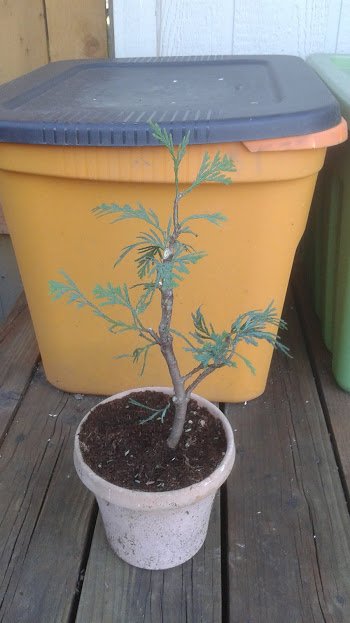
This looks like a nice front view to me.
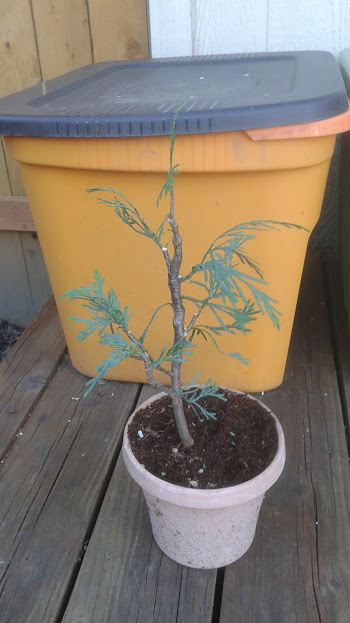
Back view.
It looks a lot like how it looked three years ago. Very thin and straggly once again. At least the branches look more substantial and better balanced around the tree now. It has the basic bones of a tree form, and now it just needs to put on a fresh coat of more green growth.
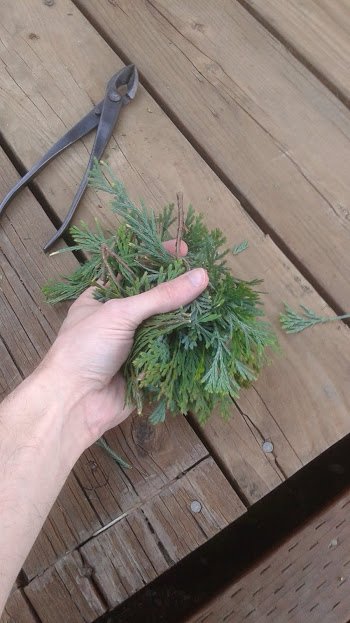
This really reminds me of my last haircut. I told the barber to cut it just as much on the sides as last time, with a little bit shorter on the top. The barber followed my instructions, except he used the electric clippers to shave the hair all the way up to the top crown of my head! I was a bit surprised how much hair he shaved, so we had to take off a lot more hair off the top too to even it out.
What do you think of my tree's new haircut? Was it a lot more than you expected?
Bonus Photos:
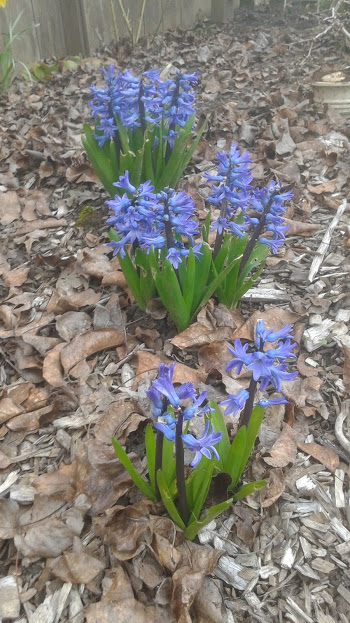
Has anyone figured out yet what my favorite color is?
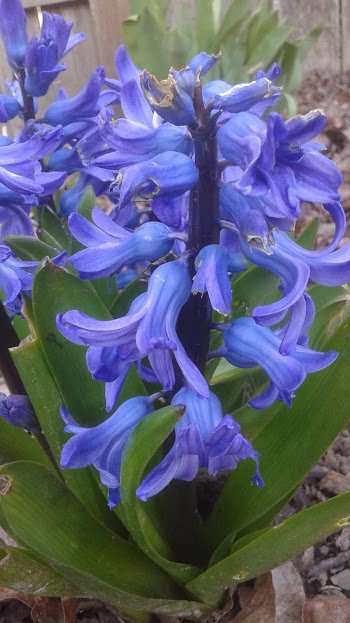
Can you take a hint?
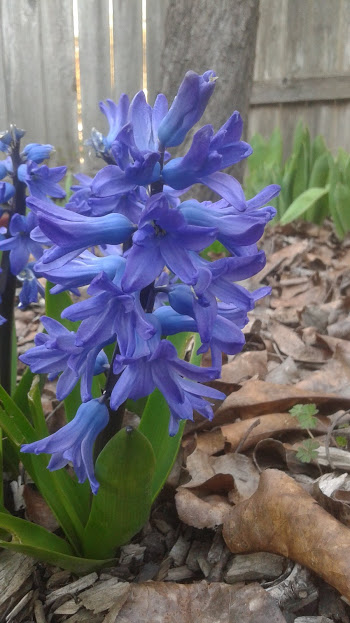
These grow in our yard, and have a truly neon/florescent color.
All photos in this post were 100% original, and taken from my smartphone.
Thank you for checking out my post. I like to upvote my posts after five days to help minnows get a higher percentage of my curation rewards, so please consider supporting my work. I share photos and writing about bonsai, gardening, and sometimes humorous short stories of my own.
Get some sunshine this week, it's good for you.

Very interesting and valuable information about bonsai trees, your article very usefull and informative, thanks for your sharing to us, i have upvote and resteem your post to more than 1350 my follower so that its benefits are known by more people, greeting friendship from me @abialfatih in aceh indonesia
Downvoting a post can decrease pending rewards and make it less visible. Common reasons:
Submit
This is so beautiful, sir. The introductory lines about yourself are so motivational because I am relatively new to the platform and looking to move forward and won't stop.Thank you so much for updating and bringing us nice stuff about different plants. Purple is your favorite color, definitely.
Downvoting a post can decrease pending rewards and make it less visible. Common reasons:
Submit
Yeah just find out what people like. I hope you get some big whopper votes once in a while like I did. Once I started making pennies, then dimes, then quarters, and finally dollars per vote, it was easier to notice progress.
Downvoting a post can decrease pending rewards and make it less visible. Common reasons:
Submit
kindly follow back and upvote my posts please...
Downvoting a post can decrease pending rewards and make it less visible. Common reasons:
Submit
a very nice bonsai tree from my best friend .. and will help upvote and resteem have you my friend .. and please help me too my friend @creativetruth
Downvoting a post can decrease pending rewards and make it less visible. Common reasons:
Submit
Nice tree her friend .. It must be expensive its price
Downvoting a post can decrease pending rewards and make it less visible. Common reasons:
Submit
Once in bonsai this plant looks very good,Whether after in bonsai plants or trees this will not grow big again.
Downvoting a post can decrease pending rewards and make it less visible. Common reasons:
Submit
Nice introduction and nice explnation no doubt you come with a great work and really creative work I alwys try to read it carefully a learn from it because i also grow plants and also training and pruning them carefully and i learn from your post because some time during this process i damage some part but i learn from you and its very easy because your way of sharing is veery simple keep it up
Downvoting a post can decrease pending rewards and make it less visible. Common reasons:
Submit
@creativetruth have you considered getting on shadow bot brother? I managed to get a few mates on and it really helps earnings @doc.hodes especially, my dad too seems to be getting there. Sadly doc.hodes been missing for months though hope hes ok..
Downvoting a post can decrease pending rewards and make it less visible. Common reasons:
Submit
Most of the bots I have steered away from, because I feel like I'm giving away my votes instead freely using my votes to improve the community in the way I like. The bid bots have never felt worth it to me, as it becomes a drug you can't get off.
Can you tell me if it works any differently?
Downvoting a post can decrease pending rewards and make it less visible. Common reasons:
Submit
I hear you brother, you can get off anytime I make probably around $1 per post on shadow bot and if i dont go too crazy my VP stays high, so I feel it's certainly worth it, I have been on since day one on Steemit basically and for me its working out quiet nicely especially now when steem price is so low. It all adds up and helps in the end in my humble opinion ;) but each to his own, with low SP and in the beginning I feel that for me it has worked quiet nicely. My two cents :)
Downvoting a post can decrease pending rewards and make it less visible. Common reasons:
Submit
Oh and what i also like is generally it starts voting for you day 2 3 4 which is quiet nice so if you have a post on day one or two that hasn't done as well there certainly still is hope, but ye you are right each to their own and all that!
Downvoting a post can decrease pending rewards and make it less visible. Common reasons:
Submit
Your introduction was very good. I have been doing bonsai for over 14 years now and learned about for you post. If I may the tree you worked on was trimmed back way to far. You removed a lot of the young foliage from the tree. Conifers strive when you leave the younger foliage on the tree. As a general rule I never remove more than 30% of the tree foliage. The tree will take long to recover from this pruning. When doing a project like the one you did try and compact tree by using wire instead of removing foliage you will be able to get a better looking tree faster.
Downvoting a post can decrease pending rewards and make it less visible. Common reasons:
Submit
You are right about the 30%.
I thought wiring had to be done on the bare wood. That is why I removed so much this time, because I knew the only way I could wire it was by removing enough off the wood so the wire won't be constricting the needles into the bark.
Downvoting a post can decrease pending rewards and make it less visible. Common reasons:
Submit
The green part of the juniper changes color and becomes the branch. You can wire the green part with thin wire.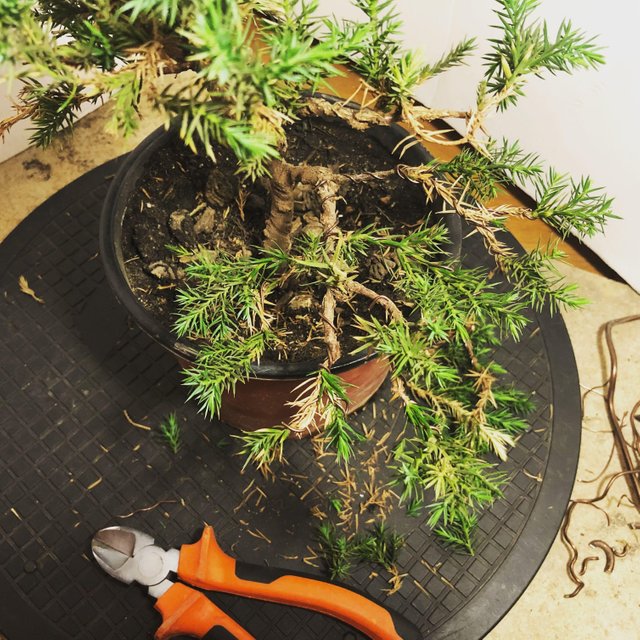
This is a different tipe of juniper but the same applies
Downvoting a post can decrease pending rewards and make it less visible. Common reasons:
Submit
Nice photo. Is that your tree you worked on?
In my last tree, I pruned this same type of tree you are showing. The arrangement and type of needles is quite different. Arborvitae has a flat arrangement of needles. Some of the others I am learning from have expressed the challenge of wiring trees with a lot flexibility like this one, because after they remove the wire it returns to the previous position. My thinking was that if I can make good choice cuts, I can leave most of the branches in the same angles without wiring through the rubbery needles.
Downvoting a post can decrease pending rewards and make it less visible. Common reasons:
Submit
This is a tree that I had prepared for my cousin. With junipers you need to wait for a year or so before removing the wire depending on the growth rate of the tree.
As soon as you start to see callusing around the wire that’s a good sign that the wire needs to be removed. I know from past experience that we don’t want scaring to be visible so we remove to soon but the scarring disappears fast.
Downvoting a post can decrease pending rewards and make it less visible. Common reasons:
Submit
Hey there! For sure that haircut makes the Arborvitae look taller! Is height control something you need to be always paying attention to? Or is it something that you don't care much about in your bonsai trees? You could say that even though you may not be claiming to be an expert on the subject, you do take it as an actual creative activity. Your blog's progress and what you're doing right now with it is really cool, I find myself always wanting to look for your updates and actual thoughts on what you write about. great job I must say, thank you for sharing!
I very much liked how you explained your aproach on this bonsai branches, especially how you compared it to the cedar tree (it takes ingenuity to put those dots together), you're also developing a way to show us your method, that sketch can sort of brief us through the pruning, I must say that I feel like I understood everything, and that's going to help me show some love to my plants growth, because I believe it isn't just about looks, but how a plant stands against time and how you said, against the infinite forces of nature. I will also say that I see it as an amazing journey to remember the first post you made, especially when it's something you've been not only passionate about, but endured long enough to be able to say that you've learned and noticed how much you've came through. Cheers to you for that.
The bonus pics show an amazing display of beauty. How can flowers be so colorful yet they are only transforming what we pretty much ignore day after day? It will never cease to amaze me how a plant can change that much in so little time, and always with its roots so attached to the ground. Nature's has this way of blossoming even through the hardest of adversities! Do you know the name to these flowers? I don't know if they're violet but I see them straight blue!
Downvoting a post can decrease pending rewards and make it less visible. Common reasons:
Submit
Yes, I think they look more blue than purple too. They are called hyacinth.
There some seems to be some confusion, and you are not the only one, about what species of tree this is. I did some research and Arborvitae is actually the same genus as the Western Red Cedar I was looking at in the forest. However, Arborvitae is a different genus than Juniper. They do have many similar qualities though, and Juniper is used more commonly in furniture labeled as "Cedar" with its insect repelling scent.
The height of the tree has to be maintained in all bonsai. Trees won't stop growing! They are genetically adapted to become taller than people, houses, and hills. In bonsai, we change the shape of the tree into something it would not normally be. It makes me laugh to say this, but no matter how much passion a bonsai expert has, they can never expect a tree to stay small if they grow it in a bonsai pot. Eventually it will force its way out of the pot, expanding for more space. In bonsai, it is practically to trim the tree to keep it a proportional size to the pot you want to grow it in. A big tree in a small pot will just tip over, or look strange. A pot too big, and the tree will eventually become too big, and no longer look like a bonsai tree.
Downvoting a post can decrease pending rewards and make it less visible. Common reasons:
Submit
I'm sorry, I was reading two posts from you almost at the same time, and I didn't realize I was actually misusing the name Juniper here! I edited my OP and put the correct name for this bonsai. Almost thought I had to move my entire comment to your Juni post lol, but after a doublecheck, it does belong here.
I understand now by your words how a bonsai's height is supposed to be maintained, but of course, it would take much more learning for me to really see and be certain of many things you're pointing out. As I didn't write this before, I first thought Arborvitae was a sort of a wild bush with many needles, but after taking a better look at it (and googling it) I realized that is sold over here as a common pine tree (If I'm correct about it), and even in my region I have seen one with lemon scented leaves, have you seen or smelled one of those? Maybe I'm mistaken but it would mean that Arborvitae also shares genes with pine trees, or is it from this family/species as well?
Anyway, I hope this hairpiece makes you feel proud, It's a sort of redemption and maybe a realization that it isn't easy to be a either a bonsai grower or a barber! At the very least you can be certain that you're always getting better at planning and managing your decisions over a plant's best interests. You may think of it at something you enjoy but it does show how well you think of it. I'll be waiting for next updates. As always, thank you!
Downvoting a post can decrease pending rewards and make it less visible. Common reasons:
Submit
This great looking bonsai tree, i like your post. all the best
Downvoting a post can decrease pending rewards and make it less visible. Common reasons:
Submit
Thank you @rakib786. I appreciate the kindness.
Downvoting a post can decrease pending rewards and make it less visible. Common reasons:
Submit
Most welcome dear friend, have a nice day.
Downvoting a post can decrease pending rewards and make it less visible. Common reasons:
Submit