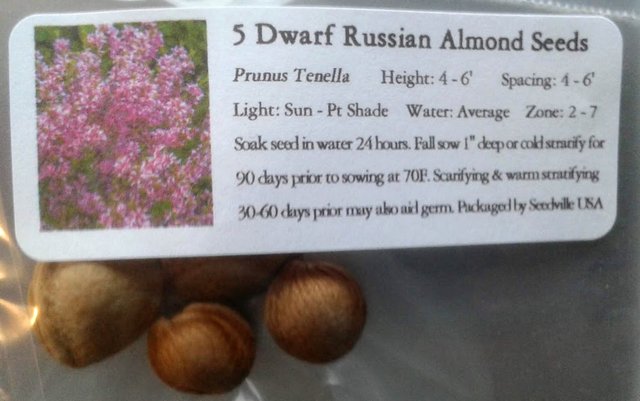
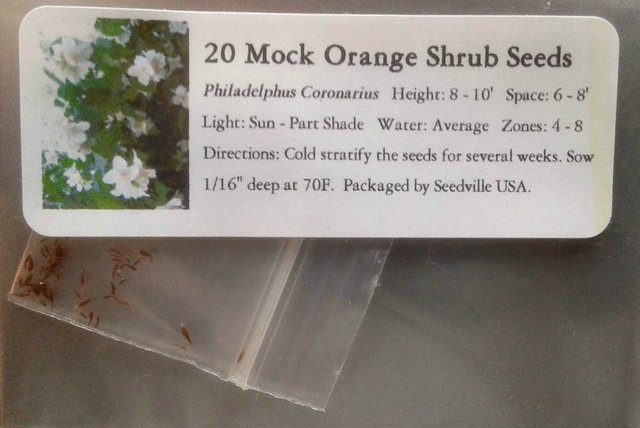
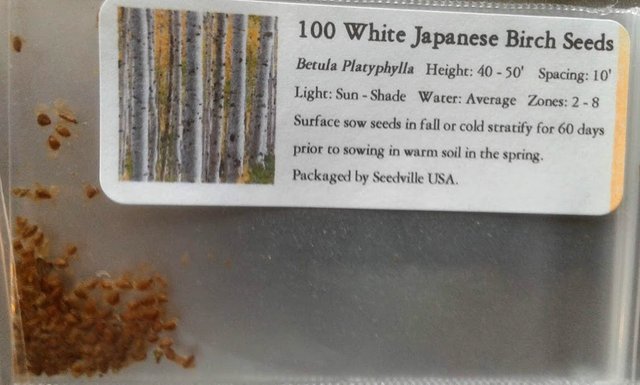
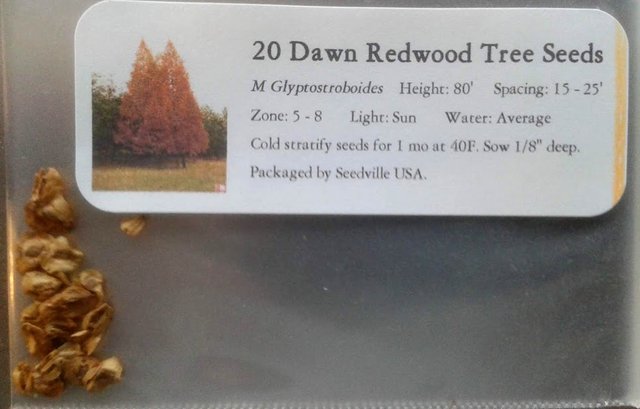
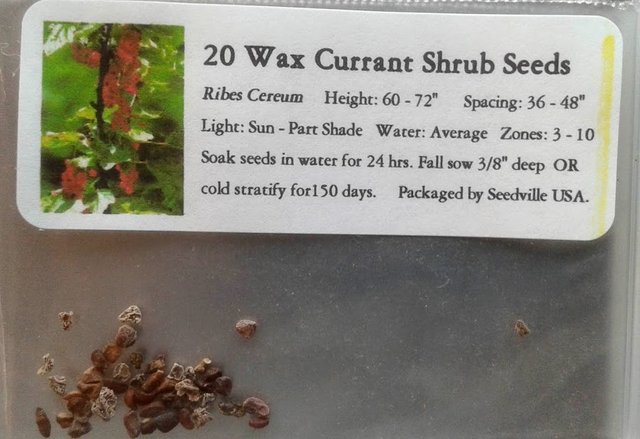
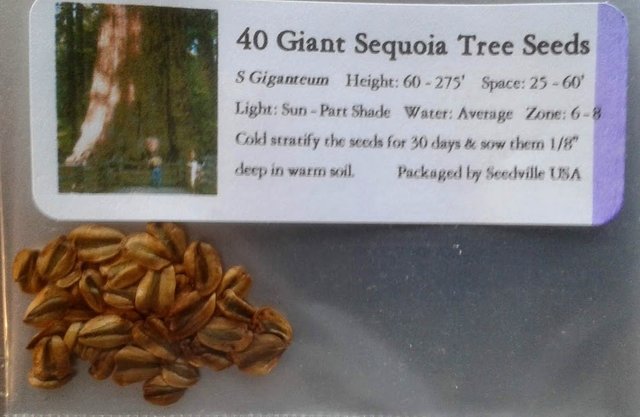
Check out the many interesting types of tree seeds I recently acquired. They sure come in many varieties of shapes and sizes. Seeds can be collected from such things as pinecones, fruit, catkins, flowerheads, and nuts.
Recently, I purchased some tree and shrub seeds online.
Why?
Well, I wasn't satisfied with the prices, availability, and size of trees I can purchase locally. I am not satisfied with the standard varieties to choose from to fulfill my bonsai collection hobby. So I purchased tree seeds online for the specific varieties I have been wanting instead. I'm still young, and bonsai is a hobby that can last beyond a person's lifespan, so let's hope I get to live long enough to see these trees grow into brilliance.
Seed List
- Dwarf Russian Almond, Prunus Tenella (A)
- Mock Orange, Philadelphus Coronarius (O)
- Japanese White Birch, Betula Platyphylla (B)
- Dawn Redwood, Metasequoia Glyptostroboides (R)
- Wax Currant, Ribes Cereum (W)
- Giant Sequoia, Sequoiadendron Giganteum (S)
Why I chose these Seeds
The Mock Orange I am hoping to grow as an ornamental shrub to plant into the garden. It's a native species to my area that is beneficial to birds and wildlife. The flowers are known to appear annually and smell like fragrant sweet orange blossoms. The native plant sale ran out of stock on these at the time I was trying to purchase a living one, and I do not want to pay full price for a large nursery grown tree.
The Wax Currant is one I will likely grow as a large potted shrub. It might have invasive roots, so I think training to grow in a large pot is best. I chose this variety because the fruit is known for being delicious for making jams and for eating fresh. It's not a native plant, but it will likely also be beneficial to wildlife and pollinators. It won't be trained for bonsai, but instead to maximize fruit yield. I'm hoping it has a showy display of flowers to attract hummingbirds too.
All the other trees I chose because I have been wanting them in my collection. White Birch especially I want to try growing because I failed at growing one in the past, and I love the snow white paper bark. The Dwarf Russian Almond, I had never heard of before, and I chose it because of the showy pink flowers that grow all along the shoots like cherry blossoms. The seeds I was surprised are large nuts.
All of these seeds I purchased on etsy.com for close to $2 per pack. I recommend choosing all seeds from a single reputable seller, if possible, when making an order to ensure everything arrives all at once.
Germination: Method 1 (Indoors)
Some of the seeds I purchased did not initially specify that they would require cold stratification. This is kind of a scary term for those who have never had much luck growing tree seeds before. Fortunately, I can say I have had success with this method I will describe here. It worked quite well for me last year in getting apple seeds to sprout and grow into trees.
All of the seeds I purchased, according to the labels, they require a certain number of days in which they must be cold stratified at a temperature close to 40 degrees Fahrenheit. To me, that means in nature they would need to be planted somewhere very cold and damp, but not frozen.
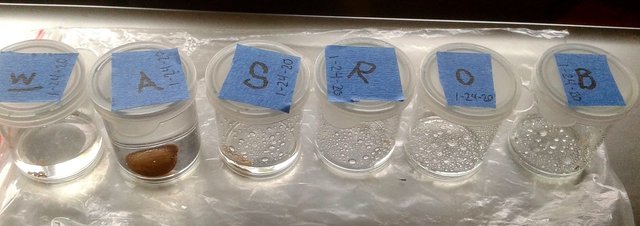
Using plastic containers with snap-on lids, I labeled each one with a letter symbol to represent the seed going inside. Each container was also dated to mark when these seeds were started. For the smallest seeds I used a small handheld spritzer, and pumped 3 to 5 times to coat the seeds and containers with distilled water droplets.
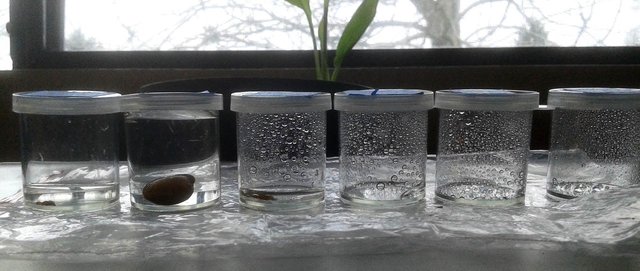
Some seeds, like the Almond and the Wax Currant had to be soaked in water first. What I did was boil some distilled water, and let it cool slightly in a mug. Into the hot water mug I placed the seeds for a few hours. When the water became room temperature, I put the seeds into their own containers and filled the containers with the water so they can continue to soak for 24 hours.
All of the seeds were placed into a small clear plastic sandwich bag, and put into the fridge. I also labeled the outer bag, stating that it was my seeds and needed 3 to 6 months to germinate after the marked date, so other family members can easily identify what it is.
The Next Day, Prepare Substrate
To prevent mold build up, and to prevent rotting the seeds, a soil substrate needs to be added. I figured 24 hours is plenty enough time to let all of the seeds undergo an initial pre-soak before substrate is added.
Many people germinate seeds by tossing them in a plastic bag with a wet paper towel. That seems to be most popular for germinating seeds that sprout quickly, like vegetables. However, for anything longer than a month, I have learned that paper towels can quickly break down and develop bacterial growth and mold, and spread it onto the seed, causing it to rot.
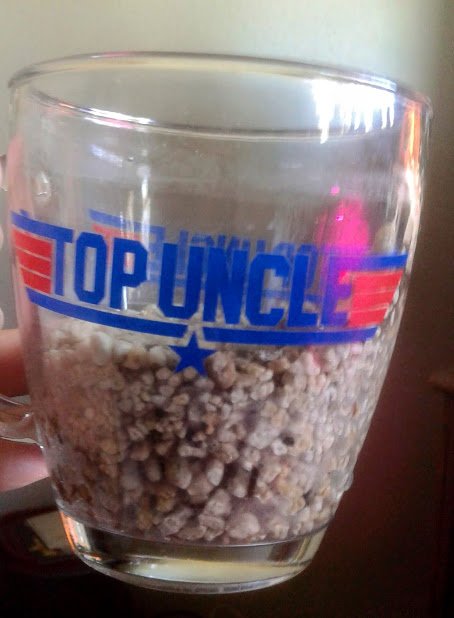
My nephew got me this mug for Christmas. At the time I thought it said Top Gun, because the font and the "TOP UN" looked so similar to "TOP GUN". Now I know it reads, "TOP UNCLE" and it makes me appreciate the novelty gift more.
Pumice, has always been my favorite inorganic medium to use as a growing substrate for plants and trees. It's cheap, porous, retains water, drains fast, increases humidity, and it doesn't break down when wet. Practically the perfect medium for small seed roots to emerge onto.
Using the mug method again, I poured boiling water onto the pumice, and let it soak for a while. This sterilizes the pumice and also rinses away any powdered rock dust. After an hour or so, I use a sieve to drain out the water. Under the facet I also rinse off any remaining dirt coating the pumice until the water runs through clean. There were some stray wood particles, and these were easier to spot and pick out at this stage.
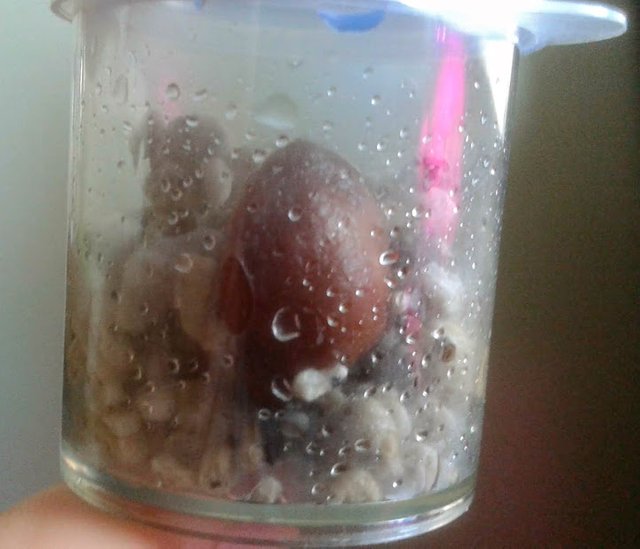
Any seeds that were soaking underwater from the day before are now allowed to drain completely. The clean pumice is then added to all the seed containers to fully cover the seeds.
Fresh distilled water is spritzed into the containers to make sure the pumice and the seeds are in contact with water droplets, but not so much to cause the water to puddle on the base.
For any seed that benefits from scarification, shake the container. Shaking the container is a good way to slightly scratch the entire outside surface of the seed shell against the rough pumice rocks, without any concern about cracking it open.
Once finished, everything goes back into the plastic sandwich bag, sealed up, and back inside the fridge.
Every week or so, I can open the bag and look through the clear containers. It will be easy to watch for signs of rooting. If the seeds develop any mold or contamination problems, I'll be able to see it.
Note: Some seeds develop a natural mold, such as the flesh on the goji berry, which aids the seed germination by dissolving the seed shell and giving the roots a micro-organism that will help to feed it early on. Washing away these essential organisms can prevent the germinated seed from growing up healthy, or cause it to die early. White hairy mold can be a good sign.
For most seeds, if any contaminant develops, it may be best to start over with a new seed batch. Sterilized containers and clean soil will be needed again. Any mold or bacteria that develops will likely be anaerobic due to the lack of fresh air, fresh water, and light. This can create an acidic environment that will disintegrate the afflicted seed. Look out for black and brown spotted mold.
Germination: Method 2 (Outdoors)
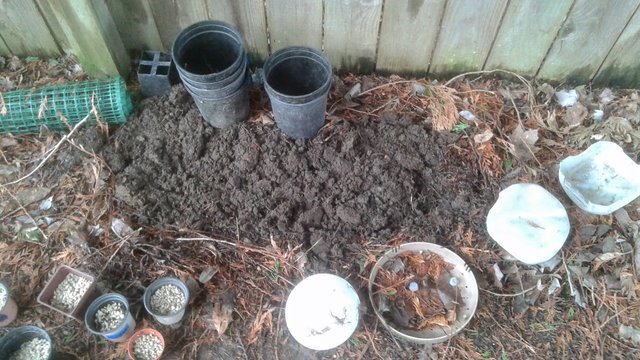
In case the indoor method does not work, I prepared a second method to germinate a second batch of seeds.
This method will only work in winter, because the seeds will require the cool outdoor air to get the benefit of the cold stratification it needs. My thinking is that I will let Mother Nature prepare the seeds to germinate by regulating the daily temperatures. Natural healthy soil will introduce organisms that will help the seeds quickly adapt to the native soil. Fresh rainwater and trace nutrients will be readily available to early roots once the seeds germinate.
In my yard, I found a shaded area under the trees that is usually wet and covered in tree litter. I raked away the litter, and used a spade to work the top 5 inches of soil until it was crumbly.
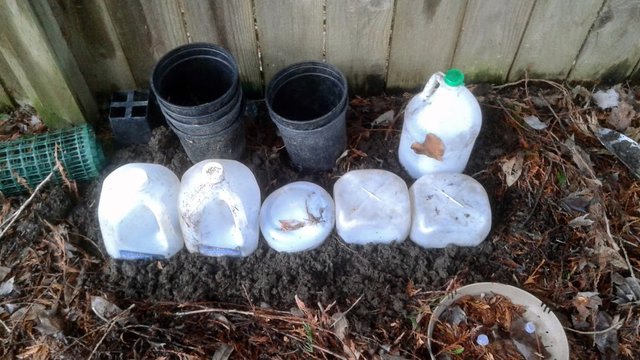
These old milk jugs are cut in half, and I've been saving them. Here I space them out across the soil. Each one will house a small 3 inch pot. These should act as mini greenhouses to keep the air warmer in the daytime, and better protect against frost.
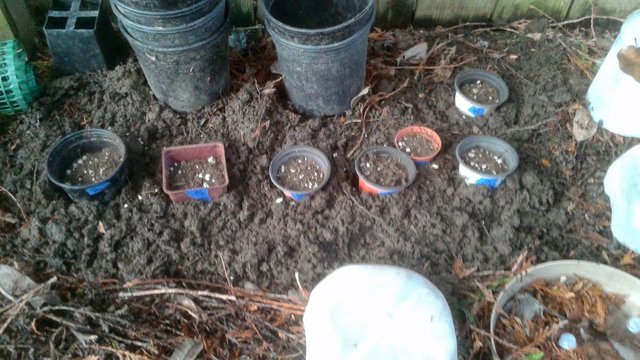
Using some old 3 inch pots, I filled them with layers of pumice and my own home-made compost (made from decomposed needles, leaves, and sticks). Into each I placed a few seeds, and sprinkled with a fine layer of potting soil (mostly peat). Each of these were watered gently and put into a dug out hole to fit. All pots were labeled.
Then I covered the edges outside the pots with the tree litter to mulch the surrounding worked soil. This should help absorb and retain rainwater into the soil underneath, and also prevent the area from puddling.
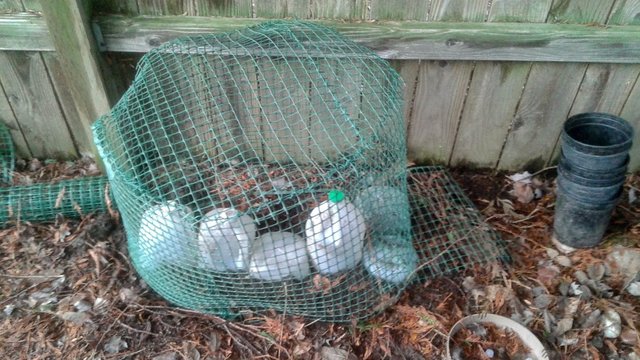
Lastly, I orient the milk jug covers back on top, and nestle them as deeply into the soil as they will go. I don't want the wind to blow them over.
The plastic fencing material is an added security. I cut and wove this basket shape together with a bit of garden wire (it's been a rather useful tool protecting my fagile plants, and has lasted for about five years now). It tends to discourage birds and rodents from thrashing around in the area underneath. Using some nearby sticks I stake it down firmly so it doesn't blow away.
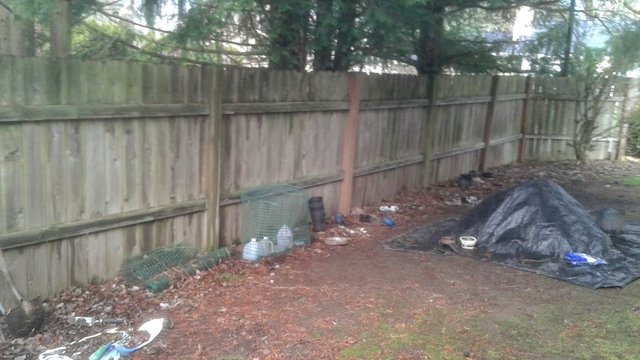
Here is the final result of the planting area. You can see the nearby trees offering some shade. The land is barely sloped towards the fence line, so rainwater should irrigate through evenly.
Mark the Calendar

Using the same letter symbols as I used on the labels, I wrote them all on the calendar day zero when the seeds were planted.
After that day, I counted out the days from day zero, and marked the dates when each seed was expected to be done with cold stratification.
If the seed has not germinated by the date marked, then the indoor seeds will be moved to into seedling trays where they will be given fresh soil, fresh water, and a warm shelf to grow on.
The outdoor seeds will simply continue where they are and wait for the warmth of Spring and fresh rain to motivate them to grow.
Comments
What do you think? Think either method will work? Which seeds do you think will be the easiest and hardest to germinate? Do you think the outdoor or indoor seeds will have an advantage?
February 23, 2020 is the date my earliest seeds (Giant Sequoia and Russian Almond) are scheduled to finish their 30-day cold stratification. I'll be sure to document and share the results here for us all to see.
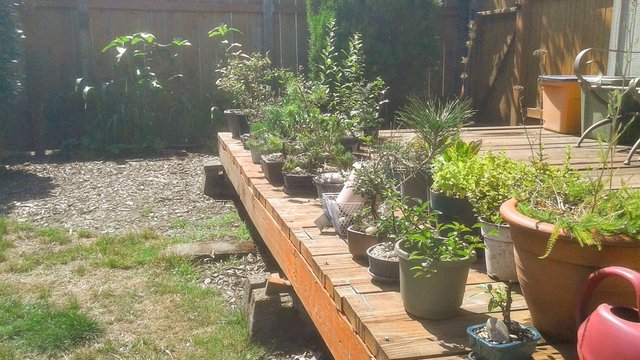
Photos in this post are all #originalworks by @creativetruth, unless stated otherwise.
Find me on discord and chat with other tree growers, bonsai enthusiasts, and gardeners. We have quite a few accredited experts filling out our ranks, and a helpful Spanish-speaking community.
#tree #shrub #trees #shrubs #tree-seeds #seedlings #germination #stratification #scarification #seed-starting #bonsai-trees #seed-packs #tips #how-to #diy #propagation #roots #pumice #birch #sequoia #almond #nut #seed #redwood #currant #wax-currant #fruit #pinecone-seeds #giant-sequoia #mock-orange #dawn-redwood #white-birch

I recently did a post where I munched some Cherries. I also took some seeds home with me I want to germinate in commemoration for my sons birth in two weeks. They like cold climates so will use your cold stratification method. I also purchased 10 Boabab seeds for the same purpose, I hope I get atleast one germinating on the day he is born I will bonsai it for sure. Cheer$;)
Downvoting a post can decrease pending rewards and make it less visible. Common reasons:
Submit
Sounds like a good plan. I am sure one will germinate if you stick it in the fridge with some moisture. A big seed usually has a lot of punch to get started. I would give it two months, then check weekly for signs of roots. Cherry trees often start to grow and blossom even when the ground is still nearly frozen.
Downvoting a post can decrease pending rewards and make it less visible. Common reasons:
Submit
Whaatt serious must I leave in the in the fridge until they germinate in soil? Thing is as you know I live in a very Sunny very hot climate and I really want to grow them but I hear they dont like too much heat? Any ideas? Cheer$;)
Downvoting a post can decrease pending rewards and make it less visible. Common reasons:
Submit
Yes, I have the reverse issue when I consider how to keep my citrus trees alive. They won't make it unless I keep them indoors. With people in the warm climates, there isn't an easy way to keep things cold. Cherries and Apples won't form fruit unless they get a certain number of cold hours in a year. You can probably get the seeds to sprout in the fridge, but can you also ensure the outdoors provide the cold freezing temperatures it needs during the winter?
Might I suggest growing a tree that better represents your country and region?
Do cherries come from the mountainous elevations or another country from where you live?
Downvoting a post can decrease pending rewards and make it less visible. Common reasons:
Submit
Hey bruv.. I am germinating Boabab's too and nothing represents Africa better than that, thought I would try cherries too though since the seeds were free, boababs I bought can't wait for those to germinate. So really the Cherry seeds will literally germinate in the Fridge with no light?? Thanks brother appreciate!
Downvoting a post can decrease pending rewards and make it less visible. Common reasons:
Submit
You got some pretty interesting seeds there, particularly the giant Sequoia and dwarf Russian almond. I think the almond will be easiest to geminate. I can just imagine the nut swelling with water and cracking open its shell! I think your indoor seeds will germinate with better results but I still think the outside ones will too but who knows. The weather outside can be unpredictable.
Downvoting a post can decrease pending rewards and make it less visible. Common reasons:
Submit
@tipu curate
Downvoting a post can decrease pending rewards and make it less visible. Common reasons:
Submit
Upvoted 👌 (Mana: 0/4 - need recharge?)
Downvoting a post can decrease pending rewards and make it less visible. Common reasons:
Submit
I was able to learn few new things from your post. Thank you
Downvoting a post can decrease pending rewards and make it less visible. Common reasons:
Submit
This post was shared in the Curation Collective Discord community for curators, and upvoted and resteemed by the @c-squared community account.
If you are a community leader and/or contest organizer, please join the Discord and let us know you if you would like to promote the posting of your community or contest.
@c-squared runs a community witness. Please consider using one of your witness votes on us here
Downvoting a post can decrease pending rewards and make it less visible. Common reasons:
Submit
Wondered if you know about the naturalmedicine community, where there's a lot of gardeners and nature lovers hangin' around. I feel you would really fit in there :>)
Greetings from Portugal,
Vincent
Downvoting a post can decrease pending rewards and make it less visible. Common reasons:
Submit
Yes I do. I try not to use their tag unless I am offering some information related to natural medicine, such as beneficial plants and herbs.
My other garden and bonsai hobbies are a bit unique. Sometimes I just post photos and talk about how I grow things.
Downvoting a post can decrease pending rewards and make it less visible. Common reasons:
Submit
I think most of your gardening content would be welcome there. I myself write about a raptor called Hypersensitivosaurus and I count that as Natural Medicine content, as the group is also very much focused on health and natural healing and creativity plays a part in that.
I would suggest you come hang out with us in Discord. If people get to know you a little better, you will be part of the family - in the least scary meaning of the word possible - very soon.
Let me know if you're interested in joining and I'll sent you an invite.
Have a great day,
Vincent
Downvoting a post can decrease pending rewards and make it less visible. Common reasons:
Submit