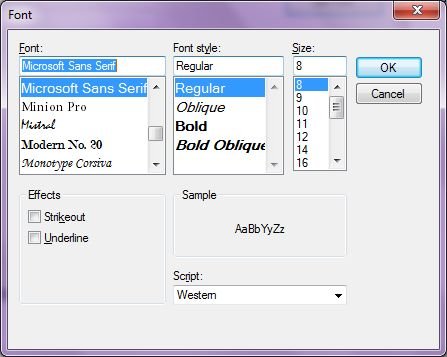
Learn How To Use FontDialog Control in Windows form Application using Visual Studio.
If you like this video then Do share the video in the article to your friends or in your social media accounts. You can also subscribe to the YouTube channel.
I recommend checking out C# in Nutshell Definitive Reference book. You can get a lot of answers to your questions. Plus the new edition of the book can cover some of the latest topics too.
Check out the below video to learn How To Use FontDialog Control in Windows form Application using Visual Studio Professional IDE.
How To Use FontDialog Control in Windows form Application in Visual Studio?
Inside the Windows, you get an option to make use of the fonts on textbox or the textarea control. And here you can change the fonts using the fontdialog box. The sent parameters from this dialog box can be used for the further editing of the text and saved from there.

Image Credit: Visual Studio Blog
For example, to create instance of the fontdialog control you cna use this code.
FontDialog fontDlg = new FontDialog();
You can also use the showDialog() method to show it once the event is triggered. So that demo can be checked from the option shown in the video. So I'd recommend you to first try to build some sort of project which can make use of the text editing. And here you can use this font dialog. And you get to understand how it works and how it can be changed for content as you trigger font with some event.
I hope that this tutorial article helped. Don't forget the view the video above completely to learn the concepts.
If you are interested in learning more, check out Visual C# Winforms Tutorials.
I hope the information here helps you. I'd appreciate if you like the video and share it with others.