Prior to owning a converted bus RV, DC power was always a somewhat mysterious thing. But as a dedicated miser & hating to the core being at the mercy of the gouging, exorbitant rates demanded by auto electricians, I decided I should take the opportunity to learn. I’m glad I did as it’s not really all that hard. But keep in mind. The vehicle I will be using as an exemplar is a 42 year old, 1976 Bedford bus. So that means no black boxes and tricky electronics. Therefore, cautionary note. If you are going to replicate any of the following, be it at your own risk, caveat emptor and all that. Especially so if you are DC diy-ing a vehicle which has the aforementioned black boxes and tricky electronics. Blowing stuff up will mean that most times it can’t be repaired and the only option is a horribly expensive replacement. Something to be avoided.
The Switchboard
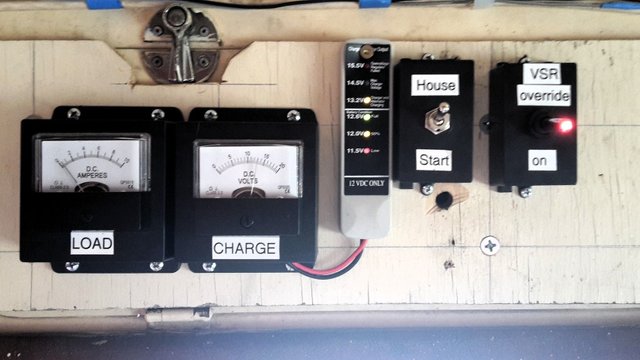
I begin this series with the switchboard. It helps with explanations to have a bit of eye candy and some lights. So this is why I have chosen the switchboard to begin. Just be aware that between the switchboard and the batteries there are bus-bars which help to simplify the wiring. There will be another post on the function of these bus-bars.
Load
The LOAD meter measures the amount of amps being drawn from the battery. As you can see, I am drawing under 0.5 amp. The only thing I am using at the moment is my radio. My computer is on AC as I am parked up and also drawing AC power. Later, at night, when I need lights, these will increase the DC amps being drawn from the battery. All my lighting is on the DC circuit.
Charge
The CHARGE meter is a little superfluous since installing the LED battery-state indicator next to it. But I keep it because old school meters look cool and it’s a good backup just in case the LED battery-state indicator fails.

LED Battery-State Indicator
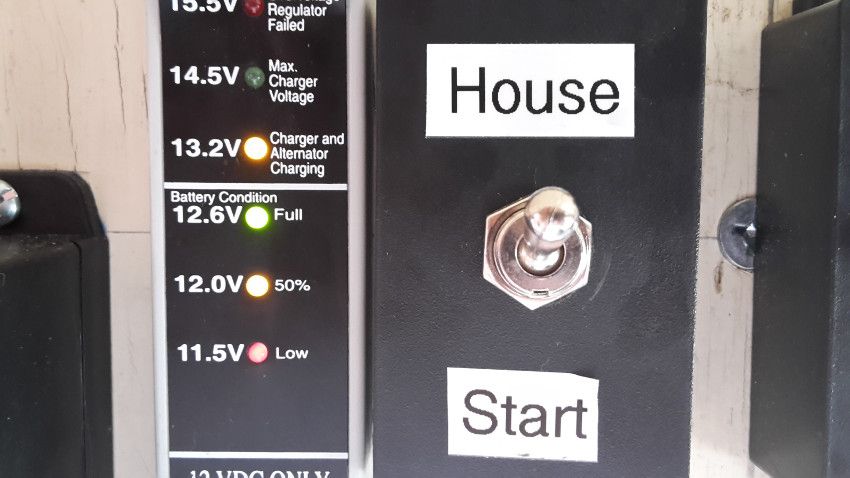
I installed the LED battery-state indicator just to see how accurate it was. My starting premise with Chinese-made electronics is to always expect the worse. But, surprise, I found a good match between it and the CHARGE meter.
House – Start Switch
The house -start switch allows for the reading of the volts of either the house or the start battery. If I need to know the voltage of the house battery I can read this directly from the LED battery-state indicator. And likewise the start battery. So when I end my journey I will switch to the start battery position to confirm the start battery is fully charged, and then switch to the house battery for the monitoring of the voltage of the house battery.

VSR override
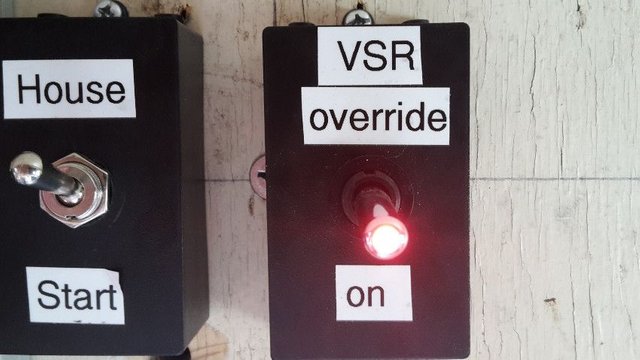
The Voltage Sense Relay (VSR) override isn’t really necessary but I like it as it’s another switch to play with. After confirming my start battery is fully charged, I will then use the VSR override to cut the Voltage Sense Relay device to the start battery. This means (if I am using AC) that the charge from the battery charger only goes into the house battery.
Also the VSR override is handy if you have to jump start your start battery from another vehicle. Just make sure it is on, then you don’t have to disconnect the house battery from the start battery.
So basically what the VSR override does is to disconnect the VSR from the start battery. A function which isn't absolutely needed, but is useful when you do. Just a convenience really but easy enough to wire up.
That’s it for the switchboard. Please indicate below if you need greater detail.
Nice post
Nice Upvote on my post i will do same !
Downvoting a post can decrease pending rewards and make it less visible. Common reasons:
Submit
Congratulations @stmoloud! You received a personal award!
Click here to view your Board
Downvoting a post can decrease pending rewards and make it less visible. Common reasons:
Submit
Congratulations @stmoloud! You received a personal award!
You can view your badges on your Steem Board and compare to others on the Steem Ranking
Vote for @Steemitboard as a witness to get one more award and increased upvotes!
Downvoting a post can decrease pending rewards and make it less visible. Common reasons:
Submit