Hello friends, I hope you are in good health and love abounds in your home!
During the past week I was not around, since I started a proposal with William the father of my daughter to work in his embroidery business, designing and operating machines, I do not really have much experience with this, I have only been with the program for a year Wilcom and embroidering with a small machine and I'm still learning many things, of which I want to share with you often.
William's place of work is inside the hat shop of his stepfather Mr. Cesar called Inversiones Riveras, towards the end of this is the embroidery and prints workshop where I will be working the next days.
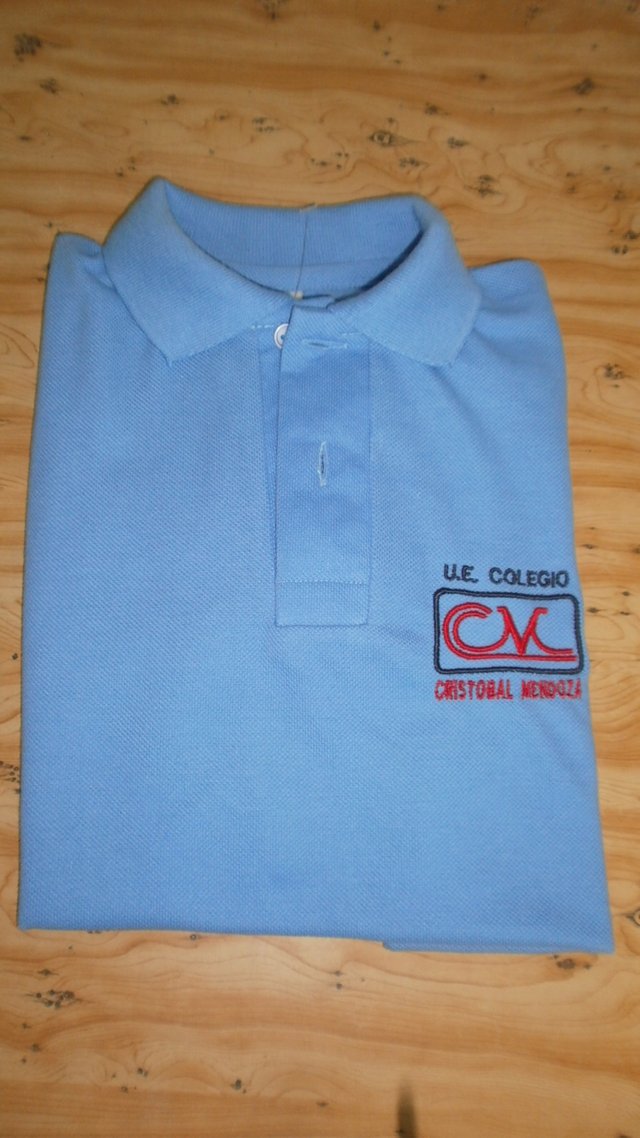
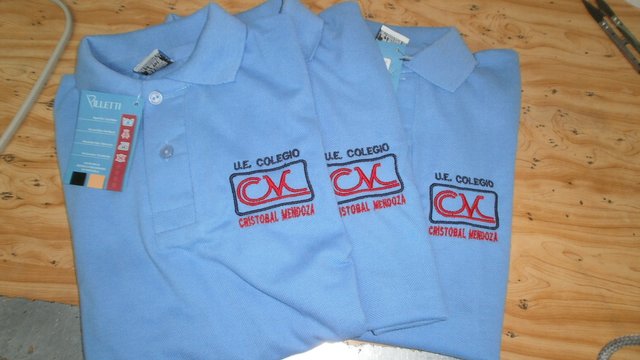
Today to the first today many school badge jobs were received, since for this time the classes in this country end. Next, I will show you how some chemises from Colegio Cristobal Mendoza in Puerto Ordaz were embroidered with the Wilcom program and my little embroiderer brand Brother PE-770.

First we must look for the design, in this case it was ready in the memory of the computer, as this company has more than 20 years working, they have a number of designs already digitized to embroidery and that makes my job easier, it is just to search and supervise the size, location of colors, centering of the drawing, revision of stitches to be sure that everything is perfect for embroidery.
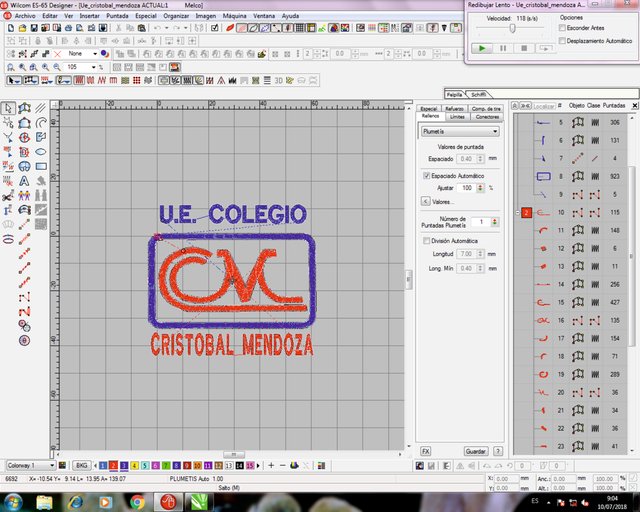
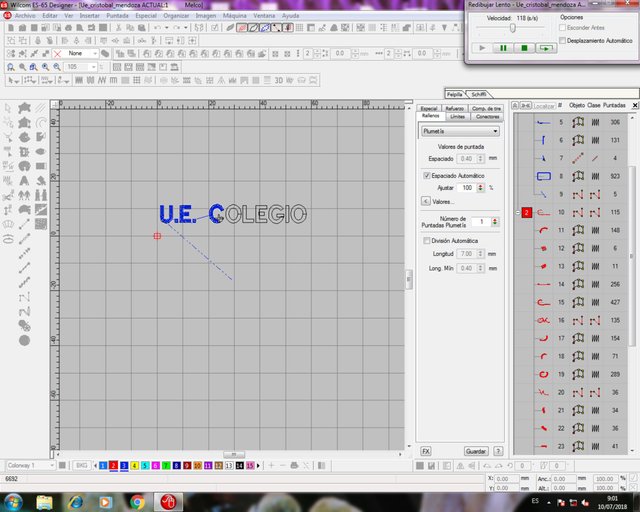
Start of stitch monitoring, Shift + R key
End of stitch monitoring.

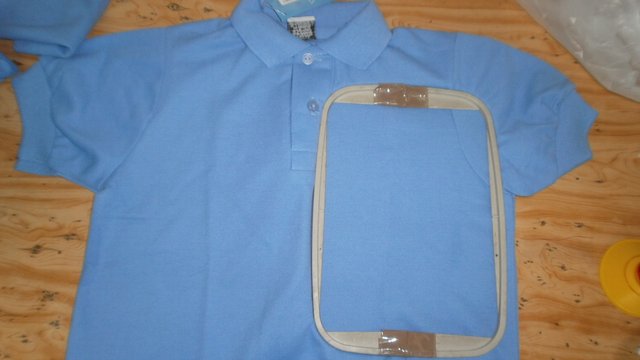
Normally a test is done before embroidery on the garment, but since this embroidery is a badge that has been embroidered for years in this company, we began to embroider it without proof, placing the piece in the frame, so that the logo is on the left side of the person, we place it in front of us and we place it so that the design reaches the top part as far as possible under the second button, more towards the left side and we proceed to place the thread, eye! first see the color that corresponds dark blue, I do it from the program preferably.
Position the frame
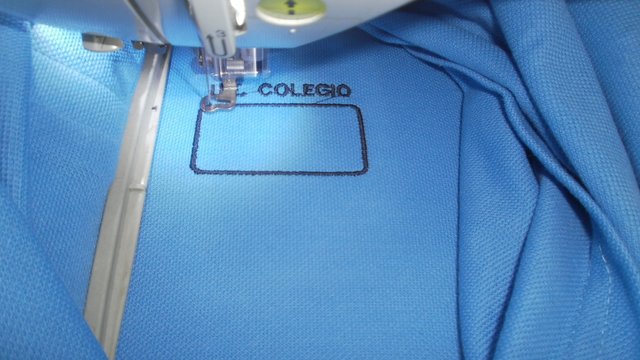
I started embroidering the first color (navy blue)

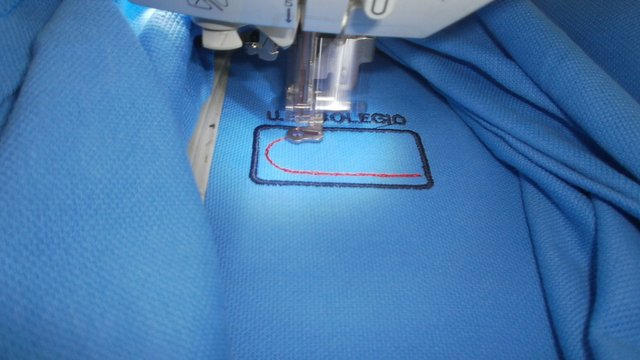
Then the machine makes its respective stop for the change of color, now it will be red, starting with a good stroke to give firmness to the embroidery.
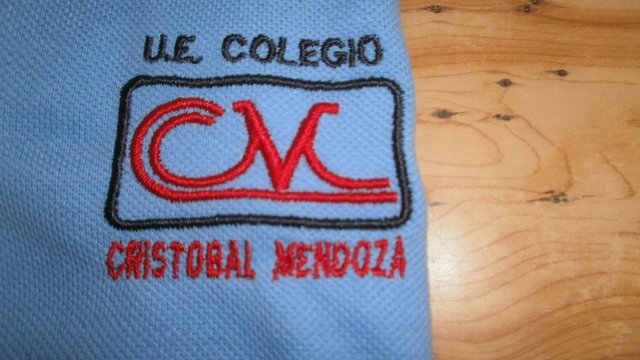
Until then finish sewing all the red part, leaving our school badge Cristobal Mendoza finished.
To proceed to carry out the other two, since the delivery is for today, I think I have discovered that the secret of the embroidery success is knowing how to distribute the time, since there are other pending works.

Greetings we continue to see here, that they are very good!

As a follower of @followforupvotes this post has been randomly selected and upvoted! Enjoy your upvote and have a great day!
Downvoting a post can decrease pending rewards and make it less visible. Common reasons:
Submit
thank you!
Downvoting a post can decrease pending rewards and make it less visible. Common reasons:
Submit
Congratulations! This post has been upvoted from the communal account, @minnowsupport, by SheilaM from the Minnow Support Project. It's a witness project run by aggroed, ausbitbank, teamsteem, theprophet0, someguy123, neoxian, followbtcnews, and netuoso. The goal is to help Steemit grow by supporting Minnows. Please find us at the Peace, Abundance, and Liberty Network (PALnet) Discord Channel. It's a completely public and open space to all members of the Steemit community who voluntarily choose to be there.
If you would like to delegate to the Minnow Support Project you can do so by clicking on the following links: 50SP, 100SP, 250SP, 500SP, 1000SP, 5000SP.
Be sure to leave at least 50SP undelegated on your account.
Downvoting a post can decrease pending rewards and make it less visible. Common reasons:
Submit