How to Design a Low Poly Plant Asset Using SelfCAD
In this tutorial, we will delve into the process of designing a low poly plant asset using SelfCAD, guiding you through each step from conceptualization to the final model. SelfCAD stands out as a powerful yet user-friendly platform that enables both beginners and experienced designers to create stunning low poly assets with ease. We will explore the specific tools and techniques within SelfCAD that are tailored for low poly design, ensuring that you can create a visually striking and optimized plant asset. By the conclusion of this guide, you will be equipped with the knowledge and skills to produce your own low poly models, enhancing your 3D modeling projects with the distinctive charm of low poly art.
To access the interactive tutorial to this article, visit https://www.selfcad.com/tutorials/1j6l1v44t124de471o1b3w736w1q4l3e5m2g
Once you’ve launched the editor;
From the generators category on the toolbar choose shape generator; Set top radius to 70, bottom radius to 40, number of edges to 30, height to 95
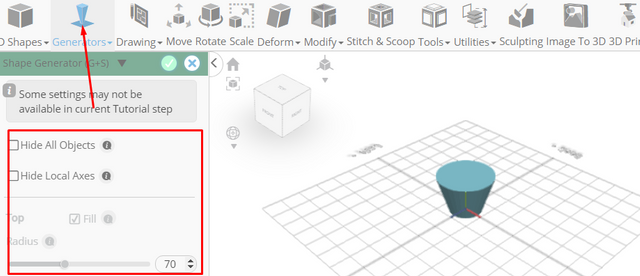
Click to finalize shape generator
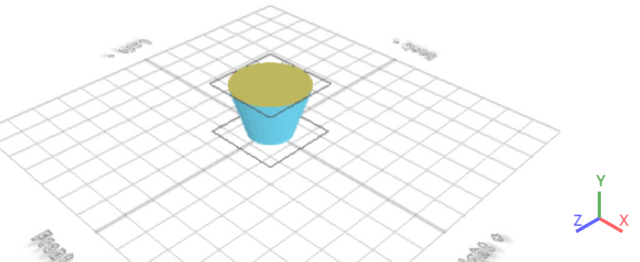
Click to activate polygon selection; Click on highlighted region to select it
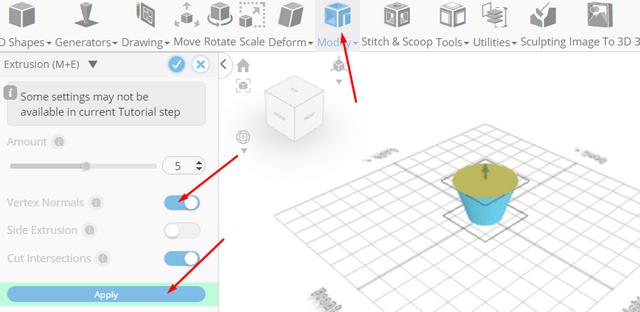
From the modify category on the toolbar choose extrusion; Set use vertex normals to true, Click apply button to apply extrusion
Set use vertex normals to false
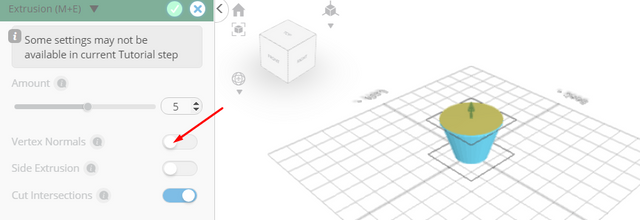
Click to finalize extrusion
From the modify category on the toolbar choose inset; Set inset amount to 5
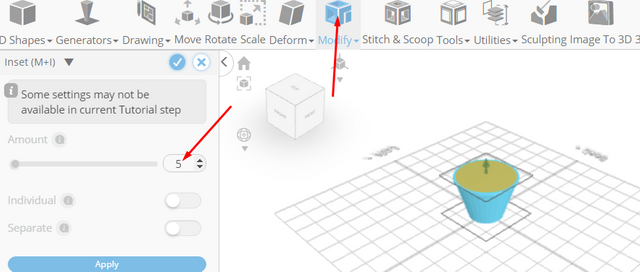
Click add option to add next macro step; Set operation to extrusion, Set amount to -2
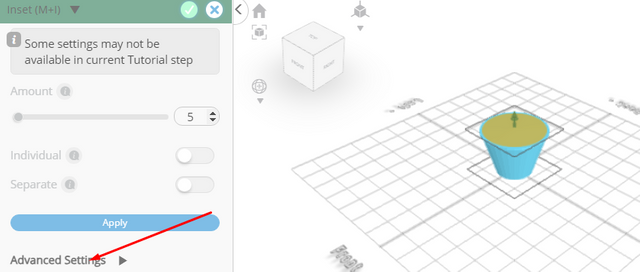
Click to finalize inset
Click on highlighted region to deselect it
From the generators category on the toolbar choose shape generator; Set top radius to 3, bottom radius to 37, number of edges to 35, height to 114, bevel offset to 1, bevel level to 3
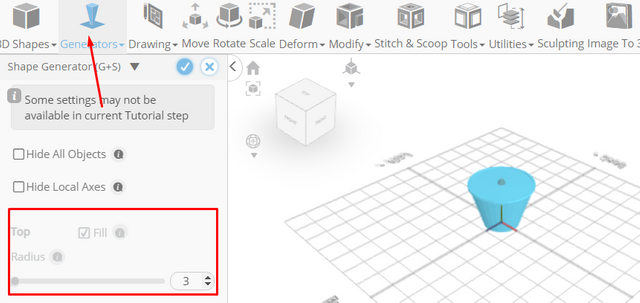
Set position x to -20, position y to 100, position z to 18

Click to finalize shape generator
From the deform category on the toolbar choose bend; Set x to -53
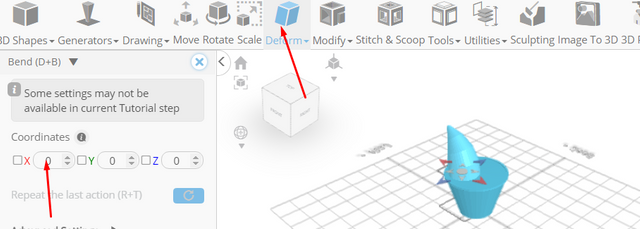
Click copy button to copy selected objects, Set x to 121

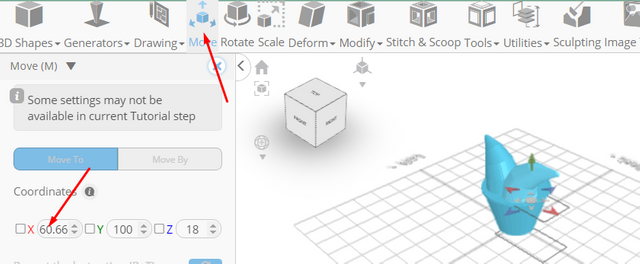
Click move on the toolbar; Set x to 60.66 using highlighted gizmo
Click copy button to copy selected objects
Click ‘x’ to close transformation panel
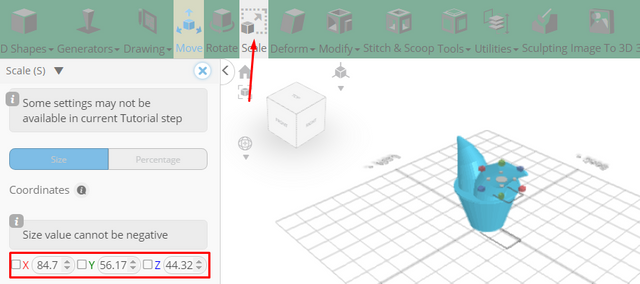
Click scale on the toolbar; Set x to 84.7, y to 56.17, z to 44.32 using highlighted gizmo
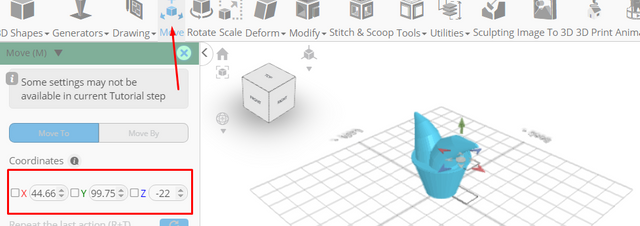
Click move on the toolbar; Set z to -22, Set y to 99.75, Set x to 44.66 using highlighted gizmo
Click ‘x’ to close transformation panel
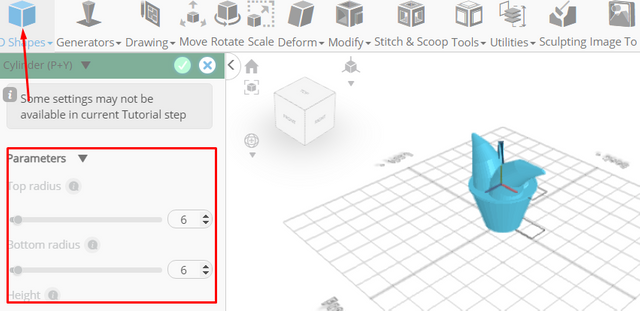
From the 3D Shapes category on the toolbar choose cylinder; Set top radius to 6, bottom radius to 6, position x to -5, position y to 98
Click to finalize cylinder
From the deform category on the toolbar choose bend; Set x to 29
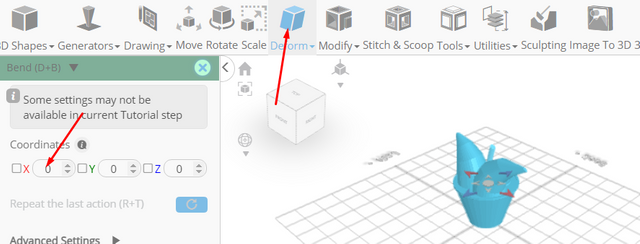
Click ‘x’ to close transformation panel
From the generators category on the toolbar choose shape generator; Set top radius to 3, bottom radius to 10, number of edges to 40, height to 40, bevel offset to 1, bevel level to 4
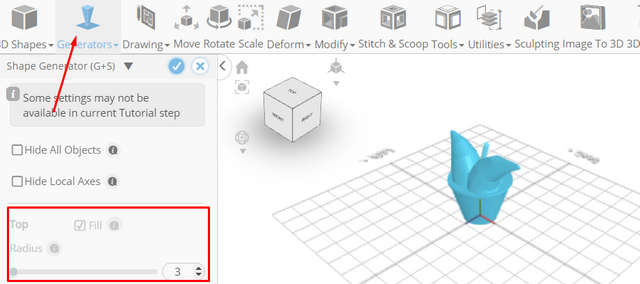
Set position x to 23, position y to 178, rotation z to -21
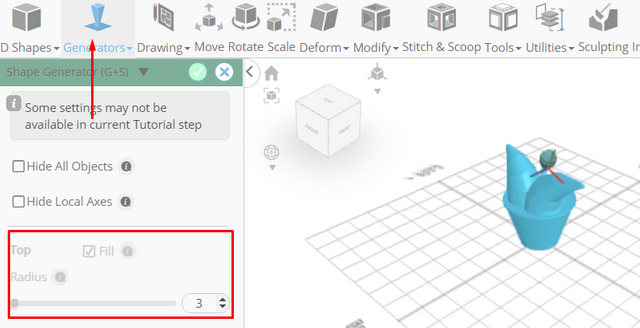
Click to finalize shape generator
Click highlighted part on selection cube to turn off region selection
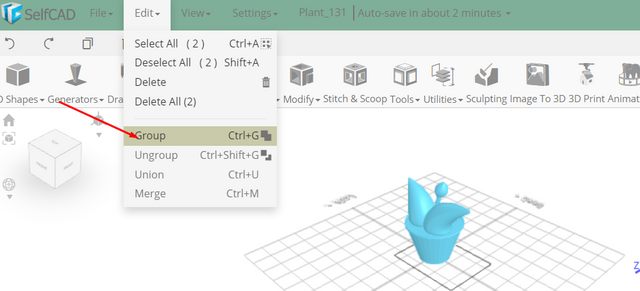
Click on mesh 4, shape 2(2), shape 2(1), shape 2 to select; From the edit menu on the top toolbar choose group
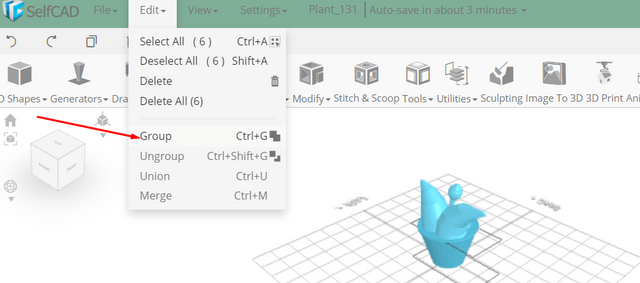
From the modify category on the toolbar choose round object; Set smoothness to 3
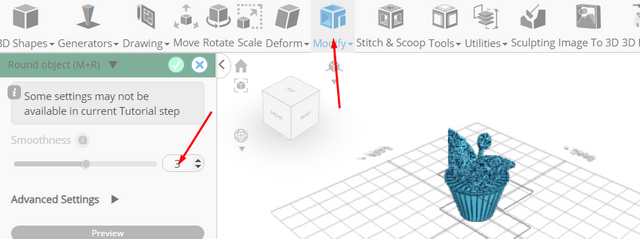
Click to finalize round object
Click on shape 1 to select it
From the edit menu on the top toolbar choose group
As you continue honing your design skills, remember that SelfCAD offers a wealth of resources to support your learning journey. To deepen your understanding and explore more advanced features, consider checking out the interactive tutorials (https://www.selfcad.com/tutorials) available on the SelfCAD website. The tutorials page provides a treasure trove of guides, tips, and tricks that cater to designers of all levels.
More structured learning experience can also be accessed at the SelfCAD Academy (https://www.selfcad.com/academy/curriculum/), https://www.youtube.com/@3dmodeling101, and 3D Modeling 101 series (https://www.youtube.com/playlist?list=PL74nFNT8yS9DcE1UlUUdiR1wFGv9DDfTB). This comprehensive resource offers in-depth courses taught by industry experts, allowing you to master the intricacies of SelfCAD at your own pace.