How to Design the SelfCAD Logo
In today's digital landscape, a compelling logo is essential for establishing a strong brand identity. Whether you are a startup aiming to make your mark or an established business looking to refresh your image, having the right tools to create an eye-catching logo is crucial. SelfCAD, a versatile and accessible online 3D modeling and CAD software, offers a unique platform for designing striking logos with ease. This tutorial will delve into the process of crafting a distinctive logo using SelfCAD, exploring its intuitive design environment, powerful features, and customizable options that enable users to transform their creative visions into polished, professional logos. By leveraging SelfCAD's capabilities, both novice designers and seasoned professionals can efficiently produce logos that resonate with their target audience and effectively communicate their brand's essence.
To access the interactive tutorial to this article, visit https://www.selfcad.com/tutorials/2e4a5gs3ol1m153vs1r5b4k35ha1j1f2t576
Once you’ve launched the editor;
From the 3D Shapes category on the toolbar choose Cube; Set Width to 50, Height to 50, Depth to 50, Position x to 25, position z to 25
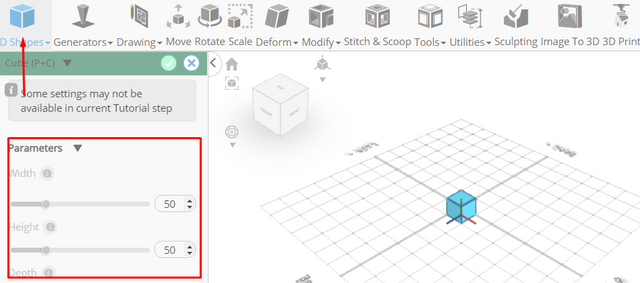
Tick the checkmark to finalize cube
Click copy button to copy selected objects
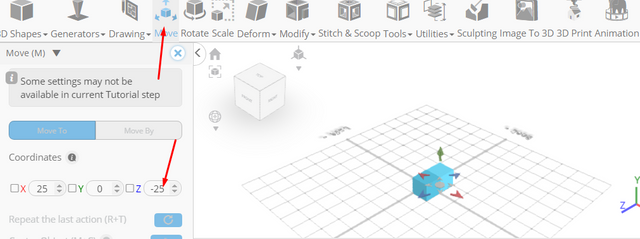
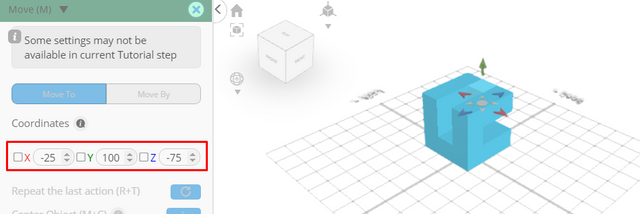
Click Move on the Toolbar; Set z to -25
Click copy button to copy selected objects
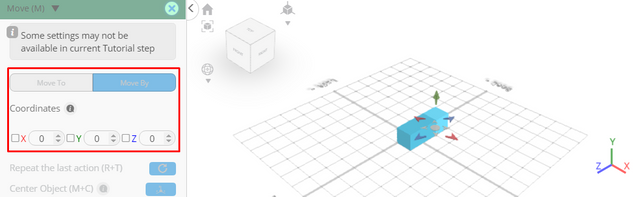
Set move mode to Moveby; Set z to -25, Set z to -25
Click ‘x’ to close Transformation panel
Click on mesh 4, 4(1) to select it
Click copy button to copy selected objects
Click Move on the Toolbar; Set x to -25 using highlighted gizmo
Click copy button to copy selected objects
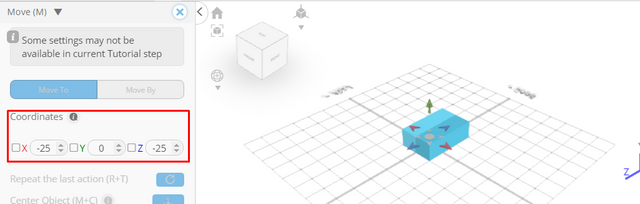
Set x to -76 using highlighted gizmo, Set x to -77, Set x to -76, Set x to -75
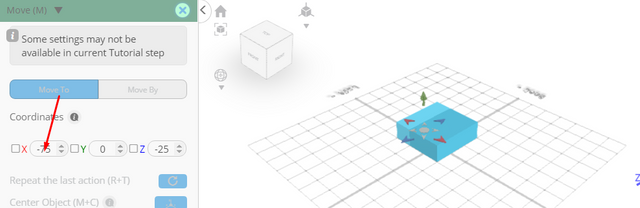
Click ‘x’ to close Transformation panel
Click on mesh 4 to select it. Click on mesh 4(7), 4(8) to deselect
Click copy button to copy selected objects
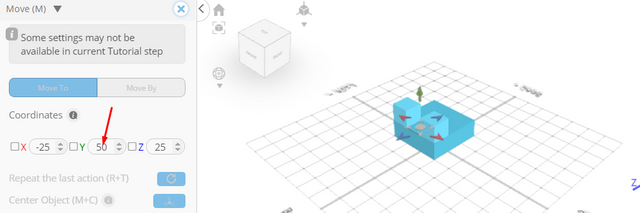
Click Move on the Toolbar; Set y to 50
Click copy button to copy selected objects
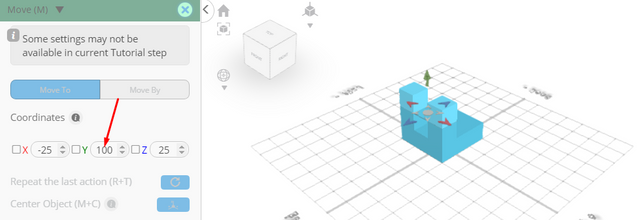
Set y to 100
Click ‘x’ to close Transformation panel
Click on mesh 4(7), 4(8), 4(1), 4(2) to select. Click on mesh 4(11), 4(12), to deselect
Click copy button to copy selected objects
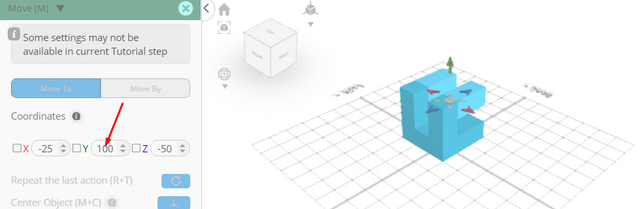
Click Move on the Toolbar; Set y to 100
Click ‘x’ to close Transformation panel
Click on mesh 4(13), 4(15), 4(16) to deselect
Click copy button to copy selected objects
Click Move on the Toolbar, Set x to -25
Click ‘x’ to close Transformation panel
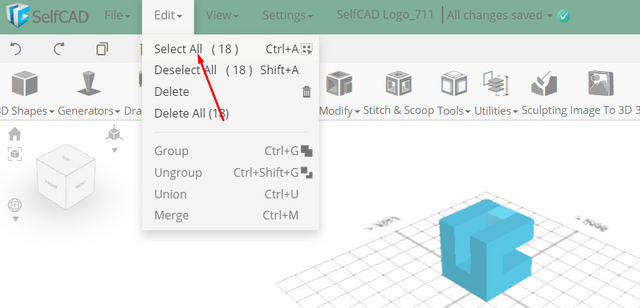
From the Edit Menu on the Top toolbar click Select All
Click Stitch & Scoop on the toolbar; From the tool panel choose union
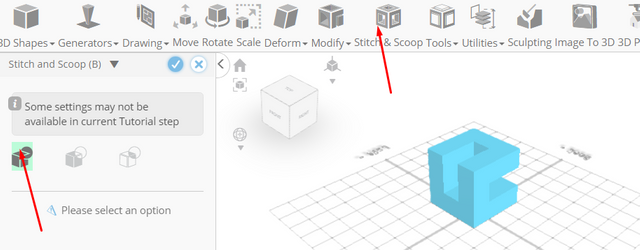
Tick the checkmark to finalize union
As you continue honing your design skills, remember that SelfCAD offers a wealth of resources to support your learning journey. To deepen your understanding and explore more advanced features, consider checking out the interactive tutorials (https://www.selfcad.com/tutorials) available on the SelfCAD website. The tutorials page provides a treasure trove of guides, tips, and tricks that cater to designers of all levels.
More structured learning experience can also be accessed at the SelfCAD Academy (https://www.selfcad.com/academy/curriculum/), https://www.youtube.com/@3dmodeling101, and 3D Modeling 101 series (https://www.youtube.com/playlist?list=PL74nFNT8yS9DcE1UlUUdiR1wFGv9DDfTB). This comprehensive resource offers in-depth courses taught by industry experts, allowing you to master the intricacies of SelfCAD at your own pace.