Installing DEXBot on a Virtual Server
This is a walkthrough of installing DEXBot
on a remote Linux server. For this example I will use
Digital Ocean but other VPS providers should also
work.
Setting Up the Server
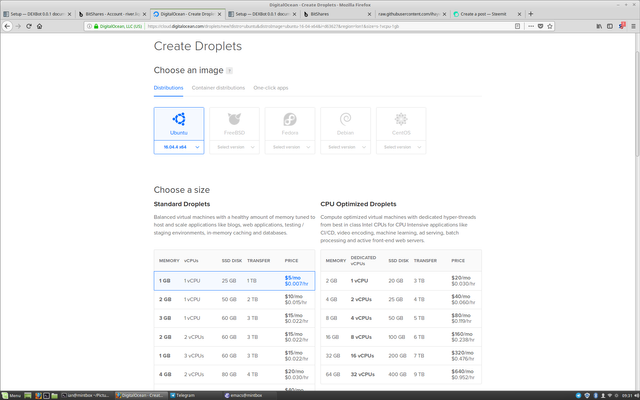
This guide has been tested wth Ubuntu 16.04. Newer versions
and other distributions might work but have not been tested.
Older Ubuntu versions (14.04) definitely won't.
DEXBot doesn't use a lot of resources, the cheapest plan works fine.
Logging In
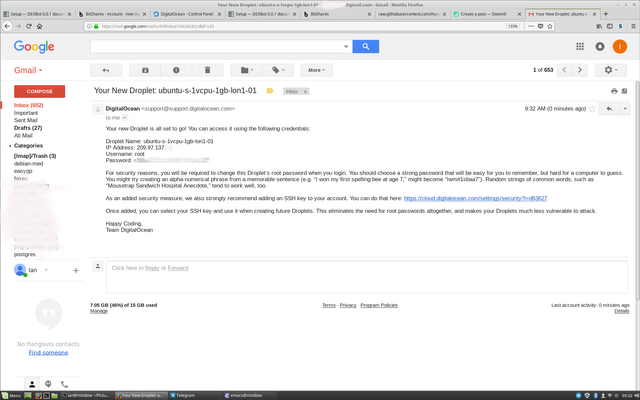
The instructions assume you can get to a working shell prompt with
superuser (root) access. Exactly how you do this depends on the VPS provider.
Digital Ocean send you an e-mail with the new IP address and password.

I'm using the ssh command from Linux, if you are using Windows
you may want PuTTY to connect, using the IP
address as the 'host'. the provided password, and the username is
always 'root'.
New Password

When you connect you need to re-enter the root password and then change it
to a new one. This is due to how Digital Ocean have set up the server and
may not be the same with different providers: nothing up to this point is actually anything to do with DEXBot, it's all determined by the VPS provider.
Remember ENTER after each line of input.
Running Install Script
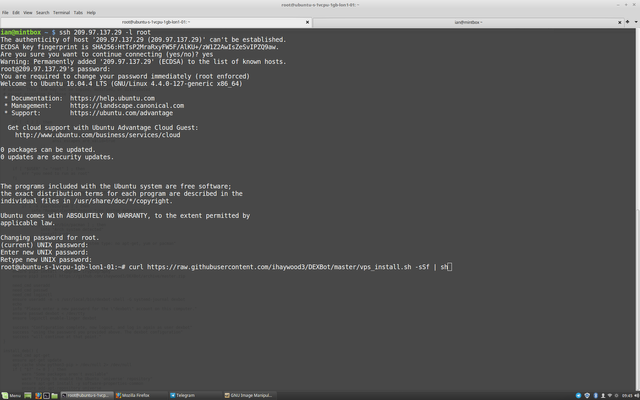
Enter this command and ENTER. This command downloads a script from the DEXBot source and runs it. It will take some time, and should install all necessary packages.
Here's that again to make it easy to copy and paste into your terminal:
curl https://raw.githubusercontent.com/ihaywood3/DEXBot/master/vps_install.sh -sSf | sh
Entering dexbot password
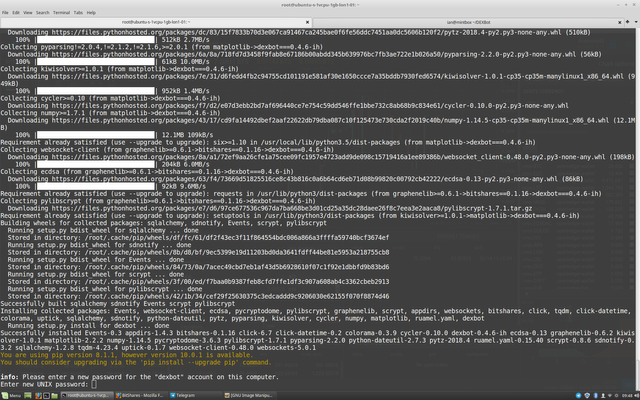
A new login account is created on the server, name dexbot (no, you don't
get a choice), you need to enter a password for this account here.
This should ideally be different to your root password.
(The yellow text is an invitation to upgrade the Python tool pip. Ignore it.)
Success

Hopefully it all works and you get the success message.
What If It Goes Wrong
Please take a screenshot of the error message and jump on the DEXBot Telegram channel. Be prepared to answer questions about what system and version you were using.
Please don't just complain "it doesn't work": no details means we can't help.
You now need to log out of the superuser account: logout plus ENTER at the prompt. This is the last shell command you need to do.
Re-connect
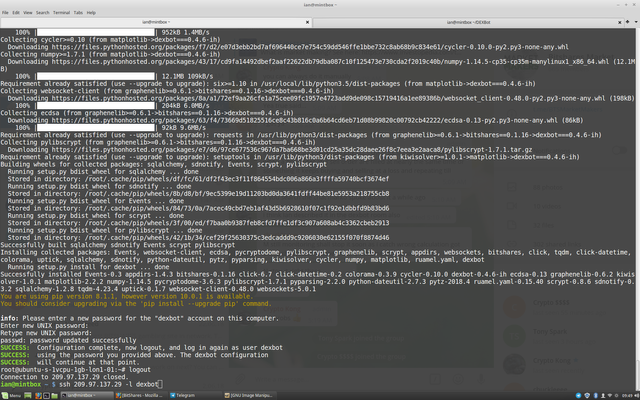
You need to connect again to the server, same IP, but now username dexbot, and password
what you set above.
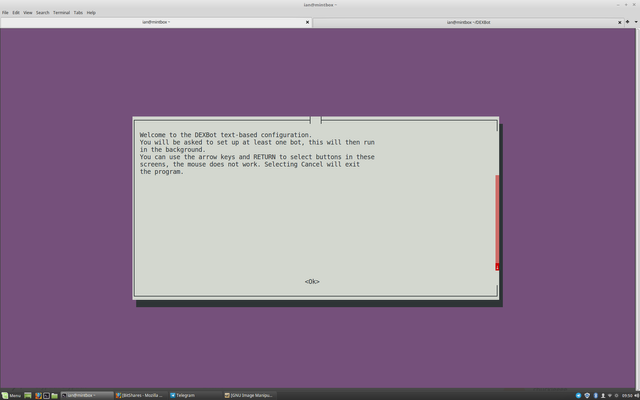
This should give you the DEXBot configuration window, instead of a
Linux shell.
It's a text-based system, like from the MS-DOS era. The advantage is the VPS doesn't need a graphics stack
and so much less RAM. No mouse, cursor keys and TAB work to select buttons, and ENTER "clicks" them.
Bot name
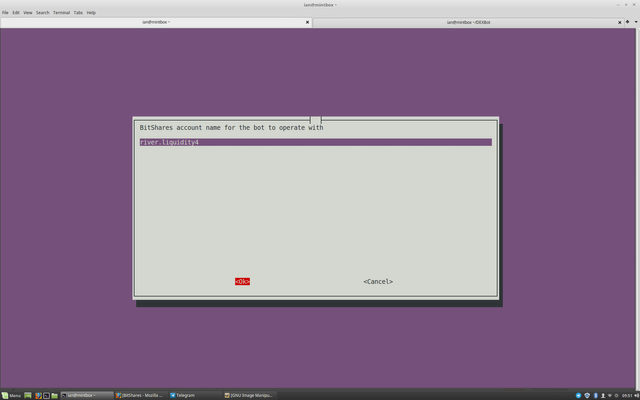
Provide a name for the new bot, this is simply to distinguish it if you run
multiple bots, can be anything you want.
Strategy type
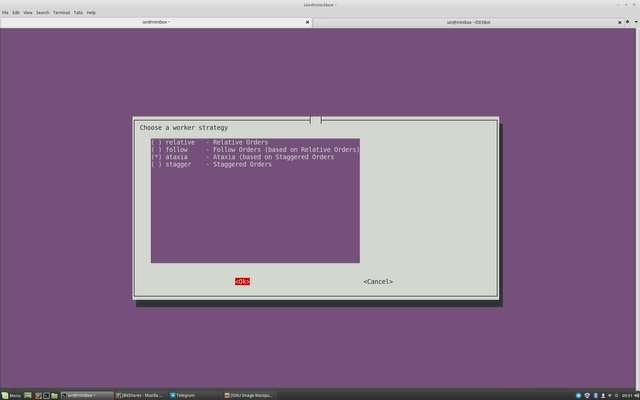
Four strategies are provided, we are going to use the "ataxia" strategy in this example, it is based on Staggered Orders but aims to be more reliable in busy markets.
Use the Space button to select the option on the list and then use TAB to the "OK" button.
Account name

Enter the BitShares account that you want to trade with. It must already be open, and loaded with some BTS for fees plus the assets to trade with, so if you want to trade on USD/CNY, you need some USD, some CNY and some BTS.
Market
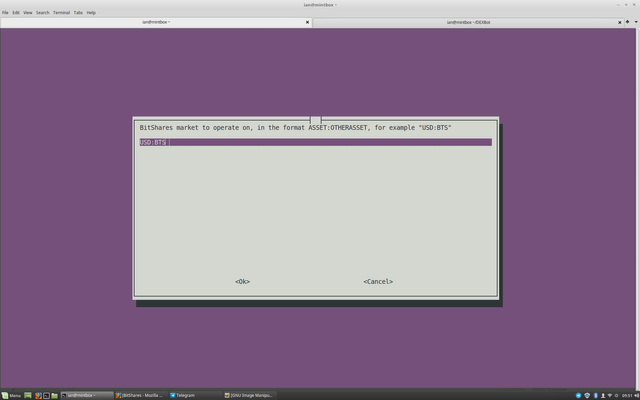
The name of the market to trade on in the form quote:base. Remember its the "full" name of the asset, for example if you are used to using a gateway like OpenLedger you need to add the prefix OPEN.
Order Size
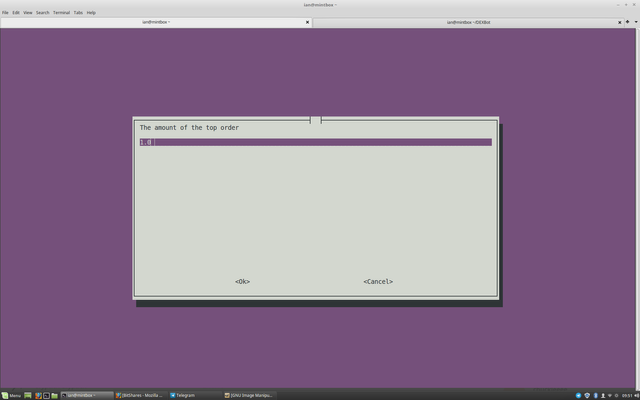
This is the maximum size of the orders entered on market, the highest price order is this size, and further 'down' the market order sizes slowly get smaller. Size is in quote units, so if you ar on USD:BTS its in USD.
Spread
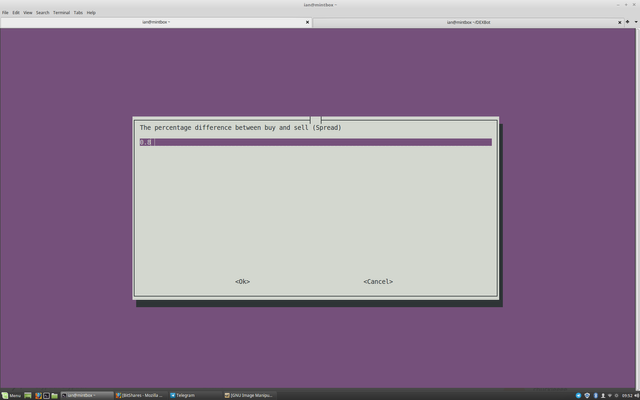
This is the difference between the top buy and lowest sell prices, expressed as a percentage. A big spread means fewer trades but more profit on each trade. In markets with a tight spread already (like USD:BTS, a spread of 0.2-0.5 might be appropriate, but on most other markets you are going to want a larger spread of around 2-5%
Increment
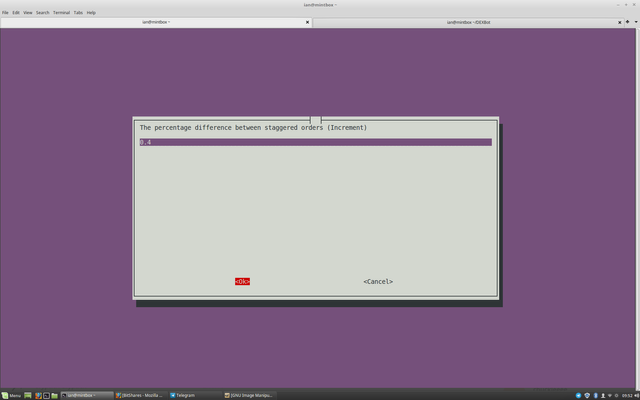
This is the difference between each order ("stagger"), also as a percentage. The minimum is 0.2% and really I don't advise below 0.4%: you are just crowding the market with orders for no benefit.
The spread must be at least twice the increment. If not, the bot will start buying and selling at the same price: great for liquidity, but bad for you as you are burning fees without making any profit.
Top Price
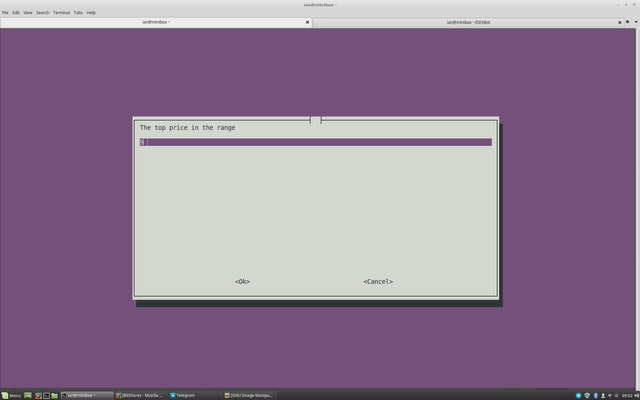
The highest price in the range of orders entered. Remember BitShares prices are "backwards": the amount of base for one quote: so on USD:BTS its the price of one dollar in BTS.
Generally you want a wide range so you can profit over wide market moves, but you need enough assets to cover orders in the range. If the market goes outside your range then the orders become all sells (or buys) and the bot effectively stops trading.
Bottom Price
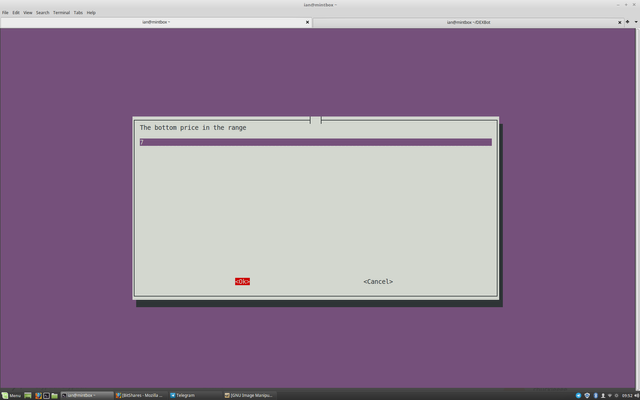
Bottom (lowest) price in the range.
More workers
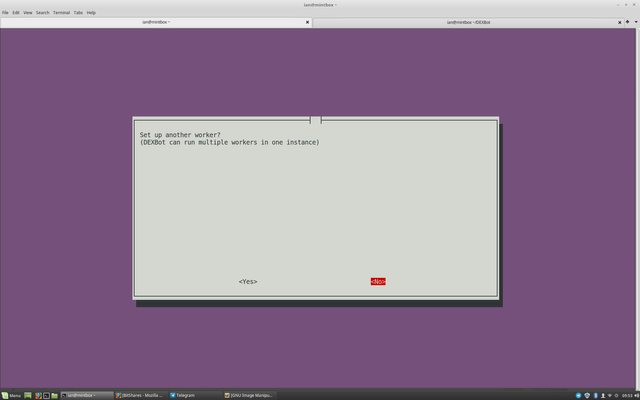
You can create more workers to trade on other markets (or, in theory run multiple strategies on one market).
You need a separate account for each worker. This interface won't enforce that rule, but you will run into problems (running out of assets, and no way to track profits)
Private Keys
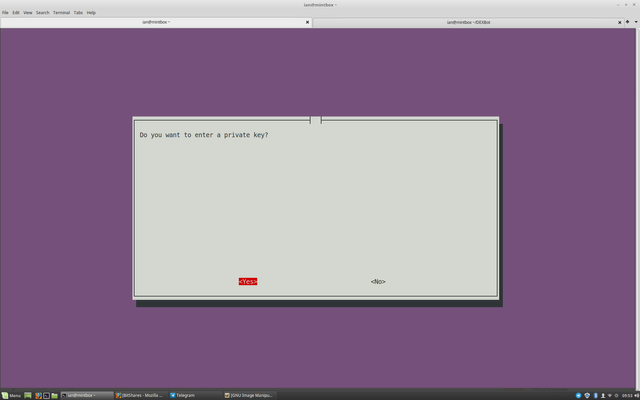
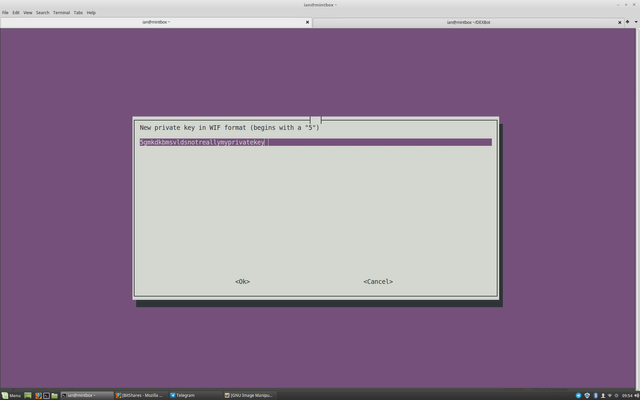
You need to enter a private key, it must to be the active key for the account, not the owner key. You need to be a bit careful about this: if you upload both the owner and active keys, DEXBot gets confused and will crash.
A Note about Security
This means your private key is now sitting on the hard drive of the VPS. If the VPS hosting provider is hacked, or goes rogue, your private keys can be accessed and hackers can steal your funds on those accounts. (One of many reasons to never run DEXBot on your main BitShares account)
Getting Private Keys
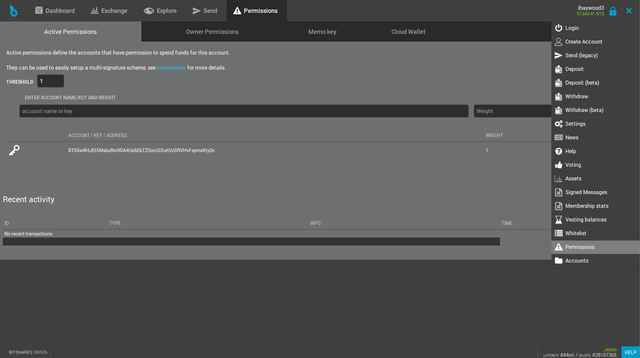
A private key is in the WIF Format: a number 5 followed by a long sequences of letters. To extract your private key from the BitShares Web Wallet, go to Permissions/Active Permissions and click on the Key icon.
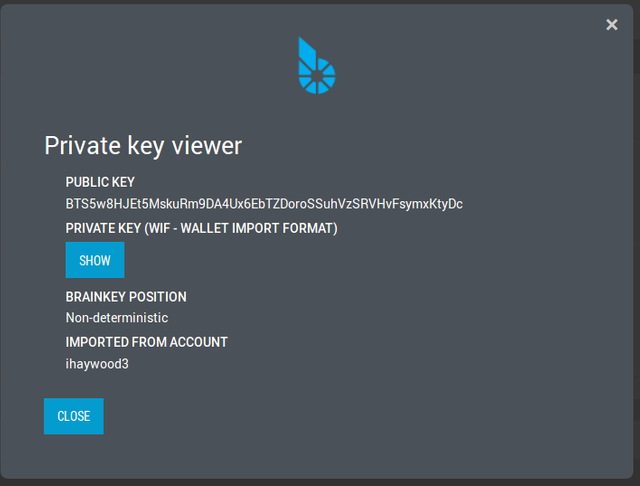
Then click on "Show" and copy and paste the private key. Again, make sure it's the active key not the owner key.
Main Menu

Finally you are put into the configuration "main menu", and if you log in again to the dexbot account you will go straight to this screen. A full description of its functions is beyond this article, but most should be fairly obvious.
Don't use Reports for now, it probably won't work.
Adding a new worker goes through the same process as the initial setup.
"Wiping" the wallet deletes all the private keys, and you need to re-upload the ones you need. This is for recovering when you have uploaded the "wrong" keys.
Password allows you to change the password for the dexbot account.
Shell will break out into the "normal" Linux shell instead of this DEXBot-specific system. Using exit in the shell gets back to this menu.
One function I will cover is the Log, which shows what the bot is up to (you can also watch it using a block explorer or the web wallet also of course)
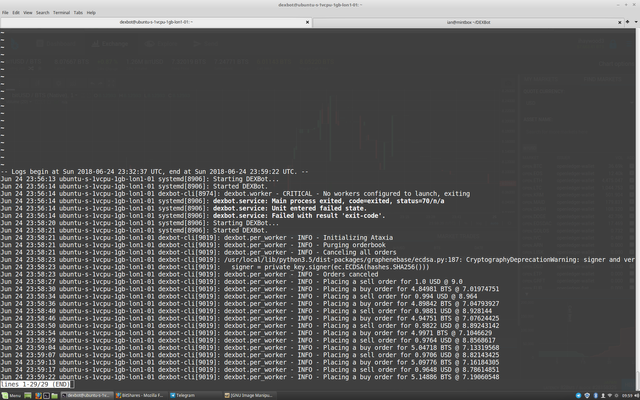
The log starts at the end, showing the last 1000 lines. PageUp and PageDown work, and use "q" to finish. (If you are curious, it's the classic UNIX less command that you are in)
Congratulations @ihaywood3! You received a personal award!
Click here to view your Board
Downvoting a post can decrease pending rewards and make it less visible. Common reasons:
Submit
Congratulations @ihaywood3! You received a personal award!
You can view your badges on your Steem Board and compare to others on the Steem Ranking
Do not miss the last post from @steemitboard:
Vote for @Steemitboard as a witness to get one more award and increased upvotes!
Downvoting a post can decrease pending rewards and make it less visible. Common reasons:
Submit