I had some family visit from out of town the last few days and I got delayed on the truck rear end project enough that I had to reposition it on the to do list. With the move over with I realized that I needed a daily driver right now more than I need to haul stuff, so the car got bumped to the front of the list. This is not to mention that a fuel pump on these takes maybe an hour or two depending on your skill level.
Why is the fuel pump bad on a car that I just bought you ask? The car ran out of gas on the way home from buying it. This in turn overheated the fuel pump and now it can't keep up with fuel demands. Sometimes if I go to accelerate it will stutter like it's running out of fuel, but it runs fine when it's idling or cruising. Classic fuel problem.
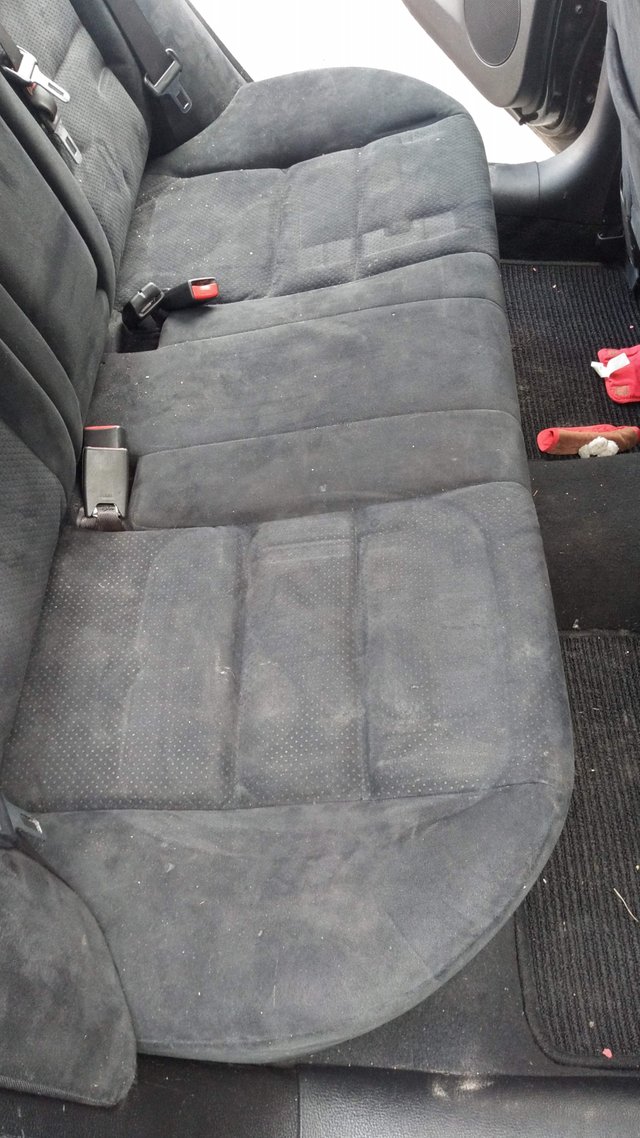
One of the things that makes this job so quick and easy is that they put a little access door under the back seat that opens right up to the top of the fuel tank where the fuel pump module assembly resides. Many vehicles require dropping the tank from under the car to do this job.
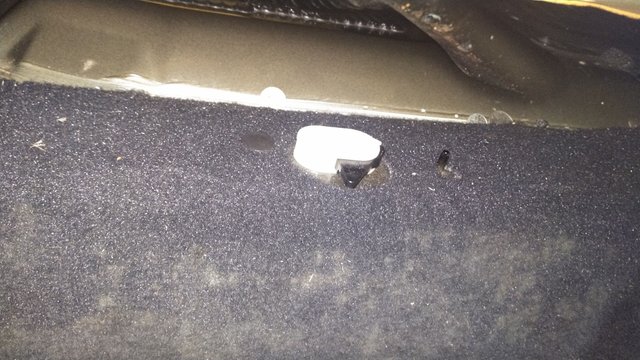
Another convenient thing, the rear seat comes out by pulling on this spring loaded tab to release the cushion from the latch. Once both sides are free it's time to pull the seat belts out.
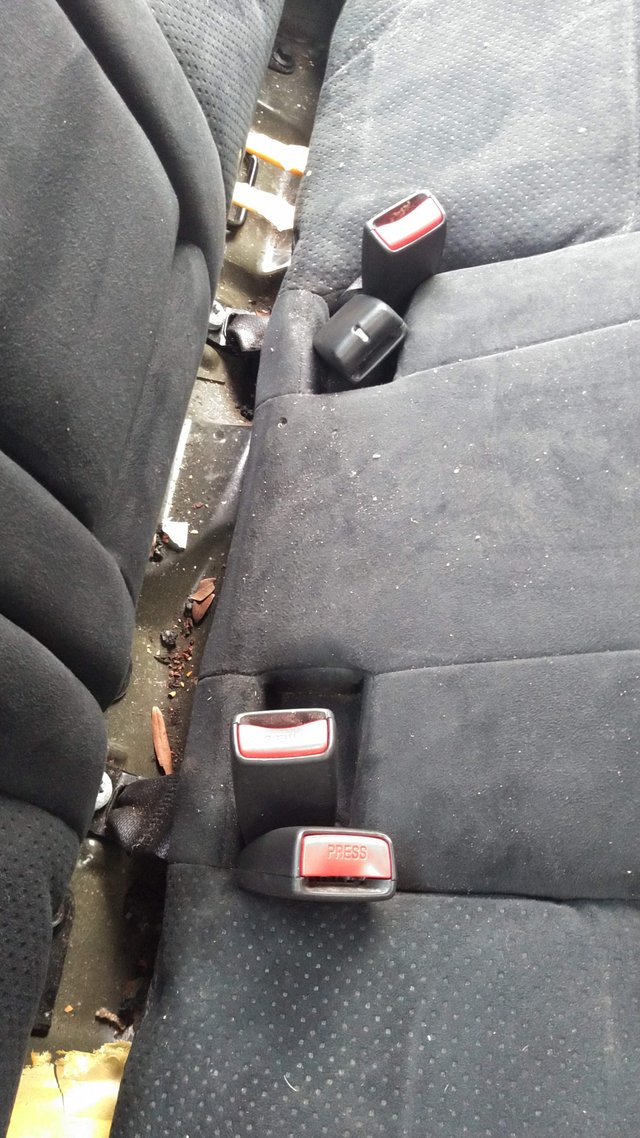
On the far side of the photo you can see that one of the seat belt latches looks different. That's the shoulder belt. I just pushed my pocket knife into the slot (a flat head screw driver would work as well) and it popped right out. They sure made these seat cushions easy to remove.
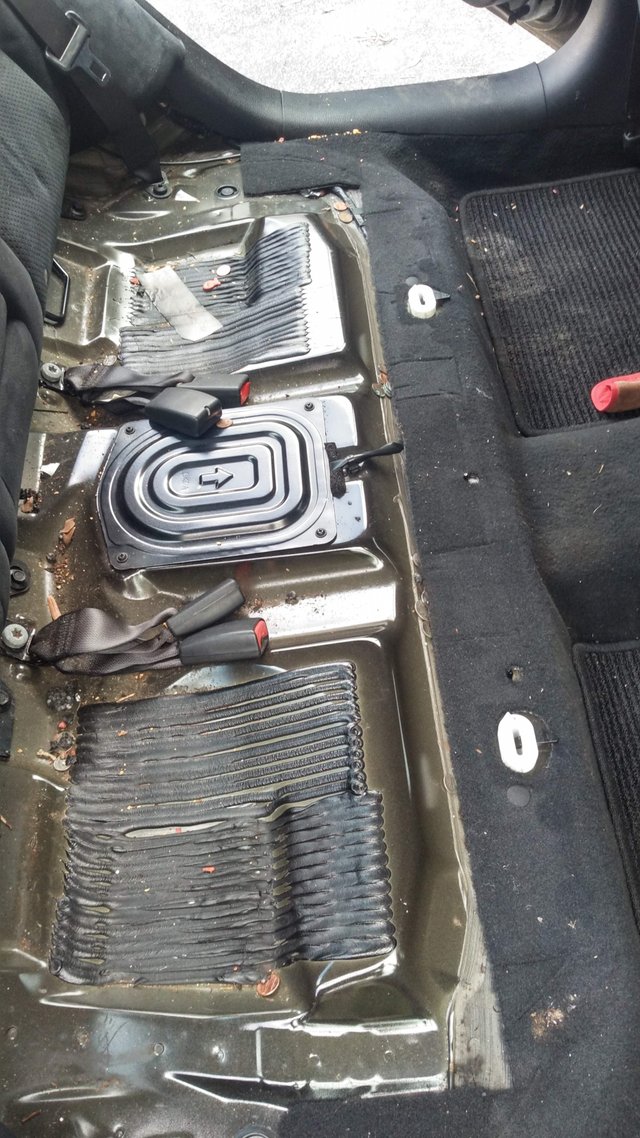
With the cushion out of the way the access panel came off with four Phillips head screws. Whenever I remove a car seat cushion like this I always find a couple dollars worth of change under it. It's a nice little bonus, although these days they're not worth quite as much as when I first started working on cars.
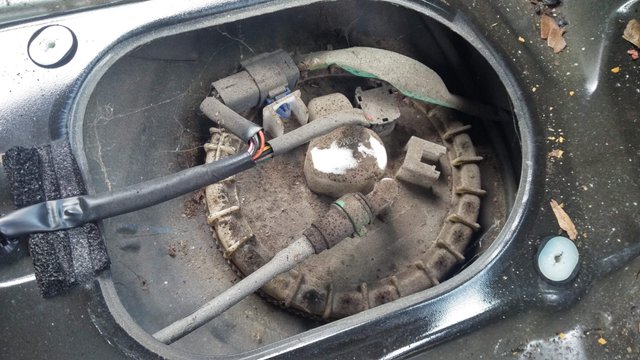
This is what it looks like under the access panel. This one looks very dirty so it's probably original to the car. Even the fuel lines are easy to remove on these. There's a little plastic clip that you lift up with your finger to release it and then it slides right off. Other than that there's just two snap connectors that have to be removed before removing the collar. Any time I need to open up something like the fuel tank, which must be kept clean and free of dust and debris, I use my air wand to blow away all the dust that has accumulated around the area. I'll often do it several times as I work because more tends to break free as you disconnect stuff.
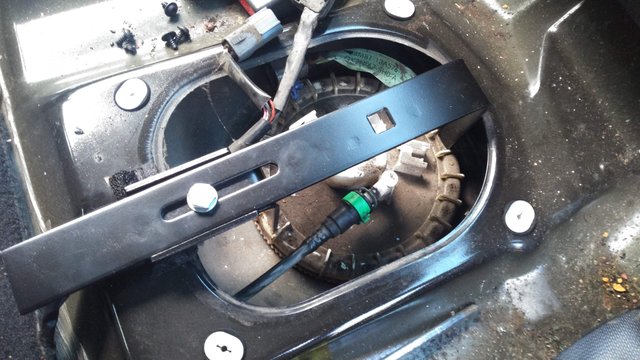
The collar is just a very large nut that holds the fuel pump assembly in place and against the sealing surface. This special spanner wrench is a handy way to remove it. If you can't get enough torque
on it to spin the collar it has a 1/2" square in the middle to put a ratchet or breaker bar onto it. This one was on pretty tight so I had to use the breaker bar option.
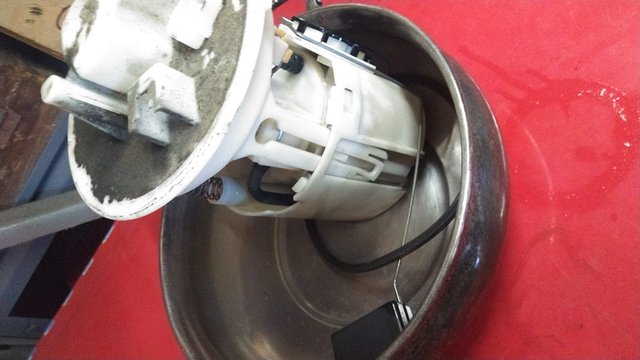
With the collar off and everything disconnected from it, the whole assembly just lifts out. This one had some plastic sliders on the sides along with a flimsy little spring that's supposed to push the pickup to the bottom of the tank, one of which came loose when I gingerly removed the assembly. I'm wondering if this is why these Mazda pumps commonly fail. It looks like it's too flimsy to hold the lower half of the assembly firmly. If the pickup is cocked to the side or able to bounce up and down while it's in the tank, it can suck up air when the fuel level gets low. These fuel pumps don't like trying to pump air and can overheat and burn up from it as I saw when I ran it out of fuel.
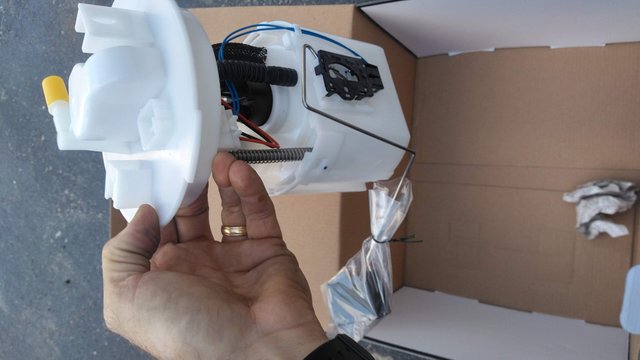
Here's the replacement pump module. It's got a pair of spring loaded steel struts holding the pickup down into the tank, which is quite a bit sturdier than the original assembly. I only had one problem with this when I installed it. When I went to drop it in and tighten the collar, the springs were strong enough that it was quite difficult to hold the keyway seated into place and it ended up rotating the whole assembly with the collar. Because I let it rotate too far it torqued on the float arm and knocked the plastic clip loose that holds the fuel sender to the float arm, and so the fuel gauge didn't work when I hooked everything up. I popped the collar back off, snapped the fuel sender back into place and this time I made sure everything was seated while I rotated the collar back on.
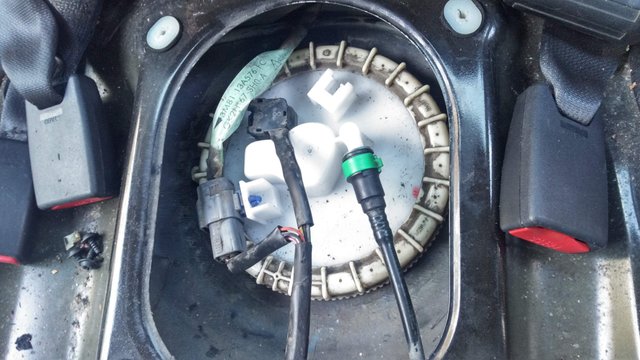
Here it is with the fuel line and electrical connections snapped back in. All that's left to do is put the access panel back in place with the four screws and then snap the seat cushion back in. I'm going to wait on the seat because some fuel spilled back there while I was working and so I'm going to let everything air out for a few days before I cover it up with the seat. Hopefully the car doesn't stink like fuel for too much longer. Gasoline smell tends to linger for a long time even though it quickly evaporates. Well, now it's off to the DMV to get this thing registered and start driving it! I think the interior could use a good cleaning too though.
Disclaimer: Working with gasoline can be very dangerous. With the presence of gasoline vapors, any little spark can cause a fire or explosion. Do this type of work at your own risk.