Which microphone do I use to do my live streaming and produce videos from my home office with professional quality output without applying any after effects? What does my entire audio setup look like? Will you take a look at this because you might be able to save a lot of time, energy and money compared to how I did it?
Best Microphone Studio Setup to Record Vocals without Applying Audio Effects
Thank you to my friend Tomas George for helping me set this up.
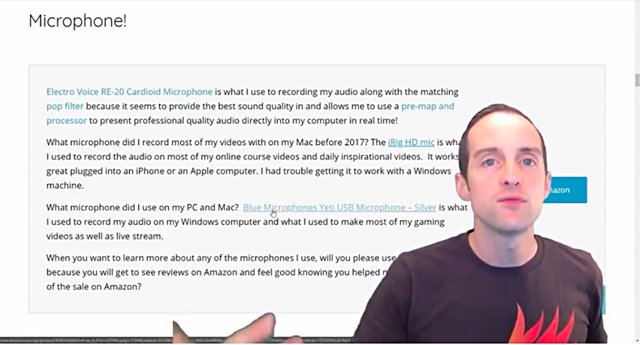
If you'd like to see where all these links are, will you please go to Jerrybanfield.com/resources because everything I use is listed on that page?
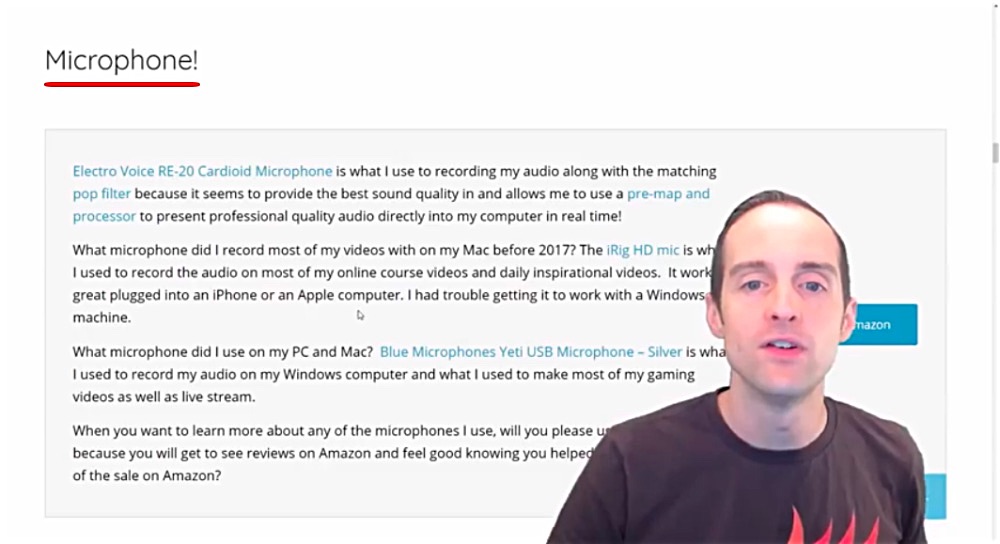
From my microphone, preamp, USB interface, all the software I use, everything is all on this one page for you, and you will feel good on some of these things you have the chance to help me earn whenever you want to buy something because they also have affiliate programs, which is nice.
The awesome thing is that I've chosen to use the things I'm using because they are the best I've found. They are what work the best for me. I get the best setup possible, and then I backwards engineer it essentially and say, "Is there an affiliate program for something I already love?"
Here are the things I've used. Here's what I started with.
Actually, I used several lower quality mics first. Then, the first higher quality mic I used was this "Blue Yeti USB Microphone - Silver."
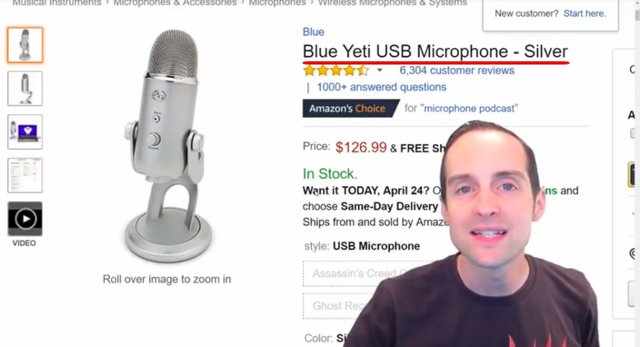
For the price at $126, the quality is very good on the Blue Yeti USB Microphone. It works on Apple and it works on Windows giving you full flexibility of whatever you want to do.
If you want a much higher quality audio than just putting on a headset or some cheap microphone, this is kind of the gold standard for a lot of instructors online and video producers that want better audio than the basic.
I also got the "iRig HD Mic" because another instructor used this and it sounded so good.
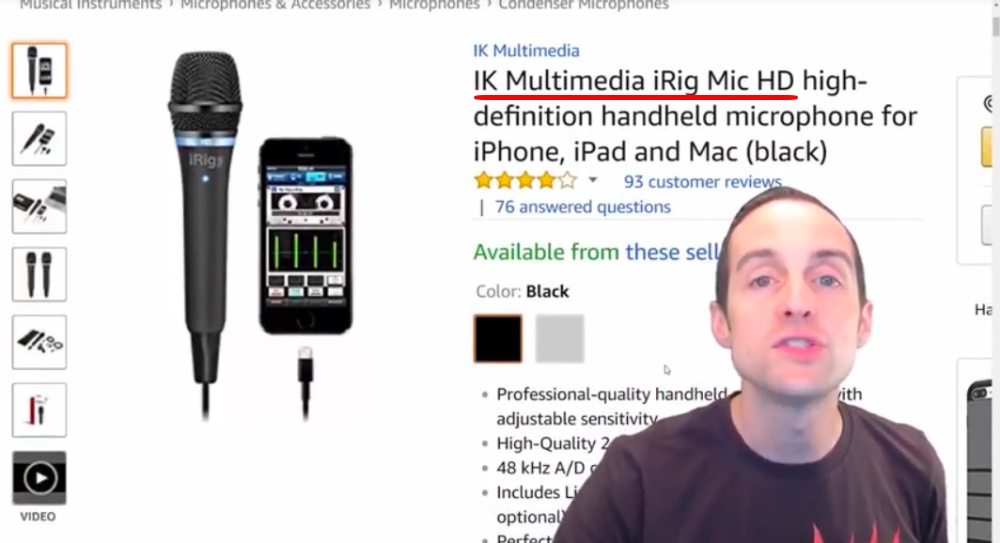
A lot of my earlier videos were made with the "Blue Yeti USB" on Windows, and then this "iRig HD" microphone on Apple, because this only works good, at least how I've used it, with Apple.
Therefore, for an Apple computer, if you are recording at your desk, I like the "iRig HD Mic" even better than the "Blue Yeti."
I thought the audio quality was better comparing the two.
However, the problem with each of those microphones is that they don't do dynamic processing in the sense that you can control for volume, you can control all of that stuff you might want to add on after the fact.
When you go through and record a video, and then you want to make your audio sound professional like I think mine does, if you want that, that provides a very high level of quality audio with the very best flexibility.
However, the cost is significantly more.
I wish I had seen this setup earlier and started with it from the beginning because I often got frustrated because if I was talking too loud on both of those mics I just showed you, the audio would clip or distort. If I was talking too quiet, sometimes it wouldn't pick up good enough and I'd have to put the gain up then after I've filmed the video, then I'd need to go through and do some rendering.
If I did anything like a clap or yell, then the audio would usually clip, which was really annoying, and if I was different distances from it, that would also mess with it very easily as well.
I started to ask, "What setup can I buy and stick with the rest of my life? How do I get that professional quality dynamic processing between the microphone and the computer? How do I put a professional audio directly into the computer because this allows me to skip all of those after effects?"
If we are recording a lot of videos and we are trying to have better audio, and our viewers and listeners keep telling us that our audio is often more important even than the video, because we are used to distortions in videos, but having audio clipping and annoying things with the audio often put us off a lot more.
What I wanted to do and have set up now, is that professional quality processing, that dynamic processing, which means that between the microphone taking in the audio and it going into the computer, it has all that stuff you normally, with a lower quality microphone, would put on afterwards.
You might go through and try to de-Ess some of the S's, you might try to go have it compressed so that the audio is more consistent. The lower volume might come up and the higher volume would get pushed down a little bit. You might want to adjust the volume after the fact lots of times. You might want to do low or high-frequency adjustments.
All those things you find yourself after you start off and get better at hearing how the audio is coming back, all those things you start applying after the fact on every single video, all those audio effects you start having to render on every single time you record a video, it's so much faster to just have the audio come in that way to start with, and then you can literally hit the record button, and finally hit the record button again and you have got a finished video.
You don't have to edit it. You can directly upload it. That's what I do and it saves so much time.
Here's the setup I'm currently using because this allows me to skip all of the audio effects after the fact.
To be able to have the input levels consistent right from the beginning to do things like de-Ess, to do things like compression directly between the microphone and the computer.
Now, you get a lot better quality, but it costs a lot more.
What I use is the "Electro Voice RE-20 Cardioid Microphone."
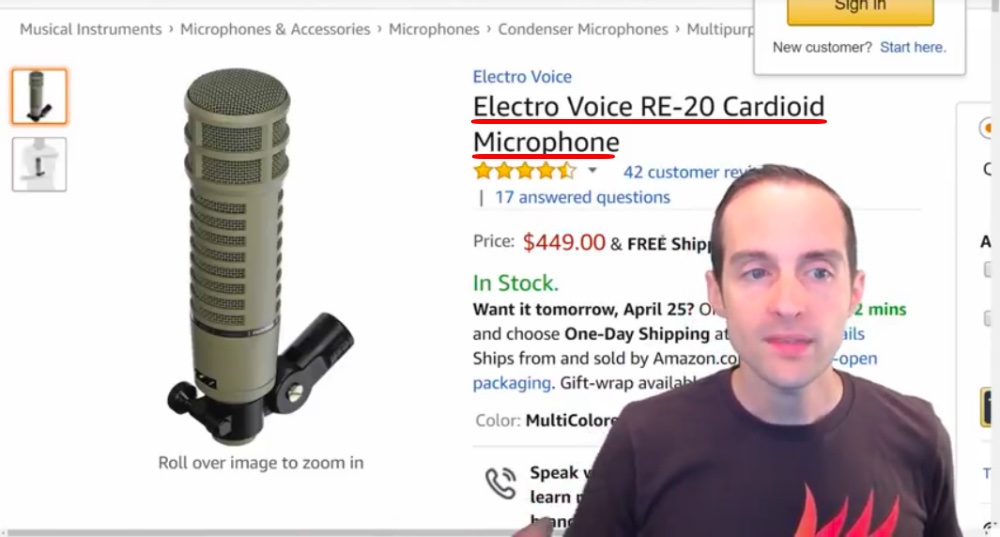
My friend Tomas George with Digital Music Masters recommended this to me.
I will have a link on the resources page to his courses where he's helped me and he's my mentor for music. This is something, as I've started playing music, I've gotten more sensitive to the audio I wanted.
I asked him as a music production engineer, I said, "Tomas, what is the very best microphone I can get? What will record my voice the absolute best?" and this is what he pointed me to.
He said these are the microphones that the professionals are using, the guys and gals with huge audiences are using.
This is the one right here.
I got this microphone and you can see that's in my studio right now. This is the microphone, as I'm doing this, I'm talking directly into this.
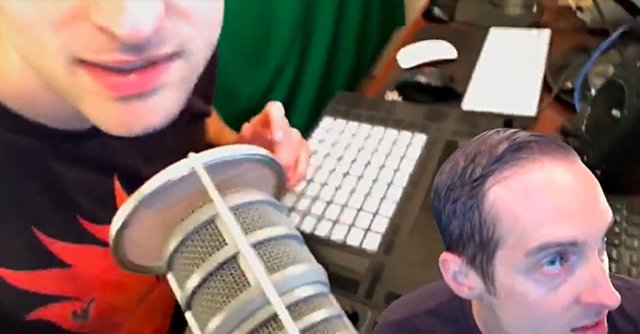
You can see where it is in relation to where I am, and the nice thing with this microphone is that I can dynamically adjust. If I go back or if I go forward, it's got the audio effects processing on it. It will change the volume while I'm talking.
If I get right up close to it and shout and I'm looking over at Wirecast to see how the volume is coming in, if I get over next to it and shout, it's cutting down the volume.
Now, sure, there are some loud spikes, but it still doesn't clip even though I'm screaming. I'm yelling and it fixes the audio dynamically. When I talk louder, it pushes the volume down. When I talk quieter, the volume is a bit lower, but it also doesn't apply a bunch of compression to it. If I talk quieter, then it doesn't need to do much with it and even though the volume is a little quieter when I talk, it's a little louder than it should be.
That's the beauty of this microphone.
I then don't have to worry about my audio being dramatically different from one video to another. If one day I'm in a nice peaceful relaxed meditative mood, then the volume for that's good, and if I scream and shout, and let it all out, it fixes that.
That's what's so nice.
Now, everything's got its ups and downs, and one problem with this "Electro Voice RE20 Cardioid Microphone" is that it's $449.
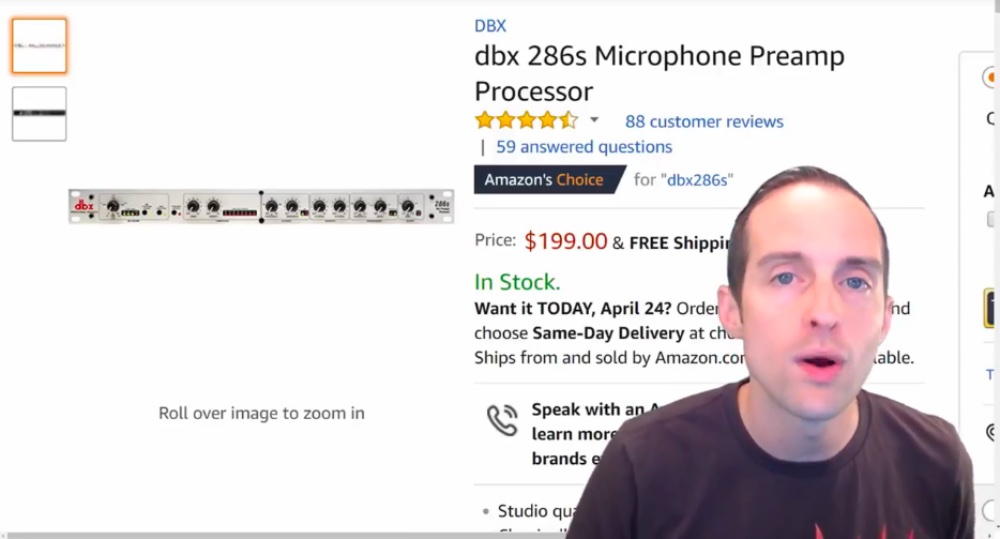
The other big problem with it is you really need a "Preamp Processor" because this microphone is so sensitive. It records the volume really low when it comes in, which allows it to have a nice dynamic range.
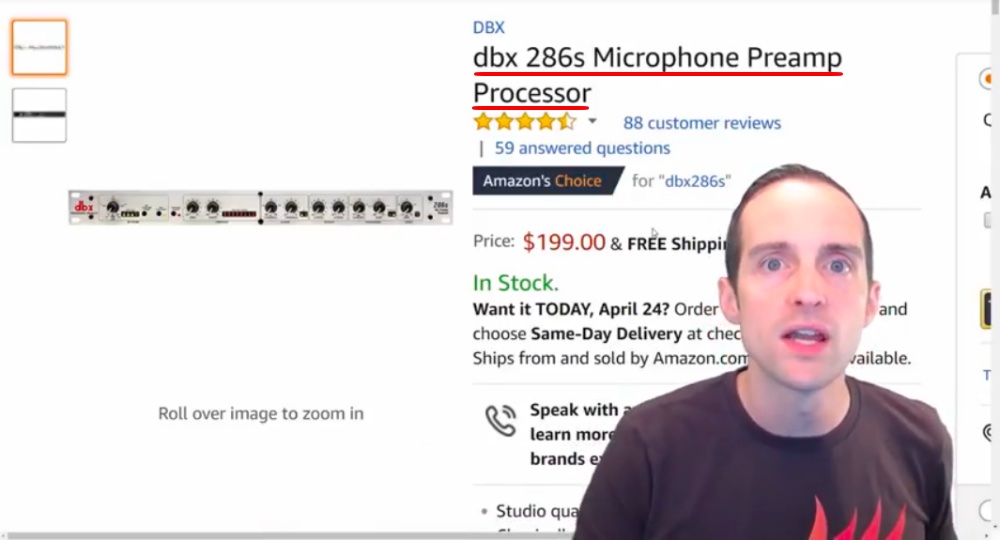
That way if you are right up next to it and shouting really loud, or if you are nice and quiet, it has a very good range to it.
The problem is this signal needs to be boosted in order to be loud enough.
Tomas tried to plug this in into the audio interface, and he said that you could hardly hear the mic arrays, the volume is not up loud enough.
Also, if you want the professional audio effects I've been going on about how great they are, this is what you need right here. You need some kind of "preamp processor" that has all of the audio controls on it.
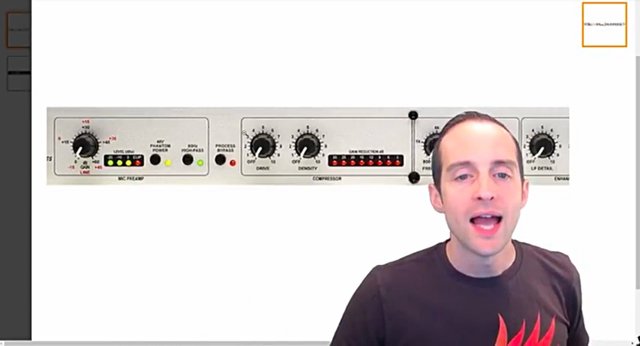
Therefore, you take this microphone, you plug it into this preamp processor, and then you get all of these settings applied before the audio goes into the computer. That's what's amazing about this. It's the ability to apply all these effects on it before you even put the audio in.
You have got an "input gain" and an "output gain," and then you have got all these different effects you can put on that allow you to compress the audio before it even goes into the computer.
You can de-Ess it, so that the S’s don't come across so strong, you can enhance, you can put the low frequency or the high frequency up or down.
Well, really you can just put them up essentially if you want to. You can enhance those frequencies if you want. You then also have an expander gain and finally then the output.
The nice thing is then you get that pro-quality audio right in the first time. You don't have to apply all this stuff right away, when you set this up, you just play with it.
I spent days, not the whole day, but each day I'd record something, test all these different settings and I'd give it to @tomasgeorge. I tested it out until I got these exact settings. I'm very happy with how this sounds in all different environments.
If you switch the audio to something else like the iPhone, you will be able to hear the difference, even though it does some dynamic processing.
There is a big difference between the iPhone audio and this mic because this microphone has all those effects applied onto it. It gives that professional sound, and that's one of those subconscious things that most of us have to make a lot of these judgments and assessments of people subconsciously.
Having a professional quality sound with that compression on it, if you want to lower high-frequency enhancement, the *de-Essing with those audio effects applied, that's something we subconsciously often associate with high quality.
Really it's just a few different pieces of equipment modifying my voice a little bit, and we associate that subconsciously with high quality.
If you want to come across as high quality, having this kind of setup helps a lot.
I will show you after I present everything here how all this fits together and connects to the computer.
I also do have a pop filter on this that I got on eBay.
Yes, I did pay $50 for a pop filter. It's the one pop filter that fits this thing just perfectly.
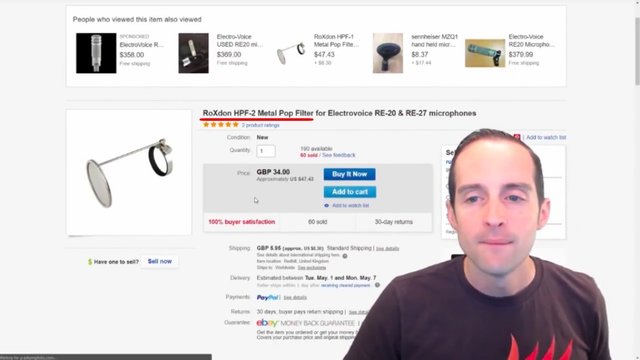
If I go show you how it looks over here, you can see that this pop filter fits it just perfectly and this helps me when I go "pa-papa-papa-papa," it helps it to not pop so much especially if you get close to the microphone.
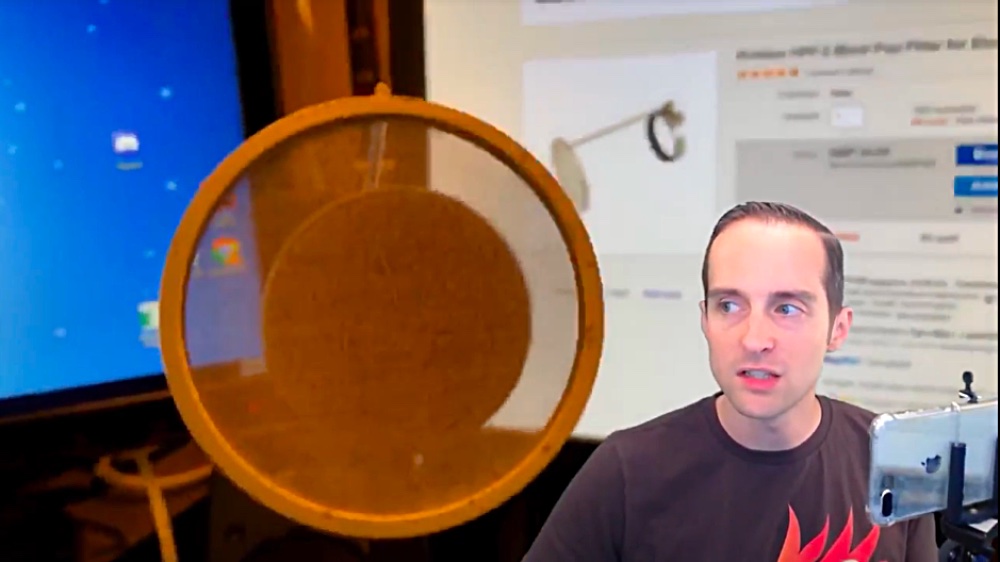
Every time you say a "P" you pop a little bit. The pop filter takes the edge off of things like that.
These are the exact things @tomasgeorge ordered.
I showed you the preamp, and I've got the exact cables listed that I've used to connect the microphone to the preamp, and then the preamp to the audio interface.
What you need then with this preamp is the "Audio Interface."
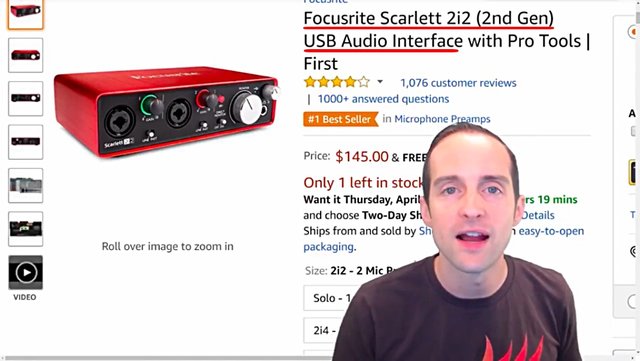
So, you are thinking, "Okay, that's like $700. I can do it," but then now you also need an audio interface and the pop filter. All this comes out to about $1,000 when you account for everything in there.
That said, you get what you pay for.
This audio quality is fantastically better than just using a Blue Yeti microphone or even that iRig HD.
In my opinion, having used both of them, having listened to the difference, this sounds professional. This has all that dynamic adjustment. This setup I've got now is amazing and I was able to hear that by Tomas going through and showing me the difference.
He had the same microphones. He went through and tested them. He allowed me to hear the difference of each one and Tomas went over this with me over and over again.
That's why I'm going in depth about this because this could easily seem like one of those things it's not a big deal, and yet having the audio set up like this makes a huge difference for the long term. Especially as you move your mic and play with the gain, then get frustrated, and then put audio effects on this, this is a really nice setup.
So you have got the microphone and the preamp, then finally you connect into the USB audio interface, which allows additional levels of control.
I can control the volume that goes in on the USB interface, and then this goes directly and is picked up as a device on the Macintosh computer I have.
I think this would also work with Windows, but I recommend to verify that for yourself. It plugs in via USB, so there's no reason it shouldn't work.
I've got this to plug into Apple because this allows me then to put it directly into whatever I want to use. This is how my audio actually gets into Wirecast. I just put the "Focusrite Scarlett 2i2" into Wirecast. It picks it up as an audio source and that's how the audio actually gets on my videos.
Now, what you might want to see is how all of these are put together. I will show you how all of this goes together on my computer.
What equipment do we have?
I'm talking right behind the microphone here. You can see where the camera is at up here as I use my iPhone to film.

Then, what you have got is me back a little bit from the mic, so I don't have to be like all up on the mic, which is really nice.
I can just stand back here and talk.

Now, the audio is different, it is ideal, of course, to get closer to the mic. Then again, the audio can distort the closer you are. If you are all up on it, every pop or "P" or something you will say, the pop filter can only help so much with that.
I like the mic about back here because then there is room for my music setup and everything down there. You can see then I've got room for everything on my desk this way.

I've got the microphone right here in a good position and this is where I'm standing. Good thing I've got pants on today, and then I've got the microphone right here on a stand. It's a $10 onstage stand.

What happens then, this audio cable from the back of the microphone goes along and connects into the DBX Professional, which is the preamp. You can see the preamp dynamically adjusting as I talk.

One of the nice things is that this is also great for reducing noise. One of the reasons I wanted a lot better audio is because of what you see with this red bar and what this allows when I'm not talking, for it to be quieter.
What I was doing before this that motivated me to upgrade my audio setup was I was starting to use, on all of my audiobooks I was recording, a noise reduction plugin to basically reduce the volume or to cut out the background noise when I wasn't talking, and the hums.
This can do that automatically. It knows when I'm talking. When you see the gain reduction, that's based on how much I'm talking. This has in the functionality to essentially allow you to reduce that hum and the background noise.
Even though I've got two computers running right now, I at least can't hear the hum in most of my videos because this does a good job of taking that out.
Then you have got the knobs on it. Each of these different knobs allows me to adjust individual things.
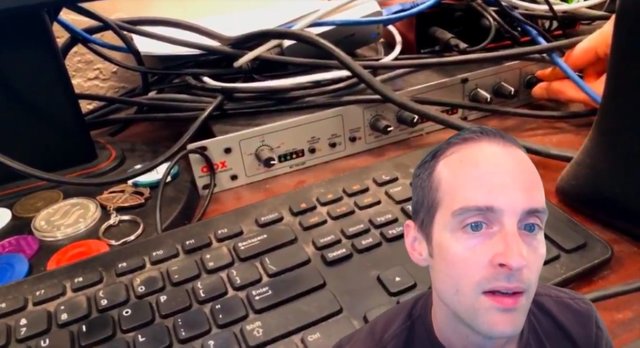
If I want to add more bass to my voice, all I need to do is turn that knob. This is a low-frequency enhancer and I've found the ideal spot for that to be about three.
I can also do the same thing on the high. I've got it at one and a half right now and if I turn it up, it will greatly enhance the high-frequency sounds in my voice.
It's got what's called an enhancer or gate and it knows when I'm talking because it goes green every time I'm talking over there. That helps it where it can screen out those background noises. It's a noise gate where then if I'm not talking it's a lot quieter, and then if I'm talking softly sometimes it trips a little back and forth, but you can set the threshold for that as well.
The DBX then goes out into the USB interface. I've used a cable to put it into both sides because for some reason at some point I just had it plugged into one side because it's mono audio, but then the Mac started picking up all of this and only started picking up the stereo and one channel on the left side.
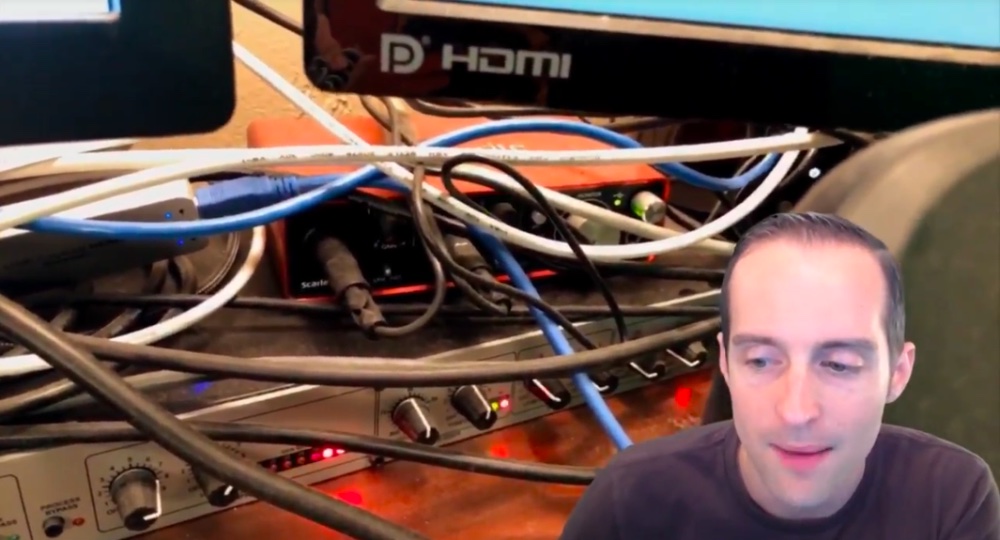
I have a splitter that takes the one cable and puts it into the left and the right side.
So, it's mono audio going into the left and the right side. I believe I've got that exact cable on my resources page as well. If not, I will add that on the list because having the audio just come into the left side was annoying.
The microphone goes into the DBX preamp, which goes into the "Scarlett 2i2" and that is picked up in Wirecast.
That's picked up as a "Scarlet Mic" right there in the red.
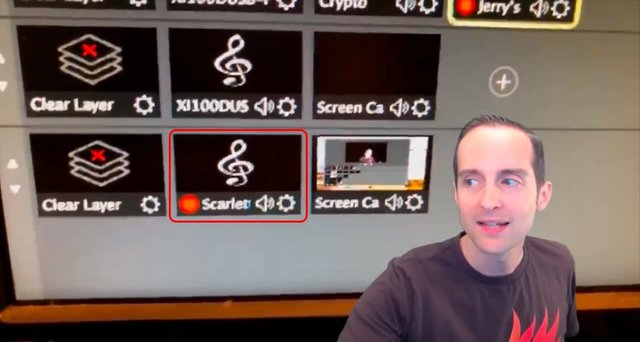
I can turn it on and off from there, and that's how this whole setup works.
If you want to see it in detail, you have got the Mac Pro back there with the dust on the top because it hasn't been moved or dusted in probably a while.
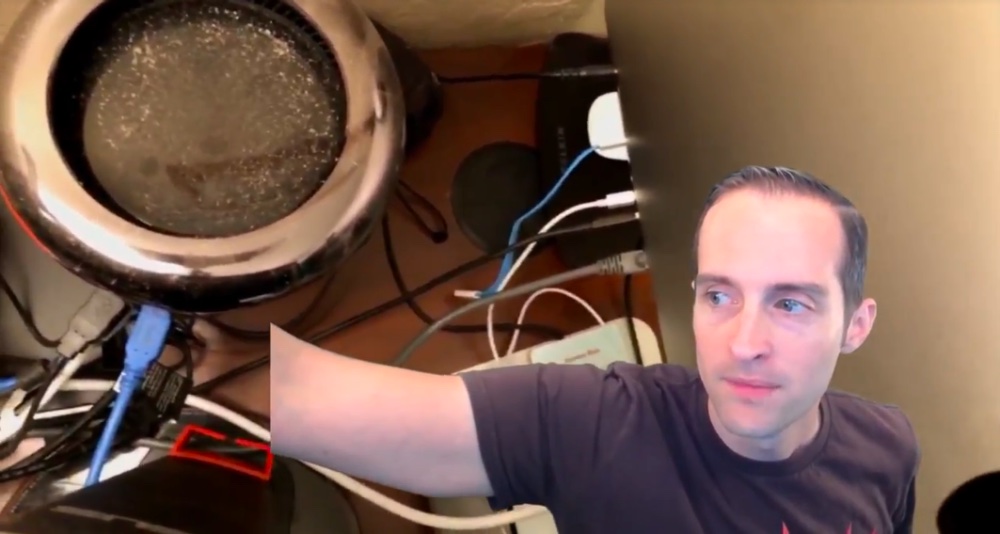
It's plugged into the Mac Pro because I can live stream on about 6 different websites at once and that's how all of this works together for my audio equipment.
After years of making videos, I've bought five, six, seven or eight different microphones, at least. I gave away my Blue Yeti. I've given away almost all the original microphones I've used.
After years I've finally settled on this, which is ideal, and I hope I never need to use another microphone again. I hope this one just works indefinitely. It's been working for about a year now. This setup is just beautiful, so let's just hope this runs indefinitely.
Thank you very much for looking at my complete audio setup with me because I've worked so much on this.
It's such a pain once you have everything set up and working to then upgrade it, and yet it is ideal if you can just start with something that's awesome, and then you don't have to go through that pain of upgrading when you get sick of having something of lower quality.
If you'd like to look at the products yourself or buy any of them, or see the rest of my setup, all these things, the video course hosting, email marketing, Wirecast, my Wordpress hosting, what I use for blogging, would you please go to Jerrybanfield.com/resources because I have links to everything there and because some of these are affiliate links that I've added on after I've decided to do something? Will you please use those links because that helps me earn something while you pay the same price? If you are like me, you will feel good using my affiliate links the same way I feel good when my friends tell me about something and I use their affiliate links, because I'm helping them earn money without spending any more money myself.
I appreciate you reading this. I hope this is useful. If you found this post helpful on Steem, would you please upvote it and follow me because you will then be able to see more posts like this in your home feed?
Love,
Jerry Banfield with edits by @gmichelbkk on the transcript from @deniskj
Shared on:
- Facebook page with 2,256,504 likes.
- YouTube channel with 236,146 subscribers.
- Twitter to 101,590 followers.
Let's stay together?
- If you want to stay updated via email, will you sign up either to get new emails daily at http://jerry.tips/steemposts or join at http://jerry.tips/emaillist1017 to get an email once a week with highlights?
- If you would like to chat, will you please visit https://jerrybanfield.com/contact/ because there we see the best ways to contact me?
Our Most Important Votes on Steem are for Witness!
- If you do not know what a witness is on Steem, will you please read https://steemit.com/steemit/@gmichelbkk/what-is-a-steem-witness-how-to-vote-and-why because our votes for witnesses determine our future together here on Steem?
- If you have never made a witness vote before, will you please set me as a proxy at https://steemit.com/~witnesses or https://steemconnect.com/sign/account-witness-proxy?proxy=jerrybanfield&approve=1 because you will feel good about helping select witnesses while I do all the work to maintain the votes for you?
- If you already have voted for witnesses and prefer to update your own witness votes, will you please place your vote using at https://steemit.com/~witnesses or https://steemconnect.com/sign/account-witness-vote?witness=jerrybanfield&approve=1 because you will feel good knowing your witness vote is helping fund projects that grow Steem as explained here?
My video is at DLive
you're post is rich
Downvoting a post can decrease pending rewards and make it less visible. Common reasons:
Submit
Jerry, I applaud your detailed posts. Where do you get the energy and time to write all of this?? I need to get a microphone once I start doing my videos. I'll likely by the one you mentioned for $126. You're one of my favorite posters on Steemit, and I love following you! Cheers.
Downvoting a post can decrease pending rewards and make it less visible. Common reasons:
Submit
@jfitmisc thank you for asking where I get the energy and time is explained in these two posts:
A prerequisite to making valuable contributions is usually a focused life free from self-sabatoge and a mindset of helping others. This post explains that at https://steemit.com/dsound/@jerrybanfield/20180505t002240550z-unlock-bursts-of-energy-by-transmuting-sadness-and-fear-into-love-and-hope-194
The video below with the matching Steem post at https://steemit.com/tutorial/@jerrybanfield/my-youtube-video-to-steem-post-creation-process explain the process I use with to turn the video into a post.
Downvoting a post can decrease pending rewards and make it less visible. Common reasons:
Submit
Wow. Thats a nice bunch of hardware but sure good investment and improvement in quality.
Downvoting a post can decrease pending rewards and make it less visible. Common reasons:
Submit
Today there are a lot of podcasts that offer great and excellent content. It is one of the easiest ways to get an idea or a topic
For me as a columnist, I think the solutions I have given are affordable
resteem
Downvoting a post can decrease pending rewards and make it less visible. Common reasons:
Submit
You're right @laciri
Downvoting a post can decrease pending rewards and make it less visible. Common reasons:
Submit
Hey man thanks for this. I need some help in thw audio department. Great job. You sent me this. Whats proxy all about and do I lose anything? If you have time, i know your busy. God bless and thank you from behalf of all us who needed ur help.

Downvoting a post can decrease pending rewards and make it less visible. Common reasons:
Submit
awesome software i also used it regularly........
Downvoting a post can decrease pending rewards and make it less visible. Common reasons:
Submit
Holy Moly Batman, you got the goods on info Sir!!! This post will take me all day to read and figure straight...weeeeeeeee... good stuff man, keep it coming .. Thanks oodles!!!
Downvoting a post can decrease pending rewards and make it less visible. Common reasons:
Submit
Love to have one microphone ..
Downvoting a post can decrease pending rewards and make it less visible. Common reasons:
Submit
@jerrybanfield i sent 2 hours ago Transfer 1.000 SBD to jerrybanfield for this memo link: - https://steemit.com/b-cell/@mstpapi/why-do-not-we-see-b-cell-battery-in-store
but not get upvote yet - vote or send back me my i sbd
Downvoting a post can decrease pending rewards and make it less visible. Common reasons:
Submit
I was just thinking about the same thing. Microphone selection for my music.
Downvoting a post can decrease pending rewards and make it less visible. Common reasons:
Submit
Congratulations @jerrybanfield!
Your post was mentioned in the Steemit Hit Parade in the following category:
Downvoting a post can decrease pending rewards and make it less visible. Common reasons:
Submit
It's awesome that you take the time to share resources that have worked for you on your journey. It saves alot of money for your followers because we don't have to go out and try things that don't work! And I like that you broke it down whether or not these items with work with Windows or Apple products. I use Apple myself and it can be difficult finding off name products that work with Apple because most companies seem to cater to Windows based products instead. Great post, thanks!
Ivy
Downvoting a post can decrease pending rewards and make it less visible. Common reasons:
Submit
Thank you for this awesome post . .
A 100% Upvote from me . .
Downvoting a post can decrease pending rewards and make it less visible. Common reasons:
Submit
Great post, a lot of good information.
Downvoting a post can decrease pending rewards and make it less visible. Common reasons:
Submit
I need a good quality microphone for a YouTube video to make my YouTube video. Which microphone will be good for me?
Downvoting a post can decrease pending rewards and make it less visible. Common reasons:
Submit
I like this post.Tanks for sharing..
Downvoting a post can decrease pending rewards and make it less visible. Common reasons:
Submit
Wow technology .Thanks dear sharing your post .I alwys see your post and follow you resteemit done
Downvoting a post can decrease pending rewards and make it less visible. Common reasons:
Submit
It's a great experience to be very good at my work after all @jerrybanfield And I found it very good to see your work, I want you to be like me, but it does not seem to be a dream.
Downvoting a post can decrease pending rewards and make it less visible. Common reasons:
Submit
@jerrybanfield .... absolut wow... Great stuff ...👍
Downvoting a post can decrease pending rewards and make it less visible. Common reasons:
Submit
I like the Heil PR40 mic that Leo Laport uses in his TWiT (This Week in Tech) video podcast.
https://heilsound.com/products/pr-40-2/
Downvoting a post can decrease pending rewards and make it less visible. Common reasons:
Submit
this post most valuable post for me.you always post something difference others.sir thanks for share this post.
Downvoting a post can decrease pending rewards and make it less visible. Common reasons:
Submit