Hello EOS community,
These are updated instructions for launching a testnet. Instructions for the now-outdated DAWN-2018-03-29-ALPHA are here.
We started testing the public Jungle Testnet as soon as dawn-v3.0.0 was released.
For the initialization of of block producers, we will use the contract "eosio.bios", and for sending EOS, "eosio.system".
Welcome to the Jungle
Building your testnet
If you would like to build own test network, compile and install:
Create home dir
# mkdir /home/eos-dawn-v3.0.0
# cd /home/eos-dawn-v3.0.0
# git clone https://github.com/eosio/eos --recursive
# cd eos
# git checkout eos-dawn-v3.0.0
# git submodule update --recursive
# ./eosio_build.sh
# cd build
# make install
If everything was compiled okay, build a node:
Create a dir in opt.
# mkdir /opt/mytestNetNode01
Create genesis.json file in folder /opt/mytestNetNode01 and insert:
{
"initial_key": "EOS6MRyAjQq8ud7hVNYcfnVPJqcVpscN5So8BhtHuGYqET5GDW5CV",
"initial_timestamp": "2018-04-07T00:00:00",
"initial_parameters": {
"maintenance_interval": 86400,
"maintenance_skip_slots": 3,
"maximum_transaction_size": 2048,
"maximum_block_size": 2048000000,
"maximum_time_until_expiration": 86400,
"maximum_producer_count": 1001
},
"immutable_parameters": {
"min_producer_count": 42
},
"initial_chain_id": "00000000000000000000000000000000003c332053555045524845524f203c33"
}
Create config.ini in /opt/mytestNetNode01
et-transactions-time-limit = 3
genesis-json = "/opt/mytestNetNode01/genesis.json"
block-log-dir = "blocks"
http-server-address = 0.0.0.0:8888
p2p-listen-endpoint = 0.0.0.0:9876
p2p-server-address = localhost:9876
access-control-allow-origin = *
#p2p-peer-address = localhost:9876
#p2p-peer-address = localhost:9876
mongodb-queue-size = 256
agent-name = "Agent Name"
allowed-connection = any
log-level-net-plugin = info
max-clients = 25
connection-cleanup-period = 30
network-version-match = 0
sync-fetch-span = 1000
enable-stale-production = true
required-participation = 33
private-key=["EOS6MRyAjQq8ud7hVNYcfnVPJqcVpscN5So8BhtHuGYqET5GDW5CV","5KQwrPbwdL6PhXujxW37FSSQZ1JiwsST4cqQzDeyXtP79zkvFD3"]
producer-name = eosio
plugin = eosio::producer_plugin
plugin = eosio::wallet_api_plugin
plugin = eosio::wallet_plugin
plugin = eosio::chain_api_plugin
plugin = eosio::account_history_plugin
plugin = eosio::account_history_api_plugin
=================
Warning!: using eosio::wallet_plugin may be dangerous. It may expose a security threat. For work with wallets, it is better to use "keosd" which will also be compiled.
=========
Next, scripts to start/stop our node:
Create start.sh (https://github.com/CryptoLions/scripts/edit/master/start.sh) in /opt/mytestNetNode01/ folder:
#!/bin/bash
EOSIOBINDIR=/home/eos-dawn-v3.0.0/eos/build/programs
DATADIR=/opt/mytestNetNode01
$EOSIOBINDIR/nodes/nodes --enable-stale-production true --data-dir $DATADIR --config-dir $DATADIR > $DATADIR/stdout.txt 2> $DATADIR/stderr.txt & echo $! > $DATADIR/eosd.pid
#$EOSIOBINDIR/nodes/nodes --data-dir $DATADIR --config-dir $DATADIR > $DATADIR/stdout.txt 2> $DATADIR/stderr.txt & echo $! > $DATADIR/eosd.pid
=====
Attention: --enable-stale-production true
Setting this start script flag is only necessary in the beginning and only for first node in our network.
Create stop.sh (https://github.com/CryptoLions/scripts/blob/master/stop.sh) in the same folder
#!/bin/bash
DIR="/opt/mytestNetNode01"
if [ -f $DIR"/eosd.pid" ]; then
pid=`cat $DIR"/eosd.pid"`
echo $pid
kill $pid
rm -r $DIR"/eosd.pid"
echo -ne "Stoping Node"
while true; do
[ ! -d "/proc/$pid/fd" ] && break
echo -ne "."
sleep 1
done
echo -ne "\rNode Stopped. \n"
fi
================
For convenience, let's create
cleos.sh (https://github.com/CryptoLions/scripts/blob/master/cleos.sh):
#!/bin/bash
EOSIOBINDIR=/home/eos-dawn-v3.0.0/eos/build/programs
WALLETHOST="127.0.0.1"
NODEPORT="8888"
WALLETPORT="8888"
$EOSIOBINDIR/cleos/cleos -p $NODEPORT --wallet-host $WALLETHOST --wallet-port $WALLETPORT "$@"
====
add execution rights
chmod 777 /opt/mytestNetNode01/start.sh
chmod 777 /opt/mytestNetNode01/stop.sh
chmod 777 /opt/mytestNetNode01/cleos.sh
See if everything is done and then start the node by running ./start.sh. Node log output will be in stderr.txt file If everything is ok we will see something like this:
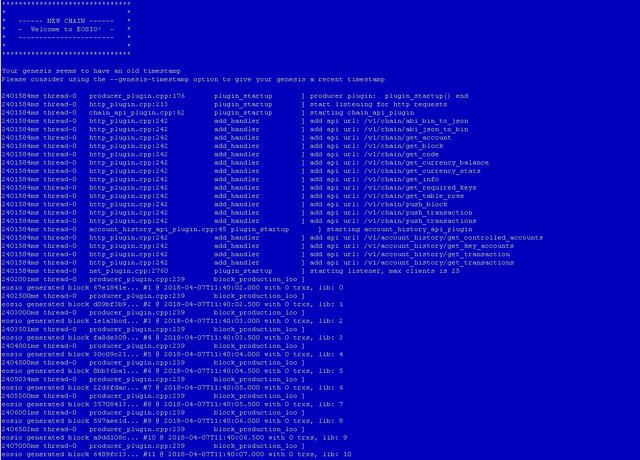
So eosio start producing blocks..
Now we will start second node with new producer and allow him to produce blocks using eosio.bios contract
Lets create new keys for new account and new BP node
# cd /opt/mytestNetNode01
# programs/cleos -p 8888 --wallet-port 8888 create key (on screenshot different port used)

We received pair:
Private key: 5KD6xe4Jy162GzmNtYQ2ExEk4bVieJEfD4RTncicWDhemR6apww
Public key: EOS5YAH5XuNFQELAiNP9uDzLvnEkRdzNt8vvhvazUtMh9rysEF3Ta
Let’s stop the node: ./stop.sh
Duplicate folder /opt/mytestNetNode01 To /opt/mytestNetNode02
Let’s do some changes in both folders. In mytestNetNode02:
Edit Config.ini
genesis-json = "/opt/mytestNetNode02/genesis.json"
Change port to free
http-server-address = 0.0.0.0:8889
p2p-listen-endpoint = 0.0.0.0:9877
p2p-server-address = localhost:9877
Add peer to your first node
p2p-peer-address = localhost:9876
private-key=["EOS5YAH5XuNFQELAiNP9uDzLvnEkRdzNt8vvhvazUtMh9rysEF3Ta","5KD6xe4Jy162GzmNtYQ2ExEk4bVieJEfD4RTncicWDhemR6apww"]
producer-name = inita
Edit start.sh and stop.sh with new paths
Now change /opt/mytestNetNode01/config.ini
And add peer to second node:
p2p-peer-address = localhost:9877
OK. Now start 01 node and then start 02 node..
First node will continue producing blocks as user eosio.
Second node will just sync with first.
Now go back to the first node and set up the eosio.bios contract
But first we need wallet with the imported eosio key inside
# cd /opt/mytestNetNode01
# ./cleos.sh wallet create
Record you wallet password:

Unlock wallet
# ./cleos.sh wallet unlock --password PW5JSPxuKBf6gu34upQydhs68iEE1uLvy8otMoibb7GpucNmL3EX4
Then import eosio keys:
# ./cleos.sh wallet import 5KQwrPbwdL6PhXujxW37FSSQZ1JiwsST4cqQzDeyXtP79zkvFD3

Add eosio.bios smartcontract to user eosio (it was built in you sources dir)
# ./cleos.sh set contract eosio /home/eos-dawn-3.0.0/eos/build/contracts/eosio.bios
As result it will be JSON answer like this:

Lets create an account for second producer - account inita
# ./cleos.sh create account eosio inita EOS5YAH5XuNFQELAiNP9uDzLvnEkRdzNt8vvhvazUtMh9rysEF3Ta EOS5YAH5XuNFQELAiNP9uDzLvnEkRdzNt8vvhvazUtMh9rysEF3Ta

OK. Now prepare list of block producers.
Create a file setbp.json ( in /opt/mytestNetNode01) and insert this info inside:
{
"version": "12345",
"producers": [
{"producer_name":"inita", "block_signing_key":"EOS5YAH5XuNFQELAiNP9uDzLvnEkRdzNt8vvhvazUtMh9rysEF3Ta"},
{"producer_name":"eosio", "block_signing_key":"EOS6MRyAjQq8ud7hVNYcfnVPJqcVpscN5So8BhtHuGYqET5GDW5CV"}
]
}
And the last step - enabling new block producer list
# /home/eos-dawn-3.0.0/eos/build/programs/cleos/cleos -p 8888 --wallet-port 8888 push action eosio setprods "$(cat setbp.json)" -p eosio@active
After this command, second node will start producing block as inita user:
./cleos.sh push action eosio setprods "$(cat setbp.json)" -p eosio@active

After this command, second node will start producing blocks as inita user (after block with list of producers will be after Irreversible block)
To allow coins to be sent - we will install a system contract. (It will erase the bios contract, so you'll have to deploy it again before adding new producers.)
# ./cleos.sh set contract eosio /home/eos-dawn-3.0.0/eos/build/contracts/eosio.system
Now we can issue and transfer EOS
# ./cleos.sh push action eosio issue '{"to":"eosio","quantity":"1000000000.0000 EOS","memo":"init eos"}' -p eosio@active
# ./cleos.sh transfer eosio inita 100000 'test transfer'
Welcome to our Jungle Testnetwork: https://github.com/CryptoLions/EOS-Jungle-Testnet
Network Monitor:
http://jungle.cryptolions.io:9898/monitor3/
🦁🦁🦁
Comments, criticisms, and suggestions welcome.
Congratulations @cryptolions! You have completed some achievement on Steemit and have been rewarded with new badge(s) :
Click on any badge to view your own Board of Honor on SteemitBoard.
For more information about SteemitBoard, click here
If you no longer want to receive notifications, reply to this comment with the word
STOPDownvoting a post can decrease pending rewards and make it less visible. Common reasons:
Submit