This article first post on LearnThings.Online
One of the most popular application of Ethereum is to issue your own cryptocurrency. In this tutorial, we’ll teach you how to issue your own cryptocurrency without/with code.
Before we start, we need to understand there are different types of cryptocurrency.
One is cryptocurrency in the consensus system of one blockchain network. For example, BTC in the bitcoin network, ETH in the Ethereum network. In this case, people first get the currency from a process called mining. Through mining process, miners(or nodes) will get incentive to support the infrastructure of the blockchain network. All mechanism for the incentive is written in the code for the blockchain. People the mining process support the price or value of the currency.
Another one is token contract on the top of blockchain. The most popular case is ERC20 token on Ethereum. You can deploy a token smart contract on a of blockchain to issue your own token. It cost you just a little to deploy the contract on the blockchain. If you didn’t do other things to support the value of your own token, people may say it’s air-coin or shit-coin.
ERC20 is the most popular standard to issue your “contract token”. People often use ERC20 to issue their own token for their ICO for crowdfunding.
ie. ICO stand for “initial coin offering”, some blockchain project sell their coin before they build their project. Then build the project to interact with the coin.
Now, we can start.
Issue your own token without code
pre-request you need to have Ethereum-wallet, we suggest you use Chrome Extensions Metamask. Also you need to have ETH in your account.
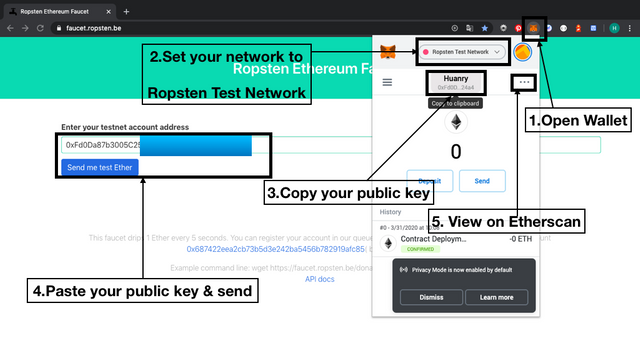
In this tutorial, we use the “Ropsten Test Net”, you can get your “fake ETH” through https://faucet.ropsten.be
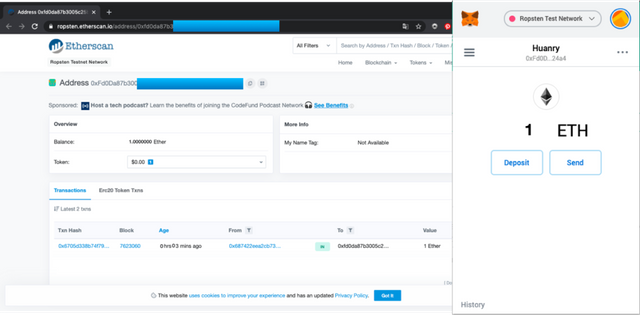
You can see “ETH” on Etherscan and your wallet.
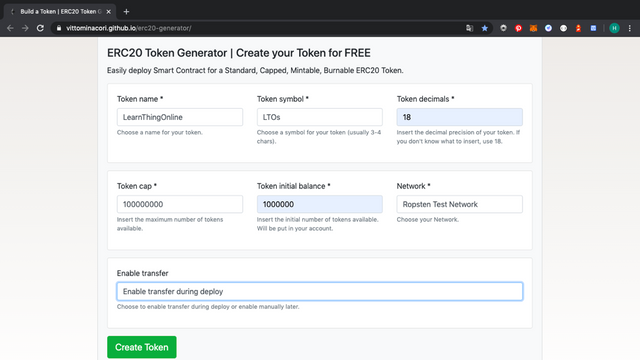
Go to the ERC-20 generator to type
https://vittominacori.github.io/erc20-generator
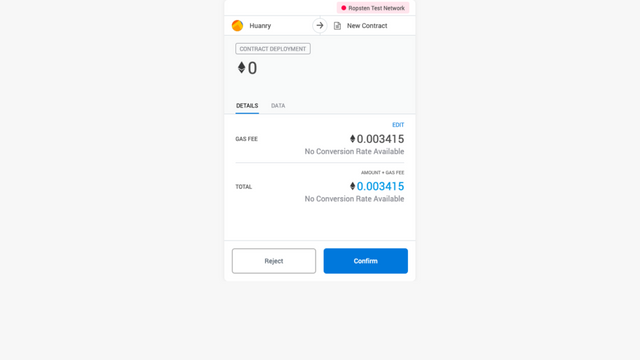
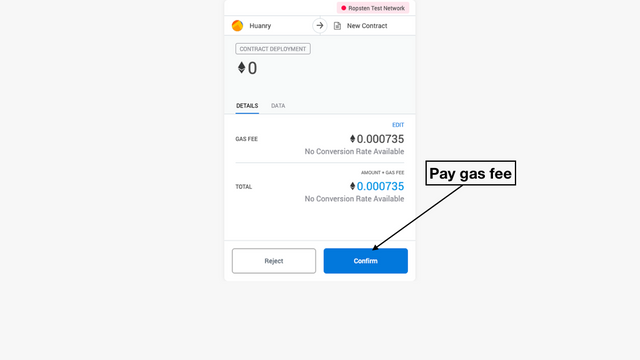
You can see the wallet will ask you to pay “gas fee” by ETH to deploy the contract.
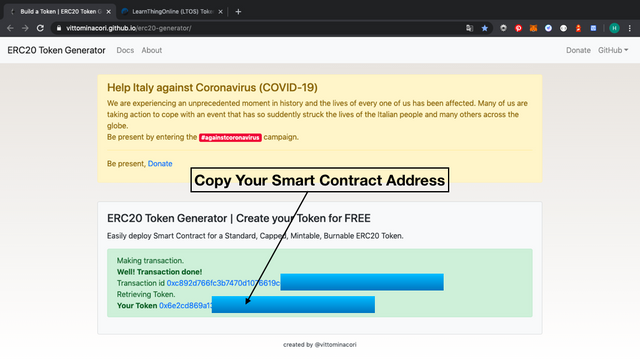
It’s down, you can see your smart contract address, click to check information on etherscan
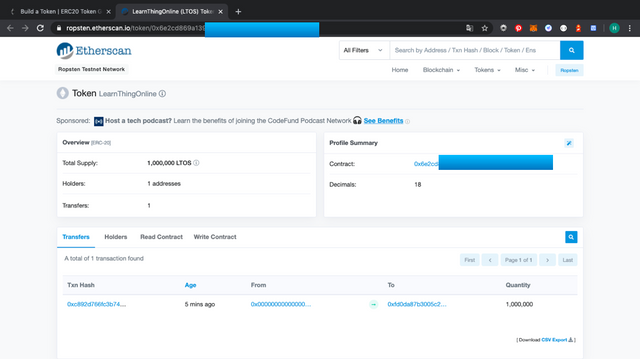
Also, you can check the etherscan with your wallet address
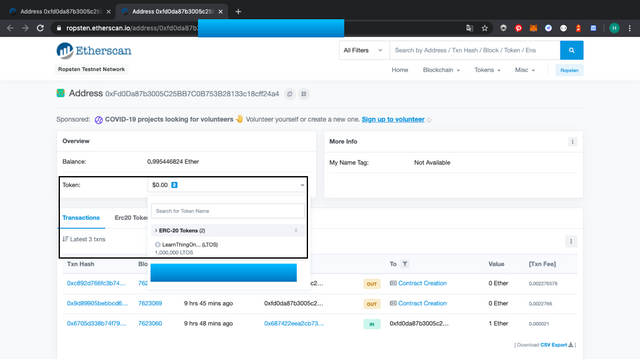
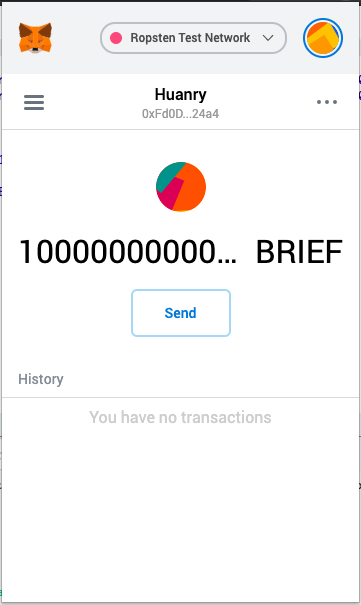
If you want to send your token to others, you can add the token on your wallet.
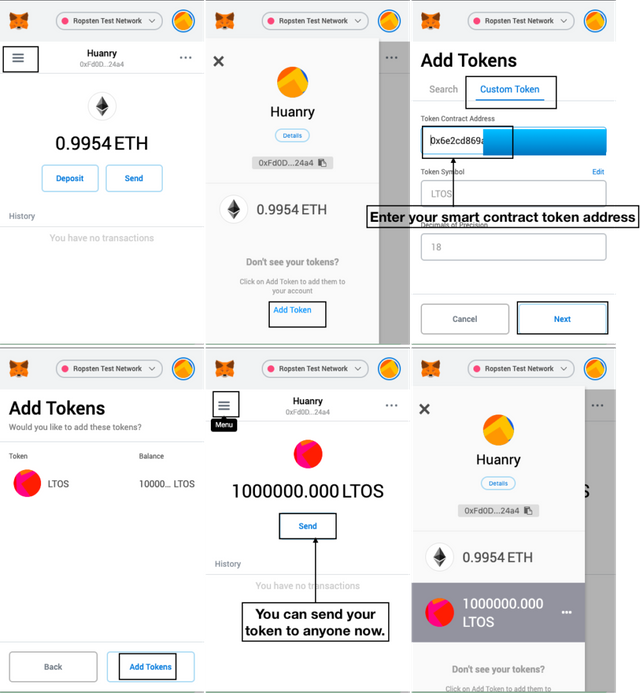
Congratulations! You have your own token now.
Let’s review the process to get the token.
- Type properties we like for the token. (The ERC-20 generator actually help you to put these parameters on the smart contract.)
- Click “Create Token” (The ERC-20 generator help you to compile the smart contract into bytecode and deploy on Ethereum network.)
- Pay gas fee by ETH. (Every time you make transaction include deploying contract on Ethereum blockchain network, you need to pay gas fee, it will go to the miners or nodes who support the network.)
- You can get transaction id address and token address. (Any transaction on Ethereum will get a transaction id address, people can check the detail of the transaction by the address on Etherscan or other Ethereum blockchain browser. For smart contract deployment, you can get a smart contract address, people can check is the contract remain the same with original one.)
- You can add your token on your wallet. (Unlike third payment applications include Paypal or Alipay … etc. You can use any blockchain wallet that support ERC-20. Since blockchain is a decentralized network, all token and transaction data are public to every one, anyone can make their own application to access the data, and no single one can mute data. )
The ERC-20 generator provide only simple version for your own token. If you like to have more functions or to interact with your own DApp, you still need to learn how to write smart contract and deploy on blockchain.
Issue your own token by writing smart contract
OpenZeppelin package some useful smart contracts, we don’t need to write from scratch.
Let’s check ERC-20 smart contract on
https://docs.openzeppelin.com/contracts/2.x/erc20
and
https://github.com/OpenZeppelin/openzeppelin-contracts/tree/master/contracts/token/ERC20
Let’s rewrite the smart contract.
pragma solidity ^0.6.0;

import "https://github.com/OpenZeppelin/openzeppelin-contracts/blob/master/contracts/token/ERC20/ERC20.sol";
import "https://github.com/OpenZeppelin/openzeppelin-contracts/blob/master/contracts/token/ERC20/ERC20Detailed.sol";

contract MyToken is ERC20, ERC20Detailed {

  uint256 public constant INITIAL_SUPPLY = 1e12 * (1e18);

  constructor() public ERC20Detailed("TokenName", "BRIEF", 18) {
    _mint(msg.sender, INITIAL_SUPPLY);
  }

}
Check github files if you want have more functions.
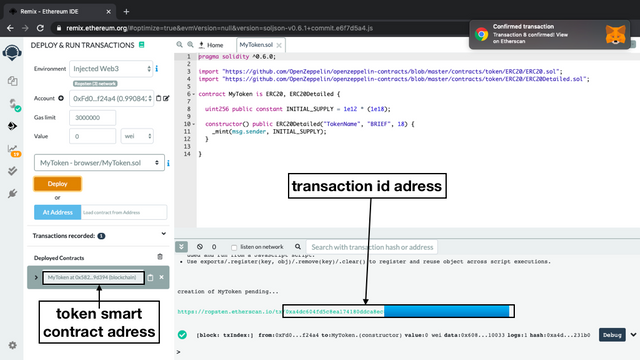
You can set “TokenName”, “BRIEF” you like. Also, “INITIAL_SUPPLY” = [1e(“Token Cap Digit”)*1e(“Token Decimals”) ]. (We set “Token Cap Digit” to 12 if we want 1,000,000,000,000 tokens. mostly, people set “Token Decimals” to 18.)
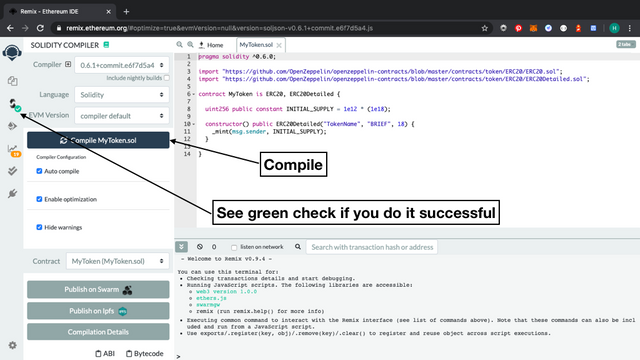
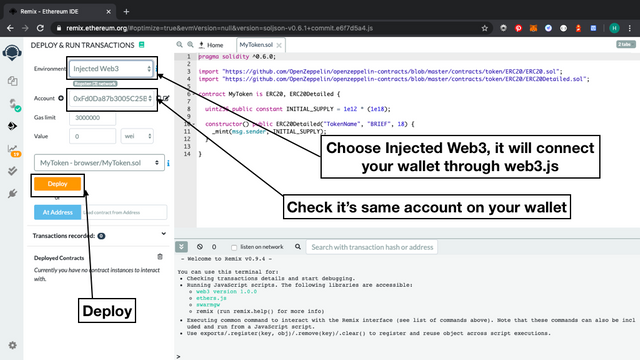
Copy the contract into online IDE. (General specking, you need to run Ethereum node if you want to deploy your contract, we can do it by online IDE. Remix help to run the node for you.)
Write smart contract
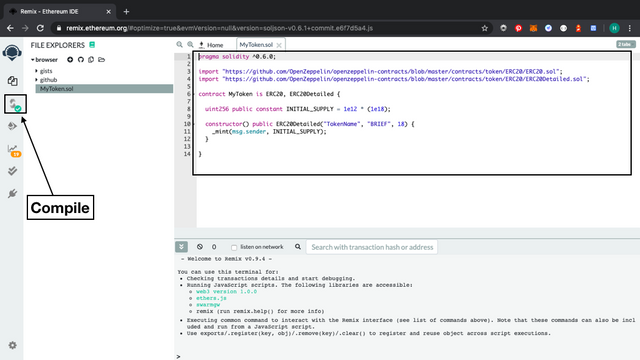
Compile smart contract into bytecode
Deploy on the Ethereum blockchain network
Pay gas fee
Done
Add your own token on your wallet
You can also check code on OpenZeppelin. The other thing you need to learn is how to interact your own DApp with your own token.
Also, you can do all above on main-net for real world, the difference is you need to buy ETH or mint by your self.
Read More