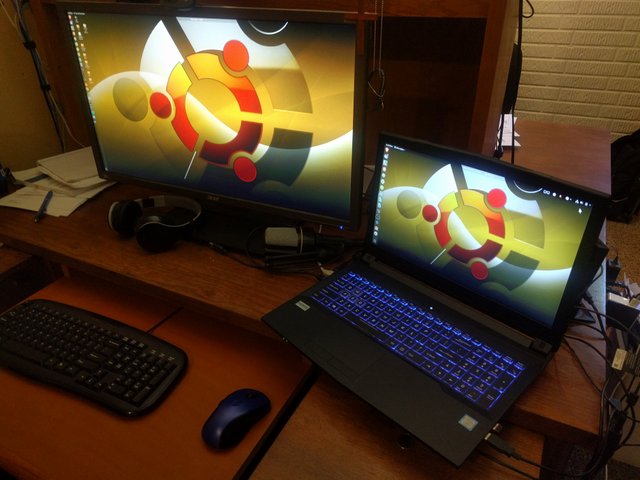
I've recently purchased a Clevo laptop and installed Ubuntu 18.04 on it. I'm writing to share why I did this and the process I used to get it installed. Switching from Windows or OS-X to Linux is a great way to win back a lot of computing privacy, while taking power away from centralizing "authorities" that also operate as data-collecting gatekeepers to the digital world. Here I upgrade to a faster machine while striking a balance for a reasonable level of privacy.
History
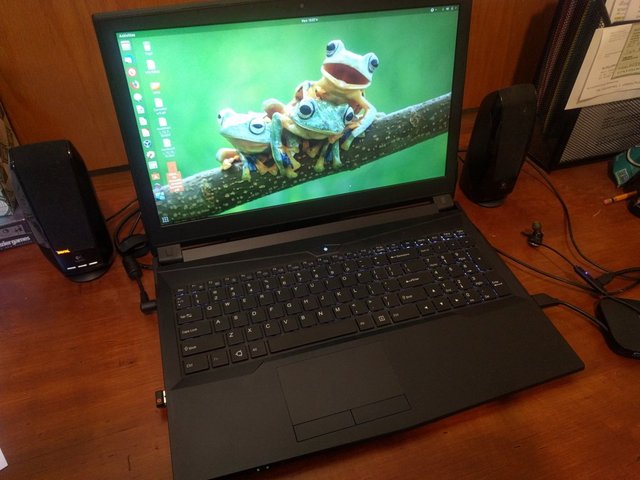
My System76 Gazelle, which is now my wife's computer.
I've been using a System76 Gazelle for about 18 months and it has been a really good, reliable machine. System76 builds and sells computers preloaded with Linux distibutions. Currently they default to their own Pop! distro, but when I purchased my Gazelle I chose the Ubuntu option. System76 provides drivers that ensure their machines work well with Ubuntu or Pop! (which is Ubuntu-based) installed. System76 is a great option for a user who wants to buy a machine running Linux that "just works," as somebody might expect of an off-the-shelf machine running OS-X or Windows.
Linux has come a long ways since the first time I experimented with it more than a decade ago. Back then it was very much an operating system for hobbyists who were enjoyed monkeying around with drivers and such, figuring out how to make things work. Compared to those days, it is amazing how user-friendly the Ubuntu distribution has become. Having a pre-loaded machine isn't actually necessary, as many off-the-shelf machines' hardware will be instantly recognized by Ubuntu and it doesn't take a lot of fiddling to get everything working anymore.
When I showed one of my helpful friends my Gazelle a while back, they researched and found out that this laptop was a Clevo machine that System76 built a driver pack for, preloaded the OS, and sold. System76 is a pretty neat company and they are doing more and more with their own hardware as time passes. Even when they are setting up and reselling readily-available machines, they are adding real value for users who might not otherwise take the time to get Linux running. The scope of maintaining sets of stable driver packages and providing tech support to their customers shouldn't be underestimated. Still, I'm a little more capable than the average user, so I decided that I could set up my own machine this time.
My wife was using an older Acer machine that was running Ubuntu reasonably well, but most of the USB ports had died and it was also struggling to run the Windows 10 virtual machine occasionally used for MS Office applications. She needed an upgrade and my System76 Gazelle was super-stable, had recently been upgraded to Ubuntu 18.04, and was more than capable of meeting her needs.
Meanwhile, I'd been using my Gazelle with a 4K monitor that was really too much for the integrated graphics card. For day-to-day web-surfing, email, and composing articles it was just fine. When editing or watching videos I would have to drop the external monitor resolution to 1080P in order to get decent frame rates. My wife's need for an upgrade became an excuse for me to upgrade to a machine with a better graphics card, while handing her a very capable, stable machine.
My New Machine
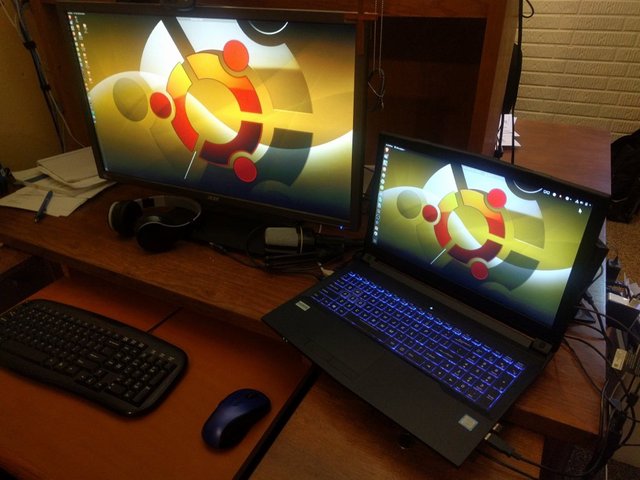
My new Clevo N850EK1, with Ubuntu 18.04 LTS installed in my home office workspace with my 4K monitor and other peripherals.
I decided to buy another Clevo with an exterior that's externally identical to the System76 Gazelle, but without the System76 logo and with some different ports on the side. I researched and found that others had luck with the N850EK1, though some tricks were needed to deal with the dual graphics cards. One is used for low-power operation while the other is used for graphic-intensive situations, including gaming. Though externally similar in appearance, the machine's internals feature an 8th generation Intel processor and a reasonably capable GeForce GTX 1050 Ti GPU. Since I found other sources that made it work with Ubuntu, I chose to go with this as a cost-effective solution. After some source and price comparisons, I chose to buy the machine from XOTIC PC as a Sager NP6853. It appears they've quit selling this exact model, but they can be found through other sources and the instructions I'll be providing will work with a number of similar machines. Here are the details of this computer:
- Processor: Intel Core 8th generation i7-8750H mobile (6x 2.2 GHz, turbo up to 3.9-4.2 GHz)
- Integrated Graphics: Intel UHD Graphics 630 (Coffeelake 3x8 GT2)
- GPU: GeForce GTX 1050 Ti 4GB GDDR5
- 15.6" built-in 1920x1080 monitor with a 120 Hz refresh rate
- Boot Disk: 250 GB solid state drive
- Storage: 1.0 TB hard drive
- RAM: 16 GB
These are sold as gaming machines, as one would expect with Sager branding. I play some occasional games, but this was a nicely balanced machine at around $1100 shipped. If I was serious about gaming, I probably would have chosen a machine with a more capable GPU. I chose to upgrade the RAM and add a 1TB hard drive from the most basic version. I also paid to upgrade the thermal compound and had the machine delivered with no OS installed.
It has nice features like a pair of Mini DisplayPorts on the side, along with a single HDMI port. DisplayPort is the preferred standard for 4K monitors, as it can handle the needed bandwidth (the equivalent of four 1080P displays). It doesn't have the classic VGA port, but I don't own any monitors without at least an HDMI port on them. When traveling, also, HDMI has become the ubiquitous interface, whether you are putting graphics on a conference room screen or playing a movie on a hotel room TV.
Like my Gazelle, it has a backlit keyboard. Though the Gazelle has just a white backlight, this one is a multi-color three-zone setup that can be customized to the user's tastes. The default after it boots is a nice, tasteful blue color, so I haven't messed with it.
The Setup Process
Installing Ubuntu 18.04
My Clevo machine showed up about a week after I ordered it, though I ordered minor customizations and didn't pay extra for a rushed delivery. Of course, the hardware was all installed and ready to go, but it didn't have an operating system installed. Installing Ubuntu was all I had to do, but it did take some experimentation to get everything working right.
I downloaded the AMD64 Ubuntu 18.04 LTS ISO image from Ubuntu.com. I used the Make Startup Disk function on one of my running Ubuntu machines to make a bootable flash drive using that ISO image.
When starting the Clevo machine, tapping F2 a number of times while it's starting up got me into the BIOS settings. This machine shipped with Sager's proprietary BIOS and there weren't really many useful settings to tweak in there, so I left the settings in their default state. Restarting and tapping F7 took me to the boot settings where I chose to boot from the bootable Ubuntu flash drive I created.
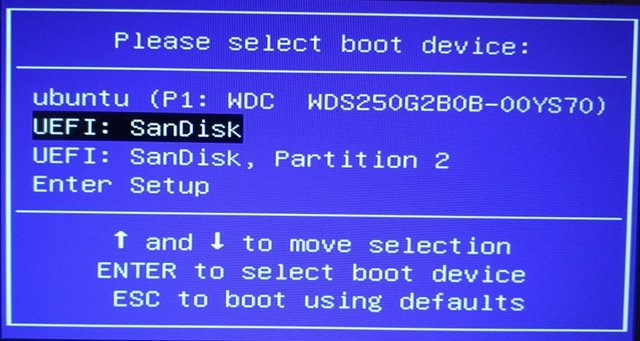
Using the F7 key while starting the computer, I was able to select my flash drive as the boot device.
Once I got to GRUB, I tried simply using "Try Ubuntu without installing," but found that the default settings (with default graphics drivers) would often lock the system up shortly after the GUI appeared. So, when GRUB came up, I would:
- Select "Try Ubuntu without installing"
- Hit "e" to edit the command line
- Use the arrow keys to get down to the line that ends in three hyphens, putting in " nomodeset" (with a space in front of it) at the end of that line
- Hit F10 to boot with the modified command lines
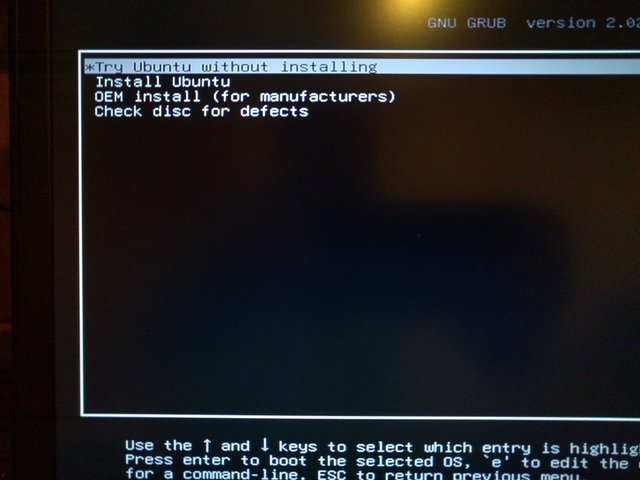
Simply selecting "Try Ubuntu without installing" would lead to a frozen GUI once the Ubuntu live disk was loaded. Instead, I selected it and hit "e" to modify the command lines.
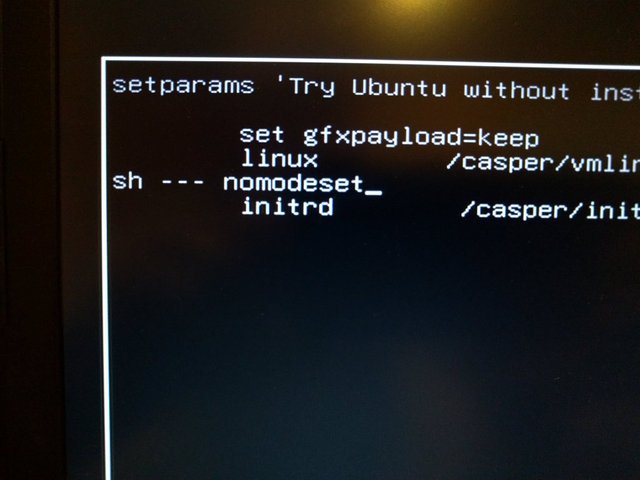
I modified the command line that ends in three hyphens, adding a space and "nomodeset". Then I hit F10 to start the operating system using the modified command lines.
Then, when the "live disk" version of Ubuntu came up, it was in a low resolution mode, but worked perfectly.
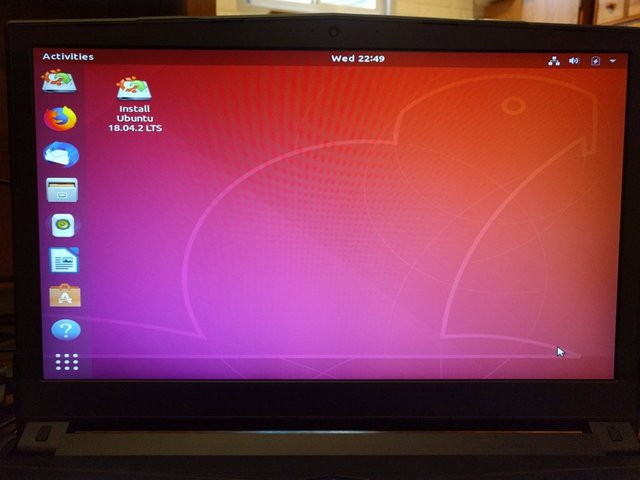
Using nomodeset resulted in a perfectly operational livedisk, although it was operating at a very low resolution.
I used the Install Ubuntu icon on the desktop to install the operating system. I installed it to the 250 GB solid state drive, otherwise using the default settings.
When everything was installed I shut down the computer and started it back up. On the first run after installation Ubuntu shows a series of screens introducing the user to Ubuntu's features. On the third screen I made sure to tell the operating system NOT to share data with Cannonical (the creators of Ubuntu). While it was running, I allowed Ubuntu to download and install the latest updates.
Setting up Nvidia Graphics Drivers
Then, I shut down the computer again, and restarted the machine. This time I used the ESC key during the booting process to get into "Advanced options for Ubuntu." Then, I:
- Used the most recent recovery mode on the list
- Enabled the network connection (using my Ethernet connection)
- Used "root: shell prompt" to get to a command line
- Then, I used the following commands to set up the proper graphics drivers
sudo apt install lightdm
sudo apt purge gdm3
sudo apt-get remove gdm3
sudo apt-get install nvidia-384
During this process I accepted some terms and conditions. I also told it to use lightdm, when it asked me. The lines to purge and remove gdm3 didn't actually find anything to remove, in my case, but there was no harm in running them just in case. The Nvidia-384 step is where the drivers get installed. With this setup, X server knows how to use the dual graphic cards. After that, I rebooted and the machine was running great.
When you use this setup, DO NOT add Bumblebee to manage switching between graphics cards. I tried adding Bumblebee at one point, and that approach led to all kinds of issues. Because I had just installed Ubuntu, I wound up starting over again.
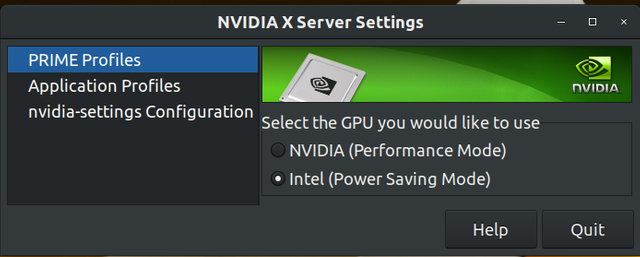
Simply use NVIDIA X Server Settings to change back and forth. To use this, simply go to PRIME Profiles, click the radio button telling it to switch to either either NVIDIA (Performance Mode) or Intel (Power Saving Mode). Then it will tell you to log out and log back into your system to apply the changes. For me, this has been working perfectly and I've tried out some games, proving that the GPU is quite capable, though an internal fan spools up and it really blasts some heat out of the side vent.
Making Use of the 1TB Drive
Because everything was installed to the 250 GB SSD, at this point, I really needed to move my Home directory to the 1 TB hard drive to make good use of the available storage space. For that process, I recommend following the process outlined on this help.ubuntu.com page: https://help.ubuntu.com/community/Partitioning/Home/Moving
If you are a new user to Ubuntu, you will be amazed at the help and tutorials that are available in the Ubuntu (and larger Linux) community. The page above is an awesome example of that. As you become familiar with the operating system, you will make entries on the command line as you set up new things and solve occasional issues that crop up. Over time many of the commands will become second nature, but you will always find a wealth of help available in forums online.
Once I moved the Home directory over, I pulled in all the files from my old machine that had been backed up to an external drive.
Results and More
Getting Used to Gnome
If you have been using Ubuntu's Unity desktop for some time, as I have, you are in for a treat as you get used to 18.04's default choice of Gnome. It takes some adjustment to get used to the Gnome interface, but when you get the Gnome Shell and start playing with the extensions, you will find that it's a very flexible, capable, and customizable environment to work in. I've also enjoyed using the Gnome Tweaks program to switch to a dark theme, which is much easier on my eyes that the blinding white of the default theme. You can always switch to Unity or some other GUIs, but I chose to give Gnome a try and I'm not going back to Unity anytime soon.
Adjusting Color
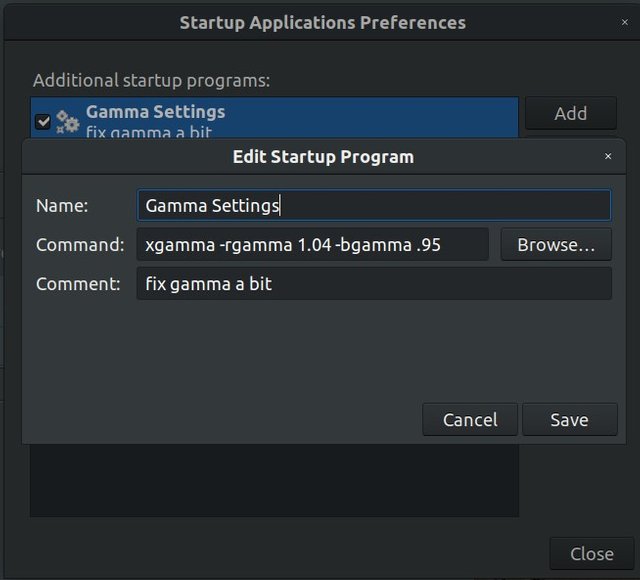
One of the few complaints I've had with Ubuntu 18.04 on this computer is that the color balance on the built-in screen seemed quite washed out. I tried playing with color profiles, but found that to be a more involved effort for another day. For the short-term, I set up a quick script that uses xgamma to bump up the red while backing off on the blue, and the screen looks a lot better to my eyes. The content of that script is quite simple.
xgamma -rgamma 1.04 -bgamma .95By accessing Startup Applications Preferences, you can gain a lot of control over what happens when you log into Ubuntu. I added the script above by clicking "Add," filling in the fields as shown (Name and Comment field contents have no effect on the function of the script).
Keyboard Backlight Colors
Some users will want to customize the keyboard colors, though I'm fat, dumb, and happy with the default blue. It just happens to be my favorite color, and it's not too overpowering or obnoxious looking. So, I'm not inclined to change it just for grins. Some people have figured out how to customize the keyboard colors, and here's some information on how to do it (though I haven't tried it myself): https://askubuntu.com/questions/184593/reverse-engineer-driver-for-multi-colored-backlit-keyboard-on-clevo-laptops#274600
The Verdict
I'm quite happy with this new computer and it is running quite well. I wound up with a machine that handles the 4K monitor much better, even in the power-saving mode, and it's super-capable when I power up into high-performance mode. This may not be the ultimate privacy machine, as I'm running a number of proprietary drivers, some proprietary software, and Sager's BIOS, but it's a decent compromise that gets me a reasonably quick machine without handing over all my data to Microsoft or Apple.
Ubuntu is definitely an improvement over more common operating systems, but I know that there are some settings I should adjust to make it more private. I'll either find a good how-to and point the readers to it, or write my own.
Final Words
Ethical Developer Group wants to be a Conscience for the Digital World. We are very concerned about digital ethics. We believe that users of digital services should have options to regain their privacy, allowing them to shift away from the central authority of "annointed" gatekeepers, and free themselves from annoyances caused by those who don't see users as customers. Ultimately, the digital world should be used to enable liberty rather than enslaving people.
Please join us in learning about threats, finding alternative paths, and making our way out of the Digital Panopticon. Sign up for our email updates, become a user of the site, and show your support of our mission on social media sites including LinkedIn and Twitter.
Thanks!
Posted from my blog with SteemPress : https://edgcert.com/2019/06/03/ubuntu-on-clevo/
Congratulations @miragex! You have completed the following achievement on the Steem blockchain and have been rewarded with new badge(s) :
You can view your badges on your Steem Board and compare to others on the Steem Ranking
If you no longer want to receive notifications, reply to this comment with the word
STOPVote for @Steemitboard as a witness to get one more award and increased upvotes!
Downvoting a post can decrease pending rewards and make it less visible. Common reasons:
Submit