This is a very happy evening and a good opportunity for me to get an invitation from brother @aril.hatake and this very interesting contest edition, and here is what I can share according to my understanding.

Via Canva
- Here is a detailed guide to applying an arm sling and a finger splint. This guide covers important steps to ensure safe and comfortable immobilization and stabilization of the injury.
- applying a sling to the arm A sling is used to stabilize an injured arm or shoulder, such as a fracture, dislocation or sprain.
- and equipment to be used:
a triangle cloth (arm sling) or other multipurpose cloth. pins or straps (optional)
make sure the patient is in a comfortable sitting or standing position.
evaluate the injury to ensure there are no open wounds that require further treatment before application.
- arm position:
ask the patient to hold the injured arm with their healthy hand, so that the arm is in a comfortable and slightly raised position. if there is pain when trying to move the arm, leave the arm in its original position.
- triangle cloth order:
open the triangle cloth and place the widest part under the injured arm. one end of the cloth is tied around the neck, while the other end is tied behind the shoulder.
make sure the wrist is slightly higher than the elbow to reduce swelling. check that the cloth is not too loose or too tight
locking:
use a pin or tie to secure the knot of the cloth, if necessary. make sure the knot at the neck is not pressing, so that the patient remains comfortable.
2.applying a finger splint:
a finger splint is used to protect a broken, sprained or injured finger from moving during healing.
- equipment needed:
finger splint (metal or thin wood).
elastic bandage or gauze.
medical tape or tape.
- Installation Procedure:
clean the wound or injured area if there is an open wound.
if there is swelling, compress with ice for 10-15 minutes before installation.
- finger positioning:
make sure the injured finger is in a straight position.
avoid pressing too hard to avoid aggravating the injury.
apply the splint:
place the splint along the bottom or top of the injured finger. make sure the splint covers itself at both ends of the finger to prevent movement.
- Binding:
use elastic bandage or gauze to wrap the splint around the finger tightly but not too tight.
- locking:
use medical tape to make sure the splint stays in place.
most important such as stabilization: make sure the injured area does not move.
avoid shaking or pressing the injured area during application.
comfort: apply the sling and splint in a way that does not cause additional pain.
circulation: check the blood circulation in the injured limb after application. if there is any body part injured after application. if there are signs such as numbness, coldness or bluishness and immediately loosen the application.
- helmet removal for head and neck injuries.
helmet removal for accident victims with suspected head or neck injuries must be done very carefully to avoid worsening spinal injuries. the helmet should not be removed unless the victim is not breathing and requires resuscitation. the helmet is blocking the airway or the helmet is not securely attached.
- safety steps:
position two rescuers: the first rescuer holds the victim's head and neck for stabilization, while the second rescuer helps remove the helmet. remove the helmet slowly, and lift it from behind while ensuring the head remains stable. use a neck support after the helmet is removed and contact the nearest medical assistance as soon as possible.
cervical spine stabilization: cervical spine stabilization is performed to prevent movement that can worsen the injury.
manual stabilization:
first aid holds the victim's head with both hands on the sides of the head, thumbs on the cheeks and fingers under the jaw. the head is kept in a neutral position, without forcing movement if there is resistance or pain.
using a head block:
first install a cervical collar to support the neck.
place the victim on a spine board.
place head blocks on both sides of the head, tie with straps to prevent movement
when used:
if the victim is unresponsive.
when moving a victim with suspected spinal injury.
emergency management of compound fractures with severe bleeding.
ABC evaluation (airways, breathing, circulation):
1.ensure an open airway, use the chin lift or jaw thrust technique.
2.overcome limited breathing with resuscitation or optimal positioning.
3.control bleeding.
- press the bleeding area with a clean cloth.
if the bleeding does not stop, apply a tourniquet above the wound.
stabilize the fracture:
1.do not move the bone, wrap the wound with a sterile bandage.
2.use a splint to stabilize the arm without disturbing the tourniquet.
monitor circulation:
1.recheck the distal pulse after stabilization.
2.finally, immediately seek medical help.

screenshot result
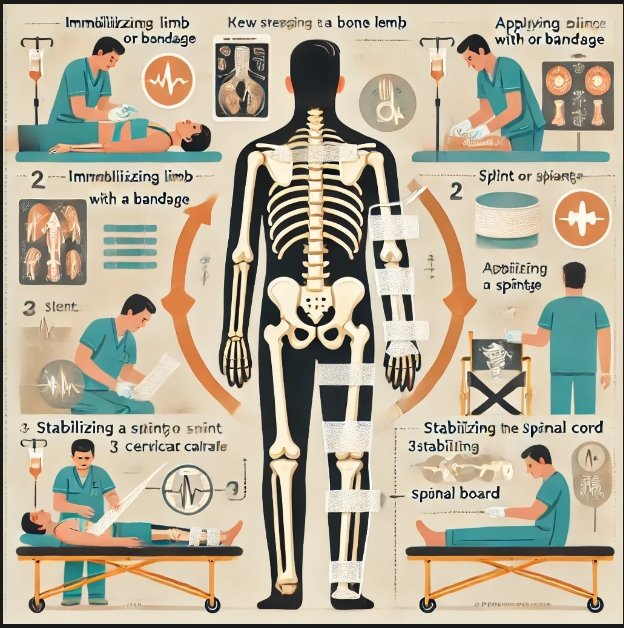
The infographic above shows the main steps in fracture management: immobilizing the limb, splinting, and stabilizing the spine. and in an easy way we can see this visual guide to facilitate understanding and implementation of the procedure.
And that's all I can write in this contest edition, and hopefully it will be useful for myself personally and also for everyone who visits the blog and reads it. also invites @patjewell, @marito74, @emsonic hopefully we will all be successful
 Click Here
Best regard @fajrulakmal99
firstaid-s21w4 steemexclusivebteachingteam learnwithsteem
Student Name: @fajrulakmal
Overall grade: 6.7
Plagiarism Check: Pass
AI Use: No
General Feedback: The student has shown good understanding of the course and has come up with a satisfactory explanation on how to manage fractures. Good job.
Thank you.
Regards,
@huzaifanaveed1
Downvoting a post can decrease pending rewards and make it less visible. Common reasons:
Submit
https://x.com/fajrulakma93753/status/1858898448982175905?t=wTYDfWYaAXSxWnVa8fQ5rA&s=19
Downvoting a post can decrease pending rewards and make it less visible. Common reasons:
Submit
Sukses selalu brow
Downvoting a post can decrease pending rewards and make it less visible. Common reasons:
Submit
Amin.
Kepiting jari tangannya bosku, nulisnya dari siap magrib sampai postingan 😴
Downvoting a post can decrease pending rewards and make it less visible. Common reasons:
Submit
Hahahaha
Downvoting a post can decrease pending rewards and make it less visible. Common reasons:
Submit
Kontes yang menarik sobat semoga sukses selalu 💥
Downvoting a post can decrease pending rewards and make it less visible. Common reasons:
Submit