Hello steemians,
I am participating in the SEC S20 W3 contest organized by @mohammadfaisal, by presenting a Flutter project. I am really excited to participate in this contest, it is a great opportunity for me to practice my Flutter skills and share my project with the community. Participating in such a contest is always stimulating, and it pushes me to innovate while learning from other participants. It is a real pleasure to be able to contribute and exchange in this dynamic and enriching environment!
Design a simple form with a TextField where users can enter their name and a Button to submit the form. Use TextEditingController to retrieve the text from the TextField and display it on the screen when the button is pressed. |
|---|
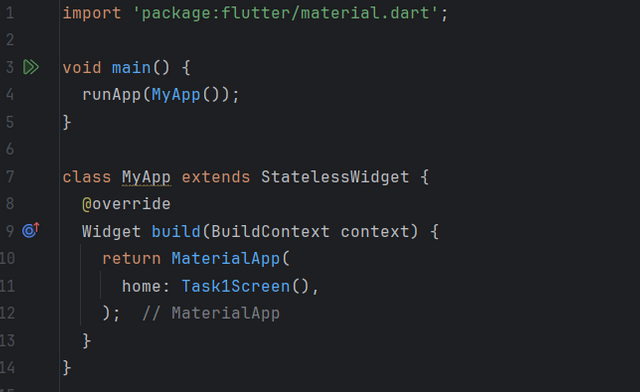
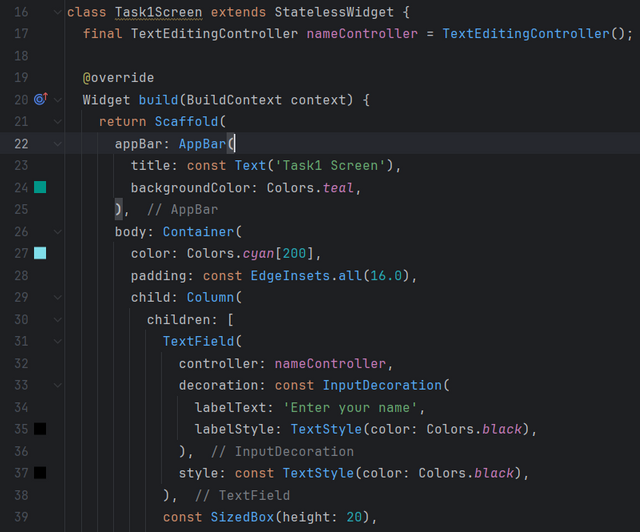
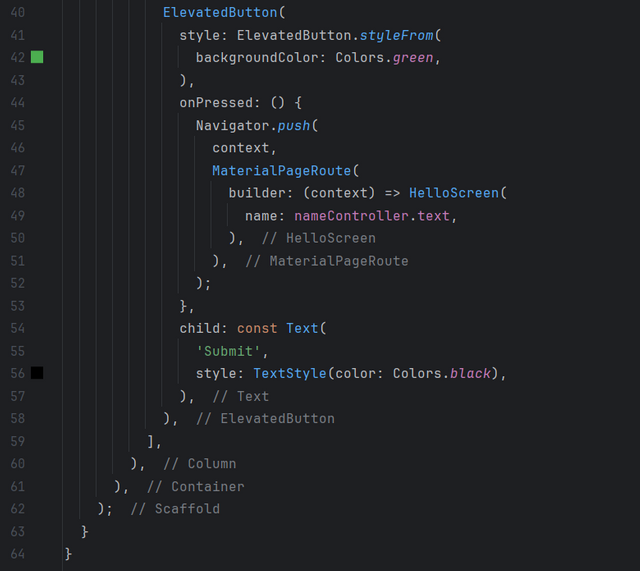
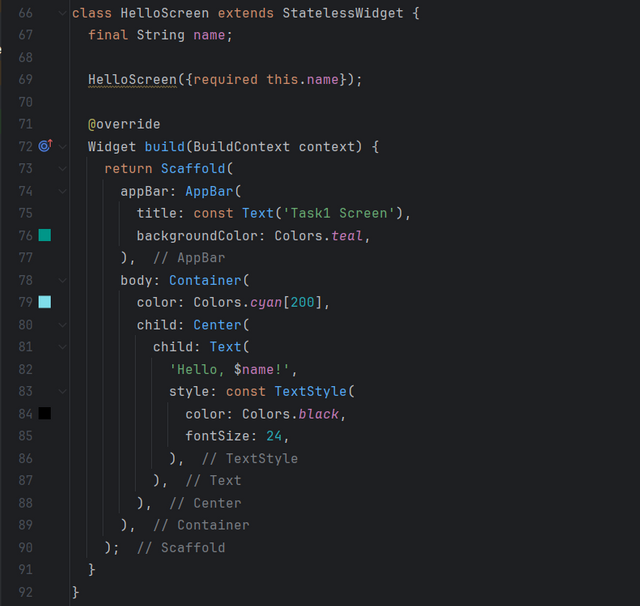
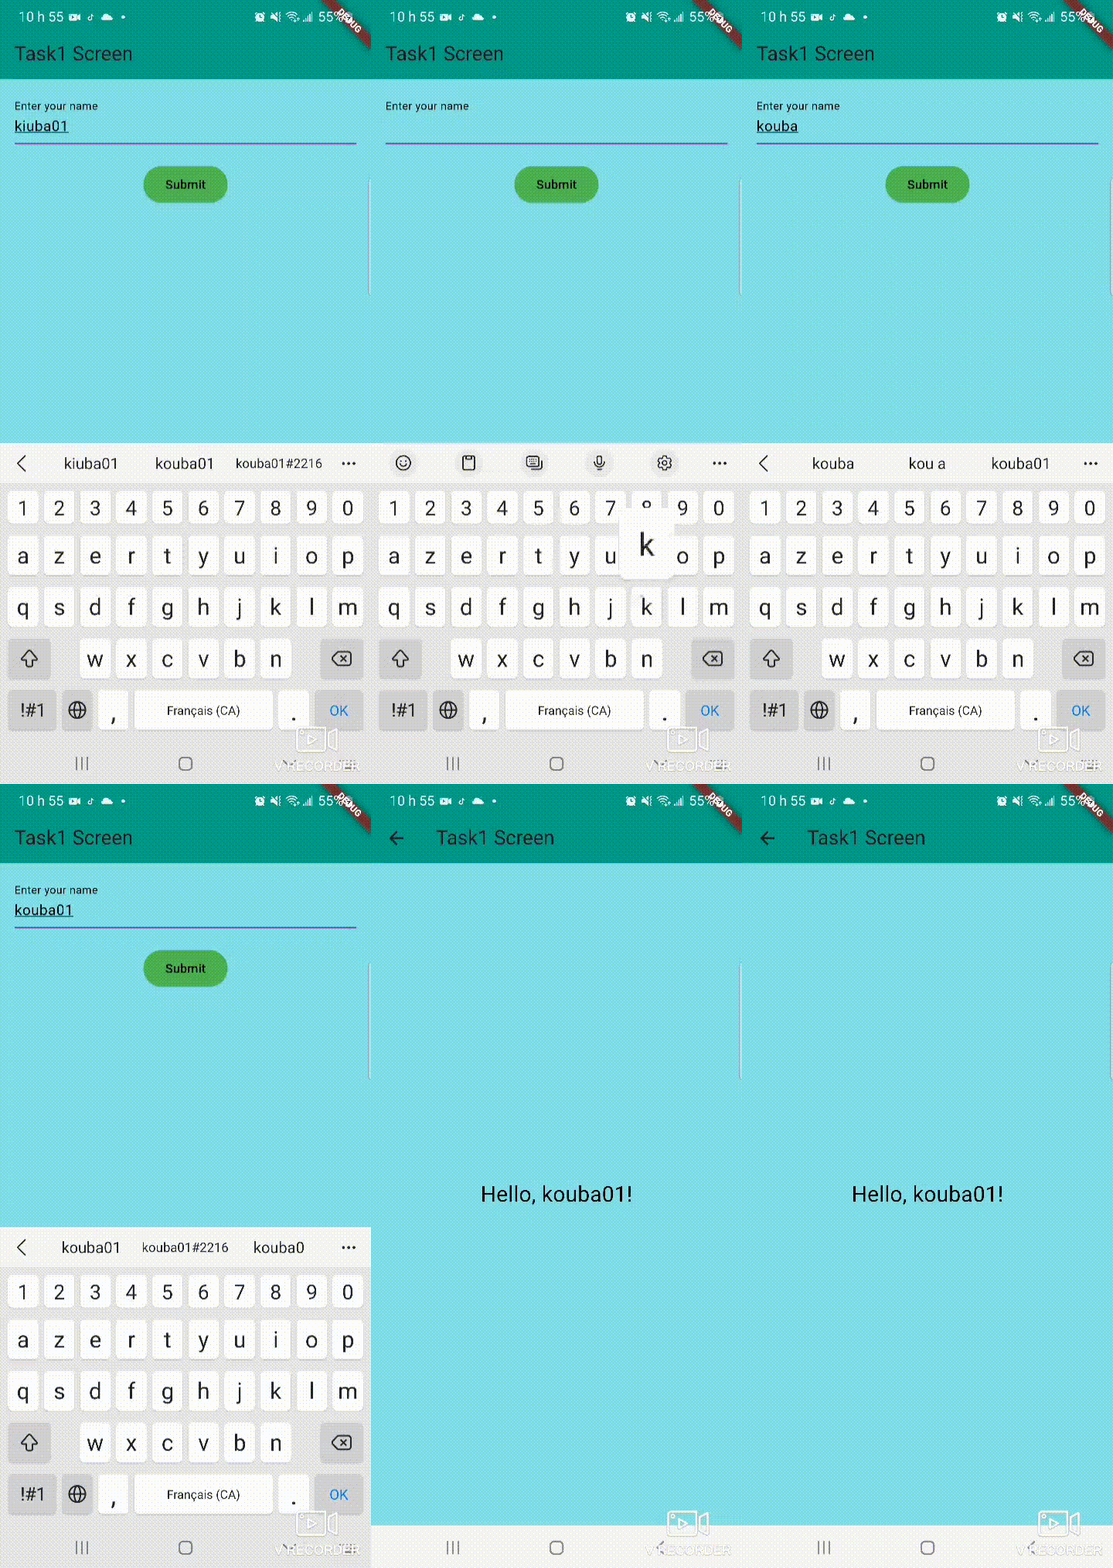
I'm building a Flutter app with two screens using widgets like TextField, ElevatedButton, Navigator.push, Scaffold, and AppBar. On the home screen called Task1Screen, I use a TextField to let the user enter a name, which I control using a TextEditingController. Then, I add an ElevatedButton that, when pressed, uses Navigator.push to navigate to a second screen called HelloScreen.
On this second screen, I display the name entered from the first screen in a Text widget by passing it as a parameter to the HelloScreen constructor. Both screens use Scaffold to structure the interface, with an AppBar at the top of each screen to display a title. The button on the first screen is configured to capture the value of the text field and pass it to the second screen when the user presses it.
| Code | Code |
|---|---|
 |  |
| Code | Code |
|---|---|
 |  |
Create multiple screens and navigate between them. Design two screens—HomeScreen and DetailsScreen. Use Navigator.push() to navigate from the HomeScreen to the DetailsScreen when a button is pressed. |
|---|
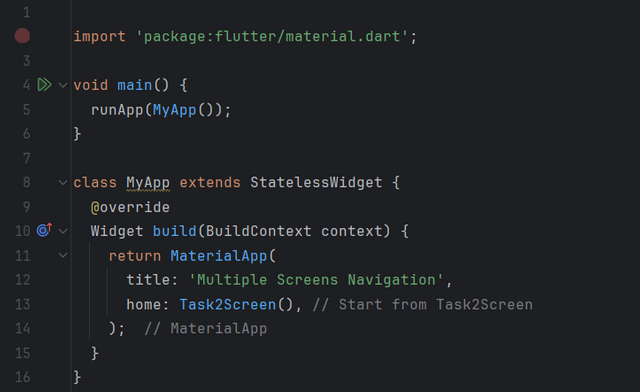
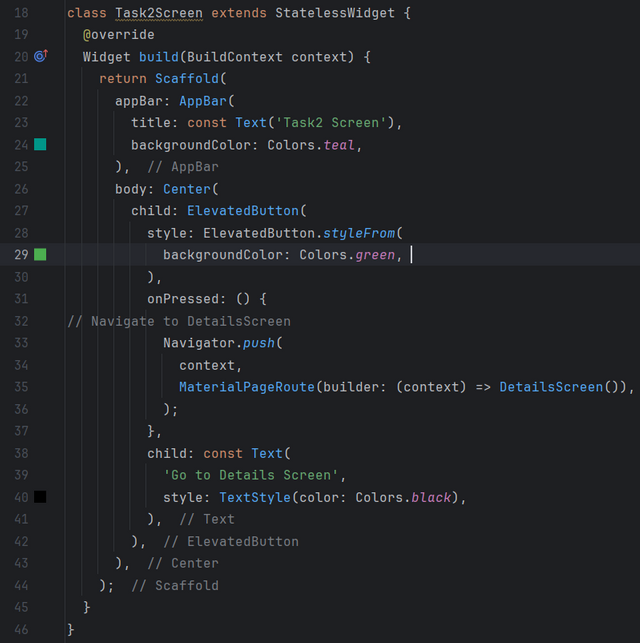
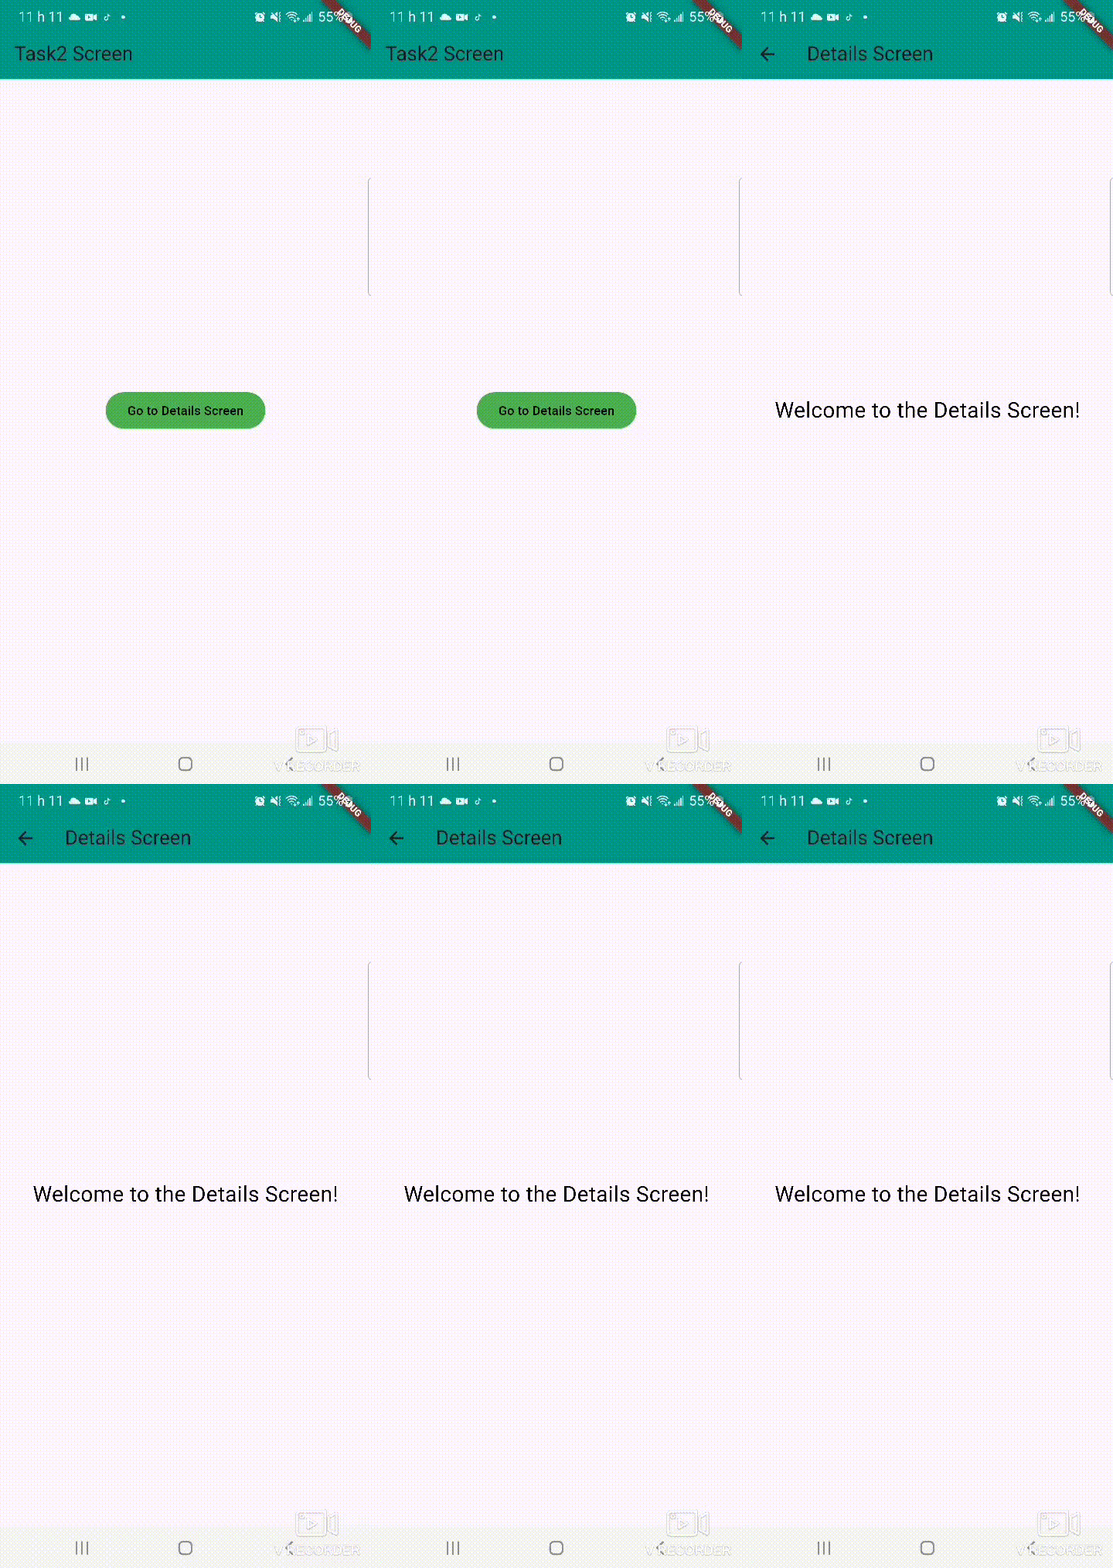
I am building a Flutter app with two screens, Task2Screen and DetailsScreen. The app starts with the Task2Screen screen, where I present a button. When I press this button, the app uses Navigator.push to switch to the DetailsScreen screen.
In the main file, I use the runApp() function to start the app and set Task2Screen as the home screen. In this screen, I display a button in the center of the screen with the label "Go to Details Screen". Pressing this button navigates me to the DetailsScreen screen using MaterialPageRoute to handle the transition.
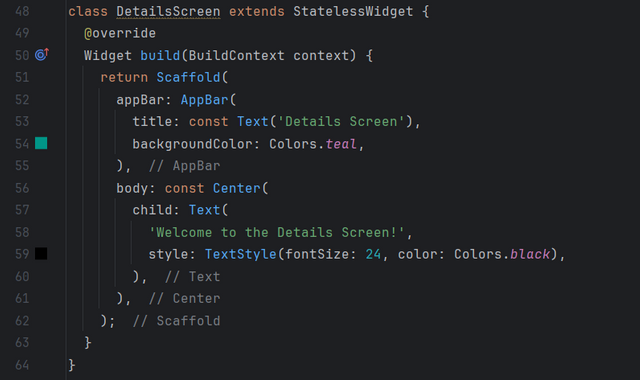
Once on the DetailsScreen screen, I see a welcome message saying "Welcome to the Details Screen!". This screen is centered on the text that is displayed and has an app bar at the top with the title "Details Screen".
In short, I am creating a simple navigation between two screens in Flutter, with a button in the first screen that allows you to switch to the second screen where a message is displayed.
| Code | Code |
|---|---|
 |  |
| Code |
|---|
Implement a bottom sheet pop up. On the screen add a button to navigate from that screen to bottom sheet. And add some data to display on the bottom sheet such as name, country, age, gender, etc. |
|---|
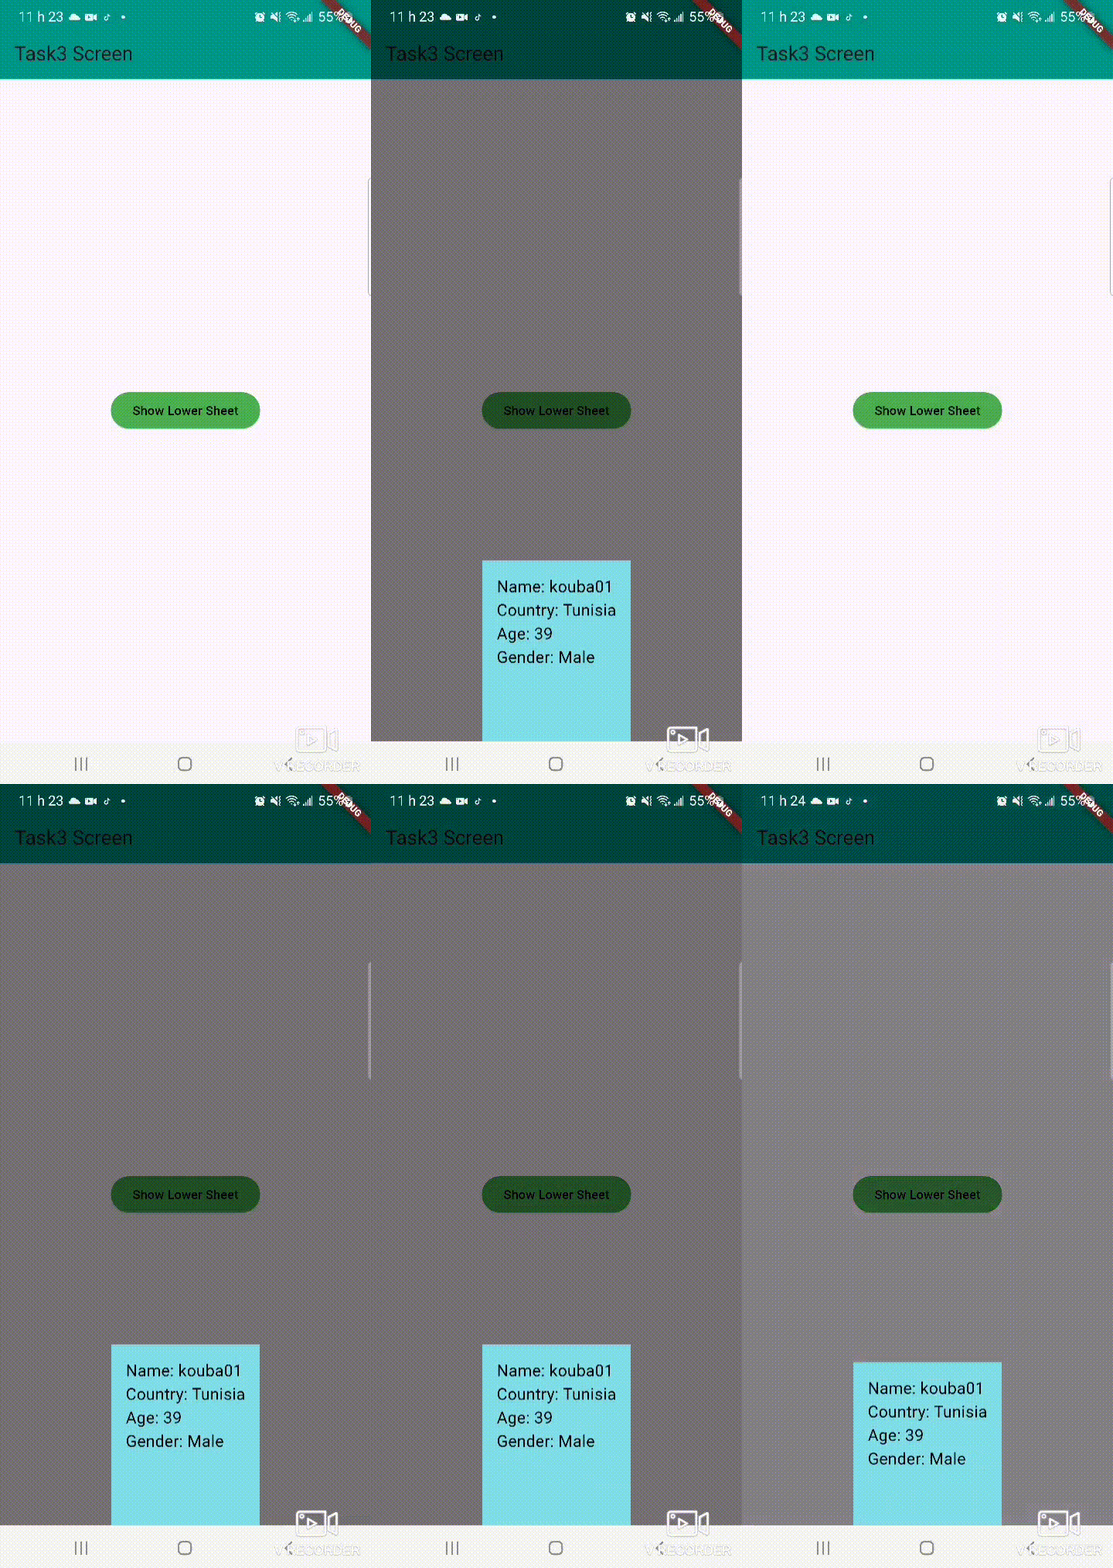
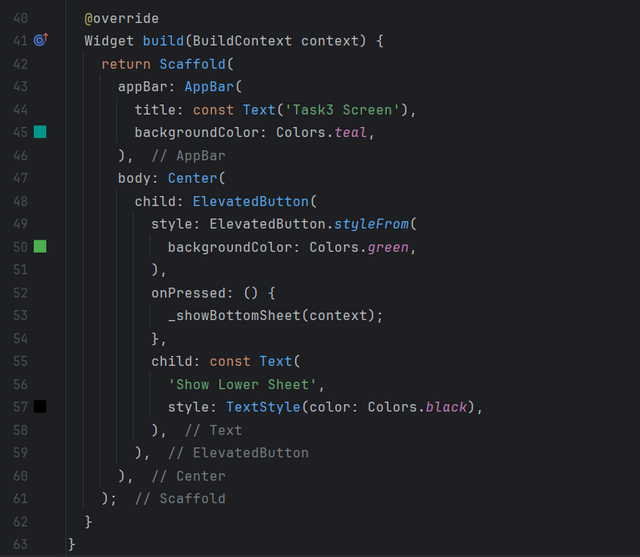
I am building a Flutter app with a bottom sheet feature. The app starts with the Task3Screen screen, where I place a button in the center of the screen. When I press this button, a bottom sheet is displayed from the bottom of the screen, displaying information like name, country, age, and gender.
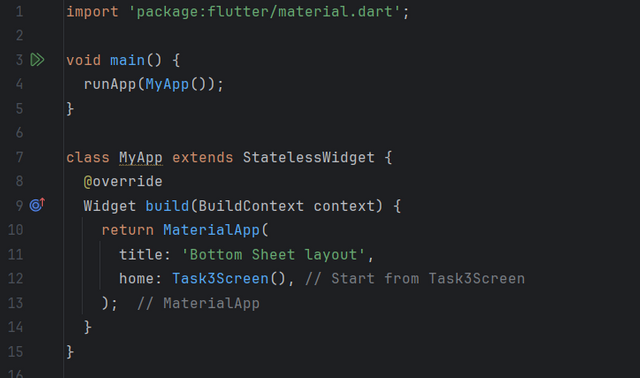
In the main file, I call runApp() to start the app and use Task3Screen as the home screen. In this screen, I add a button with the label "Show Lower Sheet". When this button is pressed, I call the _showBottomSheet() method which triggers the display of the bottom sheet using showModalBottomSheet.
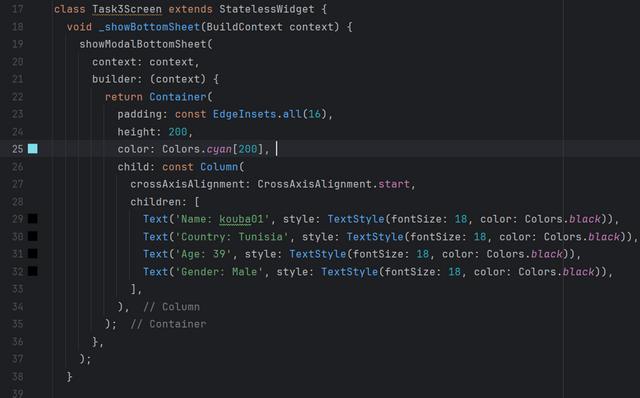
The content of this bottom sheet is structured with a Container containing a Column. This column presents several Text widgets displaying the following information: Name (kouba01), Country (Tunisia), Age (39), and Gender (Male). Each item is displayed as text, and the layout of the information is aligned to the left of the bottom sheet.
In summary, I have set up a Flutter application with a splash screen containing a button that, when pressed, brings up a bottom sheet displaying personal information in an organized manner.
| Code | Code |
|---|---|
 |  |
| Code |
|---|
Project: Car Loan Calculator App: Develop a simple car loan calculator app where users can input loan details (like the loan amount, interest rate, and loan term) and view the calculated monthly payment on a bottom sheet. The bottom sheet should include the loan amount, interest rate, loan term, and the calculated monthly payment. |
|---|
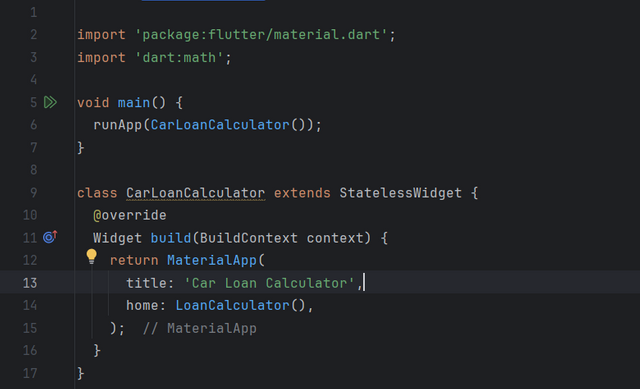
I am building a Flutter app called "Car Loan Calculator", which allows the user to calculate the monthly payments of a car loan. The app starts with importing the Flutter and Dart Math libraries for calculations.
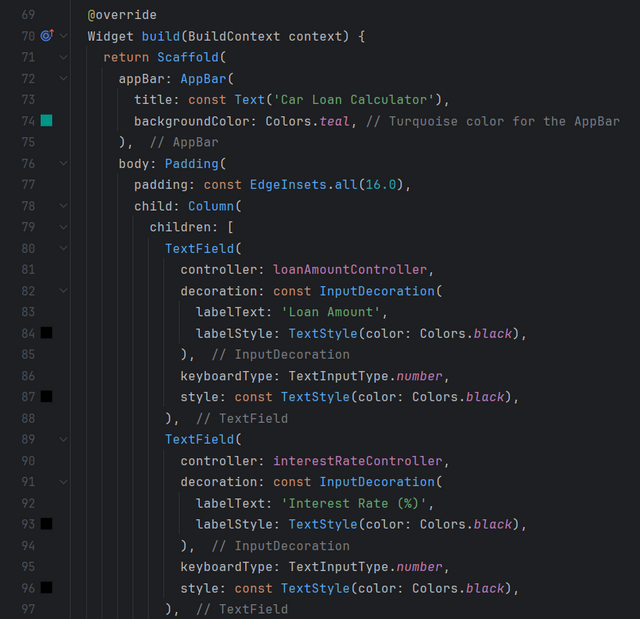
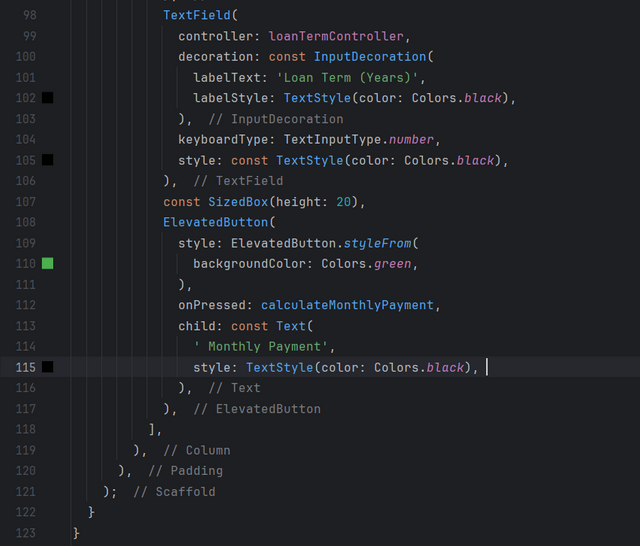
In the main CarLoanCalculator class, I use MaterialApp to structure the app and set LoanCalculator as the home screen. The LoanCalculator screen is a StatefulWidget that allows the user to enter the loan amount, interest rate, and loan term in years via three text fields controlled by TextEditingController instances.
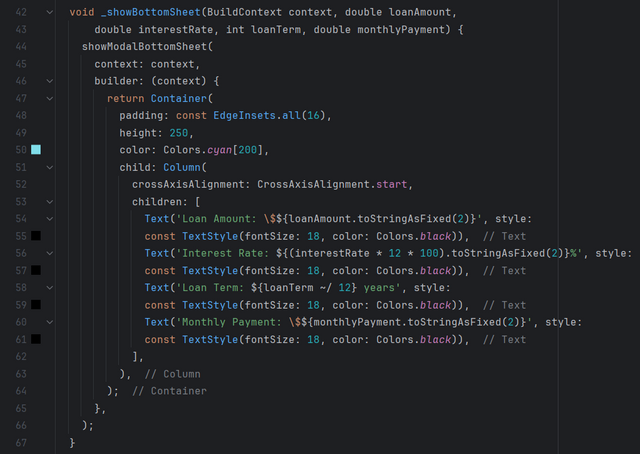
When the user presses the "Monthly Payment" button, the calculateMonthlyPayment function is called. This function takes the entered values, performs the calculations to determine the monthly payment using the classic loan formula, and then displays the results in a bottom sheet using the _showBottomSheet function.
The bottom sheet displays the loan details, including the loan amount, interest rate, loan term, and the calculated monthly payment, as well-formatted text in a Container. Each piece of information is presented in a readable manner in a left-aligned column.
In short, this application allows the user to easily calculate the monthly payment of a car loan by entering the necessary information and displaying the result in a bottom sheet after pressing the button.
| Code | Code |
|---|---|
 | 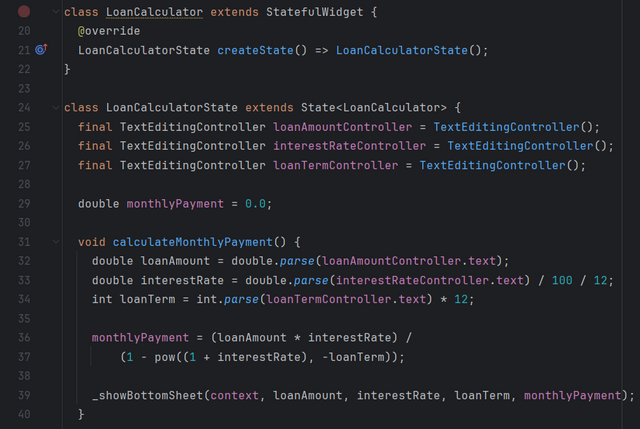 |
The formula used to calculate the monthly payment is: M = (P x r) / (1 - (1 + r)^-n), where M is the monthly payment amount, P is the total loan amount, r is the monthly interest rate (the annual interest rate divided by 12), and n is the total number of payments in months.
In the app, I start by retrieving the values entered by the user: the loan amount, the annual interest rate, and the loan term in years. Then, I calculate the monthly interest rate by dividing the annual rate by 100 and then by 12 to get a fraction representing the monthly rate. After that, I calculate the total loan term in months by multiplying the term in years by 12.
Next, I apply the monthly payment formula. The loan amount is multiplied by the monthly interest rate and divided by an amortization factor, which depends on the interest rate and the number of payments. This calculation gives the fixed amount that the user will have to pay each month during the term of their loan.
| Code | Code |
|---|---|
 |  |
| Code |
|---|
.gif)
Thank you very much for reading, it's time to invite my friends @khursheedanwar, @stream4u, @steemdoctor1 to participate in this contest.
Best Regards,
@kouba01

Your post has been rewarded by the Seven Team.
Support partner witnesses
We are the hope!
Downvoting a post can decrease pending rewards and make it less visible. Common reasons:
Submit